Skip navigation

Tag Archives: IBM computer

The IBM 300XL is a late 90’s PC from IBM that may look quite familiar to some of you. It uses the same case as the IBM PC 350 we covered on this blog way back in distant 2018. My first question is why did IBM use a model number that is lower than a previous model even though it uses a more advanced slot 1 motherboard as opposed to the socket 7 board in the PC 300. I guess that’s where the XL comes into the name, anyways….

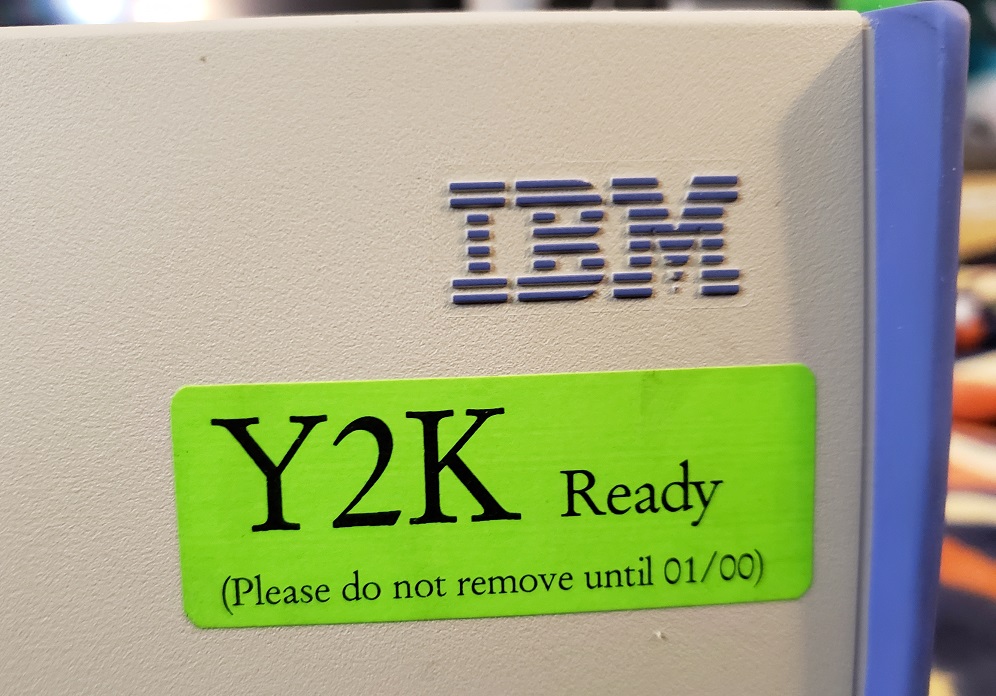
On my 300XL if you look in the lower left hand corner my case is missing the cover for some unused ports. I’m guessing some models had audio jacks in this position. A little to the right of the center is the large beige power button and to the right of that is the sliding cover that when slid to the left reveals the drive bays. I have to say I do like the “Y2K Ready” sticker placed under the IBM logo.

Guess someone forgot to remove it.

Sliding the panel to the left reveals a single 3 1/2 bay and two 5 1/4 bays as well as one peculiar slim bay in the upper left corner I believe was reserved for a PCMCIA slot though there doesn’t seem to be an easy way to mount anything in this slot on my PC. My PC has a pretty standard combo of a 1.44MB floppy drive along with a CD-ROM drive.

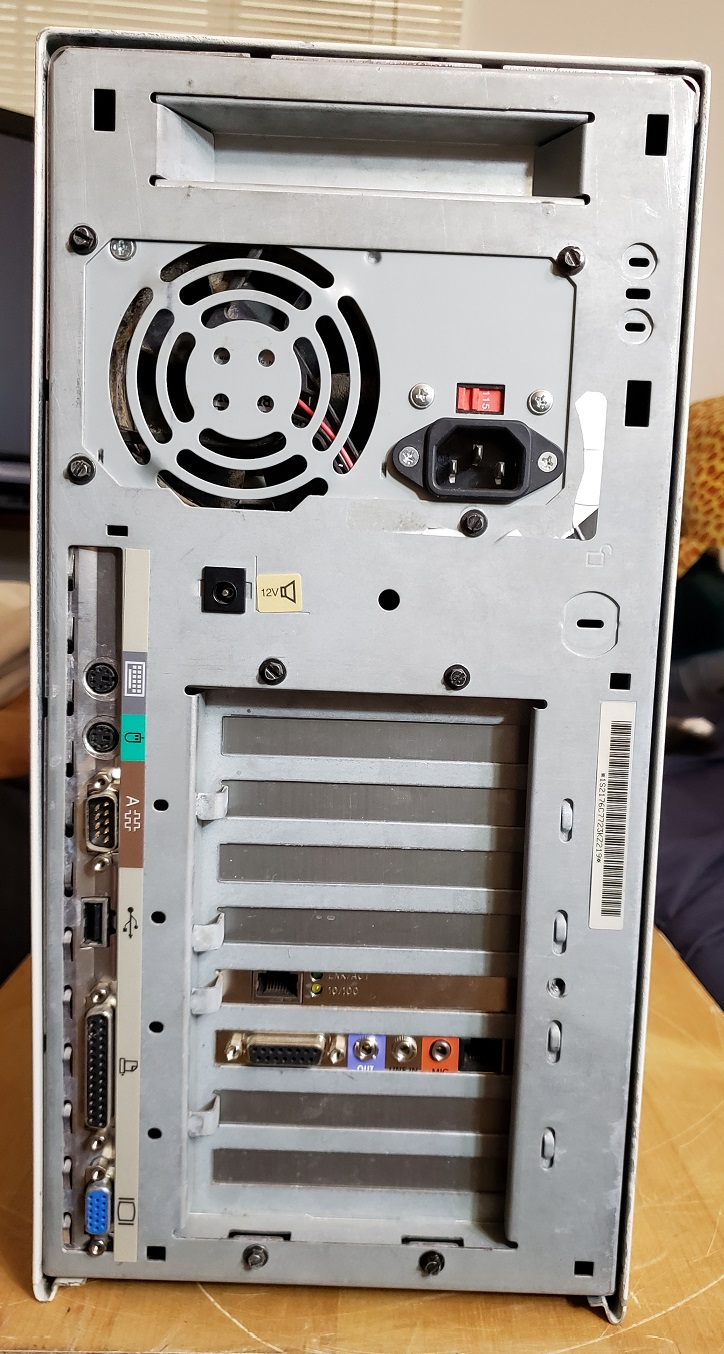
Flipping the 300XL around reveals the ports on the back. There are five total expansion slots with four on the right and a single slot on the left coming off a riser card. At the center of the case we have two ports, a serial port and an IR port.

At the bottom of the case from left to right we have a number of jacks. Firstly are dual 3.5mm jacks for audio in and audio out for the built in sound. Next to this we have dual PS/2 ports for the keyboard and mouse followed by the parallel printer port. Next, we have dual USB jacks though it’s unclear if these are USB 1.0 or 1.1 as the user manual does not specify they are very likely 1.0. Lastly, we have an Ethernet port followed by a standard 15-pin VGA connector for the built in video.

The case of the 300XL is a screwless design and should come off by depressing the tab to the rear and pulling the upper casing off. On the underside of the case top should be a diagram of the motherboard along with jumper settings.

Here is my IBM 300XL with the case removed.

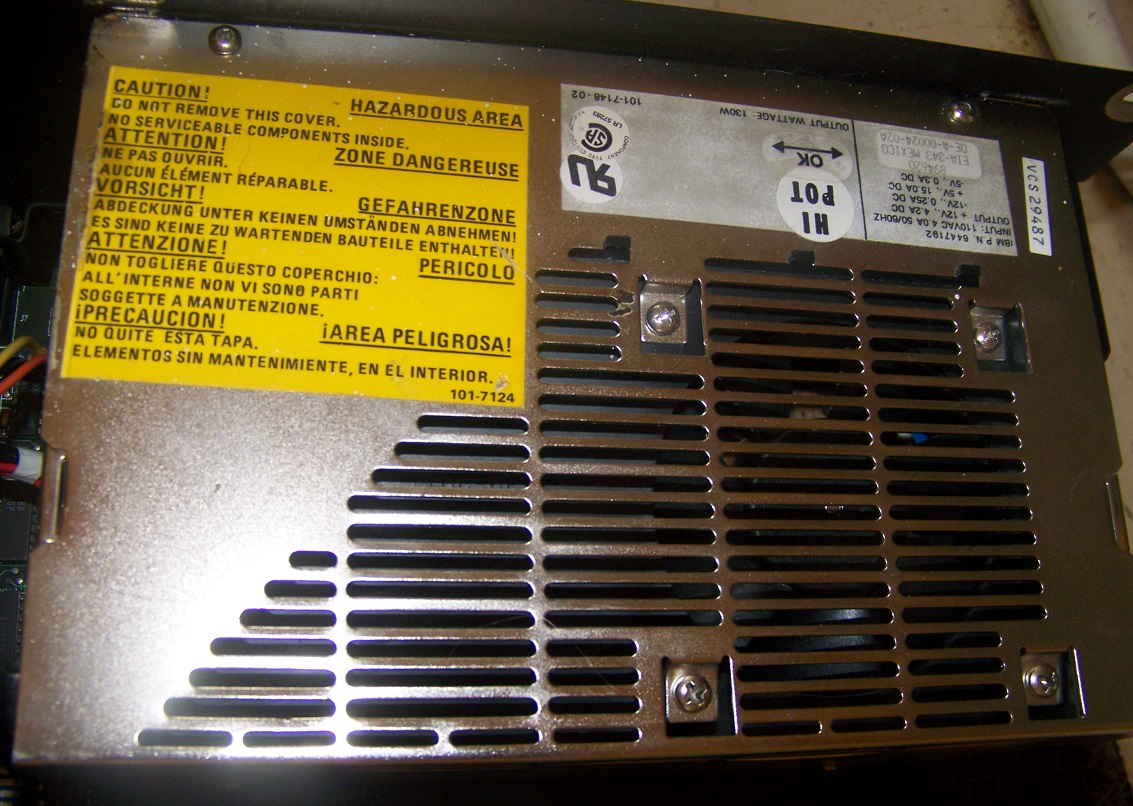
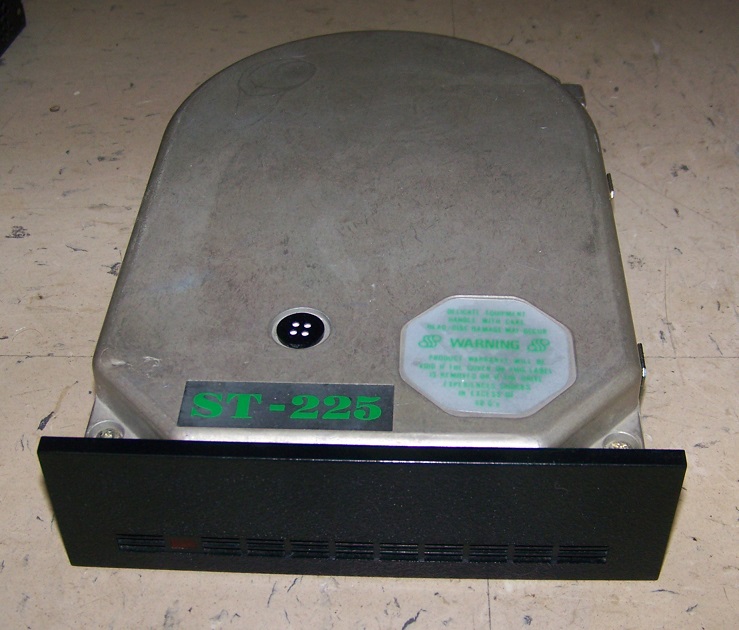
At about the center next to the CD and floppy drives is a mount for two hard drives. mine came with dual IDE HDDs one being 8GB and the other 2GB. Originally as I received it this PC had Windows NT installed but I did reformat the drive and installed Windows 95 OSR B. The power supply appears to be a fairly standard AT supply but features two extra power connectors that connect to the mainboard right behind the AT connector and another to the riser card.

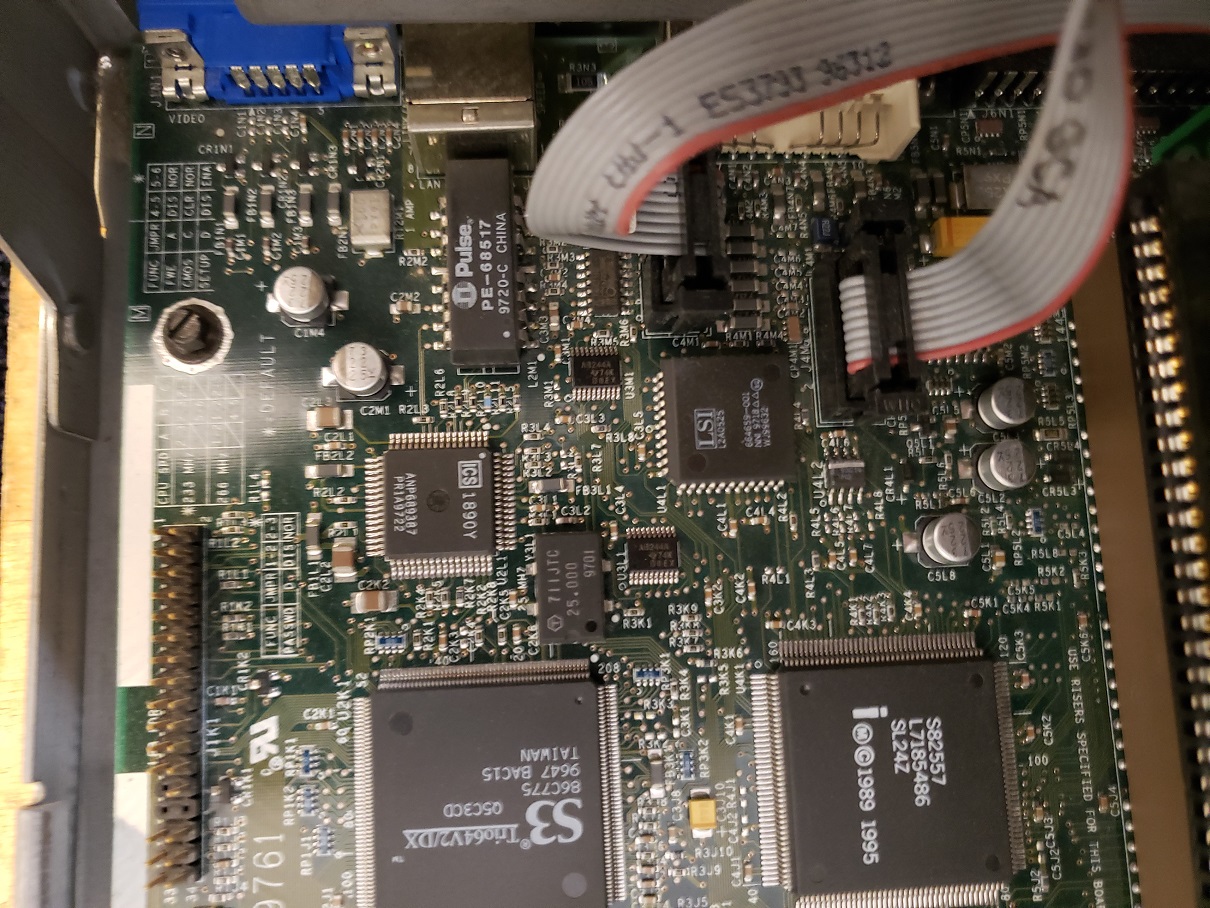
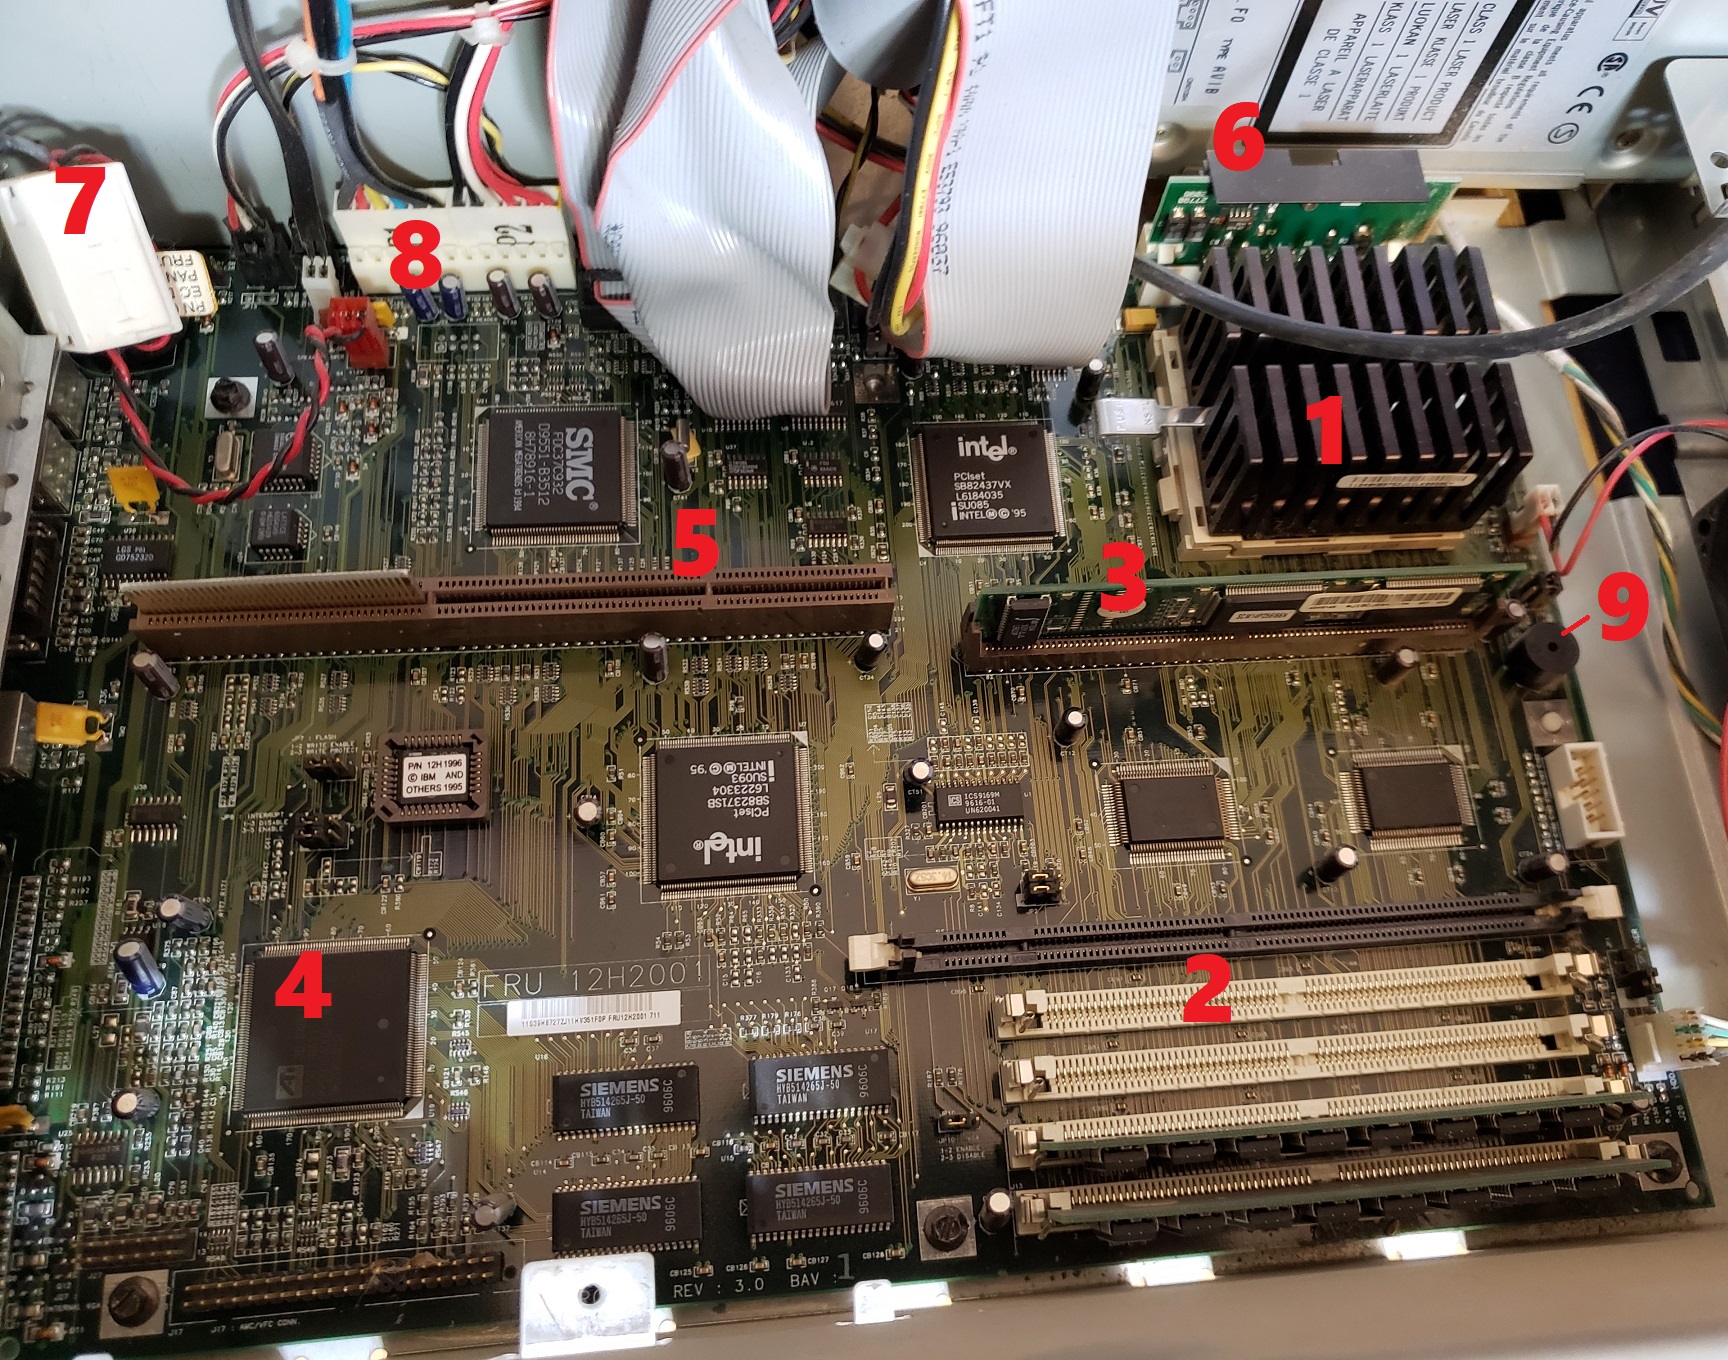
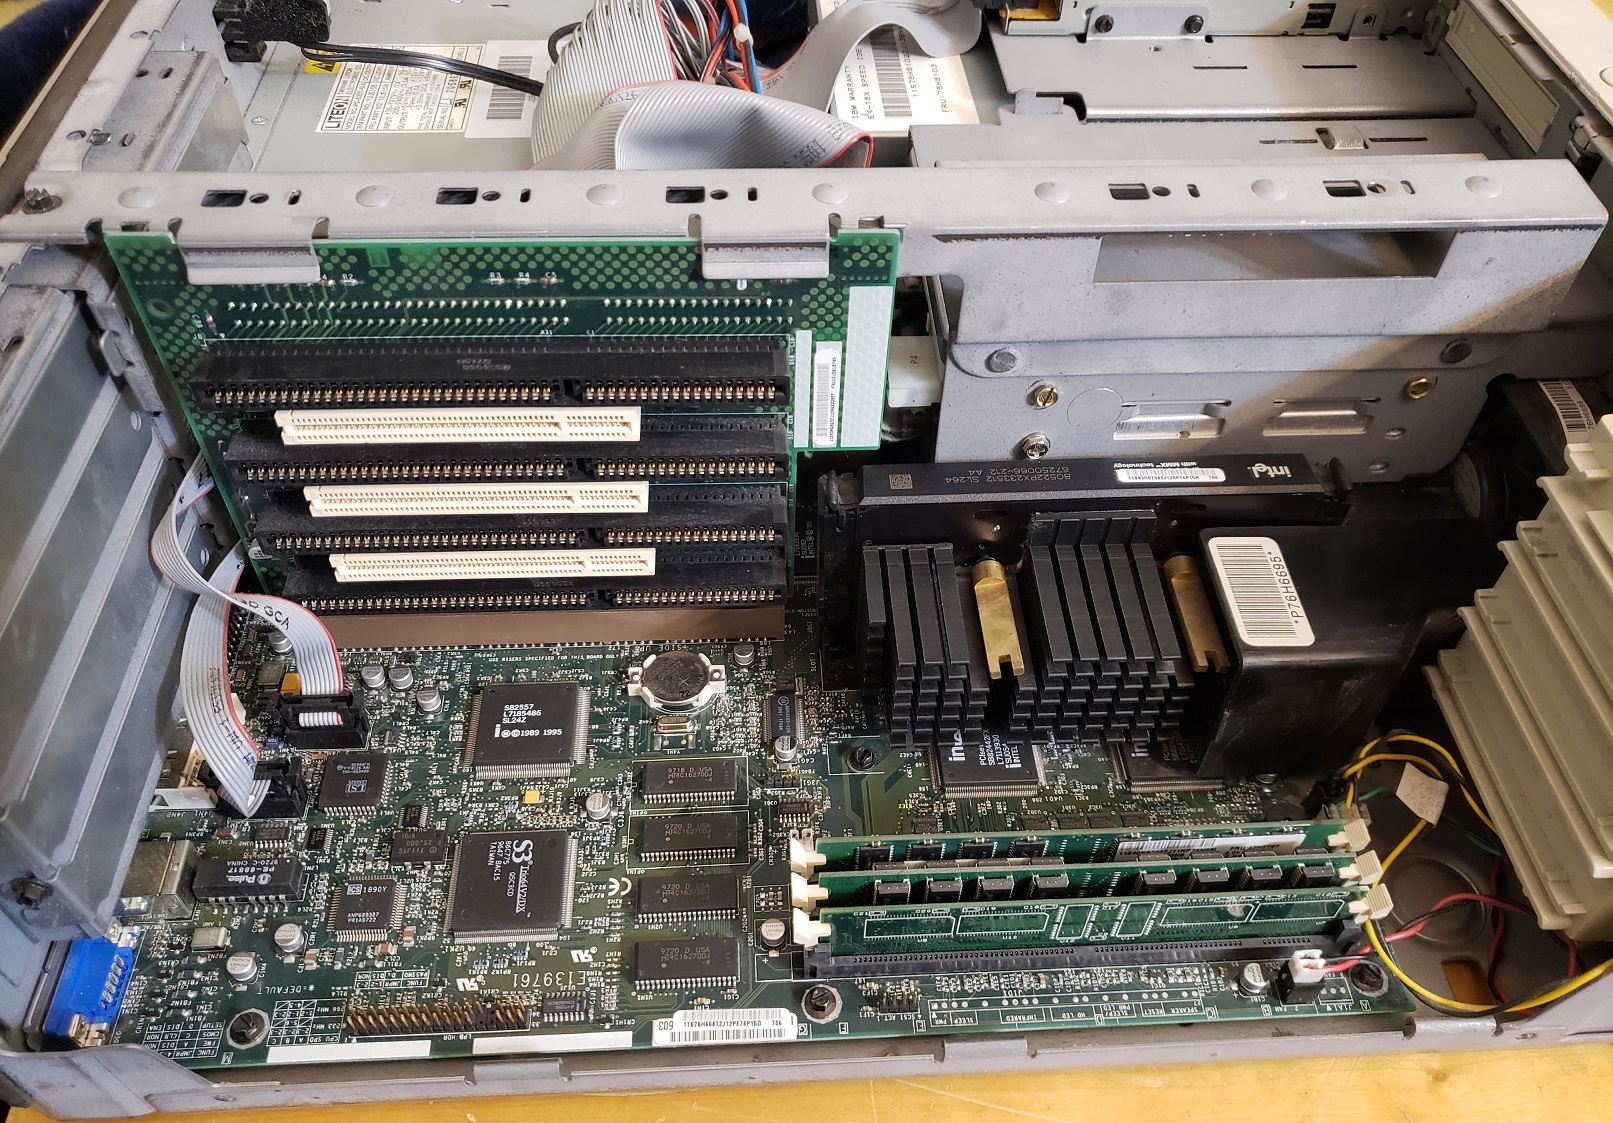
Above we have the motherboard exposed with the riser card and mid support bar/HDD bays out of the way. The board is a proprietary board using the Intel 82440FX chipset. The board does provide sound in the form of a Crystal CS4236 chip providing sound blaster, sound blaster pro and WSS support though I was unable to locate any obvious crystal sound chip on the motherboard.

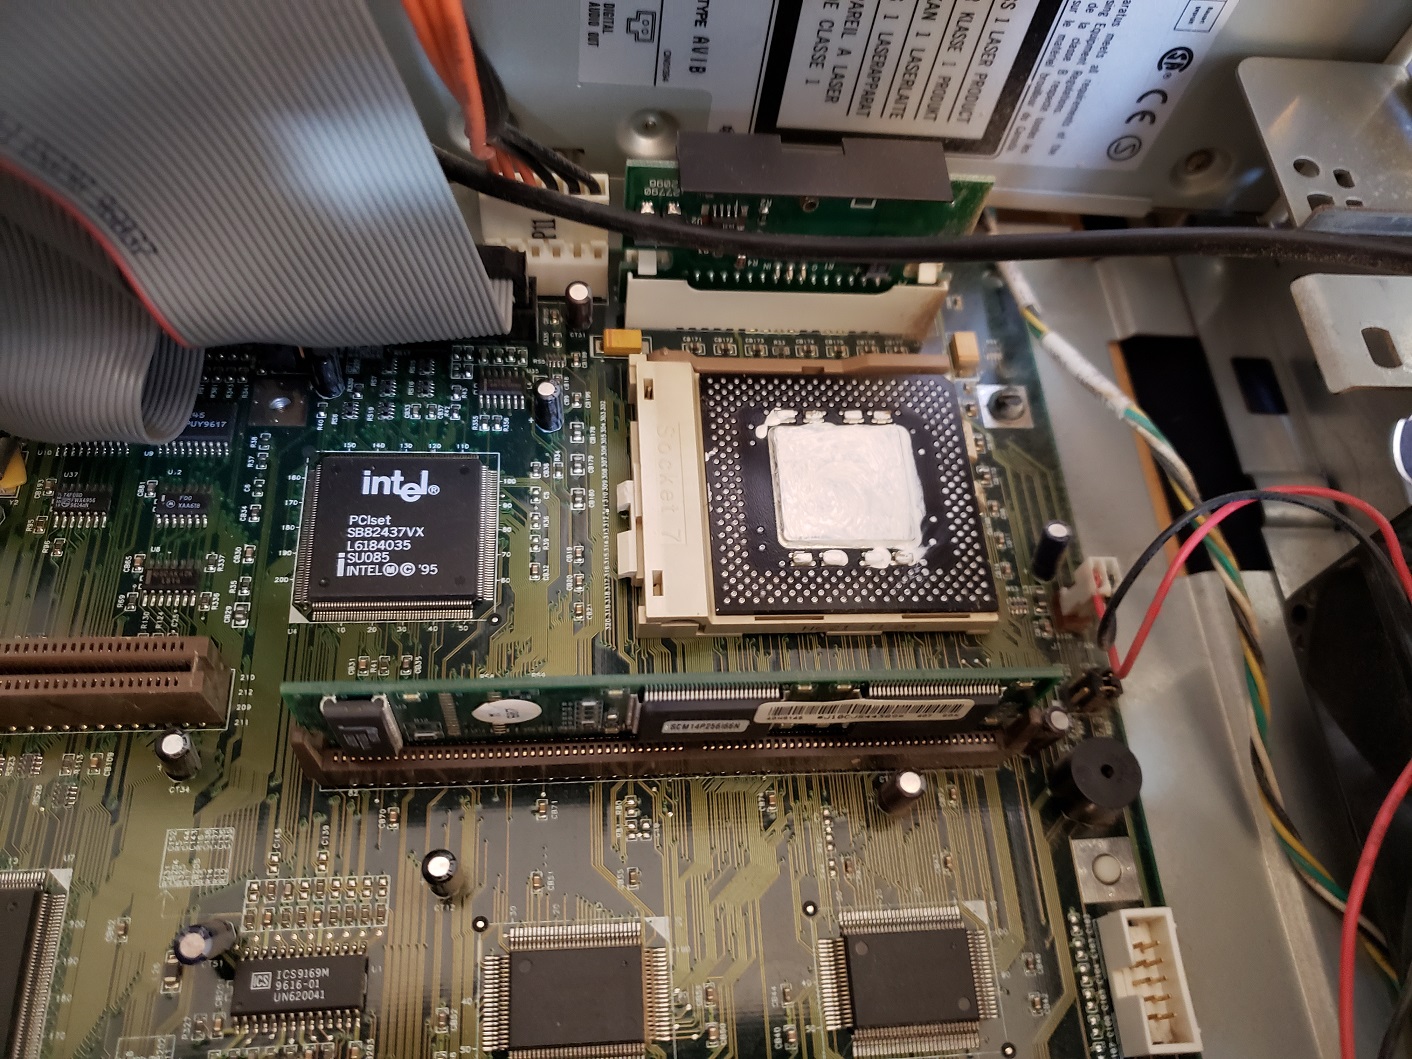
1 ) CPU – My 300XL came with a 233MHz Pentium II slot 1 CPU but also has jumper settings for installing a 266MHz Pentium II. The 300XL was probably a pretty early adaptor of slot 1 and although I havn’t tested this the 300MHz “Klamath” Pentium II would likely work as well. Later “Deschutes” Pentium II’s operate at a lower voltage which the 300XL does not appear to provide. Also Pentium II’s from 350MHz up also run on a 100MHz FSB which the 300XL also does not appear to be able to provide though provided voltage is not an issue could operate at a lower FSB and thus lower speed. The 233MHz PII is the slowest of the Pentium II’s but it should still make a capable CPU for most all DOS titles and early Windows 9x games. The CPU in my machine appears to get its cooling from a shroud directing air over the heatsink from a case fan.

2 ) RAM – The PC 300XL supports up to a maximum of 384MB of 168 pin DRAM memory. My 300XL currently has 96MB of memory installed. I’ve found many IBM PCs such as this one to be very picky about memory and none of my spare memory sticks worked on the 300XL even though they physically fit into the board. The manual states these specific memory requirements.

Must be 168-pin, unbuffered, +3 V type
Must have gold-lead tabs
Must have 60 nanosecond (ns) access speeds only
Must have a height of no more than 3.05 cm (1.2 in.)

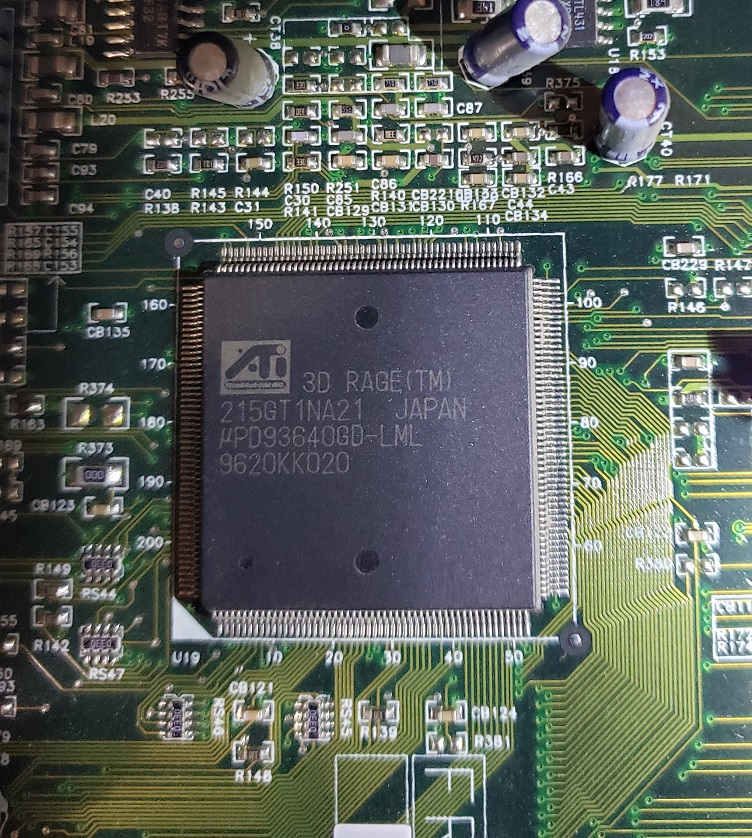
3 ) Video – Built in video for the 300XL is provided by the S3 Trio64V2/DX and 2MB of DRAM. This chip is one of the later of the S3 Trio2D graphics chips. This makes an excellent video chip for 2D games and features top notch compatibility for DOS titles but lacks any 3D support. The chip does make sense considering the 300XL’s main purpose as a office or home work PC.

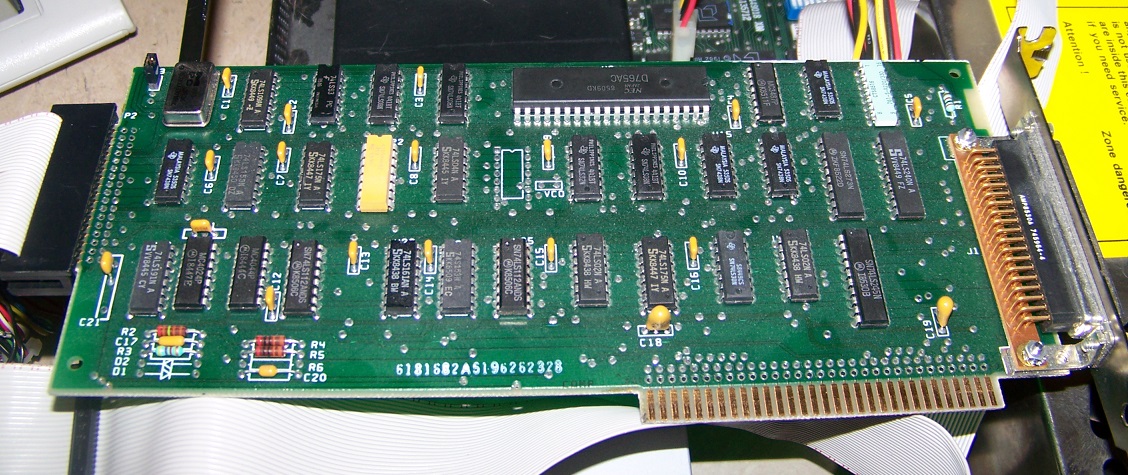
4 ) Riser – The 300XL uses a riser card to interface with any added expansion cards. The card features five 16-bit ISA slots (one on the oppose side) and three PCI slots though the PCI slots are shared with ISA for a total of five possible expansion cards.

The 300XL does not feature any AGP slot but something like a PCI Voodoo 3 2000 card as well as a good ISA sound card would be mostly all that’s need to turn this PC into a very capable DOS PC and even a quite adequate Win 9x gaming PC.
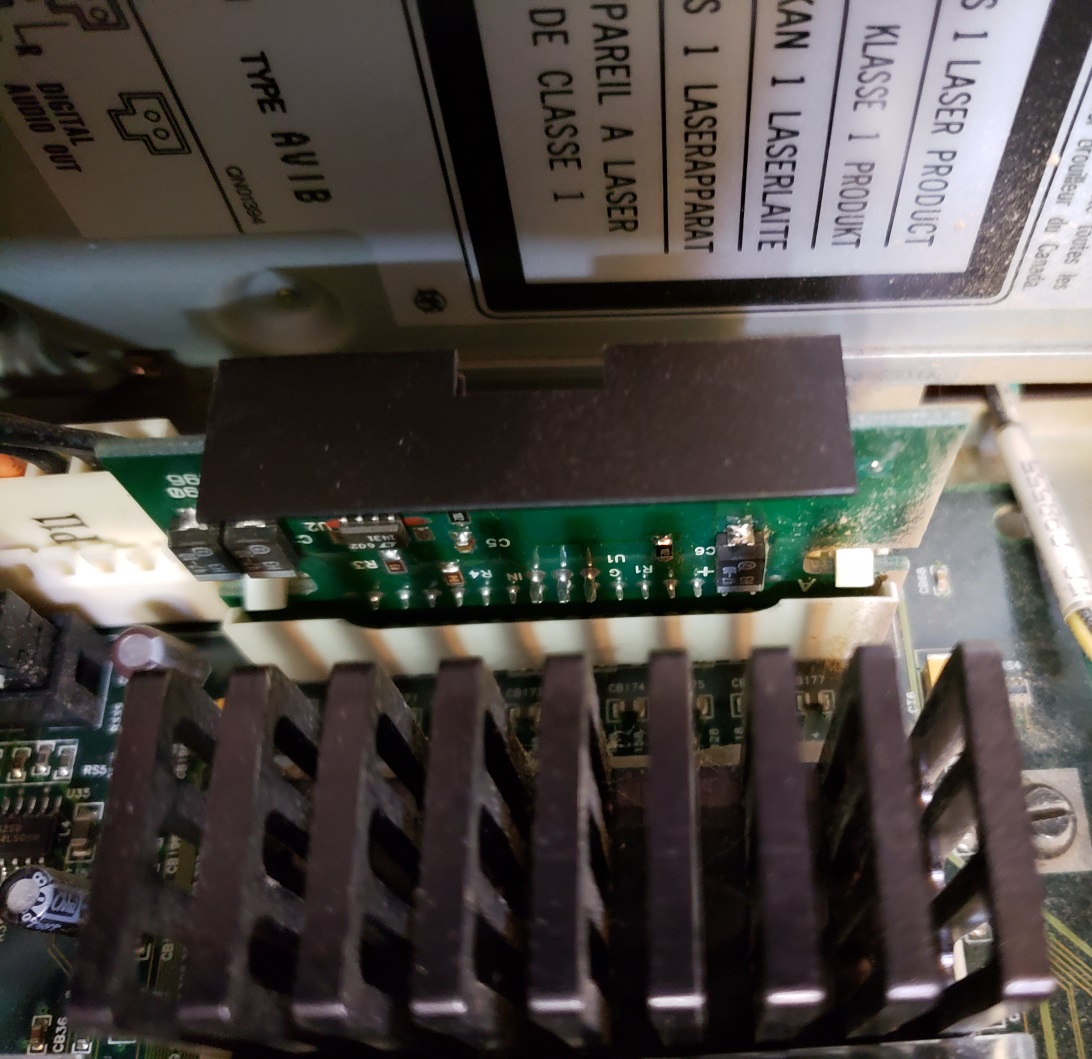
5) Piezo speaker.

The 300XL is basically a more powerful IBM PC 350 in the same case. The 2D video is slightly upgraded and it features the exact same amount and type of expansion slots so I’ll be a bit lazy here and quote what I said about that machine as it mostly applies here as well.

“The IBM PC 350 makes a fair retro computer. It excels at DOS retro gaming and needs very little besides an ISA sound card to have a very compatible machine. As a Windows PC it is quite acceptable and a PCI 3D accelerator card such as a Voodoo would do wonders. The BIOS tends to be fussy though and when I made ANY changes including simply unplugging the mouse the machine demanded I enter the setup feature upon restarting and change/save the new settings. There are other annoyances such as the extra connection needed on the power supply as well as the slightly picky 168 pin RAM slot.

The case itself is quite nice offering a sturdy design, decent bay expansion as well as being easy to get into. I also like the sliding piece on the front so you can cover up your ugly discolored drives when not in use. Adding drives though requires some disassembly and is a hassle.”

The main difference with the 300XL is the CPU and the switch from socket 7 to slot 1. The Pentium II makes for a much more capable processor and thus a more capable computer when it comes to being a Windows 9x gaming machine though at the expense of being able to install a much slower socket 7 CPU and have a more speed appropriate DOS PC.

The IBM AT also known as the IBM 5170 is IBM’s follow up to the IBM PC and IBM XT (and XT-286) home computer. Released in 1984 the 5170 featured a 286 processor and the then new 16-bit ISA expansion slots which would continue to be seen on computer motherboards all the way until the early 2000’s. The AT also supported high density floppy drives, came standard with a hard drive, featured a battery to store system settings as opposed to motherboard switches and was a great machine for then then new EGA graphics standard.

For the duration of this article please take not I will be using the terms 5170 and AT interchangeably to refer to this PC.

The IBM 5170 has a pretty utilitarian look in my opinion but there are many fans of the industrial look of this very sturdy case. My case was rescued from a garage and has some significant rust and scratching but it still fully functional. On the far left we have the standard IBM model badge as well as a lock and LEDs for power and hard drive activity.

On the right side of the case are dual 5 1/4 drive bays. These bays are usually populated by two 1.2MB 5 1/4 inch floppy drives though it’s fairly common to see at least one bay housing a 3 1/2 inch floppy drive via a bay adaptor. All 5170’s support 720KB floppy drives but later revisions like mine also support 1.44MB 3 1/2 drives. I did upgrade one of my 1.2MB floppy drives to a 1.44MB drive but keep in mind you will need a bay adaptor as well as a molex to floppy power adaptor.

Below these duals bays there is also a smaller bay obscured by the front panel that could possibly mount a smaller half height form factor hard drive.

Like the earlier IBM computers the AT power switch is a large red flip switch located towards the rear of the case and on the side.

Looking at the rear we see the power supply on the left side. The AT came with a PSU of about 200w which was sufficient to power a hard drive and several expansion cards and drives. The only built in port on the AT is the AT keyboard port located next to the expansion slots. The AT like the XT supports the now standard eight expansion ports which meant now you had to sacrifice less when picking and choosing expansion cards as the earlier PC only have five expansion slots.

After the five rear screws securing the case cover are removed we can take off the top and have a look inside the AT.

As seen in the image above my original configuration included three expansion cards such as the hard drive controller as well as a serial/parallel port card and lastly a cirrus logic VGA card. The VGA card will be replaced later for something more period correct for the 5170.

Below is a view of the motherboard with the expansion cards removed.

The hard drive is housed in a bay next to the dual 5 1/4 bays. The 5170 shipped stock with an unreliable 20MB MFM hard drive though at some point my AT was upgraded to a 40MB model.

The 5170 lacks any switch blocks on the motherboard and setup is accomplished via a setup program run from a floppy disk. There is an official IBM setup program but it can be a little outdated and the setup program itself may not have options for things such as 1.44MB floppy drives even though the motherboard may be fully capable. A good alternative is a program called GSETUP which you can use with the IBM 5170 as well as other computers which require setup programs.

1 ) CPU – Early versions of the IBM 5170 used a 6MHz 80286 for it’s CPU but later revisions like the one I have pictured were upgraded to an 8MHz 80286.

Even at 8MHz the AT’s 286 processor is on the slow side as far as 286 CPU’s go. It’s certainly faster then an 8088, even at 10MHz but it’s still to slow to be optimal for many VGA titles that are more action oriented like combat flight simulators. The earlier IBM XT-286 was said to run faster with the same speed CPU due to 0 wait states though I have never personally tested this.

2 ) FPU – The 5170 motherboard does have a socket for adding a 287 math co-processor to assist in more complicated mathematical processing.

The FPU is useful for CAD type programs but it’s usefulness in games is quite limited with only a scarce few games of the time taking advantage of the processors capabilities.

3 ) RAM – All IBM AT’s came standard with 512KB of memory on the motherboard. The 5170 supports up to 16MB of memory though expanding to a full 640KB and beyond does require a memory expansion card.

4 ) Battery – The 5170 motherboard does not have any CMOS battery on the board to save settings nor switches (besides for monitor selection) thus a working battery is essential to save the settings set with the previously mentioned setup programs. The 5170 in order to save settings uses an external battery.

As original batteries are long dead for the most part buying a newer replacement will most likely be required. There are many options on eBay that use AA batteries though usually the wiring is keyed differently. Modification will most likely be required as most of these battery holders are not wired for the AT.

There is a switch between the power connector and the external battery connector. This switch is for selecting the monitor in use. The rear position is for using an MDA monitor and the forward position is for CGA. The position has no effect when using an EGA or VGA video card.

5 ) AT Power Connector

6 ) PC Speaker – The 5170 has a fairly decent PC speaker located at the front of the case.

Let’s take a look at the expansion cards I have installed in my IBM 5170 making it a late 1980’s configuration.

We will start with the two cards my PC had preinstalled and not counting the VGA card I initially installed for testing.

Hard drive controller

I believe this WD based 16-bit MFM controller card which came with my 5170 is the stock card provided for the later revision 8MHz AT’s.

The other card that came with my 5170 was a simple serial/parallel port card which is extremely useful seeing as there are no built in I/O ports.

And now to take a look at the expansion cards I decided to add.

Joystick Card

I decided to add a gameport card since my soundcard of choice did not have a gameport on it as many later sound cards do.

The card I went with was an 8-bit CH Gamecard III automatic. I didn’t have any specific reasons for choosing this card other then it’s what I had on hand although it is nice that it supports two gamepads.

RAM Expansion

Having memory over 640KB isn’t to important on an IBM AT since most games that will run acceptably on this PC only require 640KB or less of conventional memory. Unfortunately the 5170 only came with 512KB of memory stock so although that is enough to play a number of games you really want to get a full 640KB to get the best experience with the AT.

For memory expansion I installed an Intel Above Board which has a total capacity of 2MB but also allows you to backfill the conventional memory to the full 640KB bringing the total memory of the 5170 to 640KB of conventional memory and the difference allocated to being XMS or EMS memory though usually XMS is favored for 286 class PCs. Larger memory cards are available and you can even install multiple cards up to 16MB but I’ve found little use for more then 2MB in a PC of this vintage and class.

Audio

Sound cards weren’t really a thing until 1987 and most games that will run on the 5170 well won’t necessarily require anything beyond PC speaker though a sound card does expand your options. Since I decided to go more period correct with this PC I decided an original Adlib was the best choice.

The original Ablib as seen above from 1987 uses a 1/4 inch audio jack and a simple volume knob. This card uses off the shelf parts but its YM3812 FM chip is widely supported in games. These cards are quite the collectors item these days so I can’t recommend tracking one down unless you want a strict period correct machine from the later 1980’s and have large sums of cash to burn. Almost all later sound cards like the Sound Blaster 16 have perfect Adlib compatibility so I would suggest more people go down that route. There are also a number of Adlib reproductions available for a much cheaper price if you want to keep that original Adlib look. Later Adlib cards from 1990 also switched to a more commonly used 3.5mm audio jack.

Video

In the late 80’s most 5170’s would likely have been fitted with an MDA or CGA video card though the more expensive and fancier option was the official IBM EGA card allowing 16 colors on screen at once.

There are later smaller and cheaper EGA cards with all the memory built in but the official IBM card just felt right for this PC. The IBM EGA video card only comes with 64K of video memory on the card severely limiting resolutions and colors on screen and causing some games to display an incorrect image. There is a memory expansion daughterboard as seen above which brings the card up to a full 256K of video ram. These daughterboards used to be quite rare though I believe there are third party replacements available. I unfortunately only have a CGA monitor on hand but thankfully the card can be made to display to a CGA color monitor via switches on the card and will display EGA graphics but at a lower resolution.

You can add an ISA VGA video card which would be significantly cheaper and allow the use of much more common VGA monitors if so desired though I find this much less interesting.

Overall the IBM 5170 is a capable PC for the 80’s although I do feel its CPU is a bit on the weak side even at 8MHz speeds. It’s to fast for very early PC games that require an 8088 CPU but for more demanding games of the 80’s a 12MHz or 16MHz 286 or a 386 would serve you much better. I went with a very IBM, period correct build for this article but nothing is stopping you from adding a decent VGA card and Sound Blaster 16 giving a significant boost to this PCs power and expanding the playable game library, though as I mentioned the CPU will still be a bottleneck for more demanding VGA games. In my opinion one is better off with a clone system which are usually smaller, lighter and have more things built in such as more memory and I/O ports. You also most likely do not have to worry about the tiresome setup programs required on the 5170 when using an IBM compatible which is a plus. If you are an IBM fan though this PC can be a lot of fun. The design is seen as beautiful by many IBM enthusiasts the AT is more expandable and versatile then the IBM PC and XT and the case itself is built like a tank.

There were personnel computers before the IBM 5150 but the 5150 is the computer that solidified what an IBM compatible PC would be. The 5150 featured an x86 processor, internal slots for various upgrade cards and was primarily intended to run off of PC-DOS / Microsoft MS-DOS operating system, all things we would learn to associate with the future IBM PC compatible market. The IBM 5150 was released in 1981 and was primarily intended as a machine for serious business tasks but was certainly capable of playing games and performing other non business functions.

The overall construction of the 5150 is extremely sturdy with a heavy metal case. The face of the case features no buttons or LEDs that we expect from later PCs and just features a stylish IBM PC badge, some vents and dual full height drive bays. The 5150 was sold in a few configurations including dual and single floppy drive variations as well as a version with no drives at all.

The dual full height bays commonly housed one or two 160k/360k (single/double sided) floppy disk drives. You can add two half height drives into these bays though this will require some means to secure the mounting as the bays are designed only to secure full height drives.

The power button is located on the left rear side of the 5150 case and uses a large on/off switch.

A locking mechanism was sold by IBM which one would place over the power switch which allowed the PC to only be turned on with the use of a key though I believe this also worked with XT and AT models as well.

Lets take a quick look at the rear of the case.

On the left side we have one female and one male power port. the male connector uses a standard three prong power cable with the female connector intended for a monitor to to plug into. To the right of the plugs we have a large round vent for the power supply followed by a keyboard and cassette connector. On my PC these ports are conveniently labeled.

The original keyboard for the IBM 5150 is the model F.

Model F keyboard

The model F is similar to the later model M in that it is very well built and does feature “clicky” keys. As you can see above the function keys are located to the left and there is no space between the num pad and the rest of the keys. This is a PC/XT class keyboard and will not work on later AT class machines.

The cassette port located next to the keyboard port was rarely used on the 5150 though I suppose if one had purchased a variation without any disk drives this would have been the expected method of data transfer. Finally we have five slots for adding expansion various cards.

Before opening this case up and looking inside lets take a quick look at the monitor.

The intended monitor for the 5150 was the IBM 5151 green monochrome monitor. Being mostly intended as a machine for office use where sharp text took priority over color, although IBM did release a color CGA and EGA monitor with very similar styling. The 5151 monitor gives a very nice and sharp monochrome image and is also surprisingly light compared to the general heft of the 5150. The two dials are for controlling brightness and contrast.

Unfortunately the two power cords on the 5151 are hard wired to the monitor itself. One cord is a 9-pin connector to connect to a monochrome video card with the other being the power connector intended for connecting to the female plug on the 5150’s power supply. There is no power button on the 5151 as the monitor was intended to power on with the 5150.

OK, now lets take a look at the inside of our 5150.

Take note that I have upgraded the power supply in these images to a 130w power supply in order to accommodate a possible hard drive. The stock power supply in the 5150 is a fairly anemic 63w supply and may not supply enough power if a hard drive is added.

There were two motherboard versions released for the 5150 depending on when it was manufactured. Earlier models used the 16kb-64kb boards which only were capable of supplying a maximum of 64kb of RAM on the board’s RAM sockets. My 5150 uses the later 64kb-256kb motherboard indicating a total of 256kb of RAM could be installed on board.

1 ) CPU – The CPU is the classic 8088 running at 4.77MHz. This was a cost saving measure as the 16-bit 8086 would have been faster but more expensive. Keep in mind that the NEC V20 which offered a slight speed boost over the 8088 was a fairly common upgrade on these machines.

1.5 ) math copro – Located alongside the CPU socket is the FPU socket for adding an 8087 math co-processor if desired.

2 ) RAM – My PC has been upgraded to the full 256kb of memory. Notice how the first row of memory is directly soldered to the motherboard while the following three rows are socketed.

3 ) PC Speaker – The 5150 uses a real PC speaker located on the far side of the case.

4) Switches – Two switch blocks located on the motherboard are used for setting things such as installed memory, type of video card installed ect… switch settings as well as a large amount of other information on the 5150 and other IBM PCs can be found here.

Lets take a look at the various expansion cards I have installed in my 5150.

Unlike later IBM PC compatibles which upped the standard expansion slot count to eight the 5150 only sports five 8-bit ISA slots. This can be a little limiting considering there is virtually nothing built in as far as video and I/O goes as well as the fact that your going to most likely be losing one ISA slot right from the start to a floppy drive controller card.

This is the standard IBM floppy controller. It features an external floppy port and when paired with the 5150 can support up to four floppy drives. Drives connect via the edge connector on the rear of the card. This card is currently running my dual 160k/360k drives but is also capable of supporting 720k 3 1/2 inch floppy drives.

Next up of my currently installed cards we have the monochrome video / printer card.

The IBM monochrome monitor card (MDA card) is designed to connect to the 5151 monochrome monitor and you will usually find this card installed in almost all 5150’s. The MDA card is not capable of displaying pixel graphics but only characters thus making it largely unsuitable for games but great for business which mainly benefited from having a sharp text display. There are games like Rogue which can be played on an MDA monitor since it only uses text and characters for graphics. Thankfully IBM understood the situation with limited expansion ports so the IBM MDA card also included a printer port.

An option even better then the IBM monochrome card would be a Hercules card or Hercules compatible card. These cards also worked with a monochrome monitor and featured a parallel port but also had the added benefit of being able to display graphics on a monochrome monitor for games which supported Hercules mode and with a small program even emulate CGA graphics in monochrome.

Thankfully you could also install a CGA card (as well as an EGA or VGA card) in the 5150.

There are a few revisions of this card from IBM with minor differences but I am using a later revision here. Although you can install a EGA and even some VGA cards in the 5150 I find the machine lacks enough power and RAM to properly run those sorts of games and is best suited for playing CGA titles. There are also a number of later more advanced CGA cards from companies like ATI which offer more display modes in a smaller form factor but I was trying to keep things more or less IBM and early 80s with this build.

Most commonly CGA offers games to be played with four colors from just a few palettes. Black, Cyan, magenta, white is the palette most associated with CGA though there are other palette options.

The IBM CGA card also offers a composite out for connecting to a standard TV. This produces a less sharp image then CGA on a computer monitor but techniques like dithering can be used to blend colors and create an image resembling EGA in some cases.

You also have the option, like I have done with my 5150, of installing dual video cards. I currently have both a MDA and CGA card installed. You can switch back and forth between MDA and CGA monitors with a DOS command MODE CO40 for CGA 40 column mode, MODE CO80 for CGA 80 column mode and MODE MONO for the monochrome display in 80 column mode.

The final card I have installed is an AST MegaPlus II card.

multi function cards like the MegaPlus II and the AST SixPack Plus were fairly common for the IBM 5150. The lack of expansion slots gave an opportunity for third parties to step in and create expansion cards which incorporated several useful features into one card. The MegaPlus II adds a real time clock, up to 512kb of memory to bring your 5150 up to 640kb, a serial port as well as multiple headers for daughterboard expansions.

Adding a hard drive / 720kb floppy drive

I kept my 5150 fairly stock and period correct but for some extra quality of life adding a hard drive and 720kb floppy drive is fairly simple.

The first issue you’re going to have with adding two half height drives is that the bays were only designed to securely mount a single full height drive as we can see in the image below.

Any upper drive would have no points to mount to. Thankfully there are some solutions as mounting plates were made to allow the use of dual half height drives. Theoretically I suppose if you had some sheet metal and tools you could create your own mounting plates. Below is a mounting plate I used, unfortunately it has no labeling so I’m not sure if it was homemade or part of some official kit.

If you do not have a mounting plate I found improvising works just as well though may it may not look as eloquent of a solution. I was able to position a mounting rail from a random PC diagonally and use it as a fairly sturdy mounting solution.

Once the mounting situation has been taken care of its time to well….mount the drives. Mounting the 3 1/2 720kb is fairly simple as even the stock IBM floppy controller will support it. You just either need a cable with the correct connectors or install a pin to edge connector adapter on your 720kb drive and it should run just fine. Newer 1.44mb drives will also work as 720kb drives without issue.

Installing a hard drive is a little trickier as the stock power supply is under powered for the task and the 5150 was not initially designed with a hard drive in mind as IBM never offered a hard drive as an option although later it did offer a 5161 expansion unit which did house a hard drive but which was the size of the entire 5150. Your first task is to upgrade the power supply with a beefier one. I upgraded mine to a 130w supply.

If you want to be more period correct you will want a MFM or RLL hard drive controller. I used a WD controller as well as an ST-225 20MB drive which worked without issue for me.

If your not trying to be period correct your best bet would probably be an XT-IDE controller with a CF card as these draw much less power then period drives and offer much faster speeds and reliability.

A friend once asked me why I would want a 5150 and proceeded to ask me if I “wanted to emulate being a 1980s office worker”. This comment is actually pretty fair since the 5150 is first and foremost a business machine. You certainly can play games on it and with a little work upgrade it well for this purpose but in truth there are many better options if you’re looking for an early 80’s 4.77MHz niche machine. The weak power supply and limit of five expansion slots does not do the 5150 any favors. If you want an early 80’s 8088 based machine find or build a nice machine with eight slots a turbo button and 640kb of memory built in.

On the other hand as a collector of vintage PC hardware the 5150 is a no brainer, it needs to be in your collection. The 5150 is iconic and set the stage for all IBM PC compatibles for decades to come.

In the year this article is being written (2019) what company comes to mind when you think of “Personal Computer”? Dell? HP? Gateway? possibly a maker of computer components like Asus? Well in the ’80s the answer would very likely be IBM.  IBM set the standard for the early personal computer with the model 5150 and continued to be a force in the home computer market for some time. By the late ’90s though IBM had started to withdraw from the home PC market and the average home computer buyer was more likely to think of companies like the aforementioned Dell or Gateway 2000 (as they were known at the time) when shopping for a PC. Today we are going to take a look at the IBM Aptiva model 2176 from the mid 90s and see what IBM had to offer to the home market in those later days.

The Aptiva 2176 is actually a pretty nice looking tower and for the day stood out with a unique looking design. At the top we have a large square power button with two LEDs for power and HDD activity located to the left. Lower down we have the classic IBM badge and of course that large sturdy handle on top that pretty much every tower of the day lacked giving the case its own look.

Pressing the large blue button on the upper left releases the upper cover which slowly and oddly satisfyingly slides down to reveal the drive bays.

There is room for two 5 1/4 drives as well as two of the 3 1/2 inch variety. I still have the original configuration of one 1.44MB floppy drive and the original 8x speed CD drive.

Turning the PC around and taking a look at the back.

On the back we have a curious indent near the top of the case and it took me a little while to realize that this was actually a grip for your other hand when using the handle at the front of the case to transport the Aptiva.

Under the power supply we have an odd jack with a sticker next to it showing a speaker and 12V. This is actually a pretty handy jack for powering certain external speakers, thus freeing up a socket on your wall or power strip. I’m surprised I’ve never seen this handy addition on any other PC case.

Below this we have a hefty eight expansion slots with various connectors lined up to the left of these. First of these connectors are two standard PS/2 ports for keyboard and mouse. This followed by a serial port and a single USB 1.0 port. The Aptiva 2176 is one of the earliest OEM machines I know of to feature a USB port. Lastly we have a standard printer port and a VGA port for the built-in video.

The case can be opened by unscrewing two screws at the top of the case near the handle to the front and then pulling back on the cover.

My Aptiva appears to of been mostly left stock upon taking a look inside. The first thing you notice is the odd riser board obscuring a majority of the motherboard which IBM used for this Aptiva. We will take a look at this after a quick look at the hard drive.

My machine came with the original 3.2GB hard drive installed. The hard drive on this model is installed in a small 3 1/2 inch bay directly above the power supply, thus leaving the frontal drive bays free. The built-in EIDE controller supports up to mode 4.

Let’s go back now and take a closer look at the riser board.

The riser board has one AUX style power connector connected to it and is pretty unique in its design having two PCI slots between two separate sets of 16-bit ISA slots, two ISA above and four below for a total of six ISA.

I find the choice of only including two PCI slots on a socket 7 Pentium class motherboard intended for a Windows OS especially odd. At the point the Aptiva was released PCI was certainly seen as the primary expansion style slot of the future and limiting the board to only two slots seems a tad short-sighted, especially when we consider that even 486 class motherboards that had PCI had at least three of the slots. The lack of PCI isn’t much of an issue if you intend to use the Aptiva as a DOS machine but could be limiting if you wanted a more capable Win9x PC. Thankfully having integrated graphics does alleviate the issue a small amount.

Here we have the motherboard with the riser board removed.

1) CPU – The motherboard is a socket 7 board and from what I could tell the model 2176 came with either a 166MHz or a 200MHz non-MMX Pentium CPU. My Aptiva came with the 166MHz Pentium non-MMX installed along with a fanless heatsink (though a case fan was nearby).

Officially the model 2176 only supports up to a 200MHz non-MMX but I’ve read from other sources that some individuals have had success with installing a 233MHz MMX CPU as well as later 333MHz K6-II CPU’s though you may encounter issues with the BIOS not reporting the correct CPU on POST. Installing a later K6 CPU may also require a voltage regulator that can support lower voltages. The regulator can be seen in the image below located above the CPU socket. I haven’t experimented with later CPU’s myself so I take no responsibility if you try later CPU’s though I would guess getting a 233MHz Pentium running by setting the multiplier to 1.5x to get 3.5x 66 = 233 along with a decent heatsink/fan wouldn’t be much trouble.

2) RAM – The model 2176 can accept a maximum of 128MB of memory via either a single 168-pin socket or four 72-pin sockets. I currently have 64MB of memory installed via a pair of 32MB 72-pin SIMMs.

3) L2 cache COAsT slot – The 2176 motherboard uses a COAst module or Cache On A SticK for L2 cache. The board can accept either 256KB or 512KB modules though mine has the seemingly more common 256KB module installed.

4) Video – The on-board video chip for the Aptiva 2176 is the ATI 3D Rage  chip with 2MB of memory. The 3D rage was more or less ATi’s Mach64 2D core with some 3D capabilities and MPEG-1 acceleration tacked on. As a 2D chip it does a decent job with Windows acceleration and has decent DOS compatibility. As a 3D accelerator through the first Rage is pretty lacking which is understandable seeing as this is a pretty early 3D chip. I tested a few games on this machine and found Tomb Raider playable but the sequel was missing textures. I wouldn’t expect great compatibility with 3D games past the 1997 or so mark even if you max the RAM in this system and beef up the CPU. I’d definitely recommend using one of those PCI slots for a video card upgrade.

Before moving on though I will say I found the Aptiva 2176 a bit picky when it came to video card upgrades. Some of the more “quirky” accelerator cards such as the Rendition Verite that may require some BIOS tweaking simply would not work with my Aptiva despite upgrading to the latest BIOS. A Matrox Millenium card however installed without issue.

5) Riser card connector – This is the slot for connecting the riser card. The slot uses edge connector pieces to make the connection. These edge connectors are not secured to either the slot on the motherboard or the riser card so if you do remove the riser card you may get a piece or two that stays stuck to either the card or the board. as you see below.

6) VRM – This is the voltage regulator module. I mostly see these on socket 5 and Pentium Pro and early socket 7 boards and are used to control the voltage to the CPU. If you want to use a CPU that requires a lower voltage make sure your installed VRM is capable of supplying that lower voltage.

7) This is the voltage regulator for the external 12v speaker jack

8) AT power connector

9) piezo speaker

Even though sound was not built into the motherboard IBM supplied every Aptiva 2176 with the infamous Mwave sound/modem combo card also known as the “Dolphin”.

The card is a 16-bit ISA combination sound card/modem. The card features IBM’s Mwave digital signal processor and a chip from Crystal. The Mwave is sound blaster compatible and has midi capabilities. The modem part of the card is quite interesting since it is a 28.8k modem software upgradable to 33.6k. Unfortunately the card had many issues and was infamously buggy, especially when using both the sound and modem functions. This was so bad a class action lawsuit was filed against IBM and the card was quickly dropped on later models.

I wanted to experience the sound capabilities of the Mwave myself so I installed the sound card drivers and left the modem drivers uninstalled. Doing this I had a pretty stable experience with the card overall.

There is a later plug and play version of the Mwave called the Stingray but for my non-plug and play Dolphin version Windows did not detect the card on install. The 2176 originally came with Windows 95 though I had upgraded my Aptivas OS to Windows 98SE and the drivers for the Mwave needed to be manually installed off of the Windows 98 installation.

Control Panel > Add New Hardware > No, I want to select hardware from a list > scroll down to “Other Devices” > in Manufactures select IBM and in Models select “IBM Dolphin Mwave DSP adaptor”

Doing this will give you basic sound functionality in Windows. Sound in DOS may take some extra steps to set up but this will give basic Windows sound support. The midi capabilities at this point are pretty bad and require an extra step.

For full midi support you’re going to need to find and download the Mwave midi samples on the internet and install them to C:\Mwave\Samples\Midimed

You can simply drag and drop the files to the specified folder and I found the midi capabilities of the card to be quite adequate after installing the samples.

The IBM Aptiva model 2176 isn’t a bad computer overall once you deal with its quirks. These things were quite expensive in their time and I wouldn’t have found them a great value when new but as a retro PC you can do a lot worse. The case is actually quite nice and stands out a bit from the other beige towers with its handle and sliding drive panel. There are some odd choices such as the riser board and the severe lack of PCI slots. The lack of PCI slots can hamper any thoughts of adding a new video card and a pair of Voodoo 2’s in SLI along with a USB 2.0 card and an ATA-133 controller (all at once) but I’d strongly suggest at least ditching the Mwave for another PCI or ISA sound card (depending if your leaning more DOS or Windows gaming) and bypassing the 3D Rage chip for a more capable PCI video card.


The IBM PC 350 was released in the mid 1990’s as an office / home desktop PC. It came in several sub models that used completely different motherboards and CPU’s from a socket 3 486 class up to socket 7 Pentiums all using the same case. In this article were going to look at the sub model 6587 which is the last sub model in the PC 350 class.

The case for the PC 350 is both sturdy but at the same time not extremely heavy. On the front there are LED lights for HDD activity and a power LED next to the large white power button. There is no reset button.

One pretty cool feature is the sliding front cover that slides to the left revealing your various drive bays. There is room for two 5 1/4 inch drives as well as a 3 1/2 bay and two internal 3 1/2 bays for hard drives. In the upper left corner is a cut out for an optional PCMCIA interface which I’ve never seen on a desktop before. Unfortunately mine did not come with this option installed.

My PC 350 did come with an 850MB hard hard drive installed which sounds about right for the time. A CD-ROM drive was an option but mine did not come with one installed. Installing a 5 1/4 drive can be a little taxing and removing the bay bezels can require a lot of force or completely removing the metal drive holders inside which also is not easy due to the assembly being held in by a hard plastic screw.

On the back we have from left to right, a infrared port for connecting an infrared receiver for wireless inferred communication with compatible devices. Next we have two PS/2 ports for keyboard and mouse followed by a serial port, two USB 1.0 ports and a parallel port. Lastly there is a VGA port for the built in video.

There are no screws holding the upper case on and accessing the motherboard is achieved by depressing the plastic tab in the upper left corner of the case and pulling back and then up on the upper case. Thankfully this tab is made from pretty rugged and thick plastic and feels fairly resistant to breaking off.

On the underside of the case is a simple chart explaining the memory configurations as well as a basic motherboard layout and the various switch settings. I always like when PC’s do this as it helps greatly when making basic changes like CPU upgrades.

Here is a view of the drive bay assembly removed from the case as well as the hard plastic screw that needs to be removed to get the metal assembly out.

Now lets take a look at the motherboard and relevant parts.

The PC 350 motherboard does use a standard lithium battery to store CMOS settings. In the image below is is obscured by the IDE cable.


1) CPU – My model 6587 came with a Pentium 133 but is easily upgradable. The chart found on the case underside gives settings for installing up to a Pentium 166 but online sources indicate a Pentium 200MHz classic or even a 166 or 233MHz MMX chip can be successfully installed though you may need to experiment with motherboard switch settings (Wikipedia suggests the 75MHz setting should work for 233MHz).

The MMX chips take a lower voltage from what it appears the board can provide so use caution if your going to attempt an MMX install. For a Pentium 200 classic the jumper settings were not present on my jumper sheet but through trial and error I found the settings for the Pentium 120 allowed for 200MHz operation with the P200.

The CPU’s on all of these machines are fanless and only come equipped with a passive cooling heatsink, though a rather tall one.

The instructions and all paperwork only refer to 3.3 volt Intel Pentiums CPU’s being compatible with some sources claiming Cyrix and AMD chips to be incompatible though I was able to upgrade my board with an IBM branded Cyrix 6×86 PR 166+ CPU without issue. I just made sure my CPU was labeled as requiring 3.3 volts (most Cyrix 6×86 CPU’s seem to require only 2.9 volts).

ibm350cpuchart

*Correction* The above chart refers to the Cyrix / IBM CPU as a “PR 166+” as it should be labeled as a P166+

2) RAM – The PC 350 has one 168 pin RAM socket as well as four 72 pin RAM sockets for memory expansion. You can expand the memory up to a total of 192MB and the convenient chart found on the underside of the case lid has a graph showing the advised memory configuration for the desired memory amount.

My PC 350 came with 32MB of memory installed via one 16MB 168 pin stick and two 8MB 72 pin sticks. I originally thought I would try using a single 32MB or 64MB stick of 168 pin memory and forgo the 72 pin sticks but none of my 168MB sticks would physically fit the 168 pin slot. I tried several sticks and they all were physically very slightly off and would not install. This is because I later discovered the 168 pin slot is keyed for 5 volt SDRAM which is not compatible with the 3.3V (the common used SDRAM).

3) L2 cache slot – L2 cache on the model 6587 is via a COASt module fount next to the CPU and can accept either 256KB or 512KB of L2 cache. Mine came with a 256KB stick though I needed to remove it and clean the contacts before it was recognized.

4) Video – The PC 350 comes with a S3 Trio64V+ chip on the board along with the ability to expand the memory from 1MB up to 2MB. The Trio chipset is an extremely DOS compatible chip proving excellent 2D support and compatibility for DOS and Windows 9x.

5) Riser card – The PC 350 uses a riser card in order to provide both PCI and 16-bit ISA expansion slots. In total the riser provides three PCI and five ISA slots though three slots are shared PCI/ISA slots and two are dedicated ISA slots. The opposite side of the riser provides for one of the stand alone ISA slots as well as a connection for power.

6) Floppy/IDE -The 350 motherboard provides for standard floppy connection as well as two built in ATA-2 IDE connectors for a total of four IDE compatible devices.

7) Switch – This is the switch used mainly for selecting your processor speed. Thankfully the chart on the underside of the case provides the settings and switch configurations should you decide to change CPU’s. The chart provided does come off as a little confusing though as It does not list actual FSB settings or provide a setting for 200/233mhz CPU’s. The Wikipedia entry on the PC 350 advises setting the switches to the “75 MHz setting” for a 233MHz Pentium.

8) PSU – The 350 motherboard requires three PSU connections to the board. Besides the standard AT connection the 350 also requires an additional AUX connection as seen below.

The IBM PC 350 makes a fair retro computer. It excels at DOS retro gaming and needs very little besides an ISA sound card to have a very compatible machine. As a Windows PC it is quite acceptable and a PCI 3D accelerator card such as a Voodoo would do wonders. The BIOS tends to be fussy though and when I made ANY changes including simply unplugging the mouse the machine demanded I enter the setup feature upon restarting and change/save the new settings. There are other annoyances such as the extra connection needed on the power supply as well as the slightly picky 168 pin RAM slot.

The case itself is quite nice offering a sturdy design, decent bay expansion as well as being easy to get into. I also like the sliding piece on the front so you can cover up your ugly discolored drives when not in use. Adding drives though requires some disassembly and is a hassle.

For a DOS PC the IBM PC 350 will serve you well though for Windows it’s passable but there are much better options. As a side note I could not get Windows 95 or 98 to install on my machine. This was due to some sort of driver conflict at the Windows splash screen I was never able to resolve. The machine IS Windows capable however and this problem boiled down to my particular machine.

FDISKformat

A place for the pc collector

I ❤ Old Games!

Probabilmente il miglior blog bilingue al mondo*

Waltorious Writes About Games

Game-related ramblings.

NekoJonez's Gaming Blog

My Gaming Timeline

Evelynn Star

Lynn talks about video games, records and books ...

Retro Megabit

Sharing My Retro Video Game Collection.

133MHz's Junk Box

Random electronics and gaming crap

SNES A Day

Chronogaming project featuring reviews, screenshots, and videos of the entire Super Nintendo library in release order.

Retrocosm's Vintage Computing, Tech & Scale RC Blog

Random mutterings on retro computing, music, plus radio controlled scale modelling.

The PewPew Diaries.

Work(s) in Progress!

1001Up

1001 video games and beyond

retro computing and gaming plus a little more

sparcie

retro computers and stuff

jispylicious

Stay Jispy!