Skip navigation

Tag Archives: 486

In the 1980’s and 90’s it seemed like everyone was making IBM PC compatible computers from Canon and AT&T to bigger names like HP and Dell. Of all these OEMs Gateway 2000 perhaps made one of the greatest of all these IBM compatibles. Enter the iconic 486 based Gateway 2000 4DX2-66V (Desktop) released around 1993 and retailing for a whopping $2995.

Not to say the other OEM companies didn’t make some impressive PC’s back in the day but the 4DX2-66V from Gateway 2000 really stood out as a massive and powerful PC of the time. This thing meant serious business and if the specs didn’t impress you the large case and relatively high build quality should have.

The model we’re looking at in this article is the desktop version although an even more impressive to look at tower version was also available for purchase.

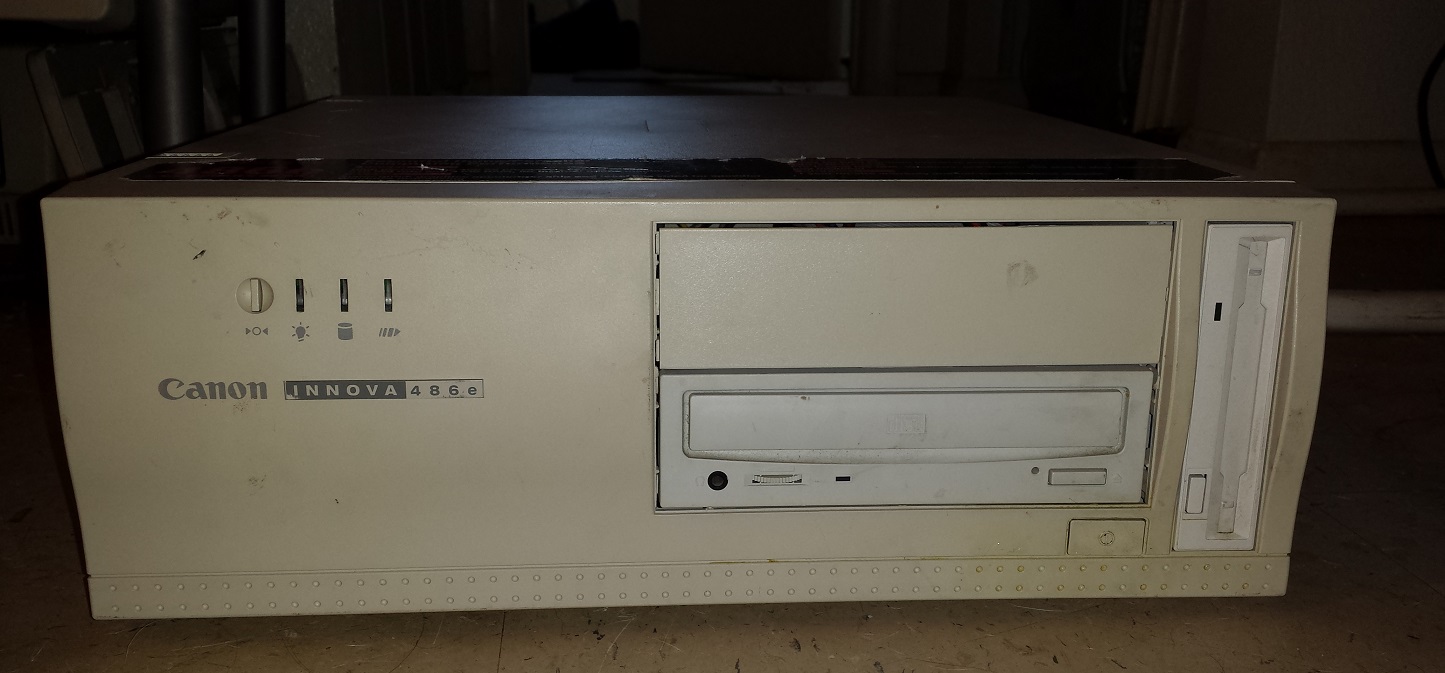
The 4DX-66V (4DX standing for 486DX CPU and 66V standing for 66MHz with Vesa Local Bus slots) is a rather large desktop case and is fairly heavy with a mostly all metal case. To the left, we have a key lock with a green power LED located underneath followed by a reset button an HDD activity light and finally a turbo button. On the far right side of the case, we have three 5 1/4 external bays. One thing I do dislike about this case is the complete lack of any external 3 1/2 bays forcing you to use a 5 1/4 bay adaptor for the obligatory 1.44MB floppy drive.

I attempted to replicate the look as closely as possible to a stock 4DX-66V and placed my drives according to some older advertisement photos I found. On the top is a 1.2MB 5 1/4 drive with a 1.44MB 3 1/2 floppy drive taking up the middle bay and finally a CD-ROM drive at the bottom.

I want to note here that there seems to be some difficulty in determining the stock CD-ROM drive type. Although IDE would be the standard for an OEM PC like this I’ve read some sources claiming the original CD drive was actually a SCSI x1 or x2 drive. The machine in question here did, in fact, come to me with an SCSI card installed and no CD drive and I had a very hard time getting an IDE CD drive to install and work correctly. In the end I did opt to install an SCSI CD drive though the drive itself is a newer and faster Sony drive.

The front of the case also lacks any power button. There is a power switch located on the right back side. This is a design more in common with earlier 80’s machines like the 5150.

This design also makes it difficult to find and fit a replacement PSU should yours die since standard AT or ATX power supplies with AT adaptors lack this side switch and are of a smaller size.

Taking a look at the back.

There is nothing too special about the rear of this PC and we have a pretty standard layout with parallel and serial connectors as well as an AT keyboard port and eight expansion slots.

Before we open the case I wanted to take a look at the keyboard Gateway sold with this machine.

This PC came with a massive 124 key Gateway 2000 “Anykey” keyboard. This keyboard featured extra function keys on the far left as well as 8 directional keys and has macro keys for programming your own macro commands.

Opening the case is fairly easy and requires unscrewing screws at the rear of the case and sliding the top section of the case forward and then up and off.

To the left of the three 5 1/4 external bays we do have two internal 5 1/4 bays. As I stated earlier the design of this case certainly feels a little out modded for the 486 era and internal 3 1/2 bays would have been a much more useful option seeing as your going to need some adapters to properly install and secure a standard 3 1/2 hard drive.

The case also features a real cone speaker nestled in the front of the case as well as guide/support ridges for extra long expansion cards.

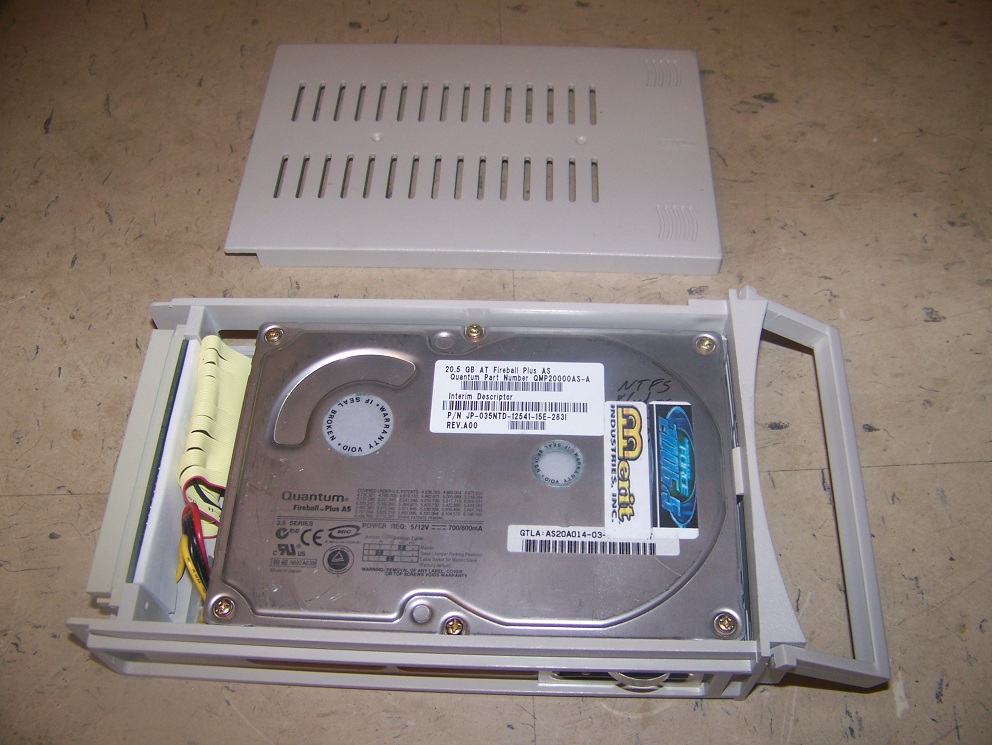
Lastly, as far as the case goes we do unfortunately have the “rail system” in effect on this case. Rather than using simple screws to hold drives in place you must first attach rails to your drives before installing and securing them. My PC came with several drives missing as well as missing rails so extra rails of roughly the same fit had to be salvaged from other builds.

Early magazine advertising listed a 340MB 13ms IDE hard drive as standard but the closest I had was a Western Digital 853MB Caviar 2850 manufactured in 1996 which installed with the help of a bay adapter into one of the internal bays.

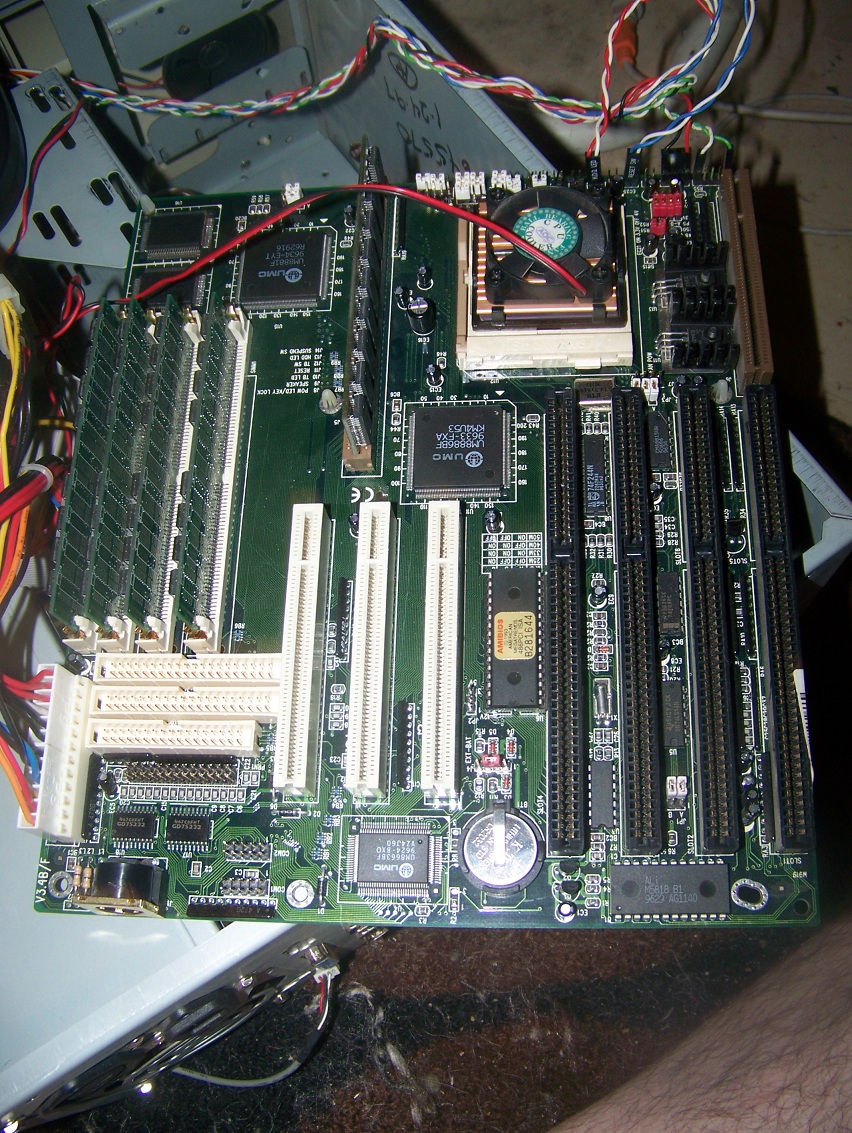
Despite the case itself having some by even the early 90’s standards a relatively outdated design the motherboard itself featured some very advanced and useful features such as dual built-in IDE controllers and even a CPU upgrade socket.

The motherboard used in the 4DX-66V is a Micronics board and sports eight 16-bit ISA slots two of which double as VLB slots.

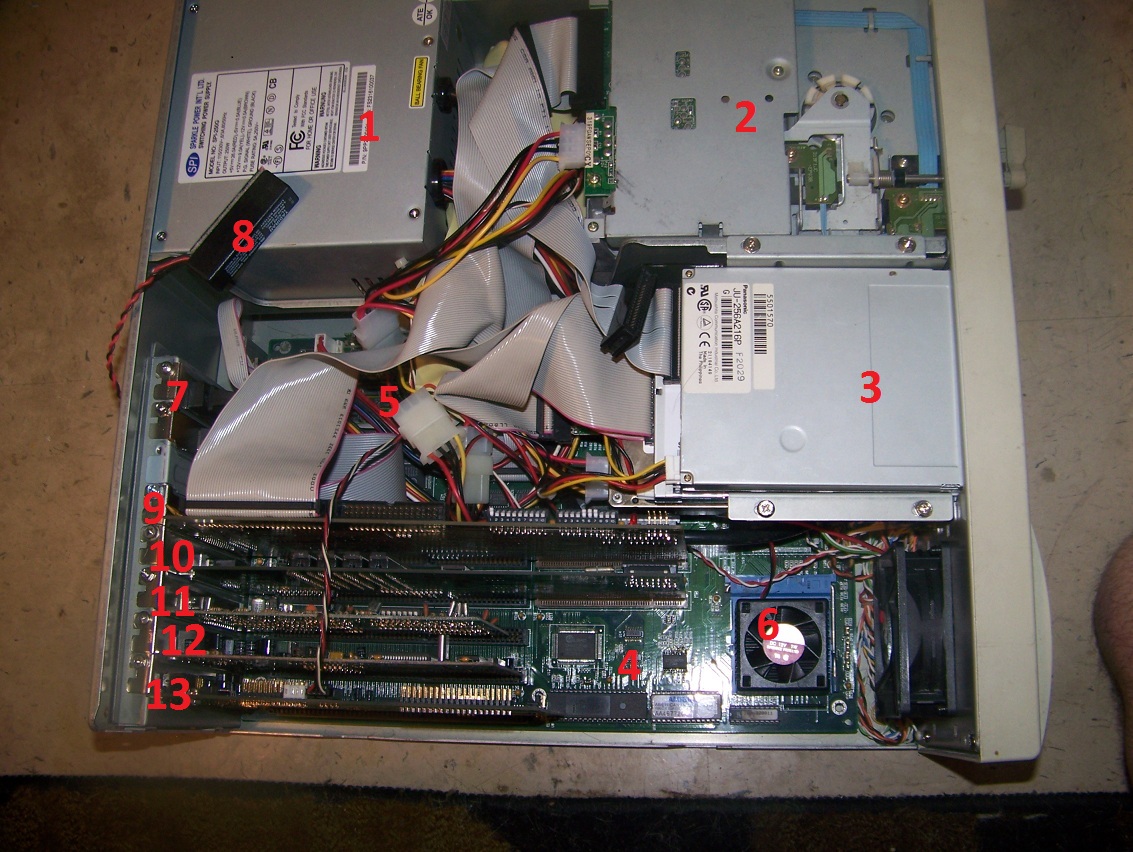
1) CPU – The standard CPU in the 4DX-66V was, obviously, an Intel 486DX running at 66MHz. This CPU was more or less the gold standard during the 486 era and offered excellent performance in a wide range of games while not being too slow or too fast as well as offering stable reliability. The DX2 CPU in the 4DX-66V came stock with a small heatsink but did not feature a fan for extra cooling.

Next to the CPU socket there is also a CPU upgrade socket to allow for easy upgrading of the CPU via chips such as the Intel Overdrive which greatly increased CPU power.

2) RAM – The 4DX-66V is capable of supporting a maximum of 64MB of FPM memory via four 72 pin memory sockets. Mine currently has 16MB installed which is still a rather healthy amount of memory for the early 90’s. The stock amount seems to of been 8MB.

3) L2 cache – Unlike most 486 era motherboards which used DIPP chips installed in several sockets on the motherboard the 4DX-66V employed a single socket which accepted a CoaST (Cache on a STick) module. This is the same method used by the infamous M919 socket 3 motherboard as well as many early Pentium motherboards. The 4DX-66V seems to of been sold standard with a 256K cache stick but mine only has a 64K module for some reason. I’m not sure why someone would have downgraded the L2 cache on my machine but perhaps at some point in the past the original L2 stick was damaged or lost and the former owner only had a 64K module as a replacement.

4) Switch – Behind the L2 cache module is a small switch block. Unfortunately, I did not have the manual for this PC nor could I find a guide to this switch block online. I did find a Video by Silicon Classics which did briefly display a page from the manual with some functions of the switch block which I was able to screen capture. switches 5-8 appear to set the CPU type.

(Click to enlarge)

5) Battery – One thing I did find fairly odd for this motherboard is the seemingly complete lack of any kind of on-board CMOS battery to save BIOS settings. The only apparent method of installing a battery is an external battery connector located next to the Keyboard port. The 4DX-66V seems to of come standard with an external Rayovac 844 battery. Thankfully the battery is easy to replace and modern equivalents using three AAA batteries can be found cheaply on eBay. It is HIGHLY recommended to change the battery before tinkering with the 4DX-66V as it seems very finicky and you’re likely to run into many random problems when operating with a dead CMOS battery

6) IDE – The 4DX-66V motherboard came with two IDE controllers built-in for a total of four usable IDE devices. This was rather uncommon to see built into a socket 3 motherboard and a very welcome addition. On my machine though the IDE was extremely problematic and picky about both the hard drive and the CD-ROM drive. In the end I decided to forgo the built-in IDE altogether and opt for an ISA EIDE card.

Above the IDE connectors we have a standard floppy connector.

7) Finally to the left of the IDE and floppy we have I/O connectors for the serial and parallel as well as the AT power connector.

Expansion cards

For the various expansion cards I attempted to get this Gateway as close to stock as I could though I did take a few liberties in the name of power, convenience and necessity.

IDE – After getting fed up with the fickle nature of the built-in IDE I did finally give in and installed a SIIG SC-JE4012 16-bit ISA IDE controller card. This card offered faster access speeds then the built-in controller as well as made life much easier when choosing hard drives. I may be wrong but I believe the built-in IDE controller hits a 512MB limit when looking at hard drives and most of the time regardless of the size the built-in controller was just not seeing the drive or only sporadically seeing the drive. It’s quite possible the controller is failing with age but regardless, a more reliable IDE card like this SIIG card is certainly recommended.

SCSI – Even though my machine did come with a VLB SCSI controller card installed and I read sources that indicated that the stock CD drive was SCSI, my original plan was to remove the SCSI card and run both the hard drive and CD-ROM drive off the IDE controller. Unfortunately this was another element during the restoration of this PC that almost drove me insane as even with the separate IDE card installed my particular 4DX-66V was incredibly picky about what drives worked and what master/slave configuration they were in. The form factor and length of the IDE cables did not help this situation in the slightest. Eventually I decided to give up and run the CD drive off the VLB SCSI controller, which after being set up properly gave me no issues whatsoever.

The SCSI controller used was a Buslogic BT-440C/445C VLB card. I’ve used this card before in my main 486 PC and I’ve found them to be reliable and mostly trouble free cards. I did briefly consider going all out with SCSI and replacing my IDE hard drive with an SCSI drive but in the end decided to stay with the IDE drive since not only was it more “stock correct” but was already setup at this point.

Sound – The sound card is another area where I took a little bit of a liberty in choosing the card. Finding out what card came installed factory from Gateway proved to be a challenge and I never did find a concrete answer. Some sources cited the Sound Blaster Pro CT1330A as being sold along with the PC while other sources claimed early Sound Blaster 16 cards like the CT1770 would of been the stock card.

I also stumbled upon the Gateway 2000 branded 16MVCARD based on the JAZZ 16 chipset from Media Vision.

The seller of the card claimed it was pulled directly from a 4DX-66V though it’s completely possible it was a later replacement for the original card or it came from a similar but not exact Gateway model. I did decide to install the JAZZ 16 based card but unfortunately the card was non-working with audio being barely audible over extreme and constant audio “noise” and squealing.

The card I did finally settle on though was the Creative Sound Blaster AWE32 CT3910. Even though this by all accounts was not the stock sound card in the 4DX-66V I feel it does make a very good fit. The CT3910 is an earlier non-plug & play card with a real Yamaha OPL chip for authentic FM sound. It lacks a wavetable header but it does have a standard IDE connector (though again, I had no luck with mine when trying to setup an IDE CD-ROM drive on this machine). It’s more or less a cleaner sounding SB16 with built-in MIDI capabilities which is nice for playing games like DOOM and Duke3D on this PC.

Video – Lastly we have the video card and unlike the sound card it was actually extremely easy to find out what card came stock in the 4DX-66V. That card was a special cut down OEM version of the Mach32 card from ATI possibly known as the Mach32 XLR or CLX. This was a VLB card and differed from the retail version of the VLB Mach32 card by having a slower RAMDAC and only 1MB of video ram standard.

The card I have installed is the more capable retail version of the Mach32 for the VLB slot.

If you look to the right side of the card you’ll notice a large square socketed chip labeled ATI68875, this is the improved RAMDAC. On the OEM card this socket would be empty and instead the lower rectangular socket which is empty on this card would be populated with the slower RAMDAC chip. These cards support a full 2MB of RAM which mine is currently outfitted with.

Like any high-end VLB video card these days the Mach32 goes for a pretty penny on eBay. The card is fast, It came in right behind my ET4000 based VLB card in most benchmarks I performed and it also makes an excellent Windows 2D accelerator but unfortunately it does fall a little short when it comes to compatibility. For instance I had some pretty bad scrolling issues in Commander Keen 4 even with the option to fix scrolling issues checked in the options menu. To be fair my ET4000 also had some odd graphical issues as well but these went away completely by checking off the SVGA box under options and scrolling was silky smooth.

Despite the somewhat outdated case design and relatively minor issues like the use of rails and an awkward to replace power supply the 4DX-66V is an impressive PC for 1993 even with the stock configuration. The board is pretty easily upgradable and the CPU upgrade socket makes adding something like an Intel Overdrive CPU a cinch. I would of prefered at least one external 3 1/2 drive but the case does look very stylish. The Mach32, even the gimped stock version isn’t half bad though it’s worth considering replacing it in the name of better overall compatibility. Collectors seem to really love the 4DX-66V (especially in the tower form factor) and I expect prices to rise, so if you see one, even if it’s just a shell, snag it.


This slideshow requires JavaScript.


As I’ve probably said before, back in the 80’s and 90’s virtually every company that had anything at all to do with electronics wanted a piece of the IBM personal computer pie. To this end many companies released their own brand of IBM compatible PC’s. Compaq, Dell and Packard Bell are some of the first to come to mind but there are other companies as well that while being well known names in the business field were not especially known as PC manufacturers. Among them are Epson, AT&T and as we will see in today’s machine, Canon. Canon is a company perhaps best known in the PC world for their printers but today’s PC is a little something I stumbled upon at a thrift and had to pick up.

cinn1

I present to you the Canon Innova 486e part of Canon’s Innova PC compatible line. The front of this PC does have a little style to it with some curves on the case. The power button is the big block under the CD-ROM drive and the reset is the curious little button above the Canon logo next to the three LED’s. The third LED next to the power LED and HDD activity LED is an LED for the turbo feature. [Ctrl]-[Alt]-[ + ] on the keyboard toggles the turbo feature on and off. You get two 5 1/4 bays and one vertical 3 1/2 bays which is pretty typical for a OEM slim machine of this era. This case does seem a little less wide then most and a little more tall. I’m sure the 1.44mb floppy drive came stock but I’m not sure about the CD drive. Mine came with one installed but this may of been installed by the prior owner. This model did come with a 210MB IDE drive that fired right up and worked fine.

cinn3

The rear of the PC is pretty standard with two PS/2 ports, two serial ports a parallel port and then the built in VGA port. The extra height of this case allows for four expansion cards running off the internal riser card as you can see from the slot ports to the right.

My case happened to still have the factory sticker mostly intact touting the stock specs.

cinn2

The specs aren’t terrible for the time and there is plenty of room for possible upgrading. The thing that caught my eye was the built in video is running off the local bus so it should give me VLB card performance levels unlike a few previous OEM machines I’ve had of this era that ran the built in VGA off the ISA bus.

One thing I noticed pretty fast is the case is screwless and sort of reminds me of a 90’s Macintosh case but without the brittle plastic shell. It did take me a minute to figure out how to get the case off but it involves removing a number of tabs around the case followed by prying off the front panel and untabbing more tabs to slide the case off. Overall I think I would of preferred screws as it’s a bit of a hassle.

This slideshow requires JavaScript.

With the case off and the bay mount removed we have full access to the motherboard.

cinn13

1) CPU – the CPU in this model is a Intel 33mhz SX meaning no built in math co-processor. upgrading is very easy though and you should be able to pop in a DX version no problem. There are two options for front side bus set by jumper conveniently labeled on the motherboard for either 25mhz or 33mhz. upgrading to a 66mhz dx2, 100mhz dx4 or an AMD 133mhz 5×86 is a cinch. The sticker proclaims Pentium Overdrive compatibility which may very well be true but I’ve encountered boards in the past that claimed OD compatibility but failed to function with the chip. It also lacks the blue overdrive socket  style common on overdrive compatible machines. For that matter the socket it uses the older style LIF socket without the handle making CPU removal and replacement a little more stressful.

cinn11

2) RAM – The 486e has 4mb of RAM soldered onto the motherboard with two 72 pin RAM sockets to either side. I have two 4mb sticks installed along with the built in RAM for 12MB total. I am unsure of the total RAM limit on this motherboard but if I had to venture a guess I would say at least 32MB and perhaps 64mb total allowed.

cinn12

3) L2 cache – Here we have the sockets for adding L2 cache. There are nine sockets for 28 pin chips. eight for the SRAM and one for a tag RAM chip. It can accommodate 64kb, 128kb or 256kb of l2 cache. again with jumper instructions conveniently printed on the motherboard.

cinn15

4) Video – The video chip is a Cirrus Logic CL-GD5428 also found in mid to high performance VLB cards such as the Diamond Speedster pro card. This is a fairly capable chip and a great DOS performer. This chip is capable of addressing 2mb of VRAM but the motherboard only has 512kb built in with another 512kb able to be added for a total of 1mb VRAM via the sockets next to the chip. There are a few suspect ZIP looking sockets by the video chip that I’m very unsure about. They may be for adding even more video RAM but I find it odd they would use a completely different socket type. As I mentioned the built in video is running off the local bus or Vesa Local Bus which gives a nice speed boost over ISA. Overall this is a really good chip for having as built in video and I’m not sure theres any ISA video card that would be worth using instead since I don’t think you’ll find one more capable.

cinn10

5) Riser card with four ISA slots for expansion cards

6) AT power connector with built in Floppy controller and one built in IDE connector for supporting two IDE devices.

7) Piezo beeper speaker

So what do I think overall? as far as OEM 486 rigs go I rather like the Canon Innova 486e. I could do without the hassle of the odd screwless case design but what you find under the hood is a pretty capable beast with plenty of room to easily upgrade. The closest machines I have to compare it to are the Tandy 425 SX and the Packard Bell Legand 115 which in my opinion are inferior machines. The Innova is more powerful, at least in the built in video department as well as offering comparable and easier upgrade options.

This slideshow requires JavaScript.

Benchmarks (Intel SX 33mhz 486, no L2 Cache, 12MB FPM RAM, Built in Cirrus Logic CL-GD5428 512kb video)

3DBENCH – 24.2

PCPBENCH – 5.4

DOOM -13.96

Quake – N/A

SPEEDSYS – 12.16

Previously I had written a post on pushing the limits of Socket 7 in this article. This time I’m going to explore pushing the limits of one of my favorite motherboard’s, the socket 3 board. Socket 3 motherboards were designed for the 486 CPU and represent a golden age of DOS from the early to mid-1990’s. Its no wonder then why many Retro computer enthusiasts cherish and focus on this era of PC gaming. As a matter of fact individuals attempting to see how far they can push the limits of motherboards meant for the venerable 486 is a rather popular topic in the hobby.

before I get into the article I want to point out that Feipoa, a user over at the Vogons forum wrote a very in-depth and well-researched post on the subject titled The Ultimate 486 Benchmark ComparisonThe point of this article though is to not only perform my own benchmarks and come to my own conclusions but to try and express the results in a simplified manner. As awesome and well done as the Vogons post is it is a little bit lengthy and technical and may come off as a bit overwhelming to a retro PC novice or casual user. Hopefully this article will be user-friendly and straight forward enough for the retro PC newbie as well as maybe even make for a good read to a more experienced PC user. I do encourage readers to check out the link above though if you want to read further on the subject.

First off were obviously going to need a socket 3 motherboard. In general if you’re pushing the limits of socket 3 your going to want late model boards and this means motherboards with PCI slots. PCI slot 486 motherboards can be expensive and in some cases buggy as manufacturers hadn’t completely figured out the PCI standard but it’s really your only choice for getting the most out of the higher end 4×86/5×86 CPU’s as it offers the most options in BIOS, CPU type support as well as allowing much higher speed PCI video cards to take advantage of the fast CPU.

For my testing I used a Shuttle-HOT 433 motherboard. These boards are known to be a little buggy but support a wide array of faster 486 and 586 CPU’s at higher front side bus settings.

shuthot1

For all tests I’ll be using this motherboard. I’m running 32MB of FPM RAM, 512kb 15ns l2 cache, 0 wait states with a memory timing of 2-2-2 and for the video I am using a PCI Matrox G200.

As a baseline CPU I’m using the Intel DX2 66mhz. I’m using this CPU as a baseline as it represents the quintessential 486 of the mid 90’s and was a widely used, capable and popular gaming CPU.

20150511_193627

Write-Back and Write-through memory

I also want to take a minute to talk about Write Back and Write Through memory. Starting from the 66mhz DX2 you start to see variants of chips using “Write-Back” cache such as this 66mhz DX2 below. The SX955 designates this CPU as the write-back variant.

20150521_163410

Without getting technical this type of memory is faster than standard “Write-through” memory. Generally you need to enable write-back via the BIOS configuration screen else it simply acts as write-through. The option should be available in most late socket 3 boards and look something like this.

20150925_132329_LLS

In my personal experience I haven’t noticed a huge performance jump using write-back but if you’re trying to get every ounce of performance it’s something to keep in mind. There are a few caveats to using write-back and that’s possible issues with stability much like with early EDO RAM usage. The other issue is most if not all VLB SCSI cards are incompatible with write-back settings. This means if you plan on using a  SCSI VLB card for a hard drive or CD-ROM drive your not going to be able to enable write-back cache as well. I believe I have read this has to do with bus mastering conflicts. I have read some SCSI controller cards may be compatible or have a jumper that needs set to enable compatibility with write-back cache but that is unconfirmed by myself.

High end socket 3 CPU choices

Alright, now let’s talk about your choices for a fast high-end CPU in socket 3 format. You actually have about three choices and that comes down to the Intel route the AMD route or the Cyrix route. They each have their own positives and minuses and each tackles the situation differently.

AMD 5×86

Will start by looking at the AMD 133mhz 5×86 CPU.

20150501_205855

This is the most common solution for turbocharging a socket 3 platform. The AMD 5×86 is fairly common and cheap. The name 5×86 is a bit of a lie though as this chip doesn’t have much in common with the other socket 3 5×86 chips were going to look at and is much more of a traditional 4×86 CPU. AMD’s approach was simply to turbocharge the 486 CPU and in this case they did very well. the AMD 5×86 is perhaps the mature height of the traditional 486 CPU. The image above is of an older variant that states that it requires heatsink and fan but later chips running cooler lack this requirement (though you probably should do it anyways). All AMD 5×86 chips regardless make excellent overclockers and can be overclocked to 160mhz fairly routinely by setting the front side bus to 40mhz. The AMD 5×86 at 133mhz is about equivalent to a 75mhz Pentium in speed (but not FPU functions). Overclocked to 160mhz it hovers more around a Pentium 90mhz in performance which is a significant speed boost for a socket 3 chip. remember a Pentium is superior in speed even when operating at the same clock frequency so a true Pentium 100mhz will blow an Intel 486 DX4 at 100mhz away. This chip overall is very compatible with socket 3 boards and generally runs very cool and stable even at 160mhz. I have read about a few instances of this chip being overclocked to 200mhz but this should be considered pretty advanced and nonroutine so is beyond the scope of the article.

The AMD 5×86 was produced for some time so labeling on the CPU itself differs depending on when it was made. On the far right is a later release of the chip with a year 2000 date code. Users have stated that they had better luck overclocking ADZ chips as opposed to the ADW labeled chips.

Cyrix 5×86

Next we have the Cyrix 120mhz 5×86 CPU

c5x86120

The Cyrix CPU is actually the polar opposite of the idea behind the AMD 5×86. Where the AMD chip takes a 486 and turbo charges it the Cyrix 5×86 takes their next generation 6×86 CPU and cuts it down disabling features to make it run stable on a socket 3 board. The Cyrix 100mhz chip is very common but the 120mhz chip as seen above is pretty rare. I was able to attain mine by luck off eBay about a year ago but have not seen any pop up since. There is also a 133mhz Cyrix 5×86 but this chip is very rare and for awhile it was doubted if it was even actually produced. Being that the 133mhz chip is rather unattainable we won’t be considering it for this article.

Unlike the AMD chip the Cyrix chip needs a little work to reach its full potential as programs can be obtained to re-enable some of the features that Cyrix disabled to help with stability issues. Re-enabling some of these features produces speed increases but in turn you may suffer stability wise. The only known motherboard to have built-in options to re-enable some Cyrix chip features (LINBRST and LSSER) is the infamous M919 motherboard otherwise you need to download and execute a program to reactivate these features. More information on these features and programs can be found here. I used the Peter Moss utility with my Cyrix chips and used these settings loop_en=off, rstk_en=on, lsser=off, fp_fast=on, btb_en=on while still achieving stability. your mileage may vary.

If you can’t find a 120mhz Cyrix chip there is still hope as IBM manufactured The Cyrix 5×86 under license. Due to IBM’s superior fabrication plants they were able to produce many chips rated at 100mhz that easily overclock to 120mhz. This is the chip I used for the benchmarks in this test.

20150501_202922

Though uncommon these chips turn up on places like eBay far more then the Cyrix branded 120mhz chips and many of them are easily able to overclock to 120mhz like the one above. Note that you probably will not have the same success in overclocking the Cyrix branded 100mhz 5×86 chips that seem to be common on eBay. A number of the IBM 5×86 chips may even overclock to 133mhz but mine did not and this is to considered less likely a case than not. Results with a 120mhz overclocked IBM chip should be equivalent to a true 120mhz Cyrix chip.

Intel Pentium Overdrive

Finally we have Intel’s offering which is a paired down Pentium processor modified to work in a socket 3 slot.

20150501_202946

This chip is possibly the most technically advanced of the upgrade paths but also the lowest clocked chip of the bunch coming in at 83mhz. I’ve read Intel tried to get a faster chip out there but ran into to many issues. You can overclock the Pentium Overdrive to 100mhz but it is not advisable. In my research most sources advised not to overclock the overdrive as it is a poor overclocker and is likely to damage the chip. For this reason the overclock should not be seen as routine so is not relevant to this article.

Despite the overdrive being restrained by the socket 3 architecture tests by HighTreason, another Vogons user, has shown that the 83mhz overdrive still outperforms a true Pentium 66mhz on a socket 4 motherboard in most tests. In my own comparisons benchmarks the Overdrive and Pentium 66 were fairly neck and neck each beating out the other in about half the bench tests but then I wasn’t using comparable video cards and such.

One advantage of the overdrive over the competition is its much superior floating point math processing in comparison to the AMD and the Cyrix. Its ability to take advantage of applications with optimized Pentium code is also a huge boon in some games and apps. Will see how this takes effect in the benchmarks.

The unrepresented chip

The one chip I wanted to include in testing but never got around to was Intel’s 100mhz DX4 if only because this was Intel’s last 486 chip. I doubt this chip would add too much to the tests though as its probably about equal to the Cyrix 100mhz 5×86 and a little faster than AMD’s 100mhz 486.

Benchmarks

And now that we’ve talked about the CPU options it’s on to the Benchmark tests. For the tests I’m using Phil’s benchmark’s which is a collection of four benchmark tests that include PCBench, 3DBench as well as time demos of DOOM and Quake.

Let’s look at the results via a bar graph, because I love graphs.

486cpugraph

As we can see the poor Intel dx2 66mhz lags behind in all respects but surprisingly in some tests like DOOM it actually fairs pretty well against the Cyrix 100mhz. The AMD 5×86 133mhz is fairly close in terms of performance to the 83mhz Pentium Overdrive while the Cyrix 5×86 120mhz and AMD 5×86 160mhz lead the pack. Overall the AMD overclocked at 160mhz beats out all other chips including the Cyrix 120mhz in all tests except 3dBench where it only lags behind the Cyrix by about 1 FPS. Notice that the Pentium Overdrive dominates in the Quake test beating all other chips. This can easily be explained as Quake relies heavily on the FPU math coprocessor and is optimized for Pentium code. I would assume though that if I had a 133mhz Cyrix 5×86 it may beat out the AMD 160mhz in all tests being top dog.

So my conclusion on the best chip to push the socket 3 platform to its limits? Well it depends a little bit. Without considering a Cyrix 133mhz chip the top dog is obviously the AMD 5×86 overclocked to 160mhz. The other great thing about this chip is its availability, low cost and solid stability even when overclocked. It would definitely be the first chip I would recommend.

The Cyrix definitely has a sort of “cool” factor but it does involve a little more fine tuning with enabling enhancements. due to the higher price, scarcer availability and more hassle I probably wouldn’t recommend going the Cyrix route unless you want to be different or if you don’t want to overclock and can find a true Cyrix 120mhz chip on the cheap. Again I think overall a Cyrix 133mhz would beat all competition but if it was me I would be afraid to run and wear out such a rare chip.

Last up we have the Pentium Overdrive which despite its slower clock puts up a valiant fight beating the Cyrix 100mhz in all tests and running a slight edge in general over the AMD 133mhz. Again, the motherboard compatibility with the PO is not going to be as good as the AMD but if you plan to play a lot of later DOS games or Win9x games that take advantage of Pentium coding such as Quake or Duke 3D this may be the way to go. Pentium OD chips aren’t too rare but are generally more pricey than the AMD chips or the Cyrix 100mhz chips.

Well this is the first article I’m writing of a series I’m calling “odds & ends”. basically just putting together a few things I think are kinda neat but don’t really have enough for an entire dedicated article. Its also decent filler till I write something more comprehensive. For this first one I’m going to go over the not so well know LS-120 “super drives”. The early 80’s Tandy portable game Hungry Monsters the 1967 Think-A-Tron…game? and lastly the Cryix 80mhz 486 CPU only because I like its green heat sink…really, only reason why.

LS-120 SUPER DRIVE

ls1201

The LS-120 and its larger capacity brother the LS-240 was the not so successful competition to the somewhat successful Iomega ZIP drives in mid 1990’s. Until recently finding one in a purchased PC I’ve never heard of these before. Like the ZIP drive these drives use special disks to store large amounts of data. This was before CD burning drives were extremely cheap and available. Unlike the ZIP drives though these things were more reliable, held slightly more data and here is the cool thing, could act as a standard 1.44mb or 720k floppy drive. Why these failed and Zip drives did not I don’t know (well I kinda do). I know it was not widely supported but many of my later socket 7 motherboards do support these drives in BIOS.

ls1202

As you can see they use IDE just like the ZIP drive but use the mini four pin molex connector unlike the ZIP drives that use the large molex connector usually taken up by your CD and hard drives. Like I mentioned earlier these drives held 20MB more Data then the standard ZIP drives and also could read/write to standard 720k and 1.44mb floppy disks faster then conventional drives. ZIP drives COULD NOT read or write to standard 1.44mb or 720k disks.

And here is an external model I recently came across at the thrift for a few $$. It uses the parallel port like many external peripherals of the day.

ls120ex

The most likely reason these failed was that Iomega had a three year head start with the Zip drive and burnable CD media was on the horizon. Its a shame these weren’t more common.

TANDY HUNGRY MONSTER

In 1983 Tandy, the makers of the trs-80 and Tandy 1000 line of computers, among others released a portable hand held game, “Hungry Monster”. Its basically a Pac Man type clone but none the less its kinda fun.

thm1

I picked this unit up at a Goodwill for about $3-$4. Its in good shape and requires 4 AA batteries for operation though it does have a connection for using an external power supply at 6 volt DC, center positive. The unit is light and pretty easy to use. I was slightly impressed by the color from the lights on this game and was expecting something more basic before turning it on.

thm2

So yeah, Its really just a Pac Man clone down to the power pellets. But its a good Pac Man clone

THINK-A-TRON

The oldest computer like thing I own. From 1967 Its Hasbro’s Think-A-Tron modeled after the huge mainframes of the time.

thinktron1

Where were going we don’t need zip codes! I say that because there’s no zip code for the address on the box (non mandatory zip codes were introduced nation wide in 1963 but did not start to become mandatory until some time in 1967). Anyways I received this for free from a bulk lot of vintage computer stuff I also received for free as a donation.

thinktron2

Basically the machine uses punch hole cards and you feed it the question cards with the punch holes and it answers via lights on it light array. Kinda neat for the time.

thinktron3

The crank on mine is cracked but other then that its in decent condition.

CRYIX 80MHZ 486 CPU

c48680

This was in a computer I picked up. I really don’t have much of anything to say about it. I was never a big Cryix fan but I really really really like that heat sink. Though I guess any 486 over 66mhz is kinda neat-o.

continuing with the Anatomy of series we will be looking at a Windows 3.1 computer designed to push the 486 CPU to its limits. Windows 3.1 or Windows 3.11 for networks was an earlier windows operating system that basically added a graphics user interface to DOS. you had to already have DOS installed and for the most part it made DOS more user friendly and allowed the user to run something sort of like what we know as Windows today. You could easily exit it to DOS and vise versa. There were also a number of games designed to run within Windows 3.1 exclusively or with a different “enhanced” interface.  For the most part Windows 3.1 installed on a PC did not interfere with DOS applications or games, In another instance of “I swear I’ve read it somewhere” I seem to recall a few games that had issues running if windows was installed or some hardware issues arising since windows does some modifying to the config. files and other such important files. Again, I cant confirm this but I swear I’ve read about these issues somewhere before. for compatibility sake though and as a simple excuse to have another PC setup I do run a windows 3.1 exclusive PC and keep “pure” DOS computers as well.

Is the creation of a PC purely for Windows 3.1 really necessary? No, not in the slightest, it’s a rather small era in PC gaming and from what I can tell the incompatibility issues with Windows 3.1 are so negligible your actually probably better off having it on a DOS PC if you only have room to spare for one PC. That being said since I do this as a hobby and have room for PC’s of every minute era or purpose I like to treat this as sort of experimental setup. although Windows 3.1 could run on older hardware like the 386 It was really meant for the 486 CPU and I want to take this setup as a PC that pushes the 486 platform to its limits. Practically speaking if you’re looking at a very fast 486 you may as well get an early Pentium as its faster and cheaper but if you want to see how far the 486 can be pushed then a Windows 486 machine is a fun project.

A nice little tower representative of the era. nauseating off-white and the standard CD-ROM, 5 1/4 and 3 1/2 floppy drives as all three of these formats were still in fairly wide use at the time. For a hard drive we have a 500MB IDE hard drive loaded with DOS 6.22 and Windows 3.1, of course a larger hard drive can be installed but again without partitioning or some tricks about 500MB is the most DOS can “see”. This tower also comes with one of those neat little LED screens that displays the current CPU speed of the computer, handy on an older computer if you have a turbo button hooked up so you can visually see the CPU speed setting. Yes, its running at 133mhz, no it’s not overclocked and no, it is not a Pentium, we will get to that in a moment.

you can always add a PCI SCSI card as well. SCSI is usually a little faster then IDE and allows larger hard drive sizes but back in the 80’s and 90’s it was more expensive then IDE. SCSI cards also generally have a external port on them for hooking up several external SCSI devices. The Maxtor hard drive I have in this machine is actually pretty fast and since I already had a lot of information on it and I do not use this PC to much I decided not to switch it over to SCSI (yet) but if your just building a similar system I do recommend a ISA,VLB or preferably PCI SCSI controller card. Another reason I haven’t bothered with SCSI though has to do with bus mastering issues with certain machines. specifically ones that use the AMD 5×86 and write back RAM like this one. apparently you can only have one of the other so with this machine I’ll stick with IDE.

A pretty standard rear view of the unit with the typical serial connections and expansion cards installed. This PC like most of the era uses the large AT keyboard port and a serial mouse. please refer to my previous Anatomy of posts for more information on these older keyboard/mouse connection standards.

MOTHERBOARD – Next is the all important motherboard or MB. To push the 486 I went with a very late model MB that incorporated PCI slots. generally I don’t recommend PCI 486 motherboards because first of all they are slightly hard to find and expensive as well as the PCI slots in them are sometimes a little buggy due to the fact this was a new expansion slot format at the time but since this is more of a project machine we will incorporate the PCI slots to give us access to some faster PCI video cards. You will also notice another of those slot fans I love to throw into my cases, again, its somewhat unnecessary for this setup but you really can never have too much cooling in a PC.

The motherboard I am using is the infamous PC Chips M919 motherboard

m919 boarcThis board has a pretty bad reputation but as far as 486 boards with PCI slots it seems to be the most common and as far as I’ve seen stable enough for normal usage. It has three PCI, three ISA and one VLB expansion slots making this a very versatile board. Also this board is DX4 compatible to support the last line of the 486 CPU’s the DX4. so what makes this board so infamous. The answer for that will usually be the legal dubiousness of these.

fakecache

See, back in the day cache chips which is a much faster secondary RAM on the motherboard the CPU can take advantage of was really expensive. Reputable motherboard manufacturers if they were making low cost boards would simply not include them on the board but on the most M919 boards there are “decorative” cache chips. That is to say completely fake chips there to fool you into thinking your board actually has L2 cache. Even on board the screen proclaims “Write back cache” but alas.

fakewin31

Without L2 cache your performance loss is probably somewhere under 10% depending on the CPU your running. Its not horrible but not great either. Fortuitously these boards do have a COAST-like slot that a special 256kb Cache chips can be installed into. Do not confuse this module with the more common ones that are meant for some Pentium boards. Installing the wrong module could damage the board.

win31cache

Here is the official and uncommon cache module. Notice the back side specifically states for use with M919 board. Once installed the boot up BIOS screen should change to “256kb cache” but run a cache checking program like cachechk just to be sure.

Now this motherboard can be notoriously picky and even though my board detected the 256kb of L2 cache at first it wasn’t actually using it and running benchmarks or cachechk utility resulted in no L2 cache detected. I wasn’t until later I discovered I needed to replace the EDO RAM with FPM for my machine to use the L2 cache stick (the performance boost from L2 cache over EDO RAM is significant so choose L2 cache if you have to chose only one). Maybe a different brand of EDO RAM would fix this but I did not have any other makes on hand to test. I also had to try several sticks or FPM RAM before I found sticks it would even boot with, its a very picky board. Also note that I have read that some boards may not detect the L2 cache if your using more then 32MB of RAM. Mine doesn’t seem to have this issue but yours may.

1) CPU – OK, now to the CPU. Were going to go with the fastest 486 CPU’s available and basically we have three choices. The AMD 133mhz 5X86 which is basically a supped up 486. A Intel Pentium Overdrive 83mhz which is a scaled down Pentium made to work on a 486 board and give “kind of” Pentium performance and lastly the Cyrix 5×86 which comes in 100 or 120mhz which is a scaled down version of Cyrix’s next gen 6×86 chip. First I’ll briefly explain something about CPU’s. As a general rule but not always the final model or speed of a CPU generation is faster than the first of the new generation. ok, as an example the 133mhz 486 is faster than the first Pentium chips, so a 133mhz 486 is faster than a 60mhz Pentium 1, actually its about as fast as a 75mhz Pentium 1 which is pretty impressive BUT a 133mhz Pentium 1 is WAY faster than a 133mhz 486 CPU. This is usually due to increased efficiency, features and designs with the newest generation. Other examples would be the last of the Pent III’s being faster than the first Pent 4’s and the 186 CPU being faster than the early 286 CPU. so with all that being said the 133mhz 486 is a pretty fast chip for its class.

There are two types of AMD 5×86’s that I’m aware of. The straight chip from AMD that is designed to run on later 486 boards whose BIOS support DX4 chips and then the 5×86 upgrade chips.

First off is the turbo chip and I have a Kingston 133mhz turbochip which is the AMD 133DX4 sold under a different brand name with an attached fan.

This chip was designed to give individuals an upgrade path for their older 486 boards. In a dx4 compatible MB this chip should run at 133mhz. it has onboard cache and is socket 2 and 3 compatible. It’s a very fast chip and great if you do not have a dx4 486 motherboard. This issue is there a bit uncommon and can be pretty expensive. as of the writing of this article a 133mhz AMD could be had for $24 shipped on eBay where the only turbochip I managed to find was over $60. Also the turbochip is not 100% compatible with all motherboards and on some may give reduced speeds. I had mine installed in an older 486 socket 3 board and was only able to achieve 100mhz (still fast for a 486).

If your board supports DX4 chips go for a real AMD DX4 133mhz as some of the upgrade chips that are really meant for older boards have some drawbacks. For instance the above Kingston turbochip only supports Write-Though memory where as the true AMD 5×86 supports Write-Through and Write-Back with Write-Back giving better overall system performance.

Next is the 83mhz Pentium Overdrive. This is not a true Pentium and performance for regular tasks it scores slightly behind the AMD 133mhz but in 3D and tasks using the FPU or floating point math the POD does much better then the AMD.

Lastly is the Cyrix 5×86 chips which come in the more common 100mhz uncommon 120mhz and rare 133mhz. The 100mhz gives inferior performance to both the AMD and Intel Overdrive but the 120 and 133mhz chips give superior performance to both. This performance may vary though depending on motherboards and supported 5×86 features.

The AMD 133mhz is in my opinion the way to go when coupled with a DX4 motherboard due to relative availability and performance. It is a mature 486 chip that gives excellent performance equivalent to and in some cases exceeding a 75mhz Pentium 1 as well as giving rock solid reliability due to the process of 486 manufacturing being fully mature at this point. Be sure to install the CPU with a 486 heatsink and fan to keep heat levels down. Having said that I do plan on eventually tracking down a Cyrix 120mhz for my machine since the M919 motherboard I use apparently supports a few features of the Cyrix 5×86 in BIOS and I should get superior performance with it.

*update* I recently replaced my AMD 5×86 with a Cyrix 120mhz 5×86. remember to enable LSSR and LB in the BIOS if using the Cyrix chip for extra performance. the M919 is the only known board that you can enable some Cyrix features without using a third party utility. I would also advise to set your cache to 2-1-2 and your memory read/write to 0/0 in the BIOS instead of auto detect. I was told this advise by a VOGONS forum member and it really helped boost performance.

c5x86120

Another interesting “quirk” about this motherboard is that the PCI bus usually runs at 33mhz but when your CPU demands a 40mhz bus like the Cyrix 120 (3×40=120mhz) the PCI bus gets cut to 27mhz thus slowing your graphics card down. this has caused some games and benches to be slower with the Cyrix installed. a rare 133mhz Cyrix 5×86 or an overclocked chip running on a 33mhz bus would solve this issue. Thankfully though there is another solution. If you have a turbo button on your case as mine does you can jumper the turbo switch to JP3a. With my machine now when I boot my machine boots in 33mhz mode and the Cyrix runs at 100mhz (33mhz fsb x3). After my PC is done posting and gets to the C:\ prompt I hit my turbo button unjumpering JP3A and returning the CPU to a 40mhz bus and 120mhz speed. The PCI bus though I believe ends up being overclocked to 40mhz which may cause issues with some cards. So far my Ark card has handled it just fine.

Benchmark results

AMD 5×86 @ 133mhz, 256kb l2 cache module

3Dbench = 75.2
PCPbench = 19.7
Doom = 42.58
Quake = 12.6

Cyrix 5×86 @ 120mhz, 256kb l2 cache, video card at 33mhz (as with AMD due to jumpering trick), loop_en=off, rstk_en=on, lsser=off, fp_fast=on, btb_en=on via Peter Moss 5×86 utility

3Dbench = 95.0
PCPbench = 22.3
Doom = 48.63
Quake = 15.0

The Cyrix is now clearly beating the AMD 5×86 with the video card running at full speed and certain Cyrix enhancements enabled via a third party utility.

2) RAM  Not much to say about RAM except to pack in as much as you can. The later 486 motherboards  should pretty much all support at least 64MB of RAM. Mine is loaded to the MAX of 64MB but as I’ve said before most DOS games will run fine with about 8MB. As a fast 486 though were probably going to be playing some rather later FPS games like DOOM and Duke 3d so more RAM is defiantly better. Take note of the Ram type your Motherboard needs. its most likely going to be 30 pin or maybe 72 pin. Your also going to want a board like mine here that supports EDO RAM for that little extra speed.

3) VIDEO CARD Now I’m going to let you in on one of the best kept secrets of DOS gaming, the ARK Logic 2000MT chipset. upon first discovering this card in my collection I looked it up as I’ve never heard of it before. At the time the only information I could find was a German wiki page that even after translation yielded little useful information. I simply tossed it aside and assumed it was a low budget no name card. It wasn’t until a few months later I discovered an online post about someone who was testing video card speeds in DOS and was shocked to find that the unassuming ARK LOGIC 2000MT was beating out all the competition under DOS and was practically neck and neck with the much praised ET4000 video chipset. After further research and reading I discovered that the ARK LOGIC cards were well praised in their time and are indeed very fast and very compatible PCI video cards for DOS rivaling the well known ET4000 family. Across the board the Trio64V2 that I use in my Pentium DOS machine from all accounts does give somewhat better game compatibility the ARK card is definatly the faster card. The ARK 2000MT chipset was also used in the Diamond Stealth64 Graphics2001 PCI card but the one I’m using is an ARK PCI card with 2MB of RAM.

4) SOUND CARD usually the trickiest part to set up in DOS. I’m using an ISA Sound Blaster AWE32 with 8MB of added ram. Actually the card I’m using is a Sound Blaster 32 with 8MB of RAM making it almost just like a regular AWE32 except the SB32 uses the VIBRA chip which is a little less noisy then the standard chip used in the AWE32, also you cant make fine adjustments to the SB32 that you can with the AWE32 like to the treble and bass but the cheaper price and clearer sound from the SB32 makes it a good trade off in my opinion. these cards are HUGE and can be a little pricy sometimes. the cheapest and more overall compatible solution would be a Sound Blaster 16 card but I like the AWE32/SB32 for its enhanced 16 bit sound ability and good game compatibility. there are a few games (like Cyclones) that do not support the AWE32/SB32 but i find most games from the late DOS era do and many from earlier as its SB16 compatible. games like Duke Nukem 3d sound much better with this card then on a SB16 and late era games is what were shooting for with this setup. The model I’m using here is CT3930, this model has an actual Yamaha FM chip on it allowing older games that use FM to sound correct. Some models do not have an actual FM chip onboard so always look for the Yamaha chip when buying a SB32 or AWE32.

sb32win3

 Overall this is a very capable PC for gaming and Windows 3.1 multi tasking. As I said at the beginning there really is no pressing practical need for a Windows 3.1 exclusive PC and for a PC this fast you could do it more easily and more cheaply with an early Pentium 1 setup but for what it is it does show off the high end of the 486 platform very nicely and will play later more demanding games silky smoothly. Doom plays perfect and really only a blast from the BFG in the most monster crowded of room will even have a chance to start some small slowdown for a few seconds. Overall a fun project and a capable machine.

Continuing with the “Anatomy of” series we will be looking at perhaps the quintessential computer and CPU of the early to mid 90’s and a DOS mainstay. The 486 CPU was introduced in 1989 and continued to be refined and made faster. It stuck around well into the Pentium era of the mid 90’s. The PC were looking at today is based around the 486 and designed to run virtually any DOS game and program from the late 80’s up until the mid 90’s. it’s a little to fast and overkill for mid and early 80’s games and although certainly playable,  just a tad to slow for later DOS games such as Duke 3D or Doom. I find this setup to really be the perfect type for most DOS gaming in both compatibility and time specific feel (if that makes sense). It’s a little harder to find the parts for and maybe slightly more expensive than building a Pentium based DOS PC but the effort is worth it. I’ll be attempting to explain the parts necessary to put together a 486 PC but as always the suggestions are my opinions and there are many, many choices available. For quick reference I also have a page explaining various PC ports and slot types here.

4861new

I chose a desktop style case, I feel it better conveys the era and I personally like the form factor but you can just as easily chose a tower type configuration. This case is slightly larger than most I have seen on the market and has 3 5.25″ drive bays where most I have seen have 2. make sure you get an AT style case as your motherboard is going to be an AT form factor with most likely an AT power connector. Most of these cases can be found for less than $20 and many times come with a AT power supply. A lot of these cases have little slots for keys, don’t worry about them, you don’t need the key. this was so owners or businesses could lock the case to protect the insides from unwanted modifications or pilfering I assume. they usually come with 3 buttons, your standard power and reset as well as a “turbo” button. contrary to what you may think the “turbo” button actually slows the CPU down. This is to help with compatibility with older games that require a slower CPU. It’s a mostly useless feature but I suppose its nice to have to somewhat increase compatibility.

4862new

One thing you’ll notice about the back is that there are no PS/2 ports for keyboards or mice. The PS/2 standard had not taken hold yet and a  majority of 486 based motherboards did not have or support the connection, you will even find these AT style keyboard connections on early Pentium based boards.

1) AT keyboard connection. Finding an AT keyboard shouldn’t be hard. I spot them a lot at Goodwill in the piles of boards they usually have in one corner. the bulk will be USB or PS/2 but look for older off white colored boards and check the end connectors for the larger AT plug. The good news is that the AT connector is compatible with the PS/2 standard by way of an adapter plug. these can be found online for a few dollars and let you use a PS/2 type keyboard with the AT plug.

2) serial ports, The mouse is slightly more tricky. Serial mice are almost always the older style “ball mice”. They aren’t to rare and almost never more than $5. Unfortunately the connection is not electronically compatible with PS/2 so even with an adapter your PS/2 mouse may still not work. You need to look for serial/PS/2 compatible mice. sometimes this feature is stated on the mouse, usually it is not. You’re most likely better off just using a serial mouse. The other port is a 25 pin serial.

3) Parallel port, generally this is where you would plug in a printer to interface or a external Zip drive.

4) External SCSI port

5) Video port

6) Midi port

7) Gravis Ultrasound ACE

8) Sound Blaster 16 and joystick port

now to get into the meat of the setup.

4863new

4864new

1) the PSU or power unit. almost all 486 motherboards are going to have an older style AT power connector so you’re going to need a AT power supply. You don’t need one that’s very powerful 200 watts should suffice. Unfortunately these power units are getting a little hard to come by but on the plus side there is ATX to AT converter cables available for a few dollars. You’re also probably going to have to wire the PSU to the power button on the case unless you bought a case with the PSU already hooked up. this isn’t difficult and it’s just plugging 2 connectors. Mine is 250 Watts which should be enough for a machine of this time.

2) these are the larger 5.25′ drive bays. your almost defiantly going to want a CD-ROM drive installed. A lot of games in the era did have a CD release with enhanced sound and graphics. I’m using a CD-RW drive simply because I didn’t have a regular drive available at the time. these drives work fine for playing CD’s in DOS. there is no need to have a DVD drive since this format did not exist at the time. A DVD drive will also work and should operate just like a CD-ROM drive when installed.

The second drive I have installed is a 1.2MB 5 1/4 inch floppy drive. Almost all games of this era came on 1.44MB 3 1/2 floppies or CD so this drive really isn’t completely necessary but it you have an extra there’s no harm adding it on. It adds compatibility for some older games and also greatly enhances that classic PC look. I’ve also learned recently that there may be a few games that actually had content CUT to fit on a 1.44MB 3 1/2 floppy version. Tongue of the Fat Man is one such game with more content on the 5 1/4 floppy version.

Lastly I have my 500MB IDE hard drive installed in a removable Hard Drive caddy. Usually these caddy’s have a small fan for extra cooling and can be easily pulled out if you need to swap hard drives or your drive fails. I have my boot drive installed here and my games installed on my secondary hard drive. This way if my main drive fails I can easily swap in a new one.

new4866

3) The 2 3 1/2″ bays I have installed a IDE 500MB hard drive and a 1.44 MB 3 1/2″ floppy drive. a larger hard drive will work fine but as stated in earlier “Anatomy of” articles DOS only sees about 500MB without using partitions or tricks. the 1.44MB floppy drive is a must since many games were released on this format.

Under the 1.44mb drive I have my 100MB SCSI Zip drive. The SCSI variant is defiantly a little rarer and harder to find then the IDE based drives but i have noticed its a little faster, uses a smaller floppy type power connector and does not take up a space on my IDE chain since IDE only supports 2 devices per cable and SCSI can support over seven. It did take me a little time to hunt one down.

Finally under the Zip drive I have my secondary 1.4GB SCSI hard drive for my games.

4) The motherboard or MB. You’re really going to want a socket 3 motherboard to support the later 486 CPU’s. There all going to come with several 16 bit ISA slots but I highly recommend you find one that also has 1 or 2 VLB slots. you can look up this slot type on Wikipedia for more detail but they are longer connector slots usually a light brown in color. they were prevalent in the late 486 era and are faster at transferring information then the older ISA slots, roughly equivalent in speed to the later PCI type slot. PCI was still having the bugs worked out of it at this point so I don’t recommend a 486 board with PCI slots. My board has 2 VLB slots which is about the standard number. also make sure to note the MB type and do some research. MB’s of this era usually required jumper switches to change settings for things like CPU types and speed. fortunately though most 486 era MB’s do have the IDE and floppy connectors built in. I’m using a UM 486V AIO motherboard. It’s okay and serves the purpose though there are others out there that support more RAM and have more slots. mine has 256k cache as well as 2 VLB slots and 4 16 bit ISA slots.

Take note of the cache slots when buying a motherboard of this era as well. cache is very fast memory that the CPU makes use of. it is much faster then your standard system RAM and at the time was much more expensive so there were issues at the time with motherboards coming with empty cache sockets or even worse fake cache. L1 cache is located on the CPU itself but in the 486 days the L2 cache was on the motherboard. your board will operate with no L2 cache but it will take a stability as well as performance hit. My board can handle up to 256k of L2 cache which is plenty for the time period. You really want between 128k and 256k L2 cache. Some boards offer 512k or on high end boards 1mb but after 256k you really start to notice diminishing results so its not really necessary.

ELITEGROUP-COMPUTER-SYSTEMS-INC-486-UM-486V-AIO-1

5) RAM. Most if not all of these era motherboards are going to use old 30 pin ram simms. there a little hard to find but not terribly expensive online. the MB I am using has 32MB which is also the most allowed, high end 486 MB’s could allow up to 64MB using 16MB simms. 32MB and defiantly 64MB is complete overkill for the era of gaming we are making this PC for. The majority of games from the time will happily run smoothly on as little as 8MB RAM. also make sure you research the RAM your MB needs, all 30 pin RAM is not the same and some boards are very picky on only accepting high or low density ram or things like EDO. for instance. most old PC’s use parity 9 chip ram in 30 pin simms. If the ram simm has 8 chips its non-parity and for a MAC. some MB’s you can adjust a setting in BIOS to allow the use of 8 chip RAM but many do not so make sure your using the correct type of RAM.

 6) CPU. The CPU I suggest and perhaps the all time classic 486 is the Intel 486DX2 66mhz CPU. I know there are several 486 CPU’s that were faster but the 66mhtz is without a doubt one of the most widespread and reliable of the time.  The 66mhtz was very widely used by DOS games and also gets along well with the VLB ports. make sure to couple the CPU with a heatsink/fan combo to extend the life of your system.

(image taken from Wikipedia as public domain)

7) serial port bracket and parallel port bracket. A lot of these older boards only have the keyboard connector built in so your going to need a diagram of your board (commonly available on-line if you know your MB type) and a bracket with the serial ports/parallel port and cable. If your lucky these will come with the 486 MB. You’re going to need the 9-pin male serial port for your mouse.

8) battery. The CMOS battery saves your BIOS settings. without it your going to be constantly configuring your drives and HDD on startup. 486 boards use a variety of battery’s from battery chips to barrel nickle-cadnium battery’s to lithium batteries on the higher end MB’s. My MB was very weird in the fact that the only battery connection available was a 4 pin external battery. these look like little bricks with a wire coming off and a connector on the end. they can go average for about $14. they usually have a side with adhesive so you can stick it to the side or inside case. I simply allow mine to dangle out the back.

9) SCSI card. I’m using a BusLogic BT-445S VLB SCSI card to handle any SCSI devices I use on this machine. SCSI or Small Computer System Interface is the alternative to IDE. In general its considered a little faster and more reliable then IDE but can be a headache to set up at times and the devices can be harder to find and costlier then IDE equivalents that’s why I like to use it in addition to my IDE. On my setup I have my secondary hard drive running on the SCSI bus. It is a newer 7200 RPM IBM SCSI hard drive detected as 1.4GB capacity. I primarily use this drive for my games. Another benefit of SCSI is that its not as size limited due to BIOS issues as drives connected to the IDE bus. You can also connect tape drives and CD-Rom drives to the SCSI bus and there is also an external connection. I believe I can connect up to 7 devices on this particular card. I originally had an Adaptec VLB card but it had a faulty BIOS chip so I switched over to this SiiG card which has worked well but was a sort of “bare bones” controller. I finally settled on the BusLogic card since it was a fair price and feature rich. Try to get a card that has features such as asynchronous transfer, large drive capability, DMA and bus mastering as these features will speed up your HDD access. Take note though if your using as later 486 motherboard and have your ram set to “write-back” you’re almost assuredly going to have bus conflict issues when adding a vlb SCSI device. As far as I know there’s no way around it. Its either write back RAM or the VLB SCSI but using a ISA SCSI card should work fine though it will be slower. Adding a SCSI card is completely optional but I think it improves your device options and ups the “coolness” factor.

486vlscsi

10) graphics card. There are many options available for graphics cards in this era. since 3D accelerations is really not a consideration for this era we need an excellent 2D card. since our board should have at least 1 VLB slot we should focus on a VLB card. as I said before PCI was still having the bugs worked out of it at this point so I don’t recommend a 486 board with PCI cards. Previously I was running a Diamond Speedster Pro VLB card with 1MB of onboard RAM. 1MB for the most part is all the video RAM you need. there are some reported issues with sound interference or crackling when using a Speedster Pro VLB with a Sound Blaster 16 but the number of games is limited and I have never personally come across this issue. If you must have the top of the line though and the current card I am using hunt down a Tseng Labs ET4000 VLB card. It’s widely regarded as the fastest VLB card. Mine came with 1MB of RAM but I added more to make a 2MB card. Buying the RAM individually can be a little pricey so look for an old cheap Trident card and harvest its RAM, just be careful which way you inset it. These cards can be a little pricy but they are very compatible and very fast.

486gfx

11) Midi card. The midi card I currently have installed is a Roland mpu-401-T. I use this card to run all my external Midi devices such as the MT-32. Prior to this card I used my Sound Blaster 16 to control my midi devices but That setup was prone to games not working because they required a true midi interface card or they fell victim to the dreaded “hanging midi note” bug that effects midi modules connected via sound blaster midi ports. These are 8 bit ISA cards but work just fine in a 486 16 bit slot. keep in mind there are several versions of the card and mine is the 401-T version. You will also require a “midi breakout box” to interface with your external modules. make sure your box is the same as the ISA card your using or it will not work. They are wired differently and I found that out the hard way.

mputcard

mpu401t486

Connected to my breakout box and Midi interface card is my Roland MT-32 module. The MT-32 sound module really deserves an article of its own on its features and how to set one up so I’m just going to briefly go over it here. There is a revision of this module that’s almost identical except for a rear headphone jack and internal updates. There are a small number of games that work incorrectly with the old version but correctly on the new version and a small number that work incorrectly with the new revision but correctly on the old one so the ultimate setup would include both modules. there is also an internal version the LAPC-I that I believe is based on the old module. Basically this was the Cadillac of sound devises and was capable of sound quality far ahead of the cards available at the time. A lot of games support the MT-32 standard and most sound brilliant for music. I urge you to go on YouTube and look up “MT-32” comparison videos and hear for yourself the difference. For maximum compatibility I have my MT-32 paired with the SB16. To avoid conflict my SB16’s midi port is set to port 300 and my midi card is set to port 330 which is the default port that most games look for. The MT-32 handles music when the option is available and the SB16 the digital sound effects. Many games will allow for the SB16 to be used for sound effects while the MT-32 handles the in-game music.

4865

Another indispensable midi module would be a Roland Sound Canvas SC-55 or SC-55 MKII. These modules support general midi and Roland midi which many later DOS games support. These games may support general midi but NOT MT-32. Th SC-55 can also emulate the MT-32 but may not sound perfect compared to a actual MT-32. The earlier SC-55 is said to be slightly more compatible with older DOS games while the SC-55 MKII may perform better with a few late DOS titles.

12) Gravis Ultrasound ACE. The Gravis Ultrasound was a competitor to the sound Blaster. Although it wasn’t as widely supported as the SB it was still supported in a variety of games and offered much higher quality sound and at times even improved game performance. The card I’m using is the ACE which is a stripped down version of the regular card. I’m using this card because Sound Blaster emulation on a Gravis was not very good and the ACE was designed to work in a machine alongside a Sound Blaster. Unlike regular cards you can disable the adlib emulation on an ACE and with the Ultrasound initialization program v. 2.26a available here, you can also disable the game port option so you have no conflicts with the Sound Blaster.

486grav

13) Sound card. I’m using a later model Sound Blaster 16 Vibra ISA card for FM sound and digital effects. The Sound Blaster 16 or SB16 is really a no brainier for this era in PC gaming. It is backwards compatible with the Adlib standard and almost every game of the period supported Sound Blaster sound. They are fairly cheap and easy to find giving the best compatibility and performance for the early to mid 90’s era. There are more capable cards like the AWE series or the Gravis Ultrasound but I feel you sacrifice compatibility and these cards are better suited for faster Pentium based PC’s.

Also a strong argument can be made to use a earlier 8-bit Sound Blaster Pro or sound blaster. The Sound Blaster 16 is NOT fully compatible with the sound blaster and older software often sound better on it. with the exception of perhaps the Vibra model SB16 cards the Sound Blaster pro has a lower sound to nose ratio. keep in mind that the sound blasters before the SB16 do not have midi ports compatible with the MPU-401 standard meaning you cannot use them to hook up external midi modules. I have recently debated replacing my sound blaster 16 with a older sound blaster but since I have some older PC’s that I can use for that purpose I’ll stick with the good all around Sound Blaster16 card.

The SB16 model I am using is the CT2900. it uses the VIBRA chip but also has the Yamaha OPL FM chip. try to use a SB with the OPL FM chip as many later models lack this chip.  and without it some sounds that use FM end up sounding off. If your observant you’ll notice in the full picture of the open 486 above the sound card is different, shortly after taking that picture I found the better model CT2900. the model I was using prior lacked the Yamaha OPL chip.

14) MPEG decoder card. (not pictured above) This is the newest edition to my 486 and thus not in the motherboard images above. It is a 16 bit ISA RealMagic MPEG decoder card. This card allows a 386 or 486 CPU machine to decode MPEG video which otherwise would be to taxing to the CPU. I plan to use this card for playing RealMagic enhanced games. admittedly the games that support these cards are few and rare and have to be a special version supporting the card. I believe there are RealMagic enhanced versions of Dragons Lair, Space Ace, Return to ZORK and The Horde as well as possibly a few others. Using the card allows for smoother  and better looking full motion video scenes as well as possibly other effects.

mpeg1

mpeg2

There are cards that connect via a external passthrough such as this card and others that connect directly to your video card via a VESA connector cable internally. The VESA connector cards tend to produce a better image quality but are less compatible then the passthrough cable cards.

486joy2

For a joystick I’m using the Microsoft Sidewinder 3d pro. this joystick is a duel digital/analog joystick that works in DOS as well as Windows 95 and has a little switch underneath the base to choose modes. I previously was using a Seitek joystick which although was very compatible was very stiff and not so much fun to use. So far the sidewinder has been a great joystick and tends to do the job quite well in whatever flight/flight shooter I throw at it in DOS. Not the best when compared to some Thrustmaster flight controllers but I think it makes an excellent all around stick.

ggamepad

For games where I would rather use a more conventional gamepad rather then a joystick I go with the Gravis Gamepad. Its comfortable and compatible. The joystick bar can be unscrewed if desired and they can be found cheap at thrift stores, commonly under $5.

I run DOS 6.22 on my 486 PC and use no navigators or Windows 3.1. A navigator shouldn’t cause any issues but I’m aware of a small number of games that Windows 3.1 may cause compatibility issues with. All in all the 486 based DOS PC is going to be a little more expensive and require a little more effort to put together than a Pentium based one, perhaps $50 to $100 unless you can find one cheap on Craigslist or a yard sale. In my opinion its worth it as it gives you access to a vast collection of excellent early 90’s games without having to worry about CPU speed issues as well as the satisfaction of gaming on an all time classic PC setup.

Things I still need to add to this setup

*add more external sound modules (Roland cm-32,)

Here’s some older images of this machine playing some games.

article updated 10/30/2015

FDISKformat

A place for the pc collector

I ❤ Old Games!

Probabilmente il miglior blog bilingue al mondo*

Waltorious Writes About Games

Game-related ramblings.

NekoJonez's Gaming Blog

My Gaming Timeline

Evelynn Star

Lynn talks about video games, records and books ...

Retro Megabit

Sharing My Retro Video Game Collection.

133MHz's Junk Box

Random electronics and gaming crap

SNES A Day

Chronogaming project featuring reviews, screenshots, and videos of the entire Super Nintendo library in release order.

Retrocosm's Vintage Computing, Tech & Scale RC Blog

Random mutterings on retro computing, music, plus radio controlled scale modelling.

The PewPew Diaries.

Work(s) in Progress!

1001Up

1001 video games and beyond

retro computing and gaming plus a little more

sparcie

retro computers and stuff

jispylicious

Stay Jispy!