How To Create A Mood Board
An online step by step tutorial
Mood boards are a favourite pastime of mine … researching, thinking, editing, trimming edges, laying out, adding sparkle.... ✨ It’s the best way to while away the hours! My office needs to grow more walls, so that I have somewhere to hang them all!
I love a good mood board, they’re a great way of pulling ideas, inspirations, and beautiful images together. They help me to expand my train of thought, to clarify things in my mind, and find direction and a creative path when I feel a little lost.
I’ll often put a mood board together when I’m trying to fathom out how something should look and feel, whether that’s a design brief for a client or a new season’s dress collection. I’ll also use them for decor ideas for the house. Or a new kitchen, (ahem … would someone please tell Mr To-Gather that I’m still dreaming and very much hoping!) Or plans for a birthday party, and come to think of it the Christmas dinner table too.
Fashion designers use mood boards as away of brainstorming new ideas for a collection, you could do the same with ideas for your winter makes with pictures of garments and scraps of fabrics too. Brand stylists will use them for conveying the look and feel of a brand or a photoshoot, often these will be digital, and handy for conveying ideas to a client.
But I love a good old fashioned physical mood board, nothing beats their wonderfully tactile quality. They’re also wonderful way of displaying pretty objects together.

Maybe you could make a memento board of a special occasion; perhaps including photographs, an invitation, dried flowers and mementos of the day?
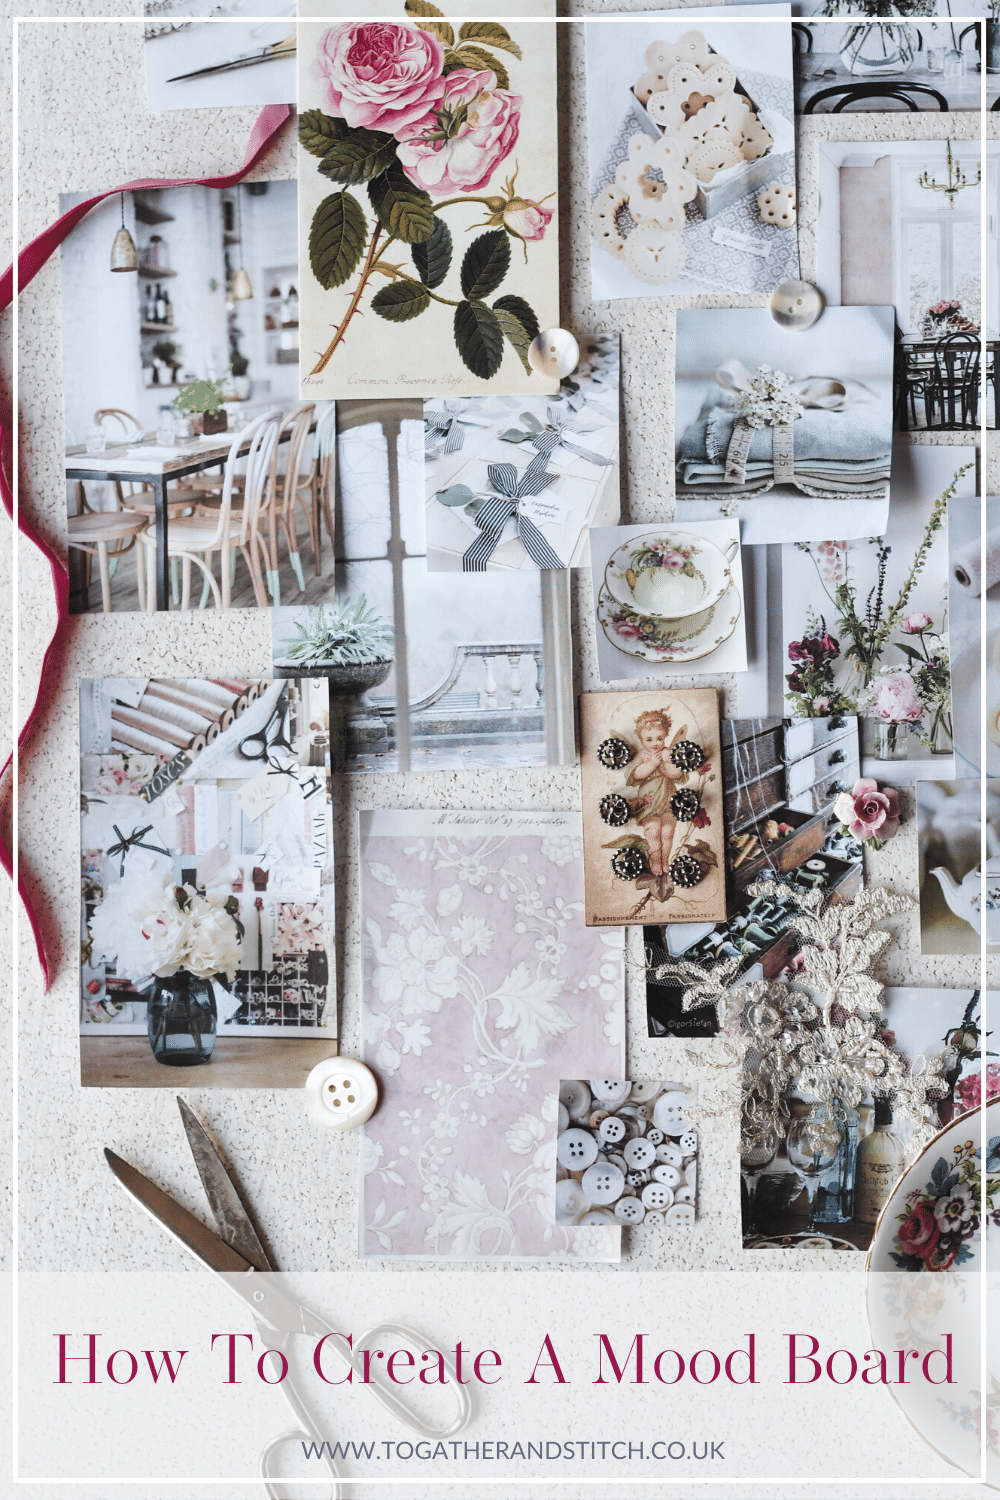
I created this mood board to try and fathom out how I wanted my workshops to feel, whether that’s in a studio or online. I've been day dreaming about a beautiful light filled space, with picture windows, cabinets with glass doors full of pretty jars filled with beads and threads. Vases filled with roses from the garden, mannequins draped in calico, tea in china teacups and shortbread button biscuits…
Instructions for creating your own mood board
You will need
A cork pin board - this one is 60 cm x 90 cm from The Range, but you can also get them office stationery suppliers and from Amazon
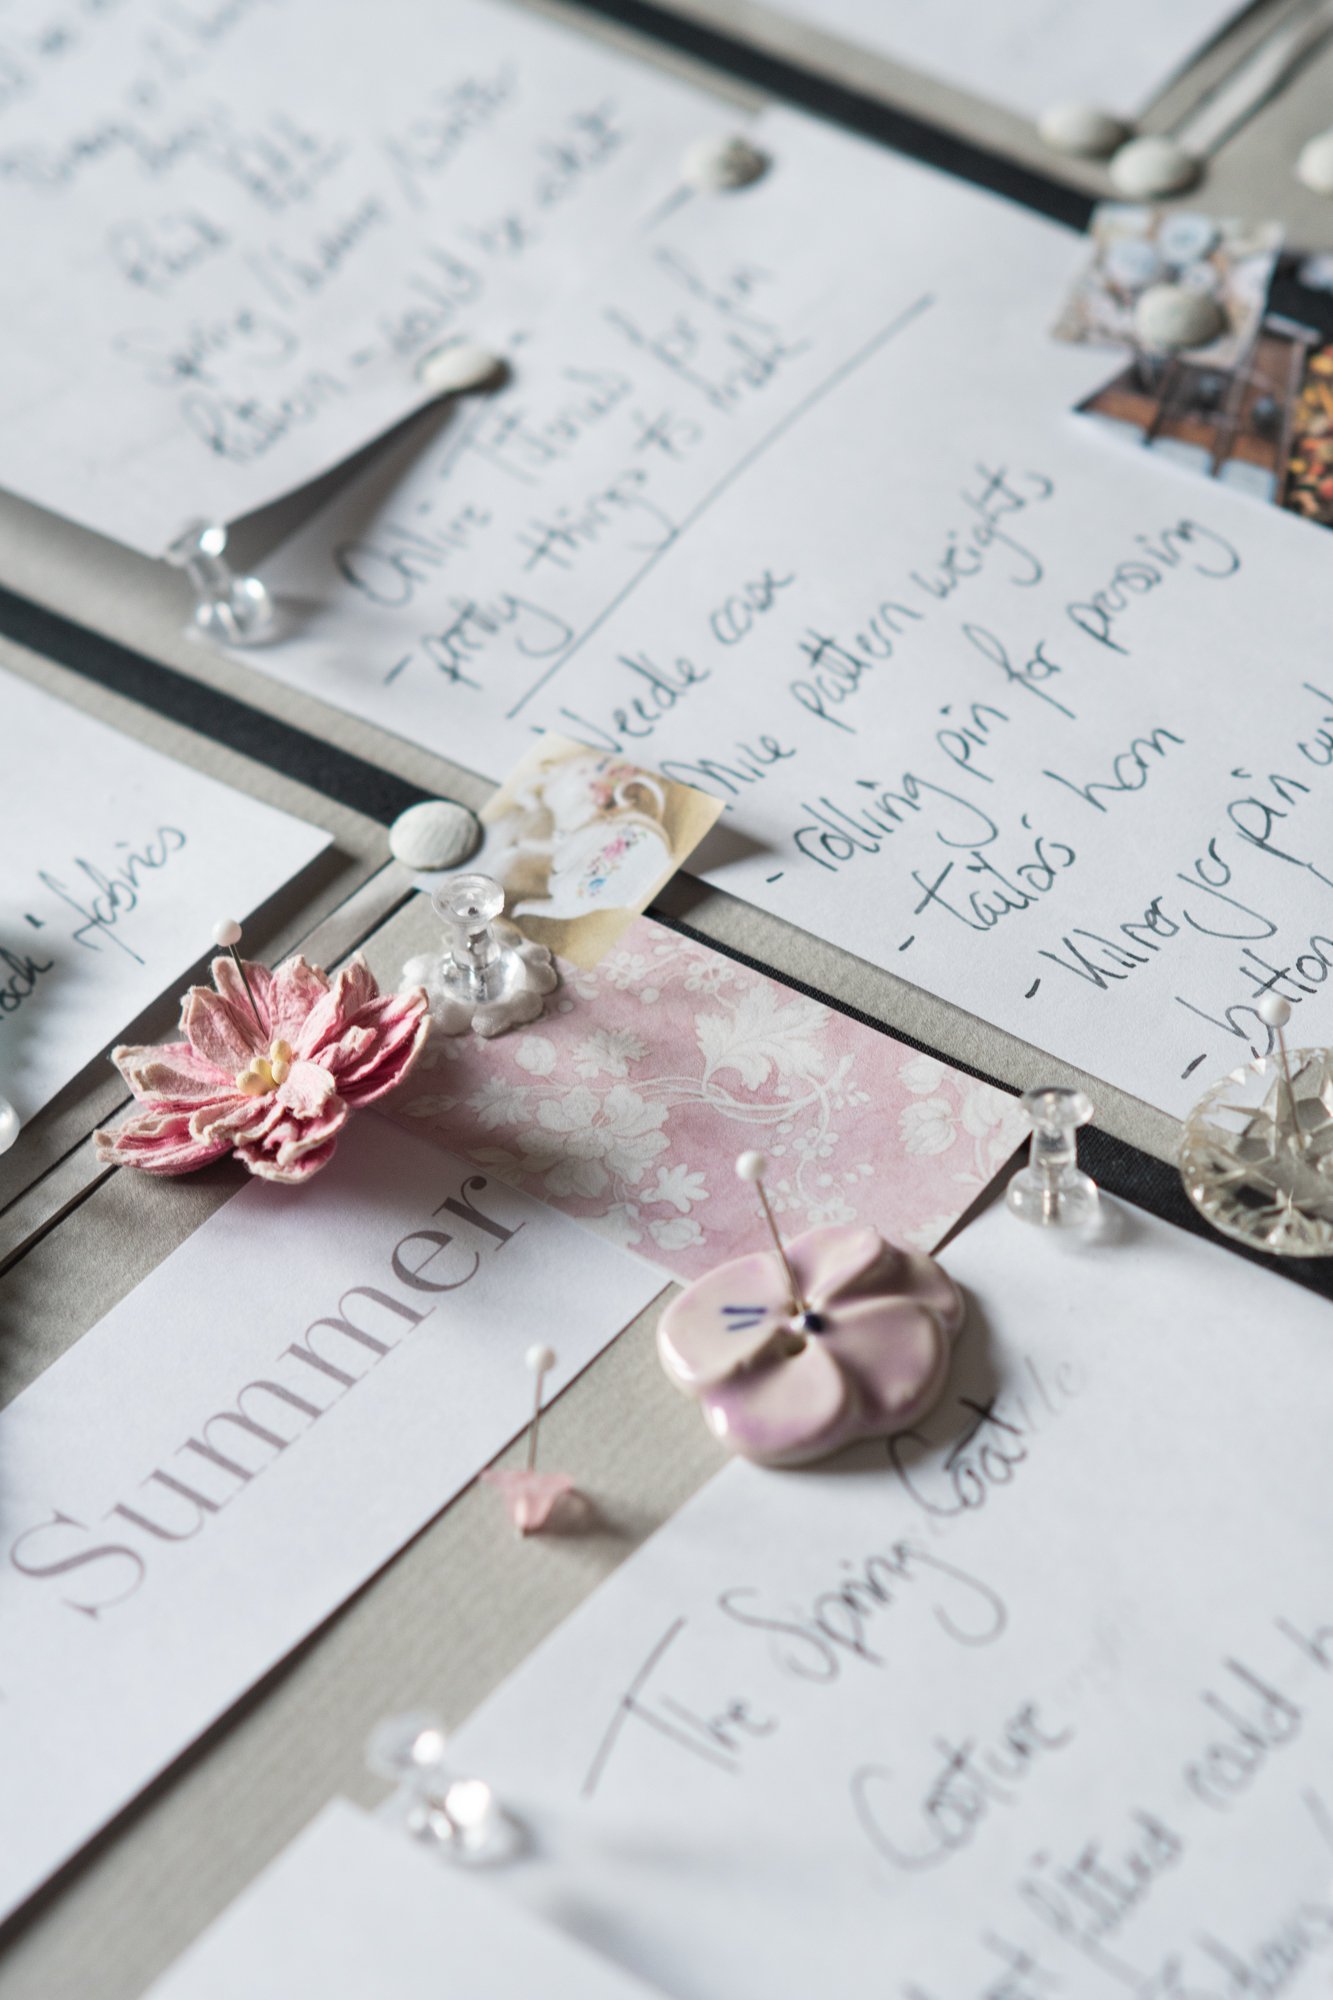
Drawing pins or WH Smith do some clear push pins that work well too. ( I’ve used them for this mood board.)
A sample pot of emulsion paint
Paint swatch cards or colour charts
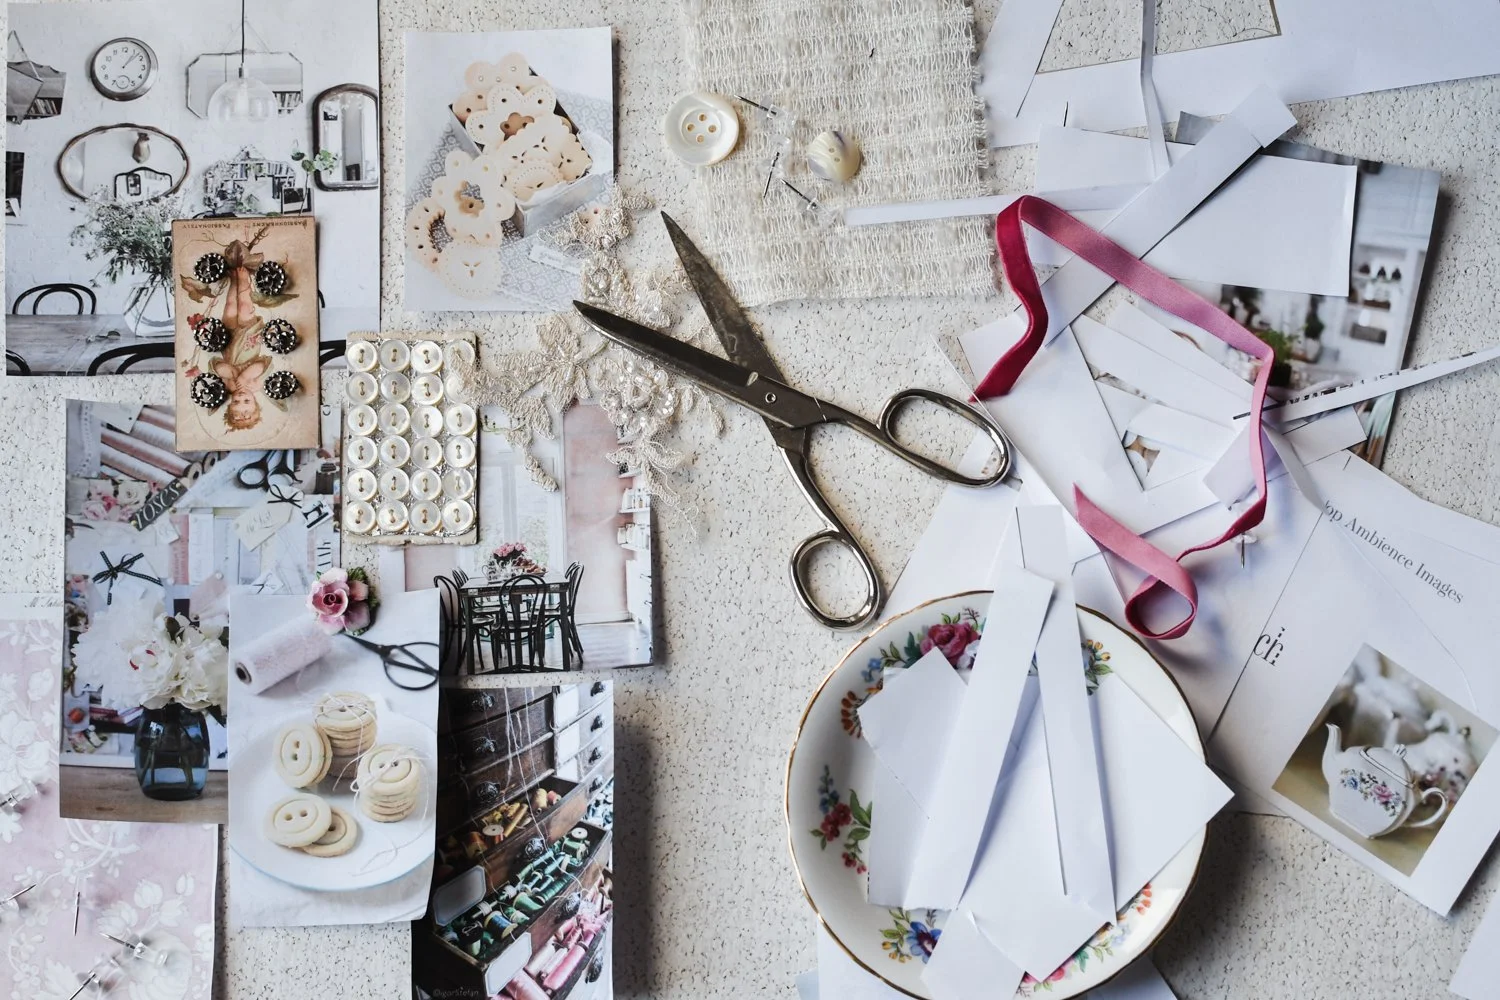
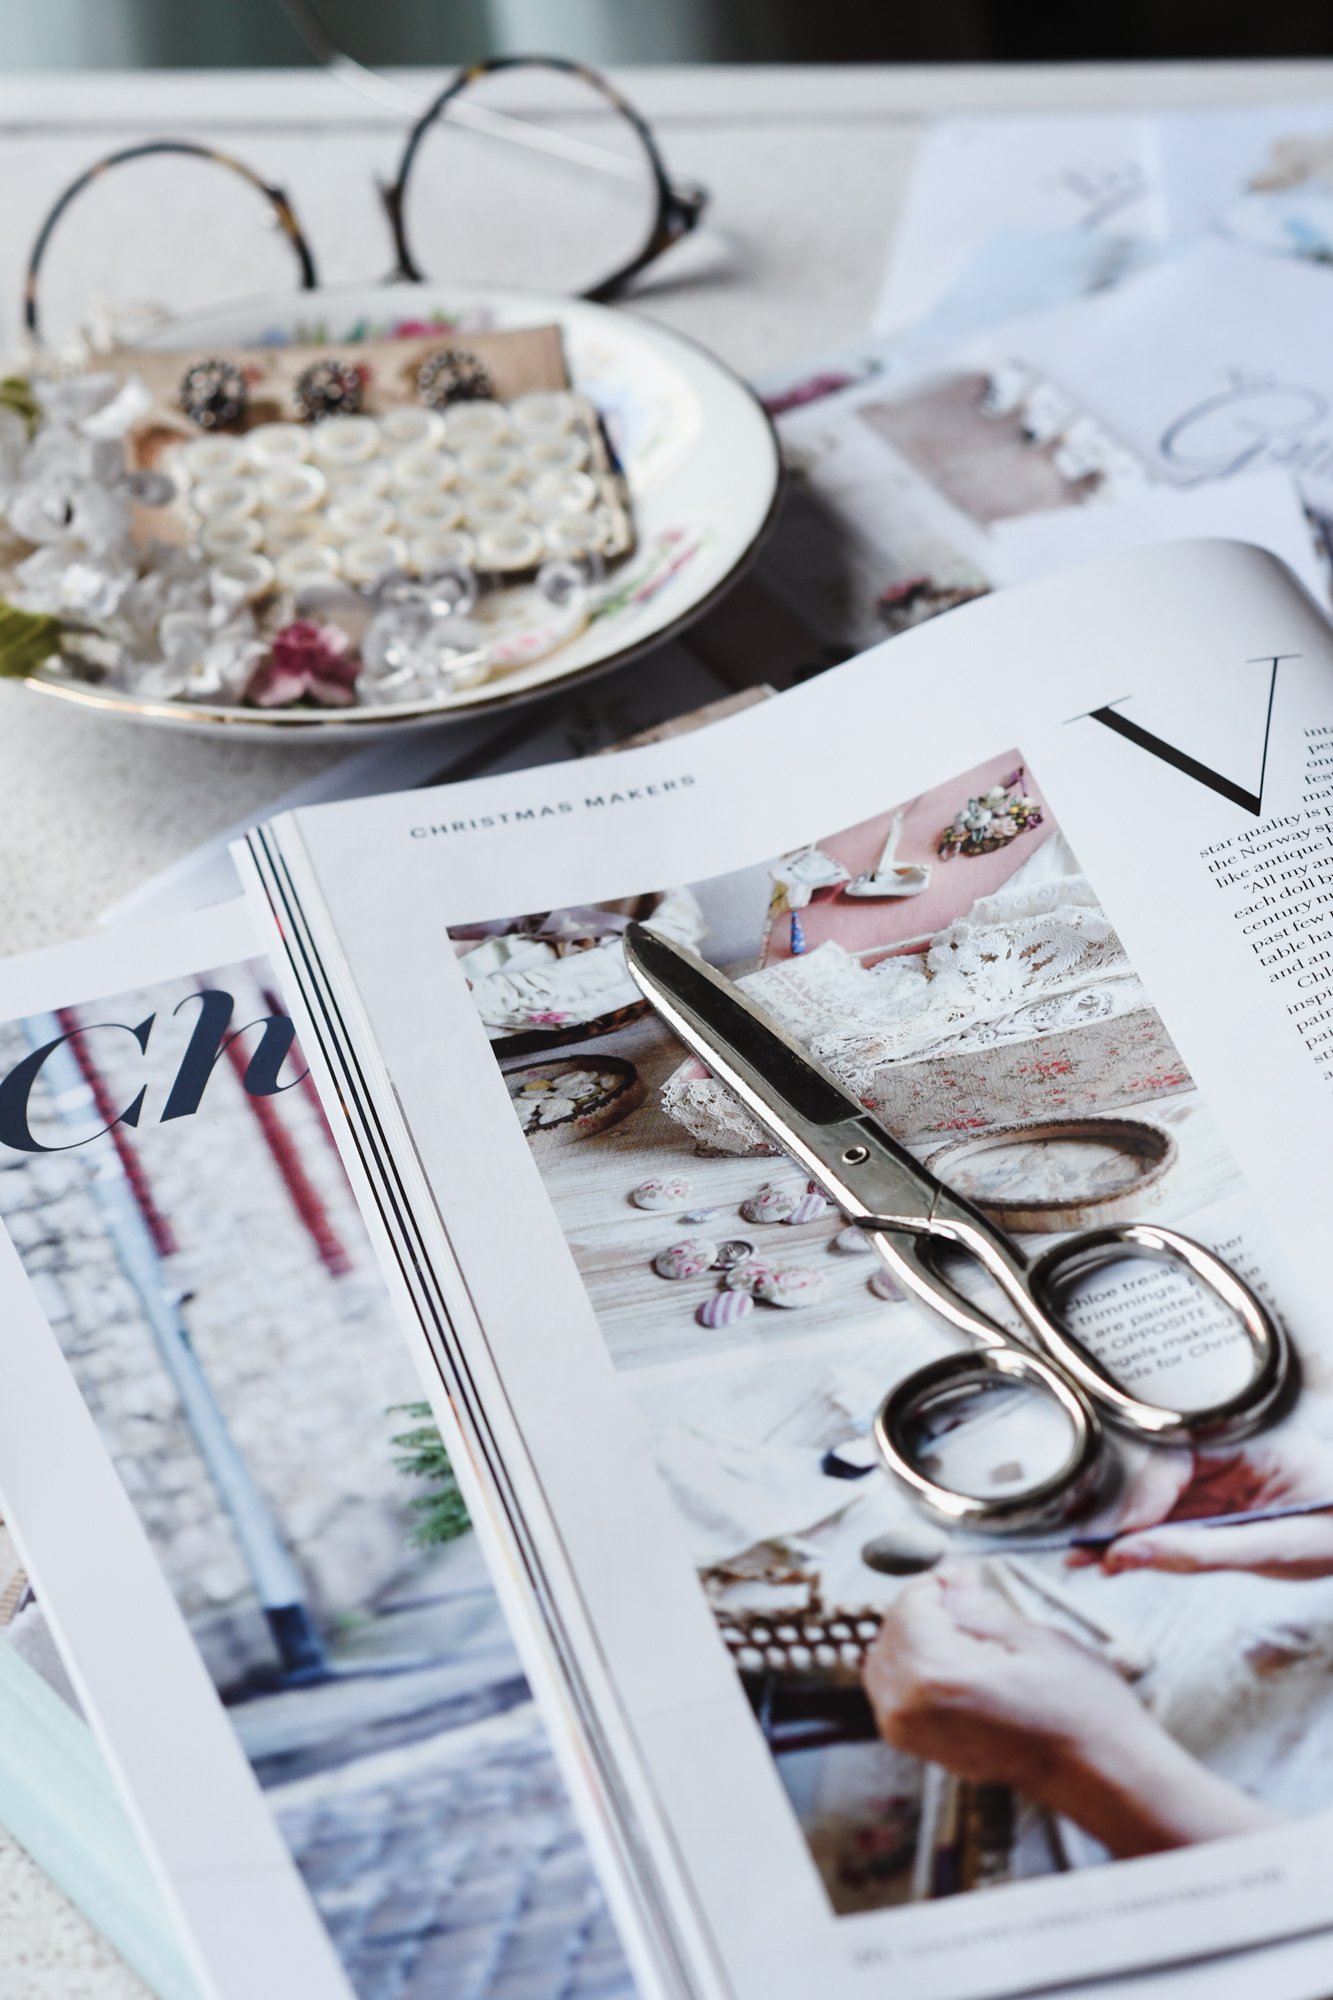
Paper scissors
A pile of old magazines that you don’t mind pulling pages from or cutting out images, Sunday supplements are often good too.
Fabric swatches
Postcards, quotes, inspiring pieces of text
A variety of objects to add texture and interest such as vintage treasures, fabric flowers, buttons and embellishments


First Steps
1)I usually paint my cork board. I’ll use a sample tin of emulsion paint to do this. It just feels better with the orangey cork out of the way. I’m going through a phase of using an off white, but a moody dark grey or a smokey green work beautifully too. If I’m using brass drawing pins, I’ll pin some to the board and paint them with emulsion at the same time.

What to do next
2) It’s easer if you try and think of a theme to begin with, or a solution to solve - remember that dream sewing room or kitchen that you’ve always wanted.

3) Cut out images from magazines that you love and that will work with your theme and ideas.
4) I’ll begin to spread out everything on my cork board, like a bit of a beautiful mess really. I’ll move them around until I’m happy, and perhaps live with it a little until I begin to feel I have something that I like. Time for a cup of tea!


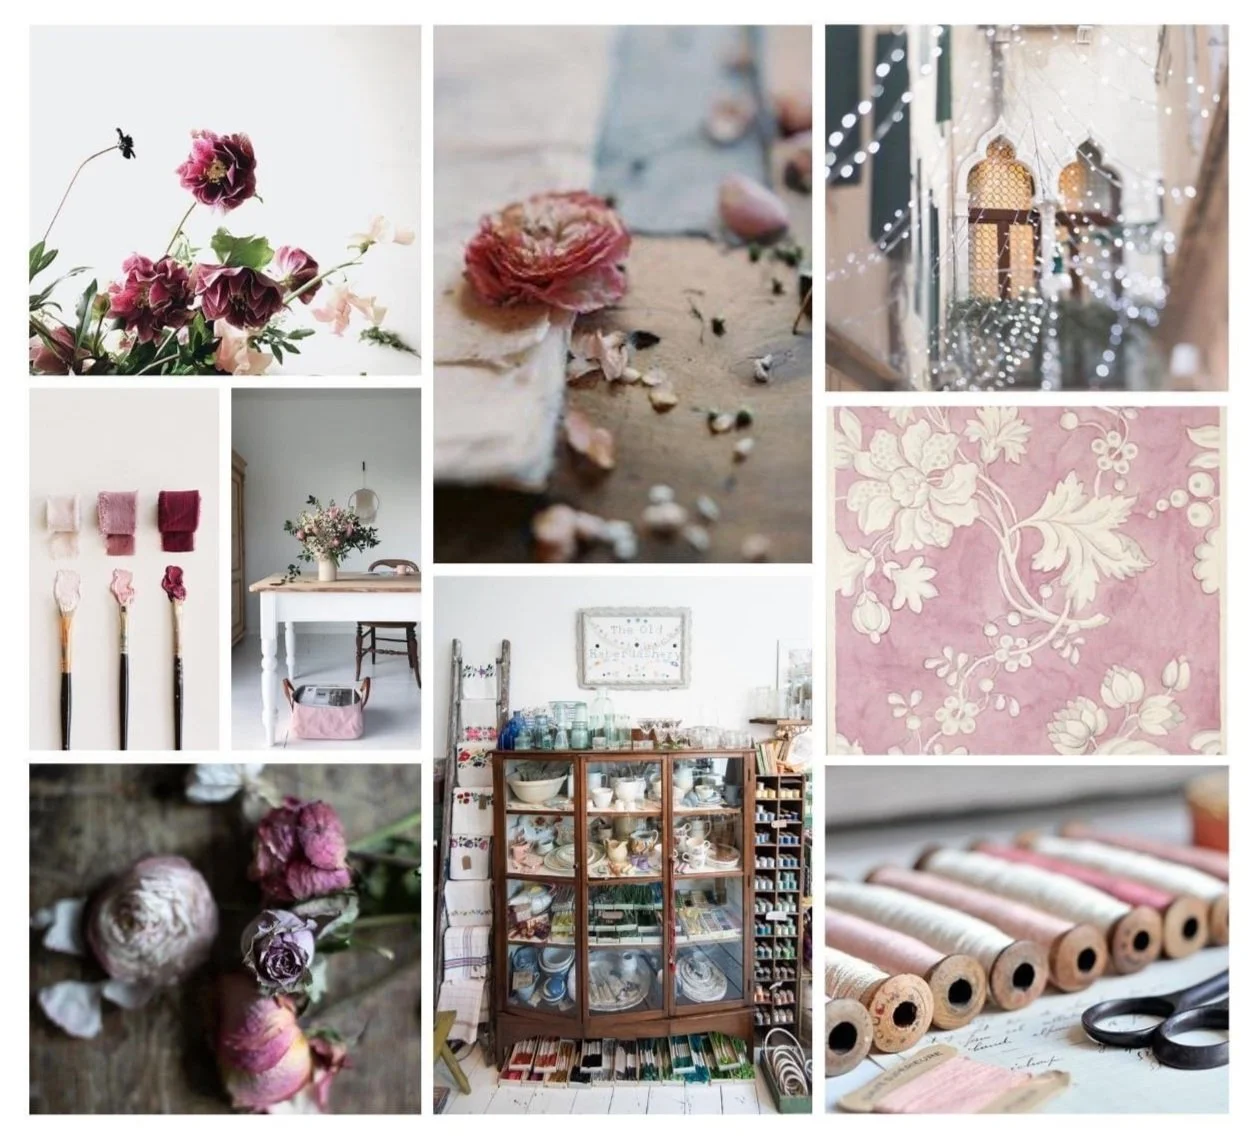
I’ll edit a little as I go on, some images sit happily side by side, others don’t work quite so well and they’ll get put into my “inspo” folder of pictures and clippings for another day.
5) Start pinning your images in place with your pins. I don’t tend to use too many dressmaking pins at this stage because they tend to stick through the cork and come out at the back, and I hate scraping myself on them.

6) Begin to add your vintage cards, quotes and sparkly things. A variety of objects will help you to think outside the box a little too.
Paint chips help to pull out colours that I want to highlight. Fabric samples help me to think about what textile I might want to use in my collection, buttons etc.
Finishing Touches
7) Be intuitive and just let things happen. Don’t get too hung on where you place your treasures – they can always be moved again. And again!
My boards are never completely finished! That is the beauty of using a cork board, (as opposed to a mount board and glue stick), you can change things and move them around as often as you please.
8) Step back and admire your work. Don’t worry if it doesn’t feel quite right first time. Done is better than perfect! Sometimes things just need to steep a little.
My mood boards are a constant “work in progress”, and there’s nothing more satisfying than lighting a scented candle, playing your favourite music and giving a mood board a little tweak on a rainy afternoon. In time you’ll find something else you’ll want to add to your board, perhaps a glass button, a ribbon from a box of chocolates, or a broken piece of costume jewellery etc..
I’m such a magpie, that my mood boards gradually acquire more and more treasures, and sometimes half my jewellery box is pinned there too!
Little Extras
You could create a box with all the things that inspire you; postcards, images from magazines and packaging that catches your eye. You could also collect ribbons and laces, patterns from a pretty wrapping paper or beautiful wallpaper samples, broken pieces of costume jewellery and quotes that resonate with you for your future projects.
You can buy pretty map pins from Etsy - I have just disappeared down a rabbit hole here! They’re on my Christmas wish list, they’d make a great stocking filler. Along with the kitchen, Mr To-Gather take note.
Happy creating ,thinking, pinning and adding sparkle. I’d love to see what you get up to, you can also tag your creations #togatherandstitch .
PS. If you would like to receive a regular dose of pretty things from me, please sign up to my newsletter below.
Are you on Pinterest?
If you enjoyed this post here’s a pin to share