- Ed Dozier
Helicon Focus versus Combine ZM for Focus Stacking
I have used Combine ZM (and Combine ZP) for many years when I wanted to perform focus stacking, but I recently switched to using Helicon Focus. I thought I’d share a few reasons for making this switch.

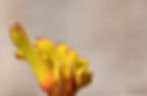
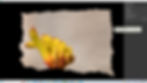
Combine ZM focus stack, 20 shots of a kangaroo paw
Before I begin, I should make some explanations for people that aren’t familiar with the concept of focus stacking. Stacking is a method to combine a series of photos that have overlapped zones of sharp focus, ignoring the portions of the shots that are out of focus. This technique is useful for landscapes, where you want to get everything from the foreground to the background in sharp focus. The more common use of focus stacking is for macro shooting, where a typical individual photo only has a paper-thin depth of focus.
I have a link to an article here that I wrote showing typical usage of Combine ZM here.
As long as you stick with shots that don’t go beyond magnifications of roughly half-life-size, you can often get by without even having to use a tripod. Both of these programs have the capability to align the shots and fix minor misalignments.
Cameras like the Nikon D850 and Z9 have built-in “focus shift shooting”, which makes it really easy to automatically get a stack of properly-overlapped shots. The more traditional method to get stacked shots is to use a macro bellows with a focusing rail, which is also the best way to get high magnifications. I own the Nikon PB-4 bellows for this purpose.
The focus stacks in this article were made using a Nikon D850 with the 105mm f/2.8 AF-S Micro-Nikkor. I used the built-in focus-shift feature.
It bears mentioning that Combine ZM is free, but Helicon Focus is not. Also, Combine ZM/Combine ZP is no longer supported, while Helicon Focus is still being supported and enhanced. Also, Combine ZM can’t be used with Mac computers; it requires Windows. Helicon Focus will work with both operating systems. You can use the older Combine ZM program in basically the same way as Combine ZP, but it will have fewer stacking algorithm options. The “P” in “ZP” stands for “pyramid”, which is a newer stacking algorithm option.
If you only rarely do focus-stacking, and are willing to put up with some compromises, Combine ZM can do the job. If you need more flexibility and speed, you might opt for Helicon Focus instead. Also, you can get a free trial of Helicon Focus to try it out before you decide to buy it or not.
How Combine ZM Works
The first thing you’ll need to do before stacking your shots with Combine ZM is to convert them into 16-bit TIFF (for maximum quality). Combine ZM doesn’t understand camera raw-formats. Also, if you have lots of shots to stack, this program tends to fail when using high-megapixel files. I tend to switch to DX mode on my Nikon D850 to reduce file size. These concerns aren’t an issue when using Helicon Focus. The link provided above gives an example of how to convert the photos.

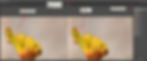
Open up the Combine ZM program, and start by clicking the “Enable Menu” icon. Next, select the “File | *New” option and select the photos in the folder with the TIFF pictures that Capture NX-D (or whatever converter program) just made.

File loading progress screen
Wait until all of your (Tiff) files are loaded.
If you didn’t use a tripod, select the “Macro | Align and Balance Used Frames (Thorough)” option. The program then proceeds to analyze, align, and exposure-balance the shots. The photos are shifted/rotated/scaled in order to prepare them for stacking. A message “Finished Executing Align and Balance…” is displayed when this step completes. Be patient.
If you happened to use a tripod for the focus-shift shooting, then you could simply skip the step above and go straight for the “stacking” step that follows. The Helicon program will automatically align shots as needed.

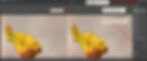
‘Do Weighted Average’ macro progress screen
Next, select the “Macro | Do Weighted Average” option. The program will proceed to focus-stack the aligned images. Did I mention that patience is a virtue? The Helicon program understands how to use most GPUs, and is much, much faster at stacking in that case.
When it completes, crop the central portion of the finished image. The borders have a sort of mirror-image effect, which needs to be cropped from the final image. The Helicon Focus program automatically crops off the edges of the stacked photo, so this step is unnecessary when you use that program.
If you have defects in your output results due to things like wind, you’ll need to edit the files in other editors to make use of healing brushes, etc.
For most stacks, the results are excellent. Most problems are user-caused, such as uneven focus shifting or wind-induced subject motion.
How Helilcon Focus Works
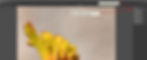
Helicon Focus focus stack closeup of a kangaroo paw (15 shots)
The shot above is from a different set of 15 shots than the photo at the top of this article. This shot is the un-cropped result.

The Helicon Focus Welcome screen
After you start up Helicon Focus, you see a prompt to simply mouse-drag the set of photos to be stacked onto the main screen. You don’t need to bother with conversion into TIFF format first; Helicon Focus understands your camera’s raw-format, too

First image in the stack
After dragging your photos onto the main screen, you’ll see the screen as shown above. Your first shot of the stack is shown. You can select some other shot to view it, if you wish.
You should select which stacking algorithm you want to try next. I’ve selected the “Method B” algorithm, or “depth map”. Beneath the algorithm choice are input algorithm values you can play with, if you don’t like the defaults (here, ‘Radius’ and ‘Smoothing’).
The rendered focus stack
If you’re unhappy with the results, you can try another stacking algorithm, or different adjustment parameters for the selected algorithm.
If you have some defects in the stacked shot (such as multiple branches where there should be only one, but it was windy) you can select “Retouching”.
“Retouching” tab
There’s an option in the “Retouching” screen to let you clone a piece from one of your selected input files over the defect in the stacked file. You can set the brush diameter (size), its hardness, etc. This is good for getting rid of multiple branches, insect antennas, etc. that resulted from image movement between frames.
There’s a tool to smooth over image defects, too.
If you mess up, there’s an “eraser” to un-do your edits.
“Saving” tab
The “Saving” tab is where you can save your finished stack in the desired file format (Tiff, jpeg, png).
But wait, there’s more.
Helicon 3D Viewer
If you select “Export 3D model” you can save the stack as 3D, and you can actually make an MP4 movie of your subject rotating around in space. It opens up the Helicon 3D Viewer, which allows saving your stacked image data in various 3D formats or even a movie with selectable resolution.
Summary
Generally speaking, the results from Helicon Focus look just the same as the results from Combine ZM or Combine ZP, except that I always have to crop off the stacked photo output edges from the Combine ZM results.
Here’s my list of the main advantages I have noticed that Helicon Focus has over Combine ZM.
Raw-file support
Handles more files and larger file sizes
Built-in retouching tools
GPU support for speed (newer GPUs)
Invoke it from within programs such as Lightroom
Automatic photo alignment correction
Works in Mac operating systems
Helicon Remote control for many Nikon, Canon, Sony cameras.
Helicon 3D Viewer to save images in various 3D formats or video.
You can make macro panoramas from a grid of photos
This program, and associated Helicon programs, can actually do a lot more than make a focus stack.
There is a Helicon Remote option that you can buy that will automate getting the stacked images for selected Nikon, Canon, and Sony cameras. Since my Nikon D850 already provides this service to me (via focus-shift shooting), I don’t need that Helicon offering.
The ‘focus’ of this article is simply focus-stacking, so I stuck to that topic alone.
I’m not actually trying to sell you anything. I don’t get any income from doing this, if you wondered.


