Growing Species Peonies
From: Burrell, G. “Growing species peonies.” In: American Peony Society Bulletin, 2001, nr 317, pp. 19-22.
From Seed to Seedling
There are a great many ways to germinate peony seeds. Read the APS Bulletin over a few years or read some of the APS publications and you will encounter a myriad of techniques for germinating peony seeds. Just recently I received a letter from a fellow-peony grower that said she knew someone who hung peony seeds in a mesh bag in the reservoir of a toilet. Supposedly the filling and refilling of the tank helped the seeds to germinate. During the past seven years I have found three techniques that work for me. All are techniques that I have read about in the APS Bulletin but each technique has been modified through trial and error. If species peony seeds are reserved in Winter, which so often is the case, store the seeds until late Spring or early Summer. Then soak the seeds in water for 4-7 days. Each day the water needs to be changed. Some of the seeds will get soft – throw those seeds away! Then sow the seeds in 1-5 gallon (4-20 l) pots that contain organic potting soil which has been mixed with a little sand. For some species that need excellent drainage, i.e. P. brownii and P. californica. I put gravel in the bottom of the pots. After watering the pots, they are put on the north side of a fence in the dense shade of a tree in a hole that has been dug which is about two feet deep. (It’s really just a cold frame that is dug into the ground). The hole helps to moderate extreme Summer and Winter temperatures. I’m convinced that if species peony seeds get too hot in the Summer they will not germinate. Keep the pots moist until it starts to rain in the Fall. If it gets too cold [below 20°F (-7°C)], cover the cold frame. Using this method, P. clusii rhodia and P. mascula hellenica are the first to come up, in late January. The last to come up are P. obovata. P. veitchii. and P. brownii. As soon as the seedlings come up then move the pots to a sunny, south-facing location. When the weather becomes warmer, move the pots under a shade cloth where the seedlings will stay until they are planted out in early Fall. Peony seeds do not always wait until the following Spring to come up in the pots. P. californica seedlings will often show their leaves above the potting soil a month or two after sowing. I have also had seeds of P mollis and P. obovata start growing leaves in late Summer after being sown in pots in late Spring.

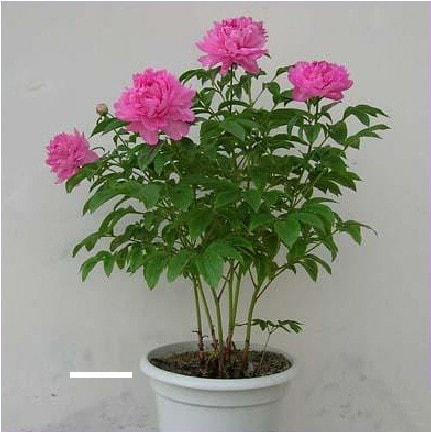
Paeonia mascula ssp bodurii
Species peony seeds do not need to be cold stratified before they will root germinate. In fact, placing peony seeds in a refrigerator before sowing is a waste of time. Some species like P. brownii and P. tenuifolia need fairly cool temperatures to germinate, but do not need to be cold stratified.
The second germination technique I use is the simplest and I’m sure the one most commonly used. Instead of putting all the peony seeds in pots, sow them in a raised bed that is in at least half shade (seeds planted in at least partial shade seem to germinate better than those in full sun). Plant seeds 3-4 inches (7-10 cm) apart. There are two advantages to this technique. One is that the seedlings do not need to be transplanted like those in pots, which means they grow a little faster. Second, a raised bed does not need to be watered as frequently as a pot.
The best time to plant seeds in a raised bed is late Spring, or at the same time they are sown in pots. Species peony seeds sown at this time will often have close to 100% germination.
I also use this technique in Fall (as late as October) for seeds of P. californica and P. brownii. Seeds of these two species planted in the Fall will come up in the Spring. For me, seedlings of our two native peonies grow better in raised beds than they do in pots.
I also plant species peony seeds that have been freshly collected from my garden in a raised bed. Some of these seeds will come up the first year after planting and some will come up the second year. Germination of freshly collected peony seed varies greatly by species. I have had 100% germination with P. japonica seeds the first Spring and 0% germination of P. obovata ‘alba’ seeds the first Spring.
Species peony seeds are often received in October or November. This is too late in the Fall to use any of the outdoor techniques. So I soak them in water for 3-4 days and put them in quart bags (15*23 cm) filled half full with vermiculite. The trick is: don’t put too much water in the vermiculite. If you do, when the roots start to grow they will begin to rot. Then I put the bags in a basement room that has a constant temperature of 70°F (21°C). Leave the bags at 70°F for 30 days. Some species and hybrid seeds will germinate at this temperature. In fact, I have had Paeonia broteroi seeds germinate in as little as 15 days at 70°F. Hybrid seeds of Paeonia suffruticosa will also sometimes germinate in less than 30 days at this temperature.
After 30 days I put the bags of seeds in an attic room with a temperature that fluctuates between 55 and 60°F (13 and 15°C). Some species seed will begin to germinate in just a few days at this temperature. Other seeds will take up to 2 months to germinate. The only species whose seed I have never gotten to germinate at these temperatures is Paeonia obovata. Generally there are a few seeds in each bag that will not germinate in two months so I save these seeds and use them in outdoor germination techniques. When the seeds have grown a root which is 1-2 inches (3-5 cm) long I put the bags of vermiculite in a refrigerator. Some roots will grow faster than others so you might have to have two bags for each group of seeds, one at 55-60°F, and one in the refrigerator. The seeds at 55-60°F should be checked weekly and moved to the bags in the refrigerator when their roots have grown long enough.
Within 2-5 months the first leaf will start to grow on the root germinated seeds in the refrigerator. Before the leaf starts to open and generally when the shoot is 1/2-2 inches (1-5 cm) long, depending on the species, I plant the seedlings 2-3 inches (5-8 cm) apart in a 1-2 gallon (4-8 liter) pot. Then, put the pot in a shady location outdoors until the leaf appears above the potting soil. Once that occurs, move the pots to a sunnier location. If all goes as planned, the seedlings are being put outside during the warm days of Spring. One common misconception about peony seed germination is that peony seed won’t germinate the first year if it is dry. This year I received seed of a species of wild tree peony from two sources. One batch of seed was sent to me moist in a little bag of vermiculite and the other was sent to me dry. I used the vermiculite technique on both batches of seed and I had better germination with the dry seeds than with the moist seeds. For some species peonies it appears that drying, might actually enhance germination.
I’ve also planted dry P. veitchii seed the same day that I collected it. This was in early August. Surprisingly, most of the seeds came up the following Spring but a few did not come up until the second year. Which of the three species peony seed germination techniques I use is generally dictated by when I receive the seeds. If I, however, only have a small number of extremely rare peony seeds, I will often try to germinate them by using two different techniques. Hopefully, my chances of germinating at least a few of the seeds is much better.
So far, I have only received one packet of species peony seeds that has refused to germinate using all three techniques. It’s been two years, but I still have not given up hope that at least one of the seeds will germinate. I think here lies the key to species peony seed germination: PATIENCE!!
From Seedling to Flowering
There are nearly 70 species, subspecies and varieties of wild peonies. They grow in a wide range of habitats, from the alpine in Turkey to nearly sea level in Cyprus and Crete, from the Kola Peninsula in Northern Finland to the basaltic cliffs of Majorca, and from the canyons of Los Angeles to the Tsangpo River Gorge in Tibet.
Because wild peonies grow in such a wide range of habitats throughout the Northern Hemisphere it makes sense that it would be nearly impossible to use only one method to grow all wild peonies. In my garden, which is 16 miles (25 km) north of Portland, Oregon, I have, through trial and error, found cultivation techniques which work for most of the wild peonies. These exact same techniques may not work in your own garden due to differences in soil, climate, etc., but they should give you a good starting point for growing these graceful and beautiful plants.
In late August or September, I remove the seedlings from the pots they have been growing in all Summer, and transplant them to raised beds. The raised beds are constructed so that the seedlings will have very good drainage and will be protected from moles, cats, children, birds, and any number of other potential hazards. Seedlings planted in the open garden do not survive as well as those planted in raised beds. They also do not grow as fast as those in raised beds.
Inevitably a few seedlings will not survive the first Winter. The primary reason they do not survive is frost-heaving. Seedling roots are easily pushed out of the ground by this heaving action. If they are not quickly planted back into the ground they won’t survive.
Once wild peonies are two or three years old, I move them to their final home in my garden. Most species peonies transplant best at this young age. As they get older and their root systems grow larger they become fairly intolerant of root disturbance. For example, older plants of Paeonia cambessedesii can sometimes take three years to recover from transplanting, while young plants transplant without any noticeable check in their growth.
The least demanding wild peonies for me to grow are Paeonia delavayi, Paeonia lutea, Paeonia potanini, Paeonia potanini var. trollioides, and Paeonia lutea subsp. ludlowii. I simply dig a hole in some of my better clay-loam soil and plant them like any other shrub, making sure to spread the roots out over a mound made in the bottom of the hole. Then fill the hole with soil and water. I do not amend the soil or worry terribly about drainage. Their only requirement is that the planting hole be dug in partial shade, since they do not like full sun or a warm position on the south side of my house.
Paeonia anomala, Paeonia mascula subsp. triternata, Paeonia lactiflora, Paeonia officinalis subsp. villosa, Paeonia mlokosewitschii, and Paeonia mascula subsp. arietina can be grown just like “lactifloras” and hybrids. A hole is dug in a sunny place in my garden. Then I discard the heavy clay soil that was dug from the bottom of the hole. In the bottom of the hole put 2-3 inches of well-composted steer manure. Next, mix the soil from the top of the hole with commercial topsoil (compost if I have it), sand, and a handful of bone meal and fill the hole with this mixture.
The peony root is planted at least a couple of weeks later on a mound (a mound will help with drainage) in the center of the hole. Some species can be grown in the above manner with one major difference – they must have shade from hot afternoon sun. These species include: Paeonia obovata, Paeonia obovata ‘alba’, Paeonia veitchii and its varieties, Paeonia ruprechtii, Paeonia lagodechiana, Paeonia japonica, Paeonia wittmanniana, Paeonia mascula, and Paeonia peregrina. In the wild, these species grow in the shade of shrubs or under an open canopy of deciduous trees.
Most of the Mediterranean species including Paeonia cambessedesii, Paeonia mascula subsp. russoi and Paeonia clusii, and one of our native peony species, Paeonia californica, need a warm position and excellent drainage. They also need some shade from the hot afternoon sun. I plant these species on the south side of my house in the shade of two crape myrtle trees. They are planted in raised beds that have been filled with equal parts compost, sand, and commercial topsoil. I also add some turkey grit to improve drainage and a handful or two of bone meal. It is important that the raised beds be at least two feet deep so the peony roots will have room to grow.
Paeonia cambessedesii also does well in other locations in my garden as long as it has very good drainage.
The large-flowered tree peony species such as Paeonia rockii, Paeonia ostii, and Paeonia jishanensis need very good drainage. If the soil they are planted in retains too much water they will succumb quickly to fungal diseases. So I grow these tree peonies in either raised beds (without clay soil) or on a steep slope in planting holes that contain my own compost, sand, grit, commercial topsoil, and some of my best clay-loam soil. I also add a little bone meal and lime to the planting hole.
Probably the most difficult species peony for me to grow well is Paeonia brownii, one of our native peonies. After a great deal of trial and error I now use two methods for growing Paeonia brownii in a raised bed or on a mound. Both methods require that absolutely no clay soil is even in sight of the planting mixture. The raised bed is made of large flat rocks (the rocks probably add warmth to the soil) and is filled with compost, peat moss, sand, commercial topsoil and some grit. Although the bed is in full sun it receives afternoon shade from a small shrub. The mound is 8-10 inches (20-25 cm) high and is made up of the same planting mixture used in the raised bed. It has a western exposure with no afternoon shade. I have had plants of Paeonia brownii that were grown from seed bloom on the mound and in the raised bed.
These two methods also work well for growing Paeonia tenuifolia, as long as it receives afternoon shade.
Paeonia hybrida is the only species that I have found to be nearly impossible to grow in my garden. However, it grows extremely well in my parent’s garden in Iowa. Paeonia hybrida grows in the harsh steppe climate of Northern Mongolia, so quite possibly it needs colder Winter temperatures than can be found in my garden.
The key to growing any peony species well is to learn a little about where a particular species grows in the wild. Then use this information to experiment in your garden.
Species peonies are a bit more difficult to grow than “lactifloras” and hybrids, but their charm, elegance, and beauty more than make up for the extra care.
| Republished under a Creative Commons Licence: CC BY-NC-ND: This license allows reusers to copy and distribute the material in any medium or format in unadapted form only, for noncommercial purposes only, and only so long as attribution is given to the creator. CC BY-NC-ND includes the following elements: BY – Credit must be given to the creator NC – Only noncommercial uses of the work are permitted ND – No derivatives or adaptations of the work are permitted |


)