
DIY Papier-Mâché Vase With Miss Mustard Seed’s® MilkPaint™
Other than sewing, one of my first memories of creating was making a papier-mâché piñata. The process was so messy and so much fun! Today I decided to bring that memory back to create a one-of-a-kind papier-mâché vase. The papier-mâché trend is making a big comeback in the form of modern vessels, like bowls, trays, and vases. I love the fact that papier-mâché is made of recycled materials, is very inexpensive to make, and allows for endless creative possibilities. I loved using Miss Mustard Seed’s® MilkPaint™ on my final vases because I believe it brought the beautiful texture of papier-mâché to life!

Today I want to show you how I made a very simple papier-mâché vase using a handmade paste of flour and water, newspaper, tissue paper, a balloon, and toilet paper rolls. I am so excited that the final result yielded such a modern and expensive look! And I loved the fact that this craft brought me right back to my childhood!
Since this project only requires a little bit of Miss Mustard Seed’s® MilkPaint™, you can use paint leftover from another larger project. I used the August color of the month, which is Mustard Seed Yellow, and I believe it brings out the modern and cheerful feel of the vase while also still adding a beautiful warmth to it. And, since Miss Mustard Seed’s® MilkPaint™ is non-toxic, your children can help make this vase!

For your convenience, I have created a step-by-step video tutorial for you. You can watch it below. Then follow along for the step-by-step picture tutorial.
Now, let’s get painting!
Supplies Needed:
To create your own DIY Papier-Mâché Vase with MilkPaint™, you will need:
Miss Mustard Seed’s® MilkPaint™ (You can use whatever color you have on hand, but I chose Mustard Seed Yellow for this project.)
Craft Paintbrush
Flour & Water for the Paste
Newspaper
Tissue Paper
Small Balloon
Toilet Paper Roll
Hot Glue Gun with Hot Glue
Step 1: Make The Homemade Papier-Mâché Paste

In a bowl, add ½ cup of flour. Then, slowly add water to the flour, and mix as you go. Continue to add water until you reach a batter-like consistency.
I like my glue a little thinner because it is easier to work with.

Step 2: Tear The Newspaper For The Papier-Mâché Vase
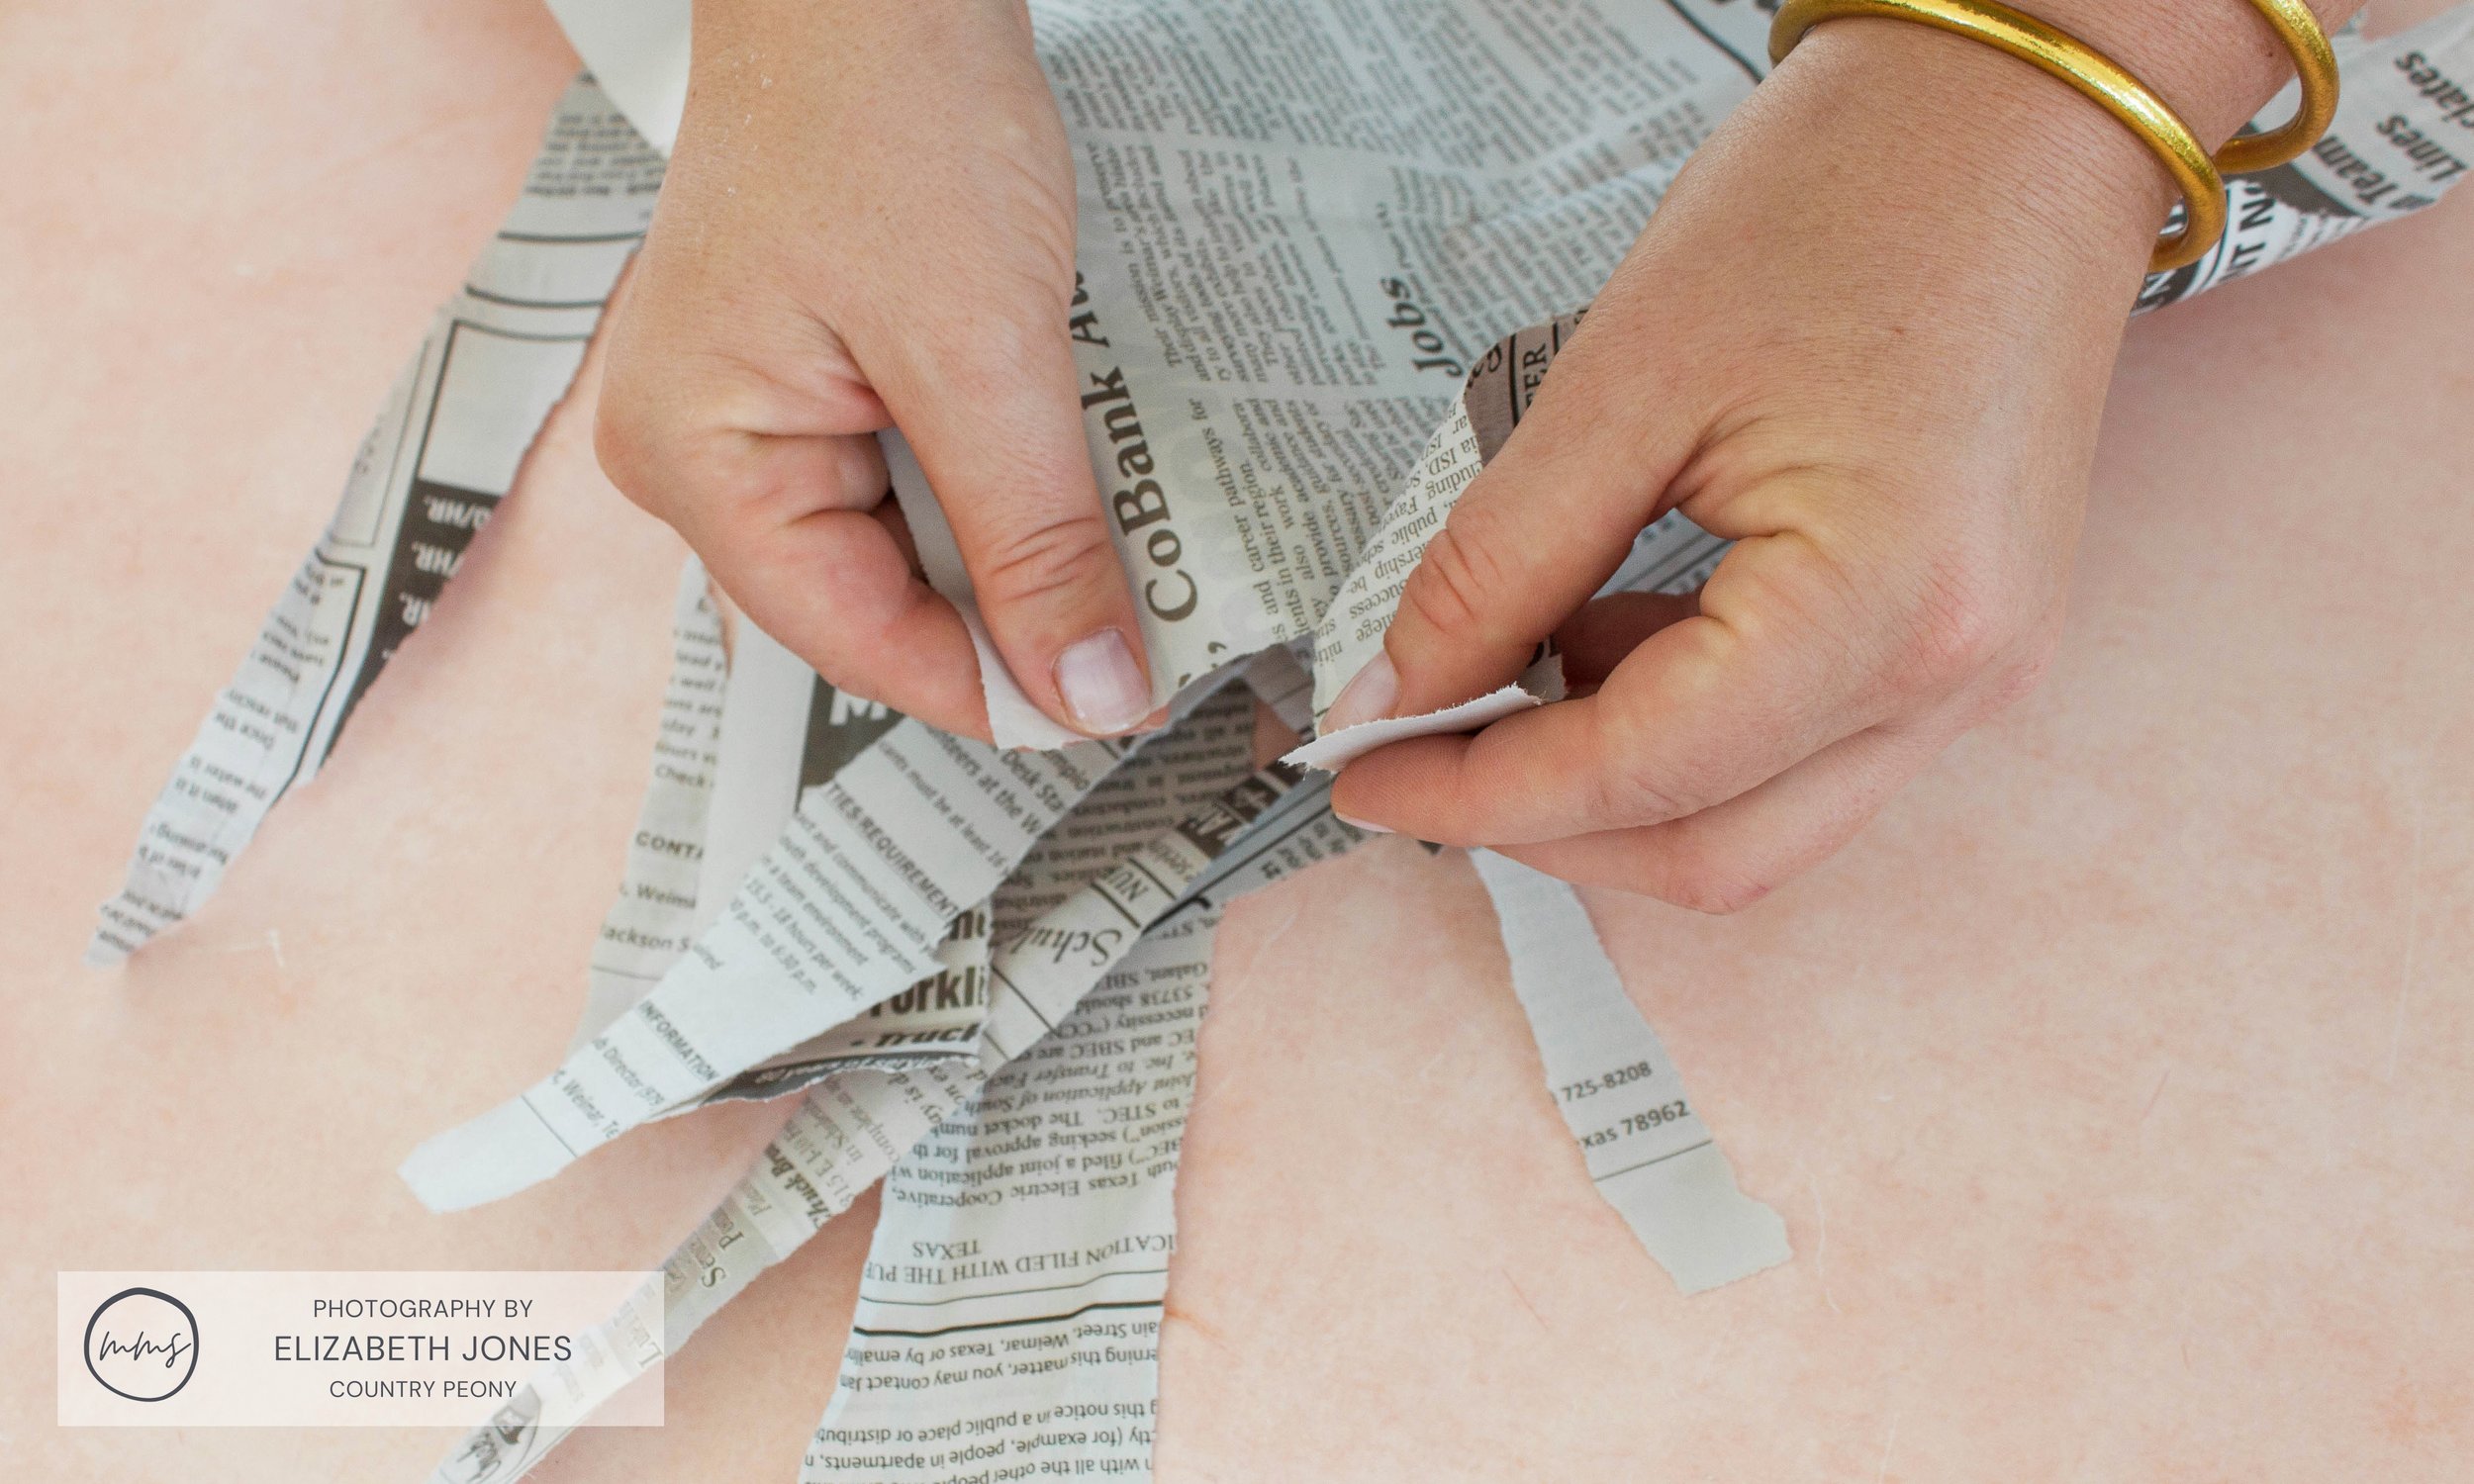
Tear newspaper into thin strips to act as the foundation for the papier-mâché.
*The smaller the strips, the smoother the application of the papier-mâché, especially around the round corners.
Step 3: Blow up the Balloon for the Papier-Mâché Vase

Find a small balloon and blow it up to about 4 inches wide. If you can’t find a small balloon, just don’t blow the balloon up all the way. The balloon will act as the mold for the bottom of the vase.
*I created two vases. They both have tissue paper rolls as the neck of the vase. One vase bottom is 4 inches wide, and the other is about 6 inches wide. Play with the size of the balloon to create different vase sizes as I did.
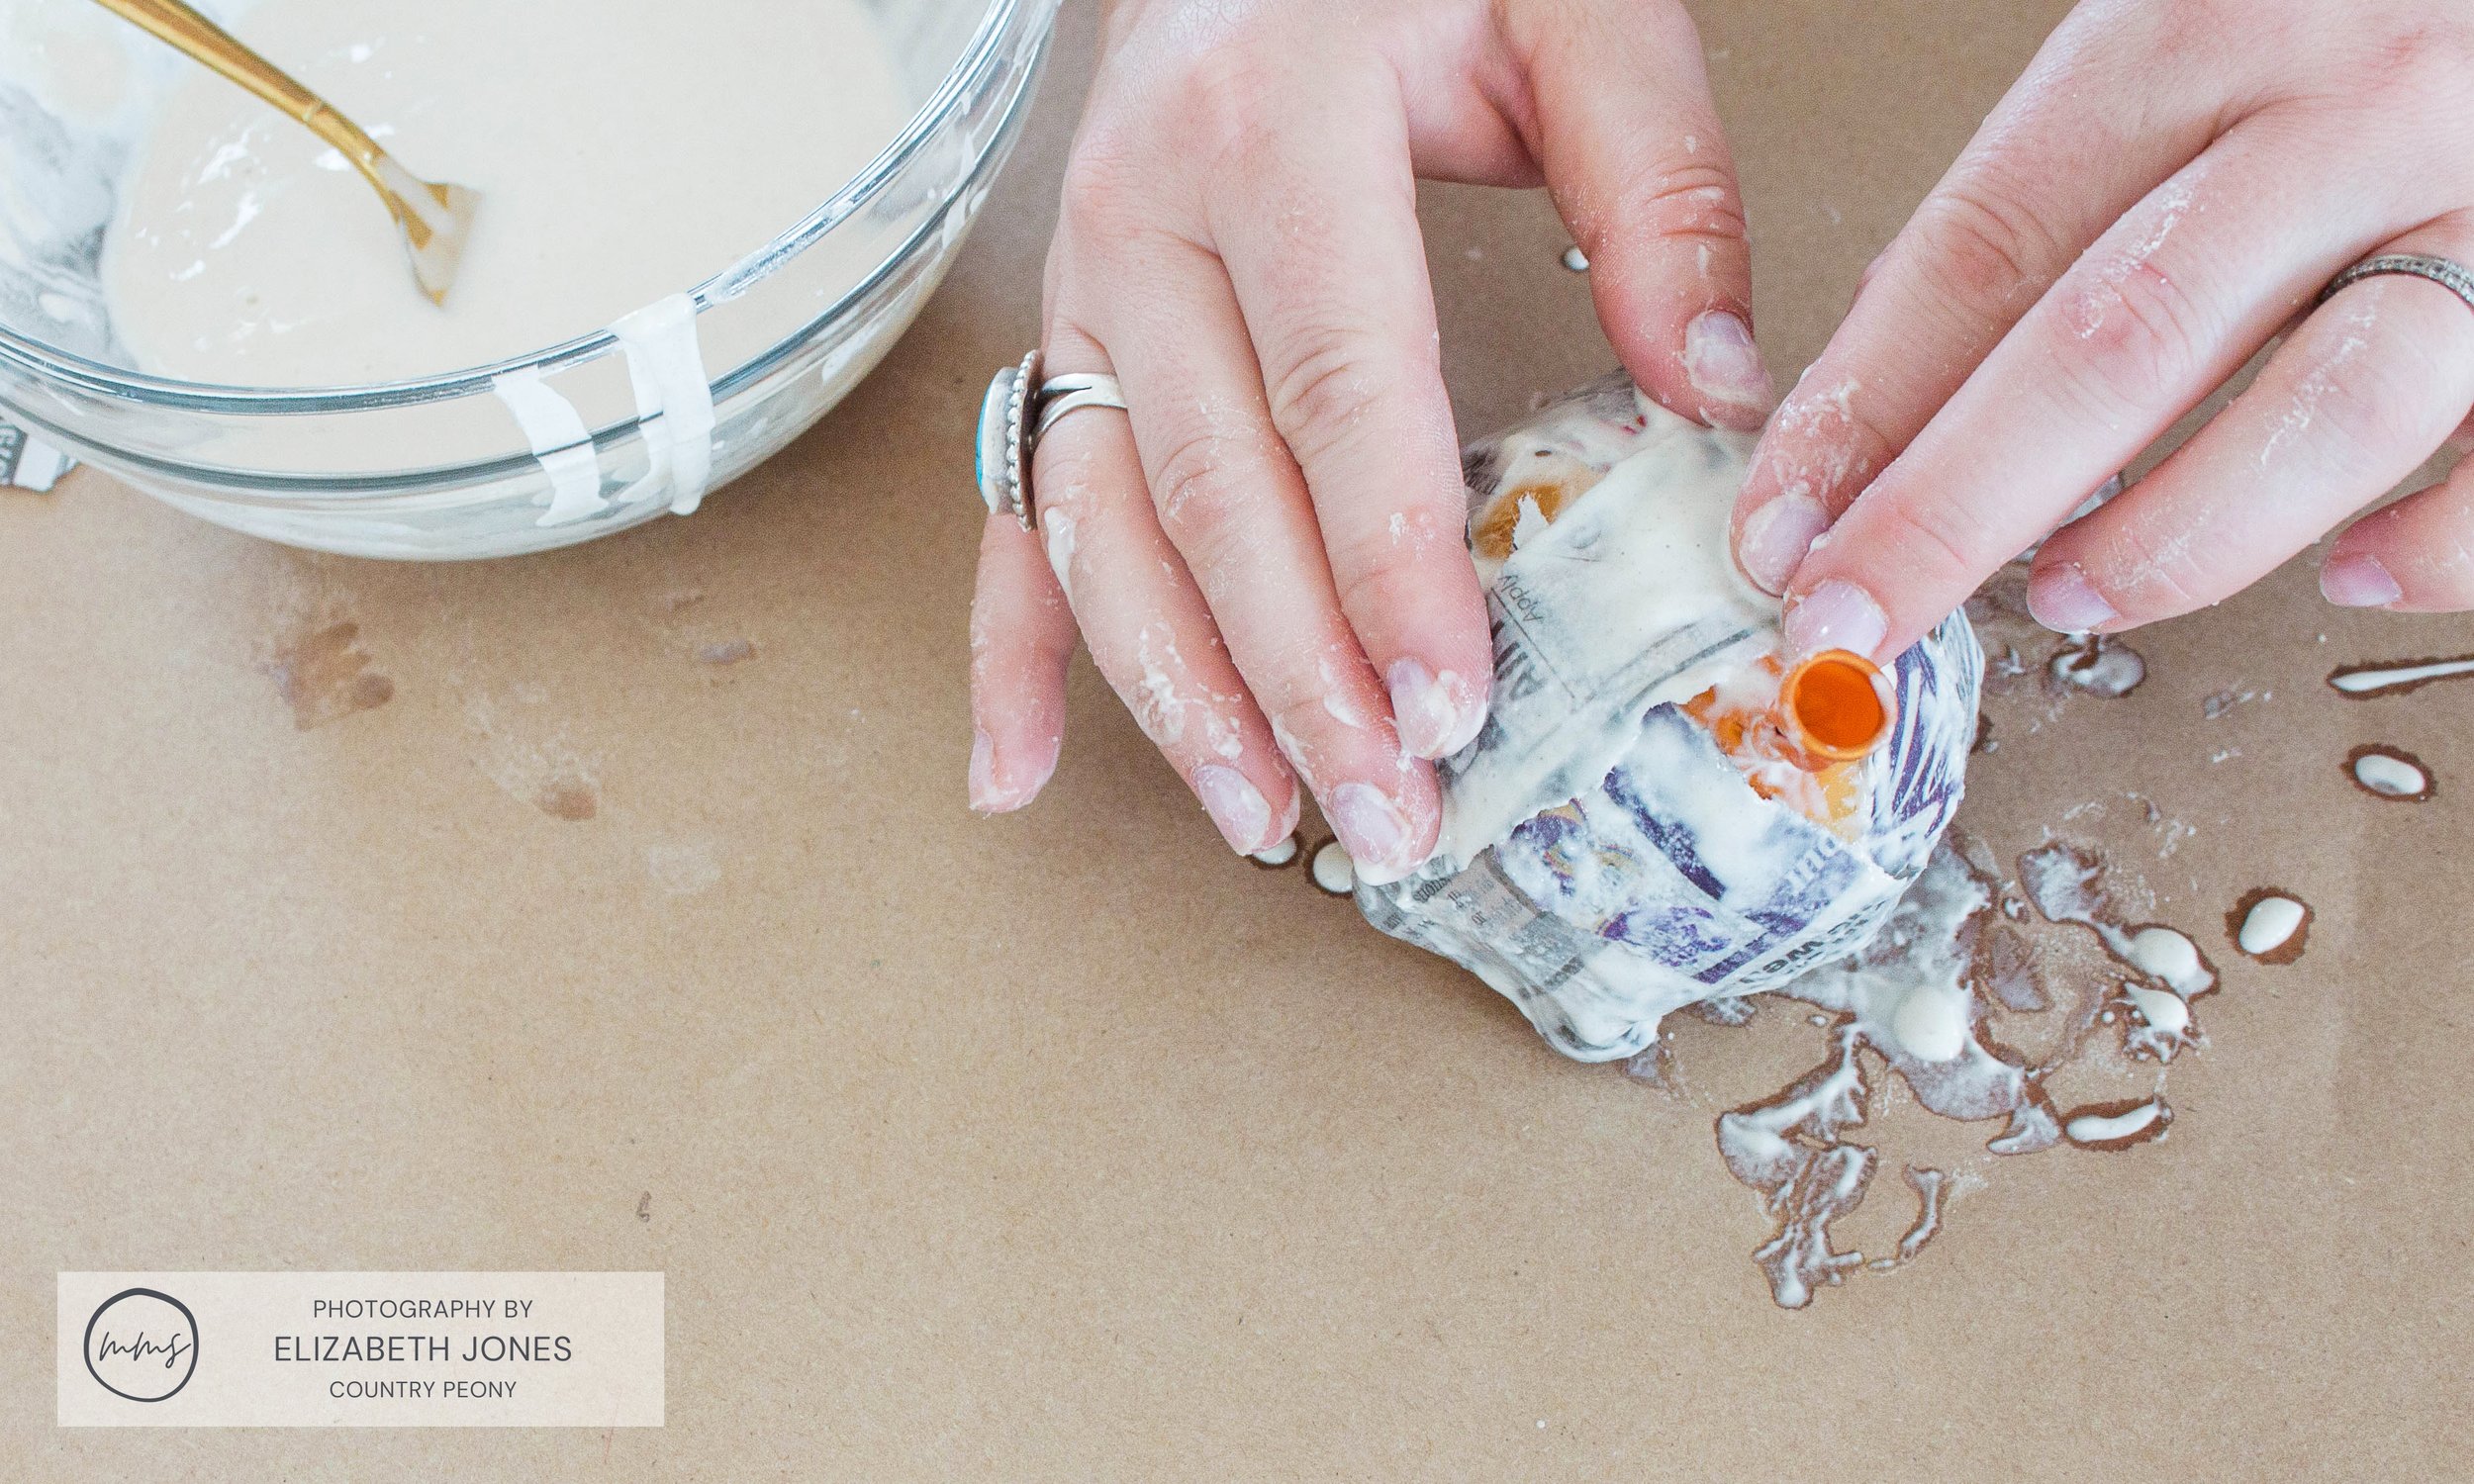
Step 4: Attach The Newspaper To The Balloon To Create The Papier-Mâché Vase

Protect your workspace as this process is very messy!
One at a time, dip a newspaper strip into the homemade paste. Then run your fingers against the newspaper to remove excess glue.
Attach the glued newspaper strip directly to the balloon. Continue to attach the newspaper strips to the balloon (overlapping the pieces on top of each other) until the balloon is covered around the bottom and sides with newspaper. Leave a hole at the top for the vase portion.
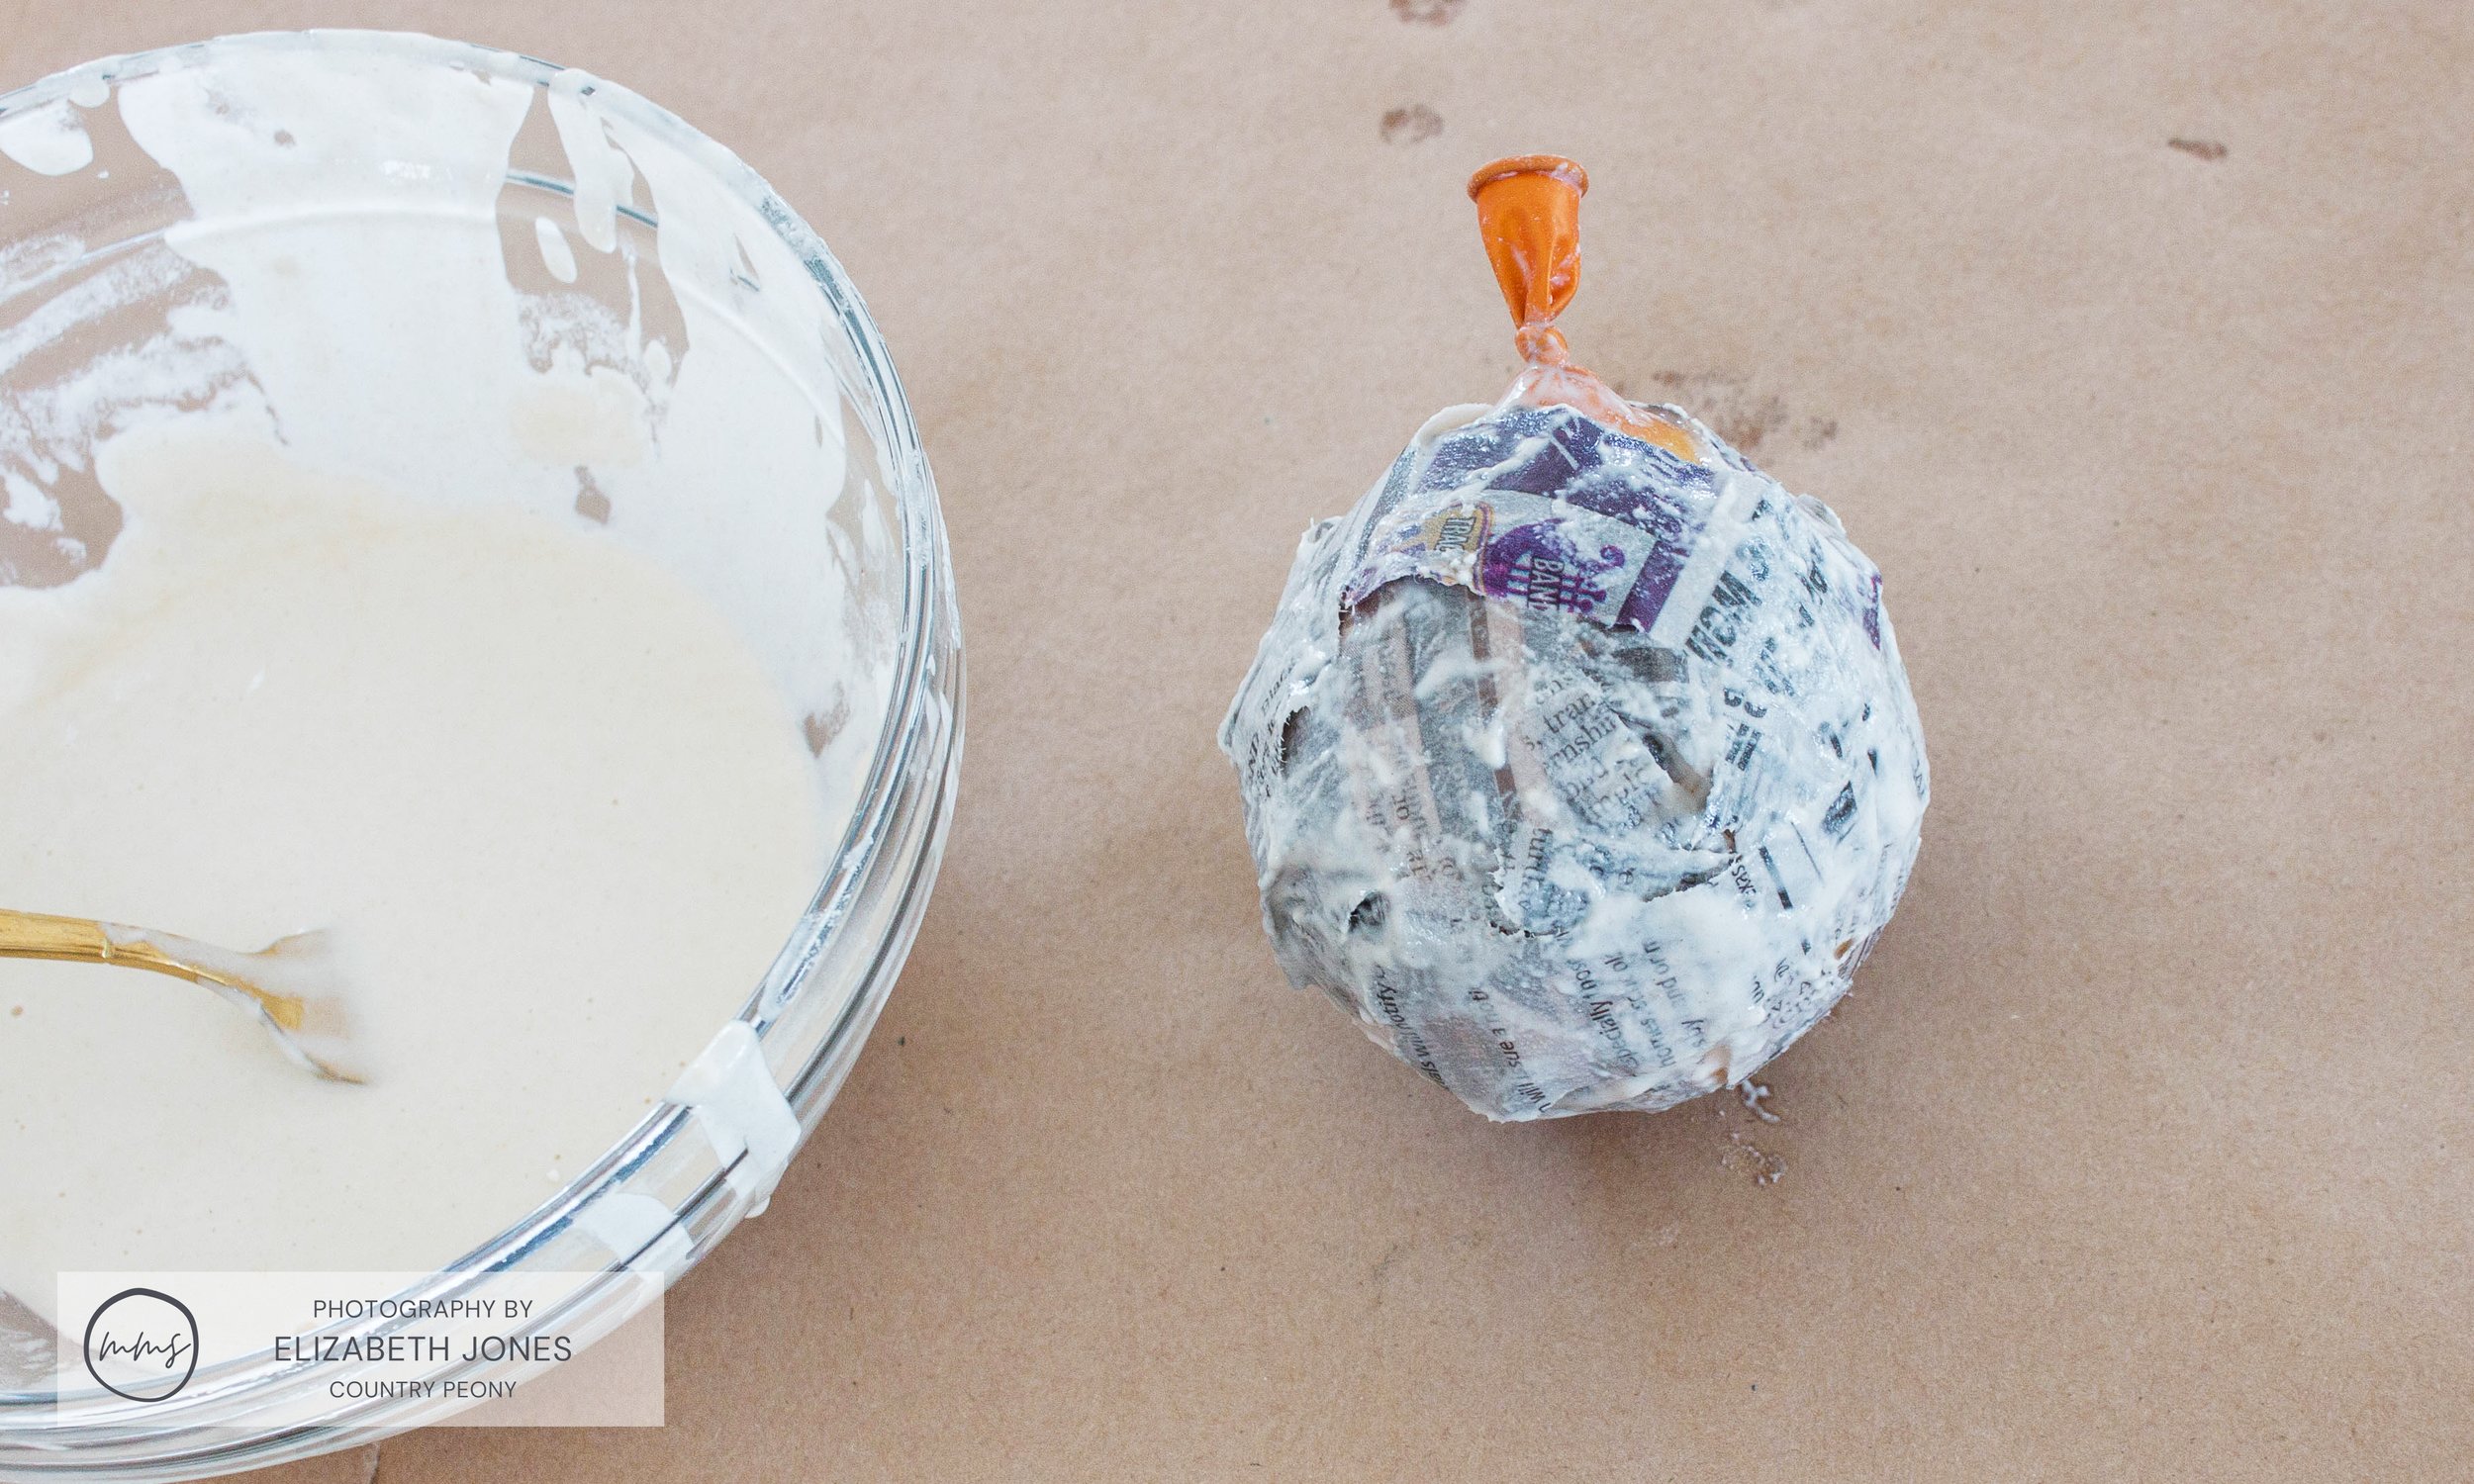
Set the balloon-covered tissue paper aside to dry! It will take at least 4 hours to dry.
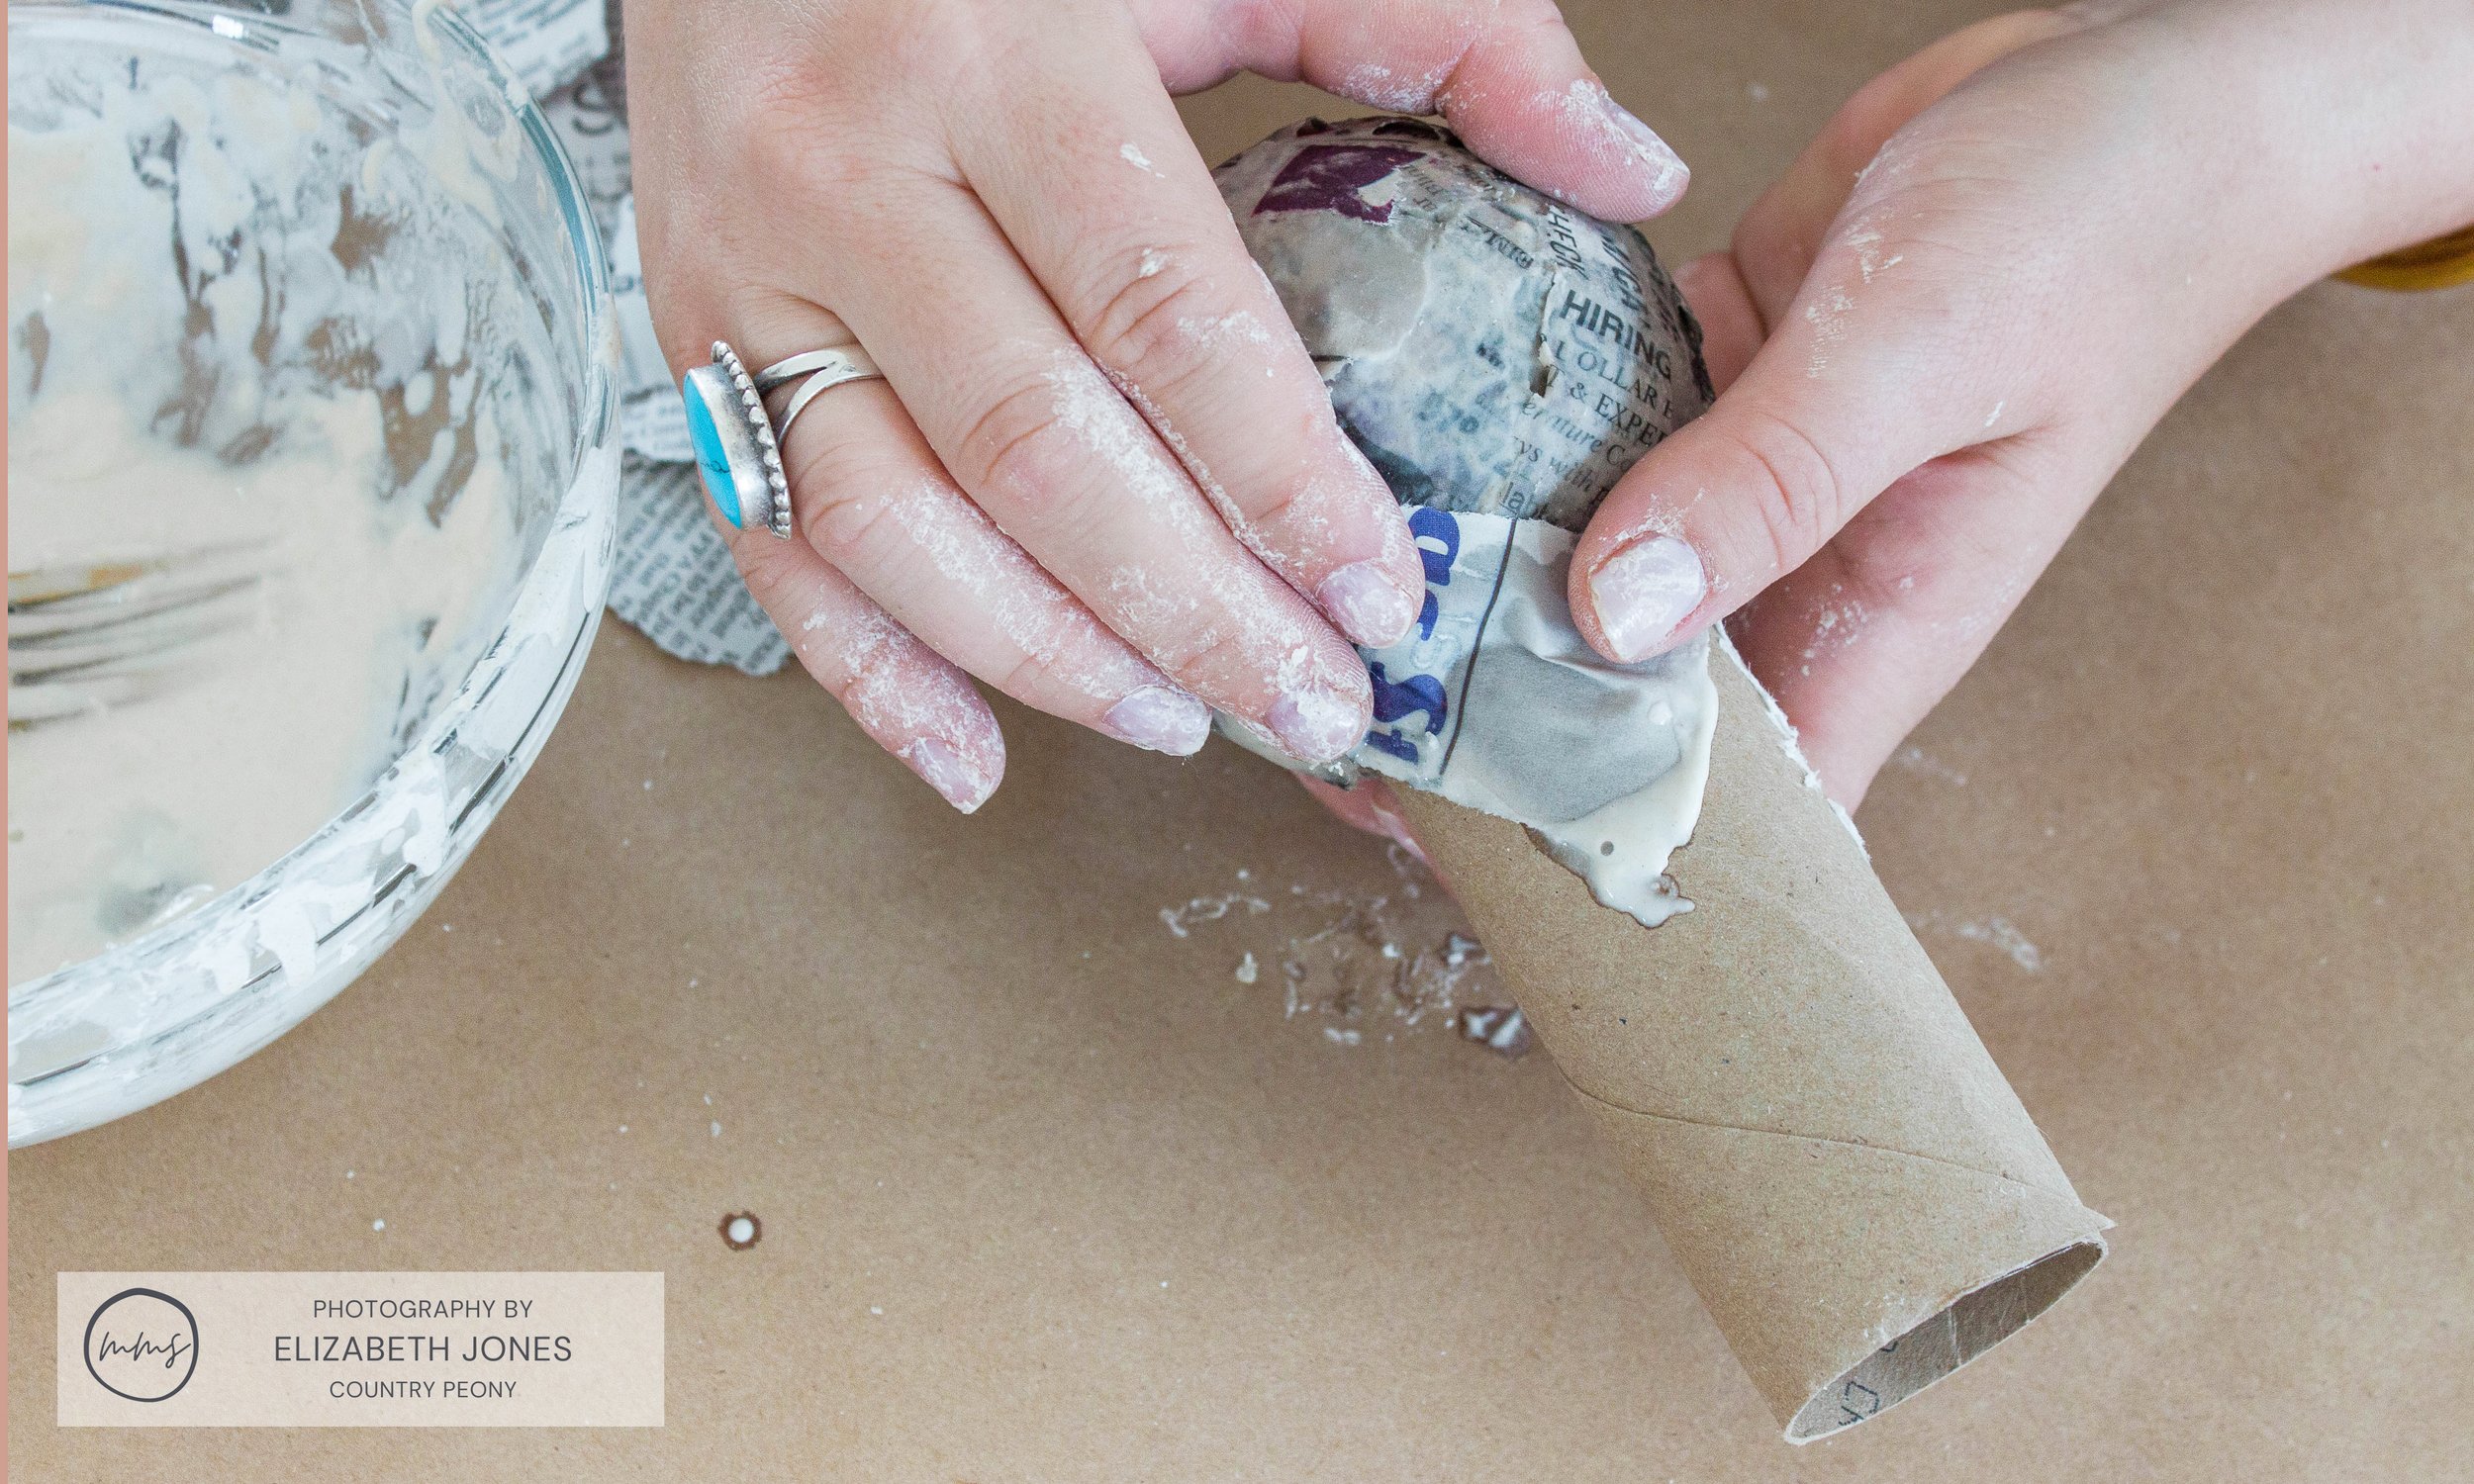
Step 4: Glue The Toilet Paper Roll To The Balloon Bottom
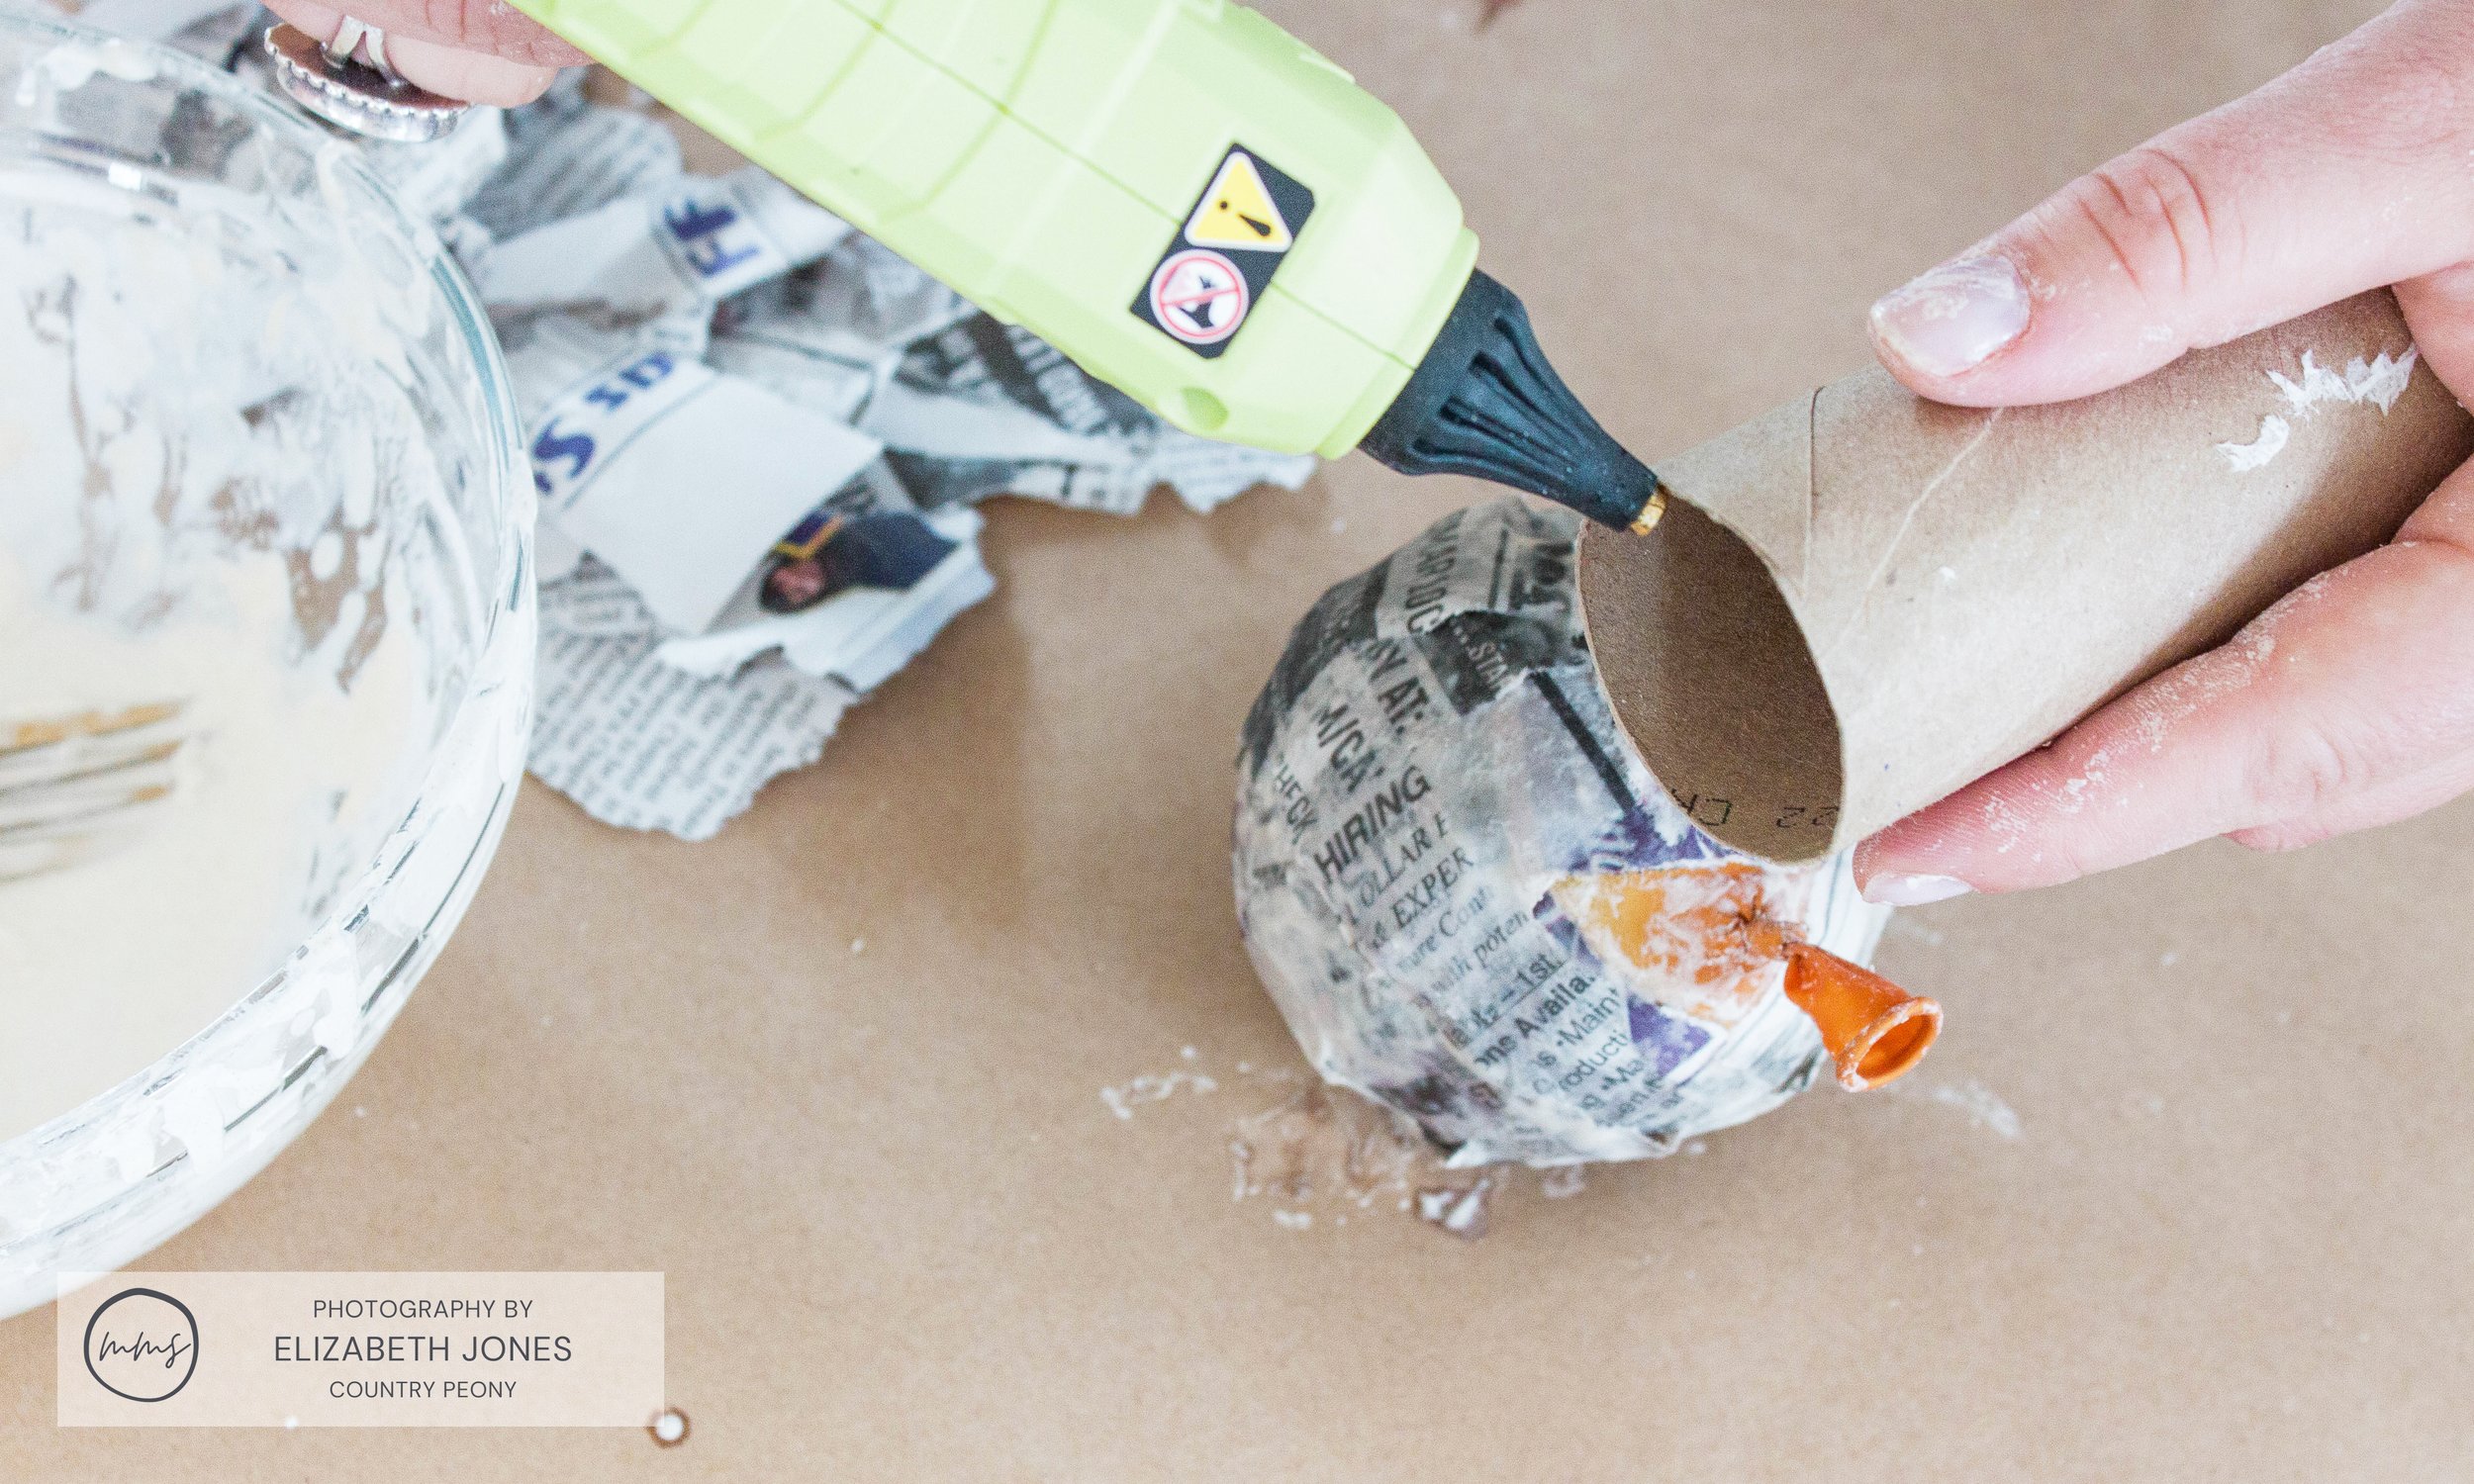
Once the first layer of papier-mâché is dry, hot glue a toilet paper roll to the balloon. Attach it at the part where the hole is, at the lip of the balloon.

Step 5: Apply The Newspaper Strips To The Rest Of The Vase
Continue to add glued newspaper strips to the rest of the vase. Be sure to connect the balloon and toilet paper roll with newspaper strips to create a smooth transition between the two pieces.
Let the new addition of newspaper dry, then apply another layer of newspaper to the entire vase and let it dry.
I created two layers of newspaper for this project, but you can use more for a thicker vase.

Step 5: Glue Tissue Paper Strips Onto The Vase

To create a smoother finish, I recommend adding one layer of tissue paper strips to the entire vase.
Use the same method as you did for the newspaper strips to apply the tissue paper. Then let it dry completely.
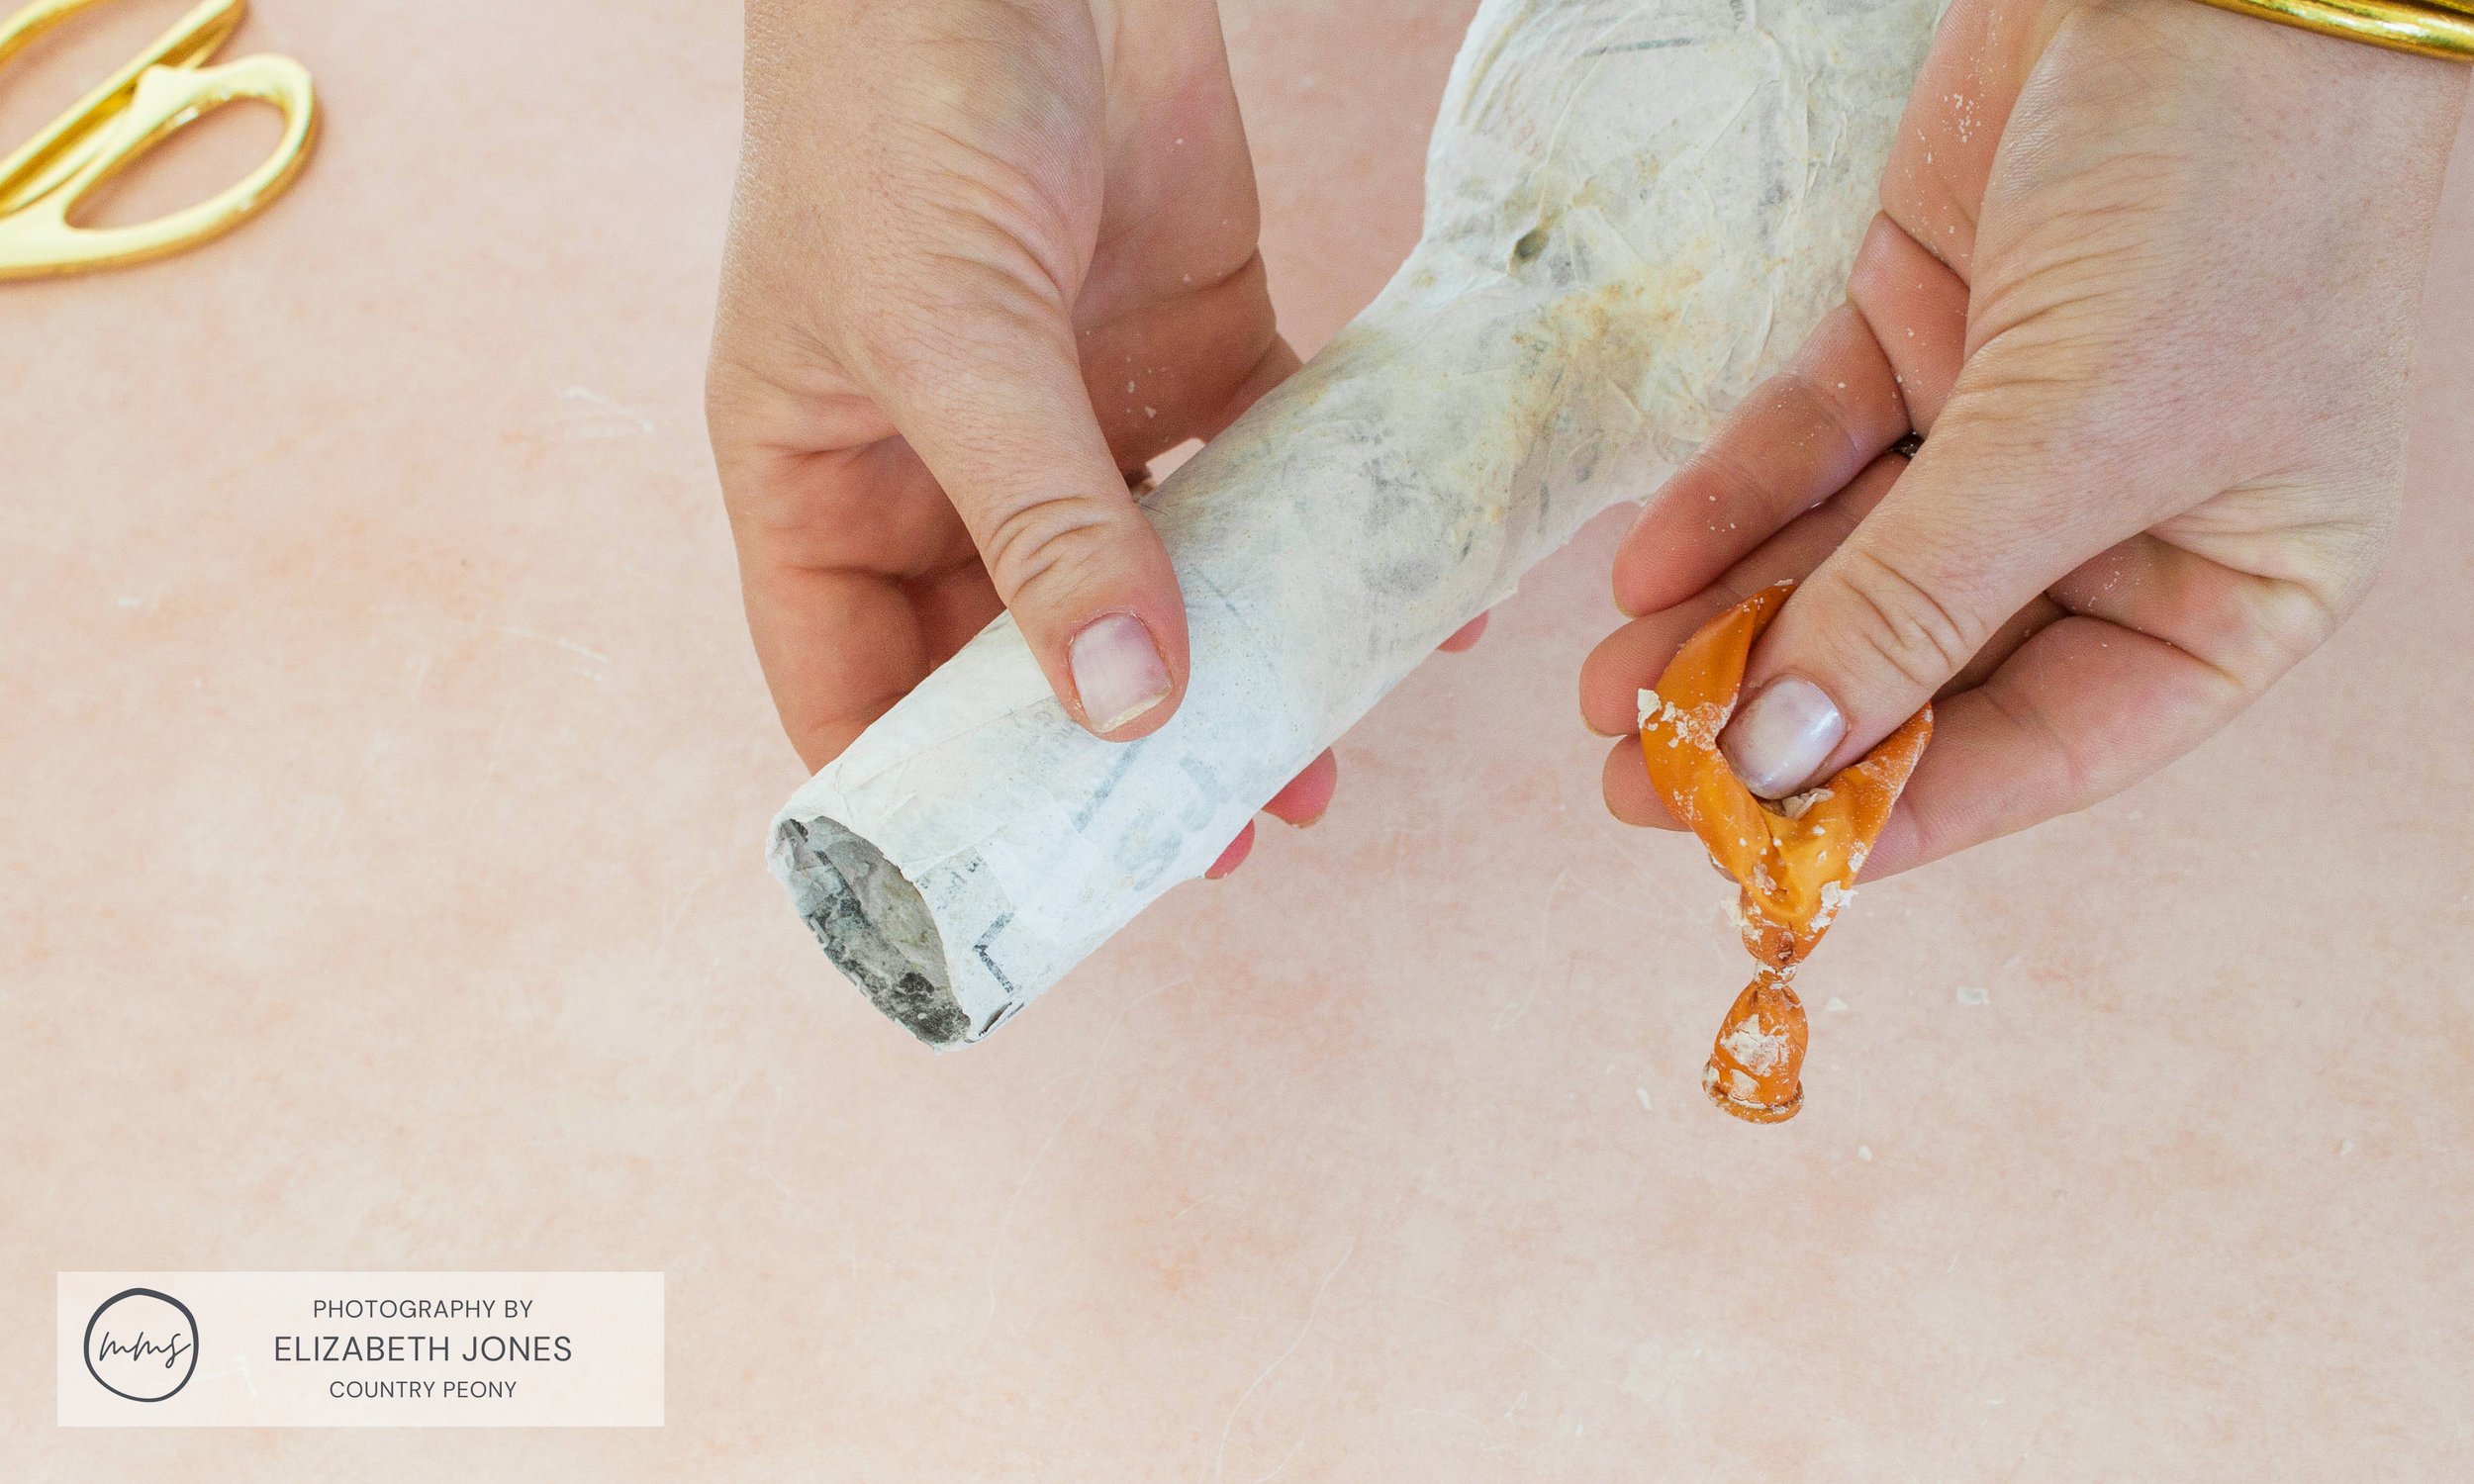
Step 6: Remove The Balloon From The Papier-Mâché Vase

Once the layer of tissue paper is dry, find long scissors and poke a hole into the balloon so it pops. Then use the same scissors to fish the balloon out of the vase.
Step 7: Create The Stand For The Papier-Mâché Vase

Find a flat surface, and gently push the bottom of the vase into the surface to create a flat bottom so the vase will stand on its own.
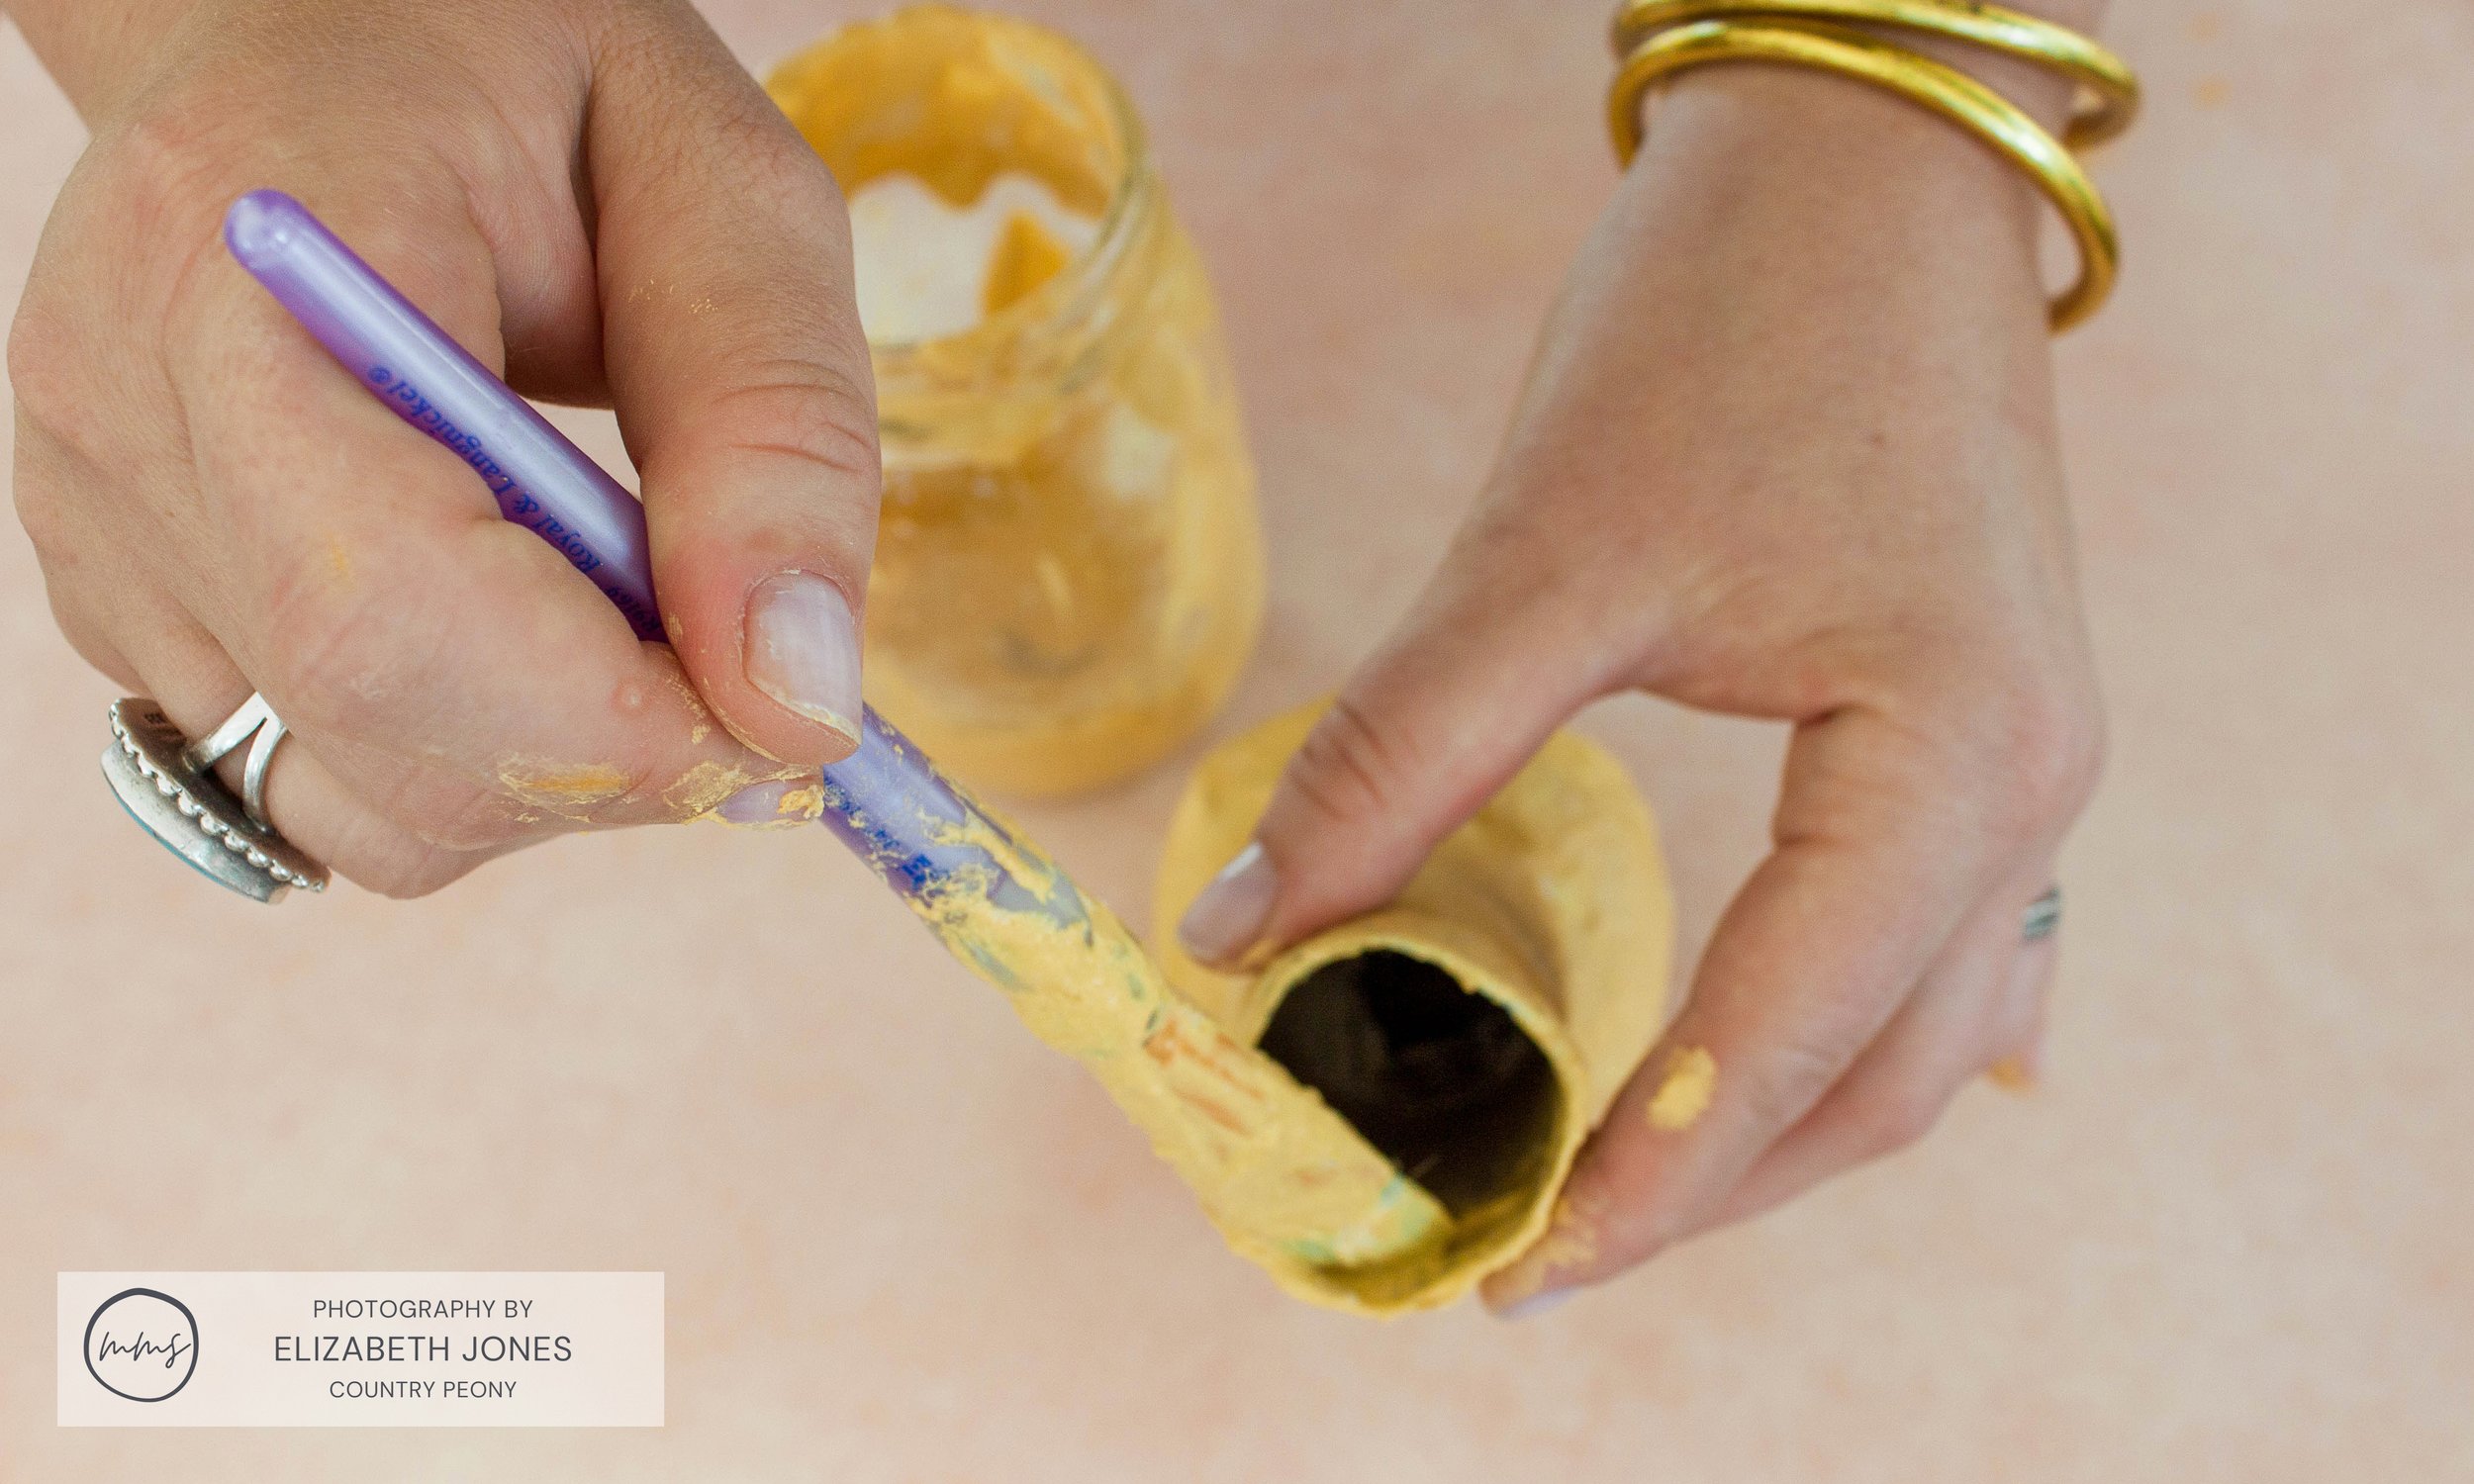
Step 8: Mix The MilkPaint™

Mix 1 part MilkPaint™ to 1 part water. A “part” can be any unit of measurement you wish. I used a tablespoon.
For this project, I used 2 tablespoons of Miss Mustard Seed’s MilkPaint™ in Mustard Seed Yellow to 2 tablespoons of water.
Step 9: Paint Two Coats Of MilkPaint™ Onto The Papier-Mâché Vase

Apply 1 thin coat of MilkPaint™ to the entire outside of the vase and to the top of the inside of the vase. Let it dry, then apply 1 more coat.
Step 10: Enjoy Your Charming Papier-Mâché Vase
Add your favorite dried or faux florals, and display your vase on your favorite mantle, side table, shelf, or main table for all to enjoy!

*I do not recommend adding real flowers to this vase as the moisture from the flowers will compromise the papier-mâché.

I love how modern and rustic these handmade vases look.
And, I love how the MilkPaint™ really elevates them into a high-end look, even though they only cost a couple of dollars to make!

Thank you so much to Miss Mustard Seed’s MilkPaint™ for having me, and thank you so much for following along today. I hope you enjoy experimenting with Miss Mustard Seed’s® MilkPaint™ as much as I do!


