The cafe racer blends the needs of a speed freak with those of a minimalist to create a near perfect motorcycle. Great examples of these bikes stand out no matter what other bikes surround them. That has led to an explosion of builds around the world However, buying a cafe racer that someone else has built can be too expensive for the average rider, and doesn’t really fit with the “built not bought” mentality. Most of us would rather enjoy the pride of riding a machine we ourselves built.
So…we decided to help the budget-minded rider out just a tad by going over the history of the cafe racer, listing the best donor bikes for a cafe racer build, then throwing in a parts section that should help you get the look you want without draining your wallet.
What is a Cafe Racer?
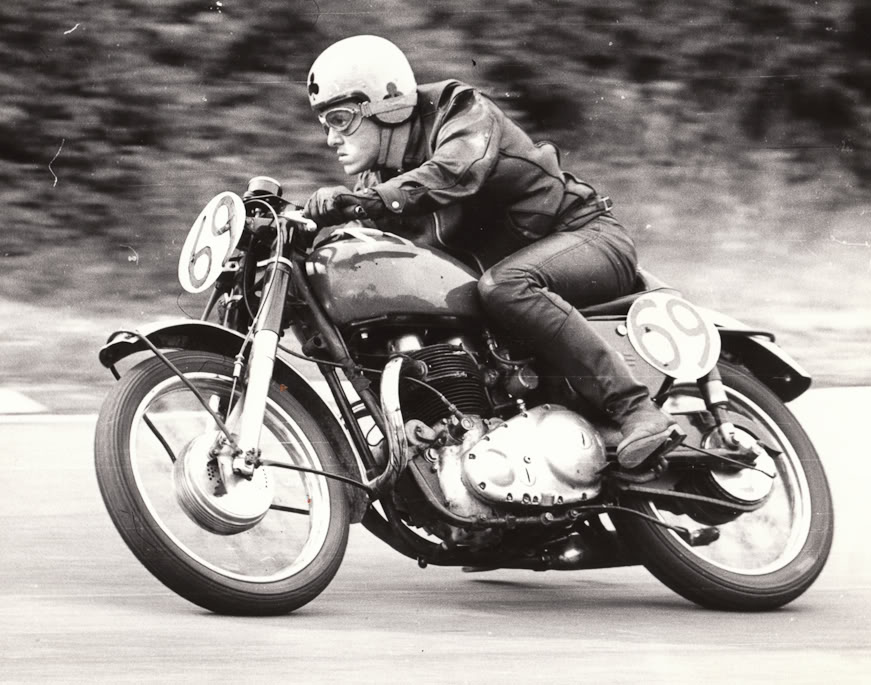
The cafe racer has it origins in a British subculture of the 1950s that enjoyed the look of the Grand Prix road racers of the era. These were minimalist bikes meant to be ridden short distances. The bikes picked up the name ”cafe racer” because the Brits who built them for personal use spent quite a bit of time riding them as quickly as possible between cafes…pubs to be exact. Luckily, the name pub racer didn’t stick. The term ”cafe racer” was originally meant to be derogatory, making fun of the rider as a ”motorcyclist who played at being an Isle of Man road racer, but is someone who owned a racy machine but merely parked it near his table at the local outdoor cafe,” according to freelance writer Wallace Wyss.
Cafe racers have a layout that places a premium on shedding weight from a lightly powered motorcycle. These bikes also feature a distinctive set of ergonomics that includes low, narrow handlebars. There are two types: clip-ons or clubman (ace) bars. Clip-ons are actually two separate handlebars that bolt to each fork tube. Clubmans are single-piece handlebars that bolt to the standard mount but drop down and forward. The handlebars let the rider get lower and closer to the bike to reduce drag and wind resistance, while improving rider control. The seat, typically featuring a bum-stop, puts the rider farther back on the bike, assisting with the tuck-in of the rider. This riding posture requires rear-set footpegs and controls (rearsets). Early riders were about fifty-fifty as to whether they would add race fairings or go without.

The earliest bikes were combinations of British bikes of the era. A very common mish-mash was called the Triton, a combination of a Triumph Bonneville engine bolted to a Norton Featherbed frame. More budget-conscious riders would often combine the same Triumph engines with a BSA frame, creating a Tribsa. If money wasn’t an issue, riders would toss a Vincent V-Twin into a Featherbed frame, building a Norvin. As you can see, Norton built the best frames at the time.
Best Bikes for a Cafe Racer Build
Today, you would spent far too much cabbage trying to build a Titon, Tribsa, or a Norvin. It might actually take a lottery win to build a Norvin nowadays. Those Vincents are scary to buy! Luckily, the Japanese came to the rescue as early as the 1970s. There are dozens of bikes from the 1970s, 80s, and early 90s that make great donor bikes for a cafe build. They make cheap options because many of them already have a small to medium displacement engine, great frames, and huge aftermarkets for the parts that you will need to swap out.
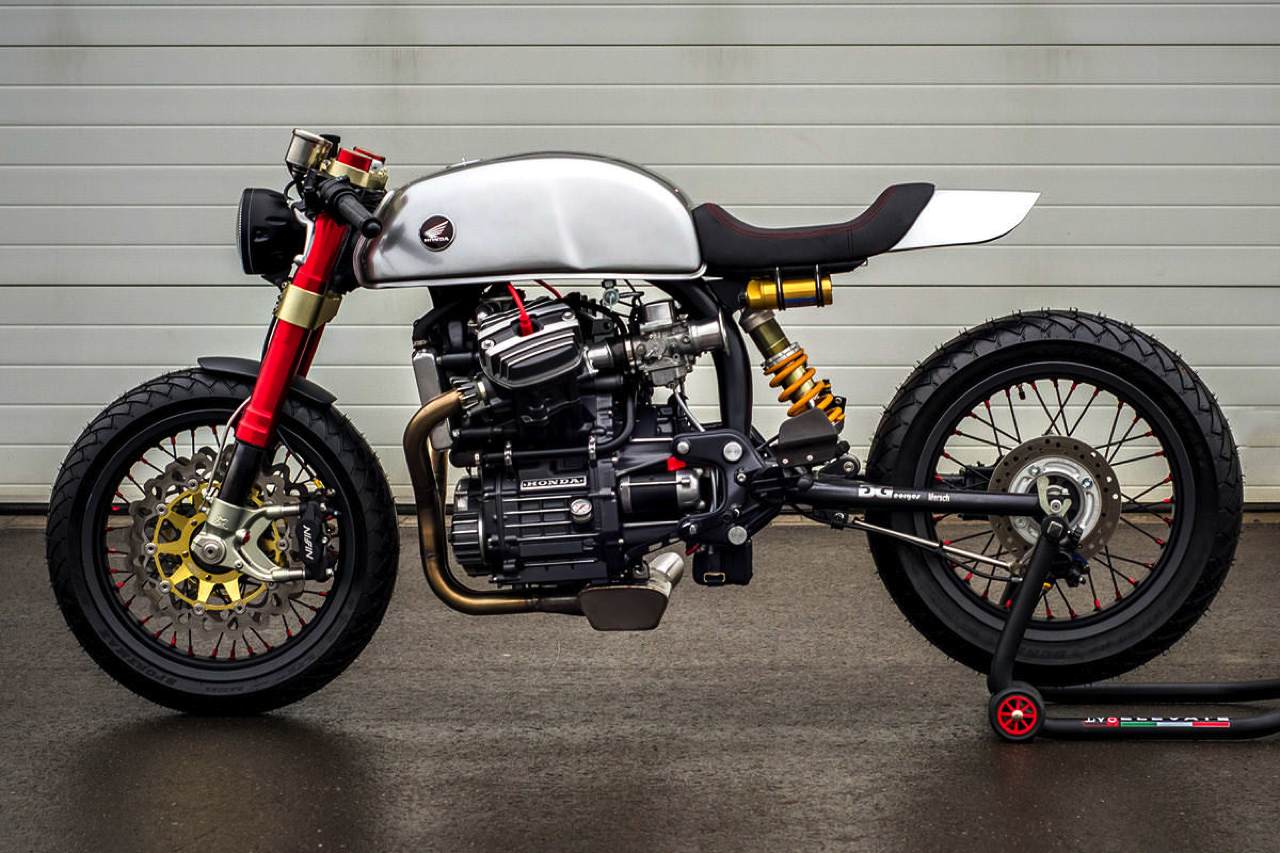
Honda CB Cafe Racers
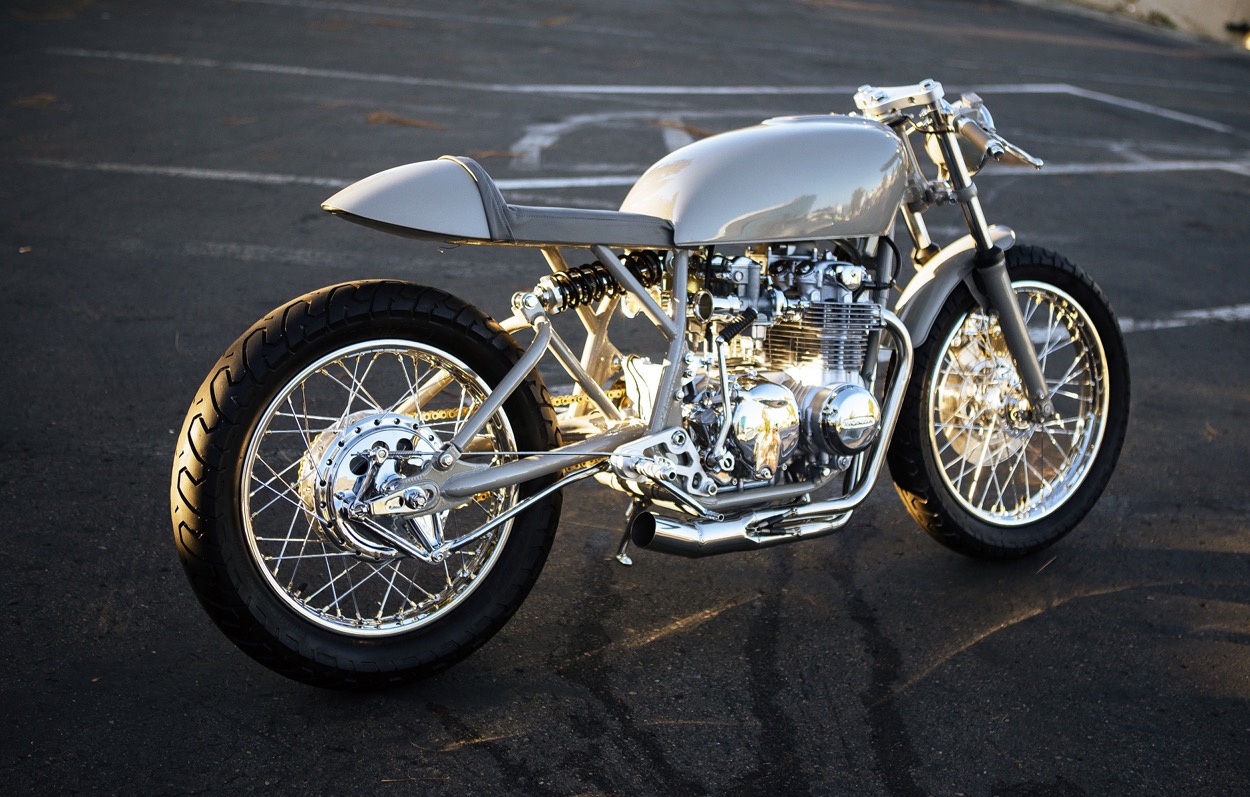
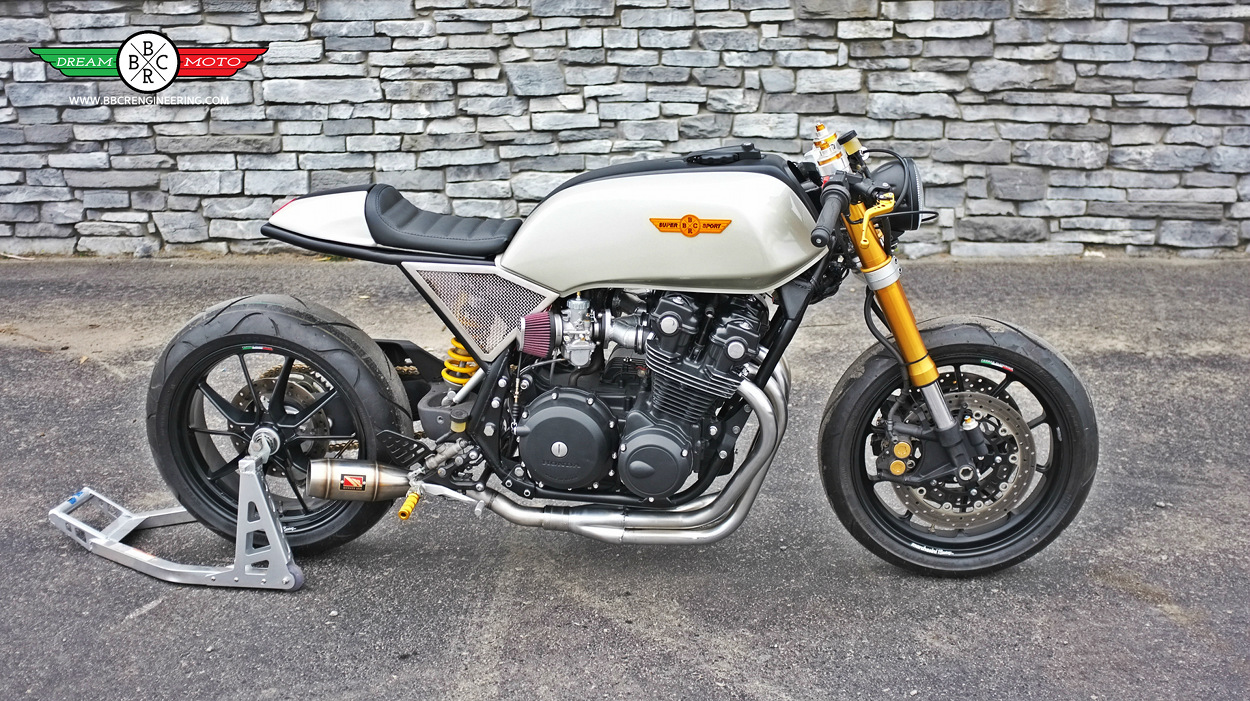
Topping the list of donor bikes has to be the Honda CB series. Every bike in the pre-1990 CB series is easy to work on and offers easy to swap parts from a huge aftermarket. The problem is the expense of some of the more popular bikes in the group. The top choices in the CB series are the CB550 and CB750. Some builders opt for the CB350, but the lower power may not be what you want. Then there is the CB400 Hawk Hondamatic. This writer bought one in October of this year for $1,500 in perfect condition. Don’t know if it will be a cafe racer of just an occasional ride.
Now that we have gushed like school girls over the Honda CB series, here is a list of other bikes that have large aftermarkets and reliable engines.
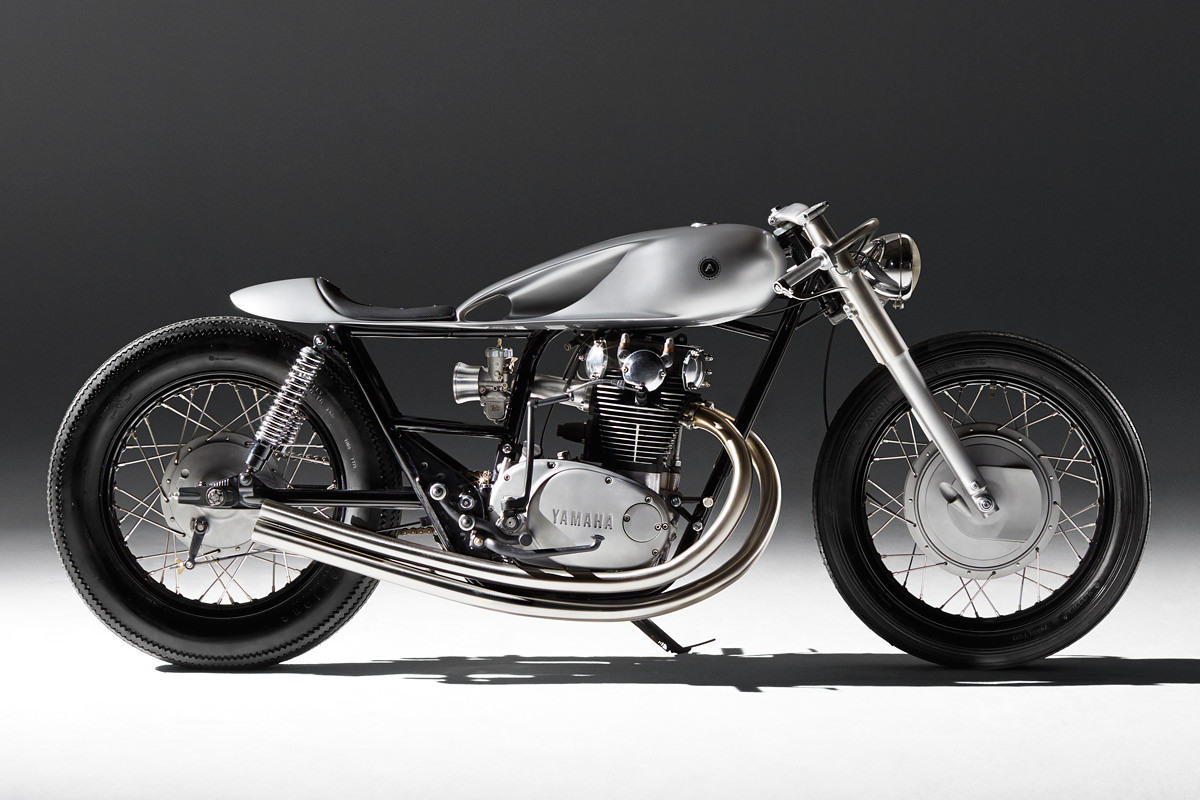
Yamaha XS, XV, and SR Series
Yamaha has many bikes that will make great cafe racers. The best may be the XS series. Bikes like the XS400, XS650, XS750, and XS1100 make great builds. The best bike in the group is probably the XS650, a parallel twin that recalls the British twins of yore. However, these bikes have become very popular, so they are the most expensive donor bike in the group.
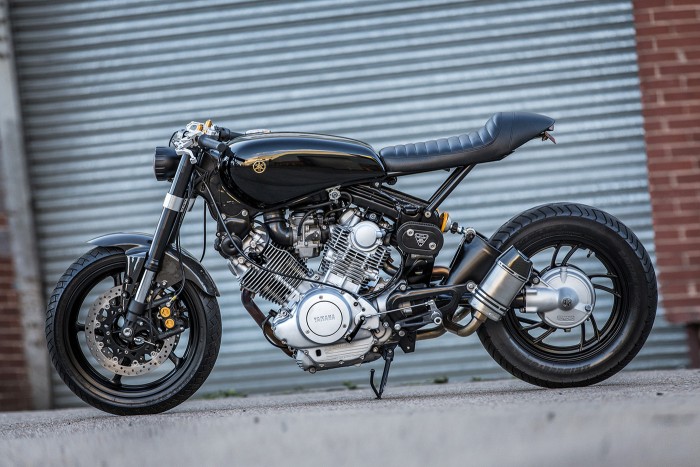
Builders have also been known to use the Yamaha Virago line-up. The Virago XV535, Virago XV750, and the Yamaha XV920R are solid options. The aftermarket is smaller than you will find with the XS series, but the early bikes have a monoshock setup that makes for killer cafe lines.
Then there is there are the Yamaha SR400 and SR500–both of which are single-cylinder “thumpers.” These bikes offer a nostalgic bent…kickstart only. The SR400 is still in production, but retains a cafe look. Donor bikes are inexpensive and parts are easy to find.
Kawasaki KZ and W Series
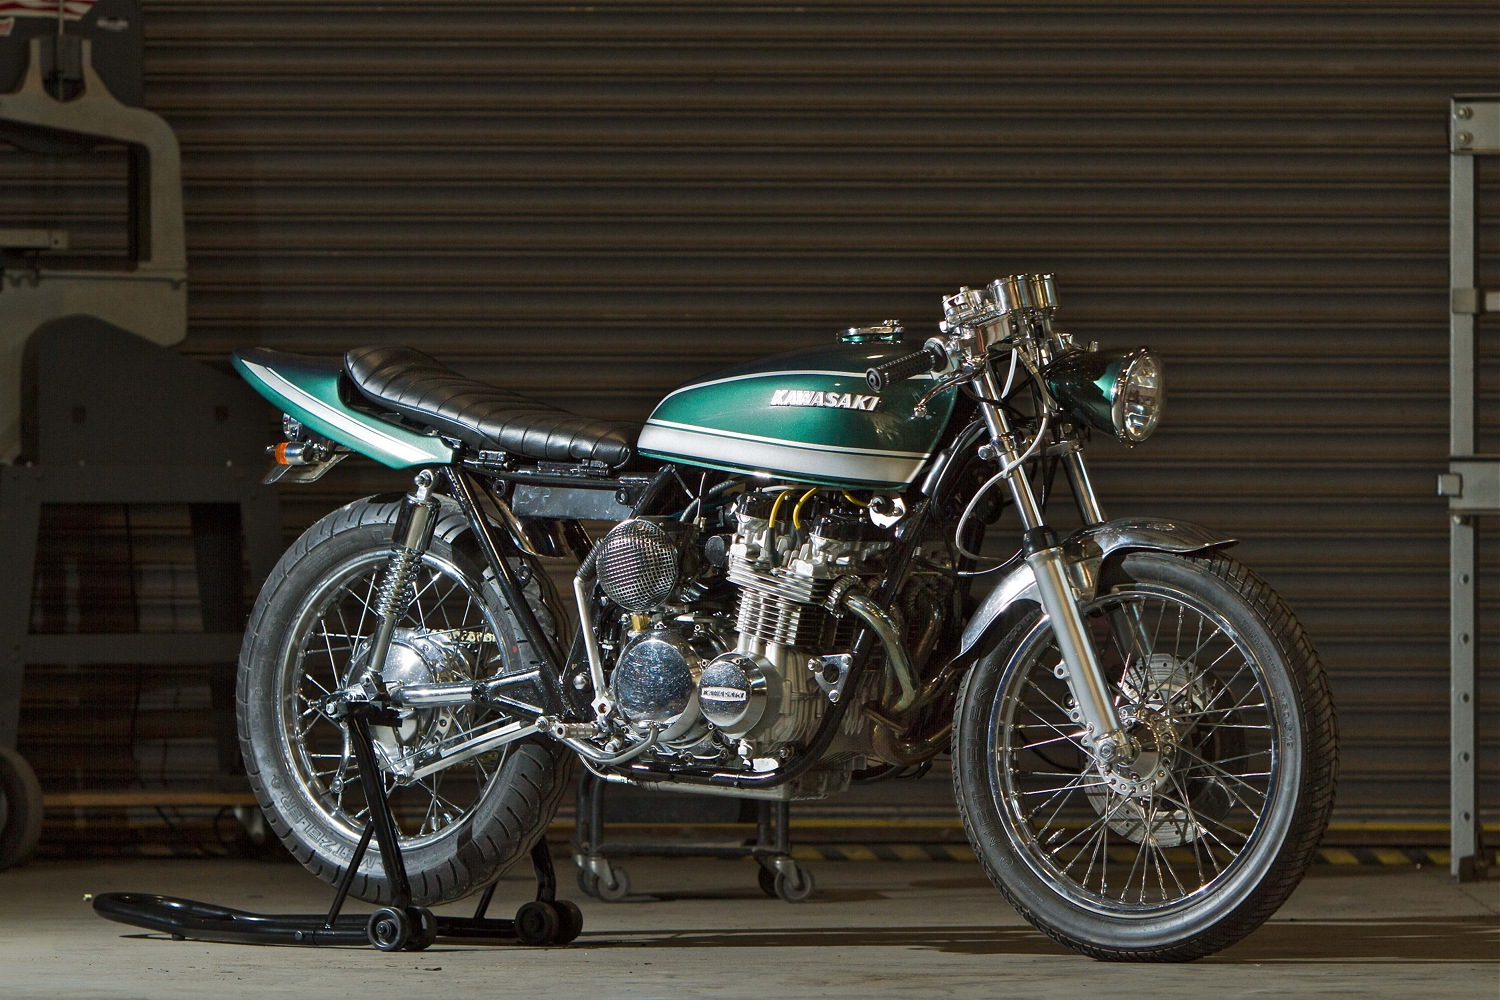
The Kawasaki Z series is perhaps the most popular platform for cafe builds from Big Green. Some of the best bikes in the group may be the KZ400, KZ440, and the KZ650 — or Z650 in the European market. The KZ650, built from 1976 to 1983, offered a strong 64 horsepower and was known as the “Son of the Z1” — the company’s legendary muscle bike.
Kawasaki W Series offers two bikes that can be great for cafe racer builds…but mostly if you live outside of North America. The W650 and W800 are all solid bikes that can be converted to the cafe racer look that you want. The W650 is a dream to build out. It was a retro-standard bike to begin with, so the look will not have to be altered too much. It was lightweight to begin with and parts are easy to lay hands on. The only problem is that the W650 was only sold in North America for two years, so finding a donor bike can be a pain. Luckily, the donor bikes are cheap. It’s just a pain to travel to find a good one.
The W800 presents a distinct challenge, especially for less-skilled builders. This is a modern bike that has a modern look. That means a lot of parts swapping and work to reduce weight and the design lines, making it an extensive build.
Building a Cafe Racer
From a design standpoint, there are many things that you should consider before you start building a cafe racer. These items should be kept in mind when buying a donor bike and parts. With a cafe racer, these points are: foundation, the cut-off points, height limit, the bone-line, visual weight, the swoop, the angles, and fork distance. Let’s have a look at each in brief detail.
Foundation

The foundation mainly deals with the base structure of a bike — the general aesthetic pleasantness, if you will. In other words, how easy is the bike on the eye. A cafe racer is completely defined by a flat line from front to rear, parallel to the ground or with a slightly forward rake. This line gives a cafe racer a no-nonsense look that speaks of strength and speed. This line should remain uninterrupted, unless it is structurally necessary to break it up. The straight line should sit upon two nearly even-sized wheels.
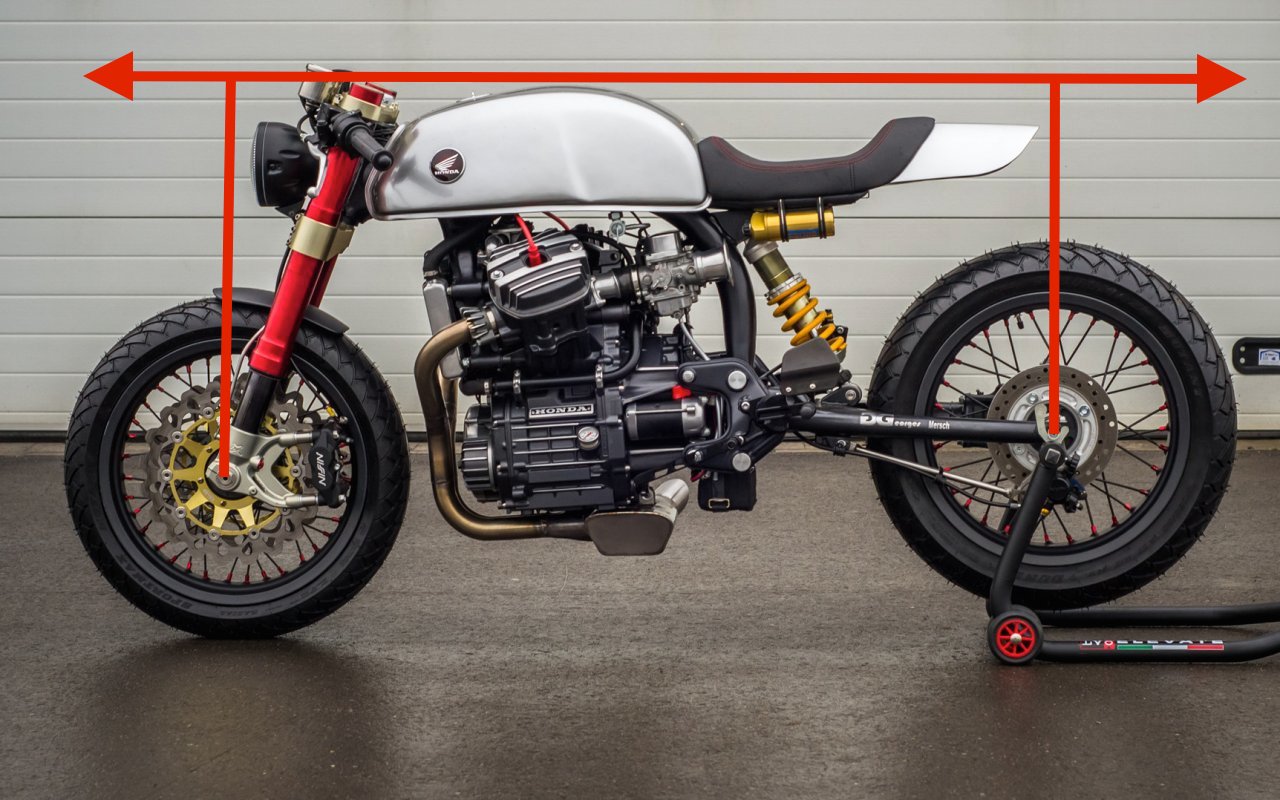
Cut-Off Points
The cut-off points of your cafe racer can be clearly defined as the centerline of each wheel. If the bodywork overlaps these points, your build will look just a tad off. The seat may overlap the rear centerline, but only a little. Too much and the bike looks rear-heavy and off balance. If you do overhang in the rear, use an extremely low profile seat to pull the look back together. Up front, the cowl should be cut of very close to the centerline. Much of an overhang upfront destroys the cafe racer look and can completely ruin an otherwise awesome build.
Height Limit
The height limit is the highest point of the bike above the fuel tank. As with the cut-off points, anything above this line can make the bike look poorly planned and hard on the eyes. Parts that stick too far above the height limit interrupt the sleek look that a cafe racer must have.
Bone Line

The bone line is the widest point of the bodywork. The bone line is where light will reflect off your seat, tank, and lamp; adding 3D effects to the foundation line of the build. The right bone line pulls the build together, making it feel as if everything on the bike belongs together.
Visual Weight

The visual weight is where the actual bulk of the bike is going to sit. The main part of a build’s visual weight will be the engine. This includes the cylinder/crank/gearbox, basically everything in the front section of the subframe. Design-wise , this is called the tank parameter and your fuel tank should be exactly the same length as this section of the bike. A tank that is smaller makes the parameter look bulky. A larger tank will change the bike’s minimalist stance, countering the look needed for a cafe racer.
A secondary consideration of the visual weight is the axis of the tank parameter. This is a visual line that bisects the cylinder/piston area of the motor. It sounds like a minor detail, but it can define your build’s character, making it seem more robust and aggressive.
The Swoop
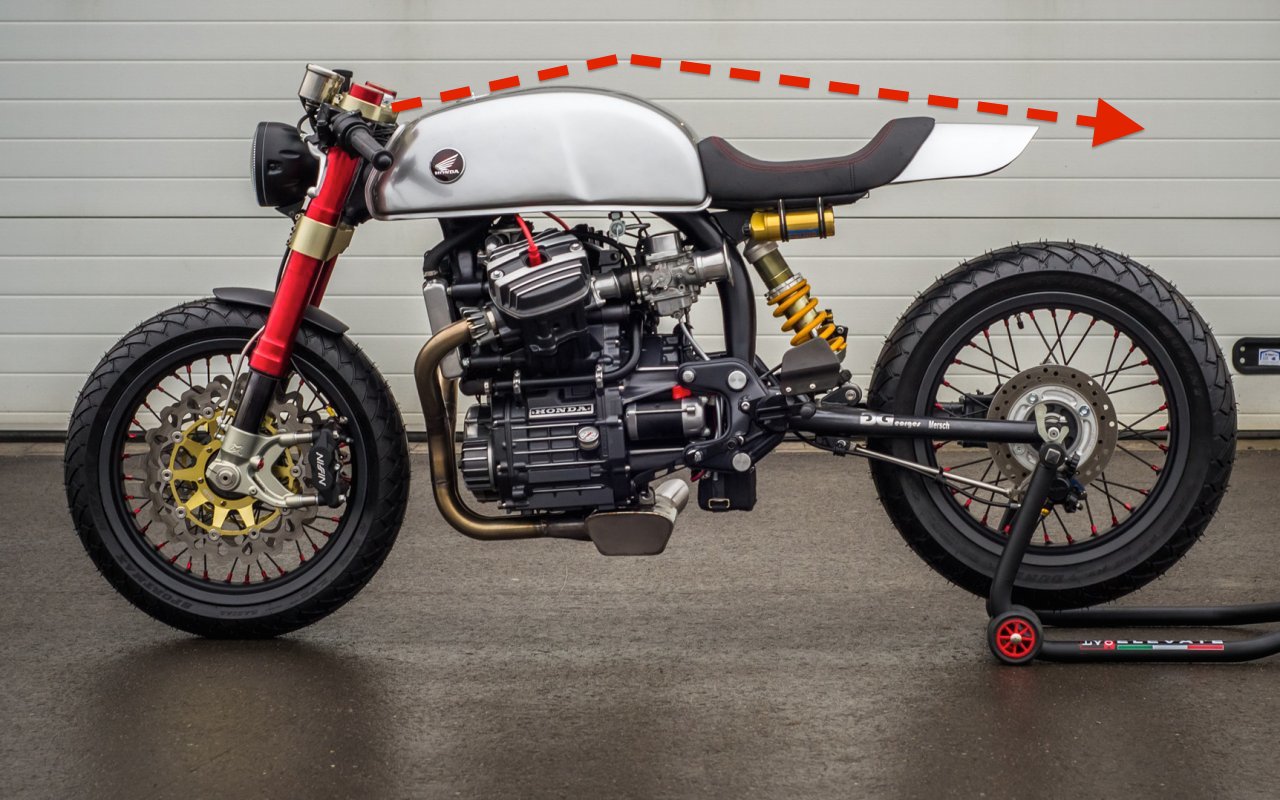
This is an imaginary angle that runs from the top of the fuel tank to the tip of the cowl behind your rear seat. If the angles flow together properly, the two pieces will look as if they were cut from a single piece of metal at some point.
Angles

There are many primary and secondary angles on a bike. All of the different angles created by the forks, shocks, and various other parts can make a bike look like a dish of spaghetti, ruining the cohesiveness of the build. You will want all angles to be sharply defined and straight as an arrow.

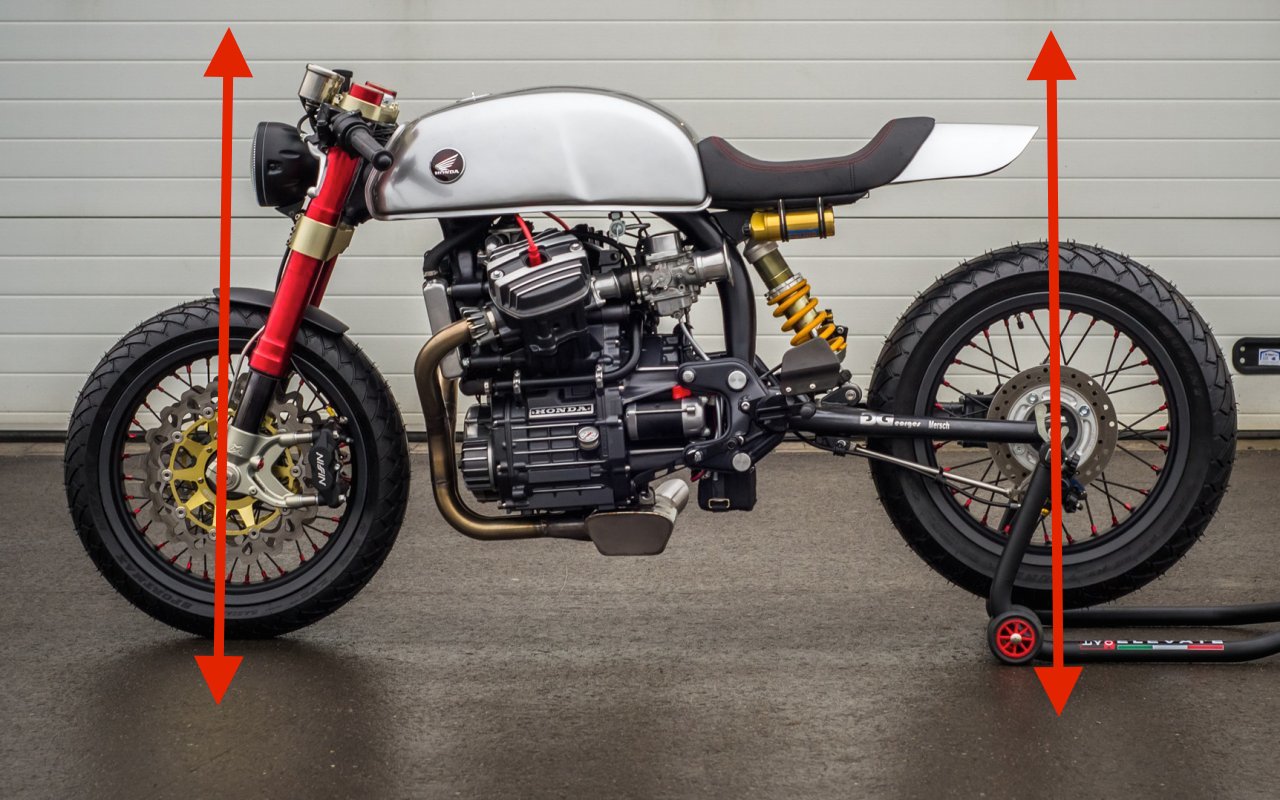
Fork Distance
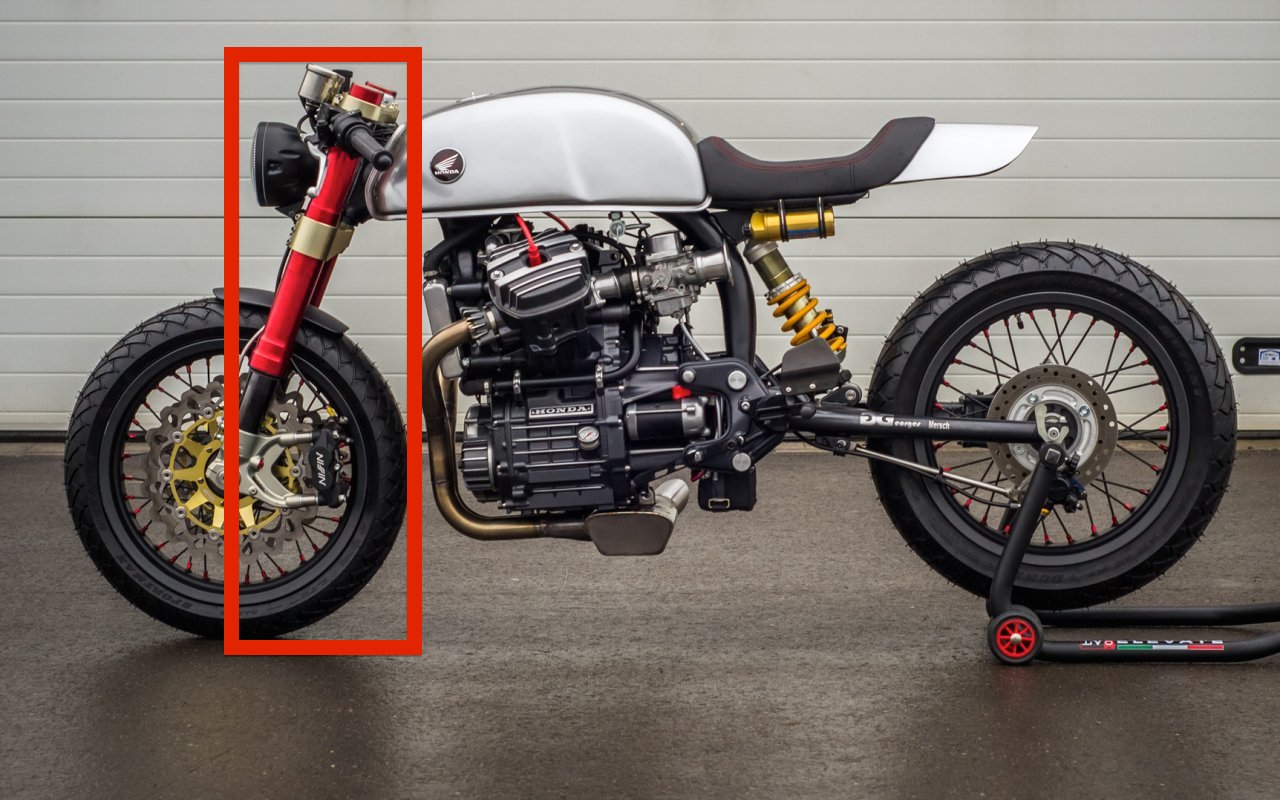
Your forks should be tucked in, close to the main body of the bike. This increases the aggressive look of a cafe racer.
(Hat tip to designer Charlie Trelogan for outlining these design principles on Bike EXIF.)
A Parts Guide
Builders differ on where to start your build. Some recommend inspecting the frame for cracks or damage, but we think that should be done before you buy a donor. That is why our parts list will start after that point.
A good jumping off point is with the bearings. You should replace the head bearings and races with OEM parts or a tapered steel bearing. After that, move to the swingarm bushing. The plastic stock unit is most likely worn out. You can use an OEM part, but a solid bronze needle roller bearing kit might be better, depending on your budget. While you are hanging out around the swingarm, have a look at the pivot shaft. You do not want any side-to-side sway: up and down movement should be free, but side-to-side (axial play) should be minimal.
Suspension is very important. You may need your rear shocks, and possibly your forks, but you cannot go about it half-cocked. The dampening and spring rates must be perfectly tuned for your bike’s and your weight, as well as taking into account the type of riding you will be doing. Keep in mind, if you lengthen the rear shocks, you get better turn-in for corners. The opposite is true if you lower the rear. Some builders opt for a monoshock setup, which looks incredible but requires intensive fabrication skills.
If your stock forks are straight and rust-free, then you have the option to retain them, but adding a fork spring and a dampening kit may help performance. What’s more, many builders are opting to swap out their original forks for modern inverted forks, often donor units from a GSX-R600, 750, or 1000. These typically cost $350-1000 on ebay, and will require a custom steering stem and possibly a new top triple — both of which can be purchased from a company like Cognito Moto.
Cafe racers are lightweight bikes by definition. You can lighten your bike in several ways. The first is to switch to remove any extraneous parts. This may include sissy bars, heavy king-queen seats, windshields, fenders, fairings, turn signal stalks, and more. Many cafe bikes run shortened fenders or none at all.
A lightweight fiberglass cafe racer seat is typically lighter than the stock unit, and it’s a must for the cafe look. Any number of companies make these units. Many are universal fit, meaning you will have to fabricate your own mounting brackets. However, if you have a relatively popular bike such as a Honda CB or Yamaha XS, you should be able to find seats made especially for your bike. You will typically have to cut the frame to install them, but the fabrication requirements are minimal. As an alternative, you could also opt for a “brat seat,” a flat bench seat that may allow for two-up riding — not an option with a solo cafe tail.
Often, builders replace their bulky stock tanks with slimmer units, either fiberglass aftermarket units or OEM tanks from other models. For instance, the Yamaha XS750/XS850 tanks are a popular swap on some builds, as they are long and slender with knee indentations. That said, many builders retain the stock tank, some of which have glorious patinas.
You will want to switch your handlebars to a set of clip-ons or clubman bars. This is one of the primary design hallmarks of any cafe build, and the ergonomics make for better handling in the corners.
When it comes to exhaust, look for small bore pipes that are as short as possible, staying in front of the rear cut-off point if possible. Many builders opt for pipe-wrap, though this has been falling out of style in recent years.
Above and beyond these parts, you may need:
- Different set of gauges. Typically smaller than stock.
- Different headlight. Many builders opt for smaller diameter units. This may require relocating the wiring harness if it’s kept in the headlight shell.
- New signals fore and aft, if your state requires them.
- A new taillight that matches your tail.
- New, sleeker mirrors and new grips.
Wow, that got long in a hurry. Hopefully, we haven’t forgotten too many items. If we have, please comment below for other riders who are looking for ideas on how to build a cafe racer. We have to help each other out!


Do you guy shave the same for bobbers? If not, please consider writing one – the info in this article is excellent for a prospective modder like myself, just not that into cafe racers.
Your built guide lines are perfect !
Ratio, proportions, and lines. Got it !
Thanks!
I enjoyed this article. Thanks.
I would like to offer a few suggestions from my personal experience that I hope will be useful:
If you plan on hooking up a set of forks from a modern bike (which, IMO you really should do):
#1 Electrics: Your donor bike wiring harness isn’t going to be a straight plug-in to the controls that come with a modern set of forks. It’s not super complicated but just be prepared to spend some time planning that out. Some older bikes (Suzuki for example) had stupid gadgets like self-canceling indicators – plan on ripping items like that out or at least be ready for some teeth grinding trying to make that work with modern controls.
#2 Throttle controls: Creating the throttle control system can be a little tricky depending on the bike. The throttle from an R1/R6 for example isn’t going to be a straight match – it’s often a single cable on some older bikes (the Virago for example) and a double on the R1/R6 – again not super complicated but it takes a little ingenuity to get that set up.
#3 Clearance: The modern forks can lower the engine clearance height. This may not be a problem for most setups but it’s worth considering. Example: Virago with R1 forks makes the bike sit a little lower than I would like – plan for that – choose your forks wisely.
One more item that requires a little planning is relocation of electrics. Moving the battery (and other items such as the rectifier etc.) from their original position (which is usually the way it goes), means you’re going to have to create/modify the wiring harness to accommodate for the new locations.
does anybody know where i can get some lightweight paint?