Want to grow Spring Onions (Allium fistulosum)? If you love tasty, versatile vegetables that only need minimal space and effort, then spring onions are an excellent choice! Even the tiniest plot or pot will accommodate them.
I grow all the flavoursome Alliums (Onion family). This includes garlic, leeks, onions and chives. You can swap them around in recipes and always have an ingredient to add flavour to whatever you’re cooking. If you haven’t grown them before, or are a beginner gardener, just follow the tips in this tutorial and give them a go!
Spring Onions, Shallots and Scallions!
OK – let’s get one thing straight first! If you’re confused about the names of these vegetables, it’s not surprising as they often differ depending on where you live!
Names and varieties include spring onions and shallots (Australia), eschallots, salad onions, Japanese or Welsh bunching onions (these grow in clumps rather than singly), scallions (US), green onions (China) and Egyptian or tree onions (bulbets grow in clusters on top of the stems).
Unless there’s a picture on your seed packet or catalogue, it’s often a case of wait-and-see what grows!!
So to simplify things, some varieties have a small bulb at the end of the stalk and some don’t!
 You can eat these mini bulbs just like you would a normal onion. The flavour is not as intense as the much larger true onions (Allium cepa) that can be grown from seed or bulb, and can be stored.
Spring onions (Allium fistulosum) don’t have a bulb. You grow spring onions from seed. ‘Allium’ means garlic in Latin and ‘fistulosum’ means hollow stemmed.
Bottom line is you can use the leaves of all spring onion cultivars to flavour your cooking. So, whatever you call them (I’m going to refer to them all as ‘spring onions’ to make life easy), they are a ‘must have’ addition to your kitchen. I simply can’t live without these delicious, handsome looking edibles.
How to Grow Spring Onions
- Flavour. There are a number of cultivars – from those with a very strong flavour to mild and sweet. You can’t go wrong with your choice – they’re ALL delish!!
- Space. One of the main reasons I grow these perennial vegetables is because they provide a high yield for the minimal space they need to grow. In the subtropics, they can be planted pretty much all year round. They grow equally well in containers as in the garden. Spring onions grow in a greenhouse in winter and even in water on your kitchen bench!
- Height and Depth – Spring onions grow to about 30-50cm (12-20in) singly or in clumps, depending on which variety you grow. They have a very shallow root system so can be grown in even the smallest of pots.
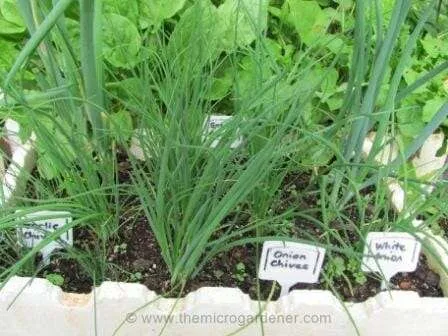 In just one polystyrene box garden, I squeezed in Garlic and Onion Chives, White Onions, Spring Onions & Welsh Bunching Onions! A perfect compact edible plant choice for micro gardens.
- Grow from Seed. This is dead easy! I save mine from previous crops by waiting until the flower head matures, then chopping it off and leaving in a paper bag until fully dry (about 2 weeks). Then simply shake the seeds into the bag, scoop them out and store in self-seal bags in a cool dry place. If you are buying seed, check my list of seed suppliers. Choose safe certified organic and non-hybrid seeds, so you can save your own seeds in future years and avoid chemically grown food.
Affiliate Links: Your support of this site is appreciated!
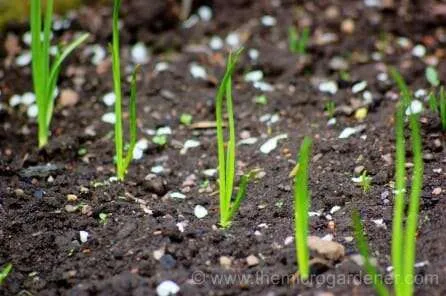
- I sow seeds in home made seed raising mix to save money. Keep moist by misting with water and cover to maintain humidity. They germinate in about 2 weeks.
- I prepare the garden soil with a good handful of rock minerals, organic soil conditioner and water in well.
Best Time to Sow Spring Onion Seeds/Plant Seedlings
- Spring onions are grown for their edible stem. They are best sown during the New Moon or First Quarter phases. (See Moon Gardening to learn how to maximise your harvest by planting in harmony with nature’s rhythms).
- Choose a variety to suit your climate. The cold-hardiest spring onion is Red Welsh, (the French call it Ciboule Commune Rouge). Benizone has violet coloured stalks and is also suited to cold areas. Beltsville Bunching will withstand hot and dry conditions more than most.
Affiliate Links: Your support of this site is appreciated!
- Succession plant spring onions every 3-4 weeks for a continual harvest during the year.
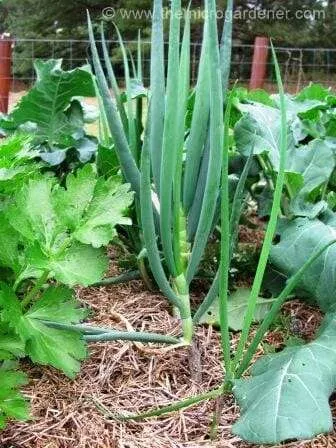
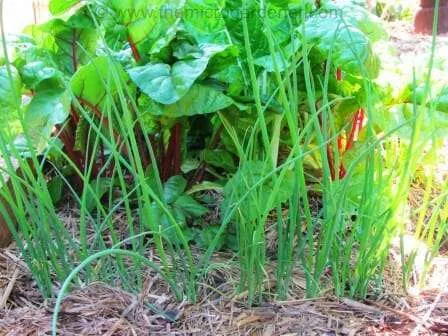 I sow spring onions and other varieties regularly for a continuous harvest all year – they only need minimal room in my garden so I tuck them into narrow spaces like in between these rainbow chard and some herbs.
- Sow 5mm (1/5in) deep, 5mm apart and about 15cm (6in) apart in rows. Up close and personal!!
- They take about 8-12 weeks to mature.
How to Sow Spring Onions Seeds
Spring Onion – Likes
- Well-drained, humus-rich soil. Add compost or worm castings from your worm farm if you have one and ensure the soil is loose and friable.
- Soil pH 6-7. Add lime if your soil is too acidic or sulphur if too alkaline. [See my DIY potting mix recipe for details].
- Regular watering, a sunny position and being grown quickly.
- A liquid fertiliser 2-3 times while growing. To keep the leaves green, I feed mine diluted seaweed, a weak worm juice made from diluting the liquid from my worm farm or a compost ‘tea’.
Affiliate Links: Your support of this site is appreciated!
- Containers or in garden beds – even a small pot will be fine for these guys so long as you keep it moist.
Spring Onion – Dislikes
- Being planted near peas and beans.
- Drying out and getting stressed.
- Competition from weeds.
- Feeling hungry!
Tips for Growing Spring Onions
Spring onions are incredibly generous and good value if you know what to do with them. Even if you buy them instead of growing spring onions, you can still get more for free. Here’s how:
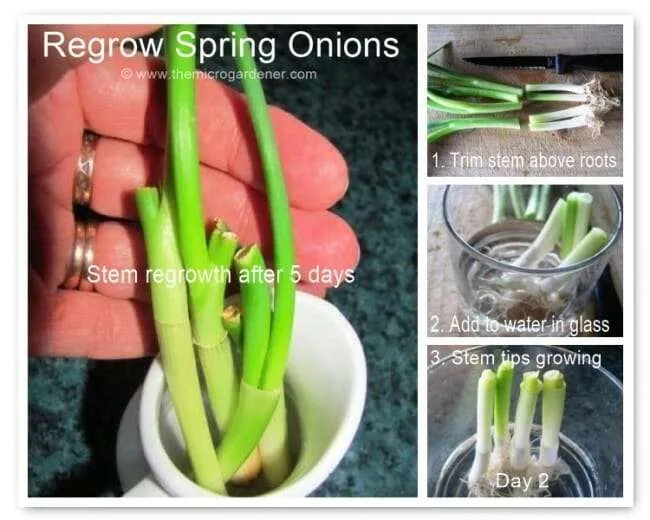 Cut your bought or home grown spring onions about 3cm (1in) above the root. Use the leaves in cooking and add the stem/roots to a glass with clean water to rehydrate roots. Change water daily & keep in a well lit position such as a windowsill or kitchen bench. Watch green leaves regrow. Snip as needed! Easy as that.
How to Grow Green Onions in Water
- If you are growing a bulb variety, be aware that snipping the leaves will deprive the bulb of the food it needs to grow to maturity!
 When bulb varieties start to flop over toward the soil, stop watering so the bulbs can dry out for a week or so before storing.
- Using a small fork, gently loosen the soil under the plant to harvest the bulbs. Brush off the soil and trim the roots. Hang the bulbs up in bunches until the leaf tops dry out completely. Then snip the leaves off above the bulb and store in a cool, dark and dry spot. This can extend your harvest for months!
- Container grown spring onions may need more frequent watering. Use a quality potting mix that retains moisture.
- Keep picking the outer leaves so new ones grow in the centre.
- Propagation by Division – If growing a bulb variety, you can divide clumps most easily during winter. Slice off individual plants (including the bulb and root) by using a downward motion with a sharp knife through the clump and loosening them apart. Once separated, trim the top and roots before you transplant.
- Uses – I pop them in as a companion plant to deter pests all over my garden. As they are members of the Liliaceae family, you can expect stunning, showy flower heads too which not only brighten up the garden but provide you with free seed!
How to Harvest and Store Spring Onions
- Start snipping leaves with scissors when they are tall, green and healthy looking.
- Depending on which variety you grow, they may develop a small white or brown bulb below the green leaves.
- If it gets too cold where you live, harvest the whole plant and regrow them in a glass of water.
- Spring onions don’t store for long in the fridge so wrap in plastic. I prefer to harvest as needed straight from the garden.
- Whilst you can pull up the entire plant, I think this is a wicked waste! If I need a whole plant, I use a sharp knife to cut the spring onion just above the roots leaving about 3cm (1 in) stem in the ground. Then I water in with seaweed and watch it regrow!
- I snip the outer leaf of alternate plants, which encourages more growth and allows each plant to recover and thicken up at the base.
- Snip flower stalks off if you want the plant to keep producing leaves. Or allow the edible flowers to grow and harvest them for use in salads, stir fries or as garnishes.
- Sometimes I’ve left my spring onions in the garden so long, they become as large and thick as leeks! They still have the hollow stem so are great for soups and stock.
- According to the Seed Savers’ Handbook, spring onions can be obtained by harvesting an early variety of white-bulbed onion at a very immature stage. Seeds will last 1-2 years if stored in a cool, dry place.
Spring Onions – Pests and Diseases
- When you grow spring onions, thrips are the main pest to watch for. These small sucking insects are active in the warmer months and most common in dry weather. Check the centre of the plant periodically. Make sure your plants are moist to avoid potential problems.
 They cause white, silver or grey blotches on the leaves and the tiny thrips tend to attack new leaves as they emerge.
- Sow seeds between carrots to deter carrot fly.
Spring Onions Health Benefits
All alliums:
- help to lower cholesterol;
- have antibacterial and antifungal qualities;
- help relieve sinus and chest ailments, asthma and bronchitis;
- contain an anticoagulant (cycloallin) which helps thin the blood and protect the heart;
- are high in sulphur so help purify the blood, clear the skin, cleanse the liver and build the immune system.
Spring Onions Recipes
- The more mature the plant, the stronger the flavour so if you want a mild onion taste, choose young slender leaves.
- Taste delicious raw when they are at their most nutritious.
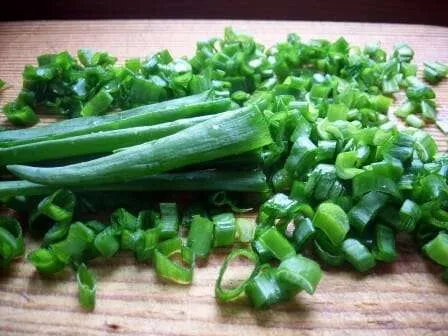
- Use both the green tops and the white or brown bulb sliced in salads, salsas, omelettes, pancakes, dips, curries, chutney, stir-fries and fish dishes.
- Flavour soups, casseroles, rice, noodles, vegetables, pasta, or egg, cheese and Asian dishes.
- Try these delicious recipes for inspiration or my salsa for something quick and fresh!
- 1 cup (about 3 large) tomatoes, chopped
- 4 spring onions, finely diced (on diagonal for presentation!)
- 1 small red onion, chopped
- ¼ cup chopped fresh coriander (or vary with basil, mint or parsley)
- ¼ tspn rock salt
- Coarse ground pepper
- 2 tblspns lime juice (or lemon if you prefer)
- In a medium sized bowl, stir together ingredients gently with a spoon to combine.
- Set aside in the fridge to chill for about 1 hour to allow the flavours to develop.
- Serve on crusty sourdough bread, with corn chips (GMO free!) or as a side dish to accompany curries, Mexican dishes, omelettes or your favourite meal!
- Variations: Add 1 chopped avocado, lebanese cucumber, a chilli or feta cubes.
Some of the links in this post are “affiliate links.” This means if you click on the link and make a purchase, I will receive a small commission. I only recommend products or services I use personally or believe will add value to my readers. Please read my Disclosure Statement for more details.
Like this article?
Please share! Join my free Newsletter for more exclusive insights, tips and all future articles.
© Copyright Anne Gibson, The Micro Gardener 2016. https://themicrogardener.com. All rights reserved.


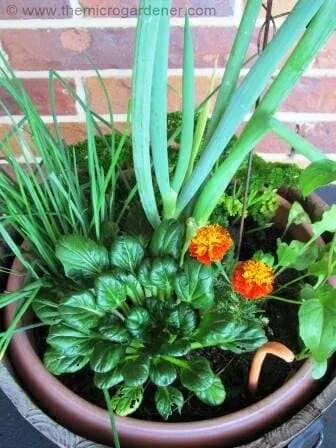





[…] Onions. These versatile root vegetables can be grown in pots and there are so many varieties. You should be able to find one that suits your climate. You can also grow spring onions. […]
I’m new to your website and newsletter. I am very interested in obtaining Spring Onion seeds, but I don’t know what they’re called. None of the seed companies I know of list them as Spring Onions. Is there another name for them? I’m interested in the white ones. Which seed company can I contact for these marvelous onions. They’re the only ones I can eat that do not cause me stomach distress. They taste so divine. Thanks for any assistance you can provide me.
Hi Pakaye,
There are a few names listed in the article. Names and varieties include spring onions and shallots (Australia), eschallots, salad onions, Japanese or Welsh bunching onions (these grow in clumps rather than singly), scallions (US), green onions (China) and Egyptian or tree onions (bulbets grow in clusters on top of the stems). It all depends on which country you live in as to what name they are referred to as.
That should help. Otherwise try the links in the article to seeds via Amazon.
Happy planting! Cheers Anne
Hi! I’ve been growing green onions in a pot, in my kitchen, for several months now. We recently started using a different plant food, Miracle Grow that sticks inside the soil. It seems to be working really well because the green onions have taken off! My question is they have now started producing it a thick, clear, slime from the inside, I wanted to make sure that this was normal since they smell very right and appear very healthy. I’m assuming this is just essentially the plants sap, but I didn’t see in your article where you mentioned it, so if you’re familiar with it, would you be able to confirm what it is? I tried pulling it up on a Google search, but I can’t get any clearer definition as to what it is or if it’s safe to eat.
Hi Diane
There’s nothing to worry about and the mucus membrane inside the spring onion (Allium fistulosum) – it is not only edible but incredibly beneficial for the immune system. There have been several scientific studies on this topic and to quote one study in part:
“Bunching onion [Allium fistulosum L. (Liliaceae)] secretes mucus in the cavities of its green leaves. The effects of the mucus, which is consumed as food, were examined. The mucus augmented the production of tumor necrosis factor (TNF)-α and monocyte chemotactic protein (MCP)-1 from RAW 264 cells and of interleukin (IL)-12 from J774.1 cells; however, extracts from green leaves and white sheaths did not. An oral administration of this mucus to mice augmented the immune functions of peritoneal cells by increasing TNF-α and IL-12 production and phagocytosis. It also augmented interferon (IFN)-γ production from spleen cells and natural killer (NK) activity. These results suggest that an oral administration of the A. fistulosum mucus can enhance natural immunity.”
So basically what this means is that the proteins contained in the mucus lining have been found in several studies* to have a beneficial impact on cancerous cells by supporting the activity of natural killer (NK) cells in the body. Tumour necrosis simply means the death of most or all of the cells in an organ or tissue due to disease, injury, or failure of the blood supply. So this vegetable (like other allium species including garlic) may play a role in preventing or destroying cancer cells.
Another study found that the “mucus could stimulate the antitumour and infection-preventative functions of NK cells” and supported the body’s immune system. Studies confirmed that it doesn’t matter whether you eat spring onions raw or cooked – they still provide the same benefits.
I grow and eat this vegetable almost on a daily basis and hope that this encourages you to revere its health benefits and enjoy this food in your diet.
If you’re interested, you can read more below.
https://www.jstage.jst.go.jp/article/fstr/22/2/22_235/_pdf/-char/ja
https://ffhdj.com/index.php/ffhd/article/view/569/1156
https://www.jstage.jst.go.jp/article/bbb/77/9/77_130084/_pdf/-char/ja
Cheers Anne
Hi Anne!
We’re doing a science project using spring onions this article has been very useful to us. We do need the date of publication of this post to give you the credit, however. So we were wondering if you could give us the date. Thank you so much!
Hi Jonathan. This post was first published November 27, 2012. It has been updated many times since then! Please check my Copyright page for more details on giving credit.
Cheers Anne
I enjoyed reading this. I recently started a small garden to help with my lifestyle change of eating more home prepared food. I struggled with planting my spring onion, kale and lettuce but this article is informative and straight to the point. Thank you
Happy to help Juliet. All these leafy greens need a compost rich soil to get enough nitrogen. You may find making your own potting mix will help if your soil is poor.
Can you use the stems/shoots of other onions like red onions as you would spring onions in cooking?
Absolutely Tam! All varieties taste great. However, when growing bulb onions, if you snip the shoots/stems/leaves before the root (bulb) has developed fully, then you WILL slow growth down considerably. These are the plant’s “solar panels” needed to turn the sun’s energy into food to grow the bulb. Cheers Anne
I am interested in spring onions that keep going all year round my father used to grow these and I cannot find them can you please help
Hi you don’t mention where you live so this is a bit tricky! You may be referring to perennial clumping spring onion varieties such as Welsh. Search for “perennial” in your location and you’ll likely find an heirloom seed variety suitable to grow all year around.
Thanks Anne, i have bookmarked link, and will look into it, 🙂 Mike.
Hi can you eat to much spring onions? stopped eating sweets etc, now munch on tomatoes raw onions, and spring onions, i see myself eating 2 bundles a day, even a whole raw onion, i love it, trying to cut the beer belly to. trying to grow them indoors, bought seeds, will try at weekend. 🙂
Hi Mike
Great to hear you’re enjoying a healthier diet with fresh vegies. I am not a nutritionist but I try to be moderate in all things and get a balance of a wide variety of foods. Have fun with your indoor garden. You may like to try growing some of your favourite vegies and herbs as microgreens too.
Hi Anne, I love your site with all the info and will be trying out some of your ideas. Thanks
Thanks Ken – would love to hear what works for you. You’re welcome to send pics and feedback any time. Or post on our community Facebook page.
Hi Anne,
Wonderful post planning to grow the spring onions now. Have sown few seeds but leaves that have come out are very thin and short ones and have stopped growing beyond 5 to 6 inches need to try again.
I had read your post on growing Peas where you mentioned they dislike being grown near garlic/onions. Wanted to share my experience, i planted 3 peas in a small container and tried training them up the window grill. The creeper would refuse to stick to it though it was throwing out tendrils, it was moving closer to Garlic planted in a small container by the side and it finally wrapped itself round the garlic plant. I had to move it out and have now tied the creeper with thread to keep it n position.
Thanks Pallavi for sharing your experiences. I guess the difference in your case is the peas and garlic were NOT growing in the same soil i.e. the plants were not releasing chemical substances (exudates) into the SAME soil as they were in different pots. So the peas were not competing for the same nutrients and thus just used the garlic as a convenient trellis. Best of luck with your next planting. 🙂
Hi!
I think my spring onions might have Thrips – where the plant meets the soils there are loads of tiny insects scurrying around. How do I get rid of these please? All spring onion in the same planter are affected.
Regards,
Eileen
When you bring your spring onion or lettuce in from the garden place them in water and add a piece off coal it will bring them to life. Try this you will be surprised.
Thanks for the tip Frank. Will check this out!
What an amazing post Annie! I have been slack planting out onions in our new veggie gardens because aside from the garlic that grows wild out in the garden from cloves that my brother planted here years ago when dad was alive I have a fear of growing onions for some reason. I wonder if onion seed can be imported into Tassie? I know we can’t get anything from the Solanaceae family and as onions are one of Tassies main crops here they might be considered one of the “danger” imports. I will have to check through those seed companies and as you pointed out regarding the amount of space that they take up I might just have to mess about with some Alliums this year 🙂
Hi Fran
Thanks for your feedback as always. Lucky you with wild garlic. How wonderful. I checked the Green Harvest catalogue for Alliums and seems there’s no problem with sending onion seed to Tassie. The ‘Long Tropea Red’ is an Italian heirloom variety with torpedo-shaped bulbs, quite long (15cm) and of course red skin, suited to eating raw in salads as it’s quite mild and suits Tasmania. Recommended to sow this variety in your region around July but try the spring onions too as they grow all year. You may be able to pick up a bunch locally and regrow from their roots, then allow some to flower and save your own seeds.
I’ve grown heaps in pots and they last forever. There’s one that has been in the same pot for years and just grows, flowers (I snip the head off and save the seed), then reshoots new leaves and keeps going! What a great value plant to have when they take up so little room. There’s another variety that you might be interested to look at – the ‘Green Stem Welsh Onion’ which has no bulb, is an open-pollinated cert organic perennial and has lovely red stems in cold climates. Hope this helps! Happy planting 🙂