
Articles
How To Make A Crumb Quilt
Modified: January 5, 2024
Learn how to make a beautiful crumb quilt with our informative articles. Discover new techniques and create stunning designs for your next quilting project.
(Many of the links in this article redirect to a specific reviewed product. Your purchase of these products through affiliate links helps to generate commission for Storables.com, at no extra cost. Learn more)
Introduction
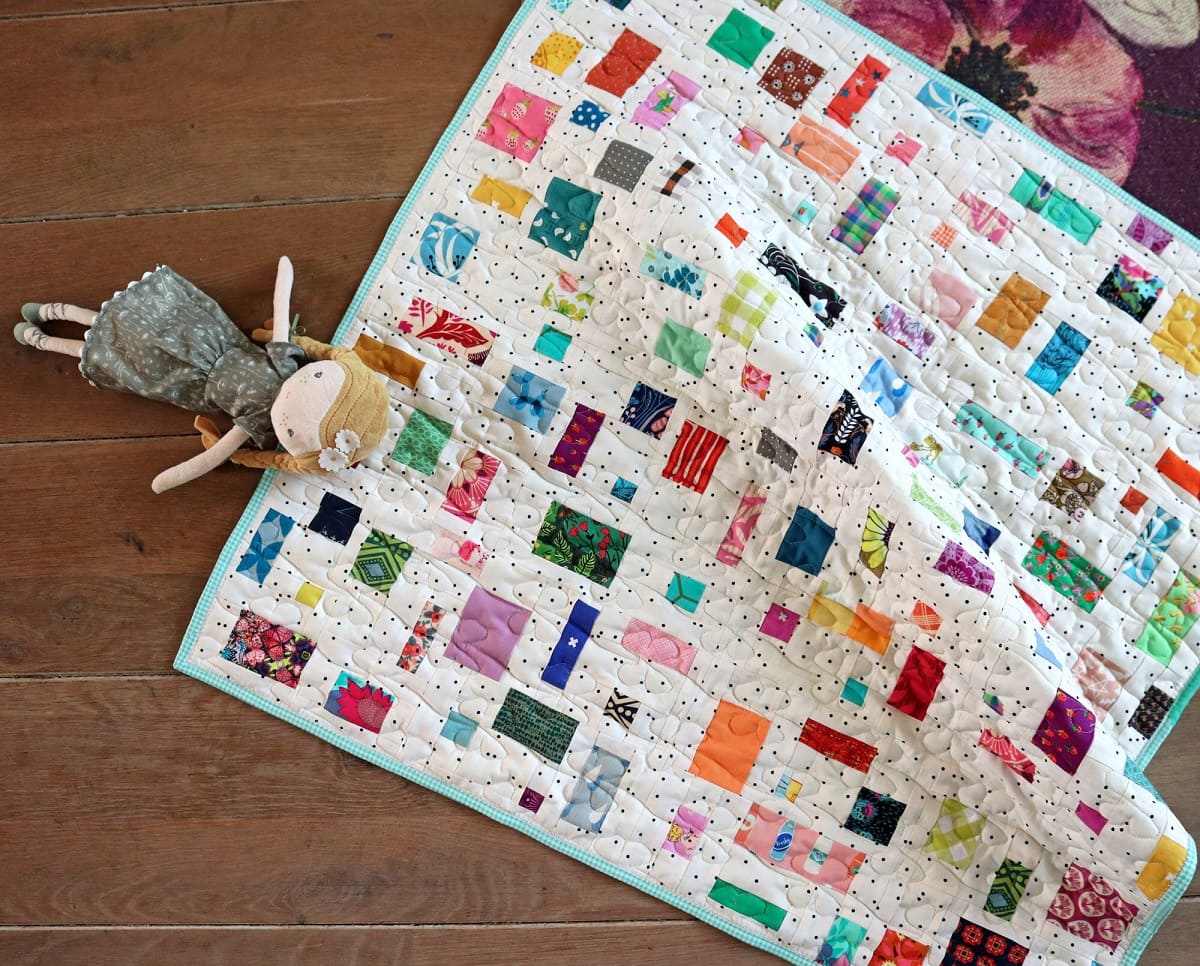
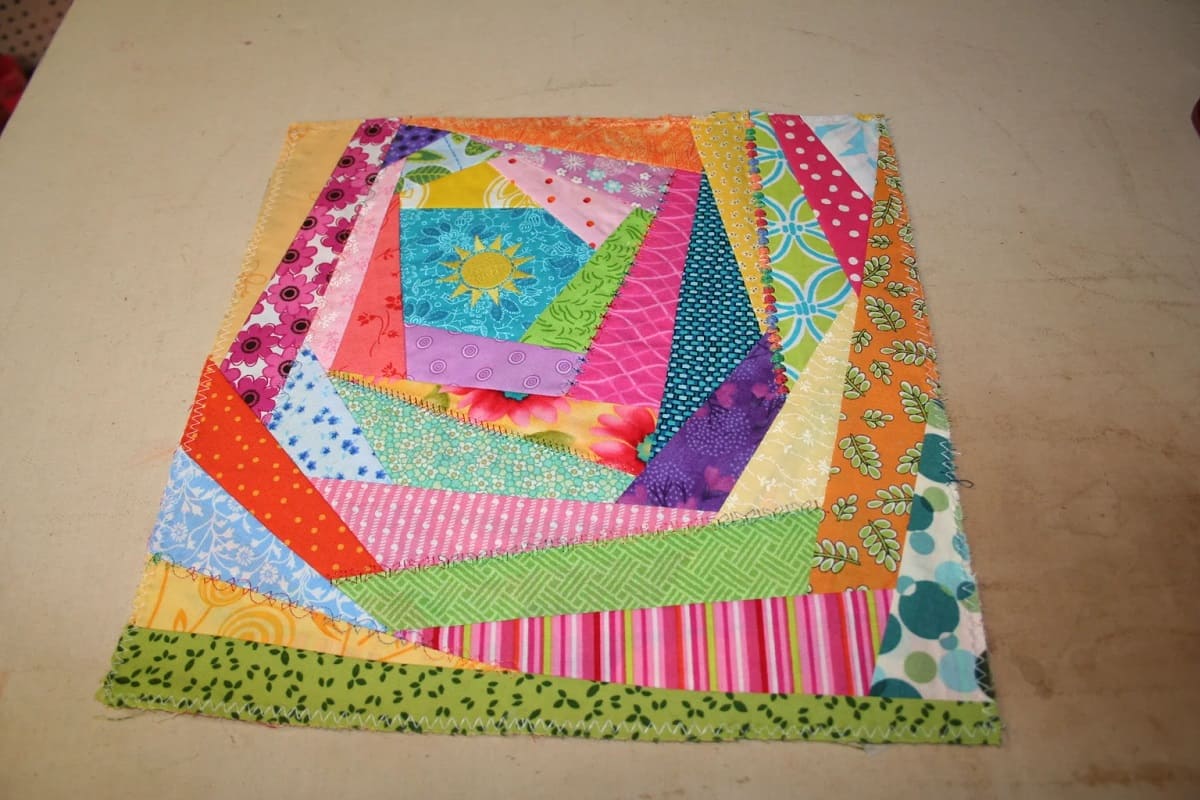
Welcome to the world of crumb quilting! Crumb quilting is a creative and innovative quilting technique that allows you to bring new life to your fabric scraps. Instead of letting those smaller pieces of fabric go to waste, crumb quilting allows you to piece them together into a beautiful and unique quilt.
Crumb quilts are known for their charm and character. They are often made up of an assortment of fabric scraps, resulting in a quilt that tells a story of its own. Each fabric crumb represents a piece of history, a cherished memory, or a fabric remnant too precious to be discarded.
In this article, we will guide you through the process of making a crumb quilt. From choosing fabrics to sewing the pieces together, we will cover all the necessary steps to create a stunning crumb quilt of your own.
So gather up your fabric scraps, dust off your sewing machine, and let’s get started on this crumb quilting adventure!
Key Takeaways:
- Embrace the beauty of fabric scraps and create a unique, meaningful crumb quilt that tells a story through color, texture, and creativity. Let your imagination soar and enjoy the process of transforming fabric bits into a work of art.
- Turn ordinary fabric scraps into a stunning crumb quilt that reflects your personal style and resourcefulness. From selecting fabrics to quilting and finishing, each step is an opportunity to showcase your creativity and dedication to the art of quilting.
Materials Needed
Before diving into the crumb quilting process, it’s important to gather all the necessary materials. Luckily, crumb quilting doesn’t require many supplies, making it an accessible and budget-friendly quilting technique. Here are the materials you’ll need:
- Fabric scraps: These can be from previous quilting projects, old clothes, or any other scrap fabrics you have on hand. Aim for a variety of colors, patterns, and textures to add visual interest to your crumb quilt.
- Fabric scissors or rotary cutter: These tools will be used to cut your fabric into smaller crumb-sized pieces.
- Sewing machine: A sewing machine is essential for piecing together your crumb quilt. Make sure it’s in good working condition and you have the necessary accessories like extra needles and bobbins.
- Thread: Choose a thread color that complements your fabric scraps. Opt for a durable thread that can withstand the wear and tear of a quilted project.
- Pins or sewing clips: These will be used to temporarily hold pieces together while sewing.
- Ruler and cutting mat: These tools will come in handy when measuring and cutting your fabric crumbs.
- Iron and ironing board: Pressing your fabric pieces will ensure neat and precise seams.
- Quilt batting: This is the soft layer that goes between the quilt top and backing. Choose a batting that suits your desired quilt thickness and warmth.
- Quilt backing fabric: This is the fabric that will be on the backside of your quilt. Measure the desired size according to your quilt top.
- Binding fabric (optional): If you plan to add binding to your crumb quilt, you’ll need additional fabric for this. Binding is the fabric strip that finishes off the edges of the quilt.
Once you have gathered all these materials, you are ready to embark on your crumb quilting journey. With a little creativity and resourcefulness, you can transform ordinary fabric scraps into a beautiful work of art.
Step 1: Choosing Fabrics
The first step in creating a crumb quilt is selecting the fabric scraps you will use. Crumb quilting is all about embracing the beauty of small fabric pieces, so don’t be afraid to mix and match different colors, patterns, and textures.
Here are some tips to help you choose fabrics for your crumb quilt:
- Scrap bag: If you have a stash of fabric scraps, start by going through your scrap bag. Look for pieces that speak to you or bring back fond memories. These can be leftovers from previous quilting projects, old clothes, or even small fabric remnants you’ve collected over time.
- Color palette: Consider the overall color palette you want for your crumb quilt. You can aim for a cohesive color scheme or embrace a more eclectic mix. Remember, crumb quilts often have a whimsical and scrappy appearance, so don’t be afraid to experiment.
- Contrast: Look for fabrics that provide contrast against each other. Combining light and dark fabrics, bold patterns with more subtle ones, or different textures can create visual interest and dimension in your quilt.
- Scale: Consider the scale of the fabric prints. Mixing small-scale prints with larger ones can add depth to your crumb quilt.
- Texture: Explore different textures such as cotton, linen, flannel, or even denim. Incorporating different textures can add an extra element of interest to your quilt.
Remember, the beauty of crumb quilting is that there are no strict rules. It’s all about embracing the randomness and creativity that comes with using fabric scraps. Trust your instincts and let your imagination guide you as you select the fabrics for your crumb quilt.
Once you have gathered your chosen fabrics, it’s time to move on to the next step: preparing the fabrics for crumb quilting.
Step 2: Preparing the Fabrics
After selecting the fabrics for your crumb quilt, it’s important to prepare them before cutting them into smaller pieces. Preparing the fabrics will ensure that they are ready for piecing together and will result in a more cohesive and durable quilt.
Here are the steps to follow when preparing your fabrics for crumb quilting:
- Wash and press: If your fabric scraps are pre-washed, skip this step. However, if they are unwashed or you’re unsure, it’s a good idea to wash them before starting your project. This will remove any excess dye or chemicals that could potentially bleed into your quilt. After washing, press the fabrics with a hot iron to remove any wrinkles.
- Trim and square: Before cutting your fabrics into crumbs, trim any selvage edges and square them up. This will ensure that your fabric pieces are straight and uniform, making them easier to sew together later on.
- Fabric stability: Depending on the type of fabric scraps you’re using, you might need to stabilize them with interfacing or fusible web. This step is especially important if you’re working with stretchy or delicate fabrics. Follow the manufacturer’s instructions to apply the stabilizer and ensure that your fabric scraps are sturdy and easy to work with.
By taking the time to properly prepare your fabrics, you’ll be setting yourself up for success when it comes to piecing together your crumb quilt. This step may seem tedious, but it is an essential part of the process that will yield better results in the end.
Once your fabrics are prepped and ready, it’s time to move on to the next step: cutting the fabrics into crumbs.
Step 3: Cutting the Fabrics into Crumbs
Now that your fabrics are prepared, it’s time to cut them into smaller pieces, commonly known as “crumbs.” These fabric crumbs will be the building blocks for your crumb quilt.
Here’s how you can cut your fabrics into crumbs:
- Choose a size: Decide on the desired size for your fabric crumbs. This can range from small squares to irregular shapes, depending on your preference. Keep in mind that smaller pieces will create a more intricate and scrappy look, while larger pieces will provide a bolder and more geometric design.
- Using a ruler and rotary cutter or fabric scissors, cut your fabrics into small, random shapes. Embrace the freedom of this process and don’t worry about perfectly shaped crumbs. The charm of crumb quilts comes from the diversity and organic nature of the fabric pieces.
- As you cut your fabrics into crumbs, separate them by color or pattern if desired. This will make it easier to create cohesive sections or specific design elements in your crumb quilt.
- Continue cutting your fabric scraps into crumbs until you have a substantial collection to work with. Remember, you can always cut additional crumbs as you go along, so don’t feel the need to cut everything at once.
Once you have a pile of fabric crumbs, you’re ready to start arranging them and bringing your crumb quilt to life. In the next step, we’ll explore different ways to arrange and sew together the fabric crumbs to create your masterpiece.
But before we move on, take a moment to appreciate the beautiful assortment of fabric crumbs you’ve created. Each piece carries its own story and contributes to the unique narrative of your crumb quilt. It’s these small fragments that will come together to form a beautiful and meaningful whole.
When making a crumb quilt, use a variety of fabric scraps in different sizes and shapes to create a visually interesting and textured design. Sort scraps by color or theme to help maintain a cohesive look.
Read more: How To Make A Quilt
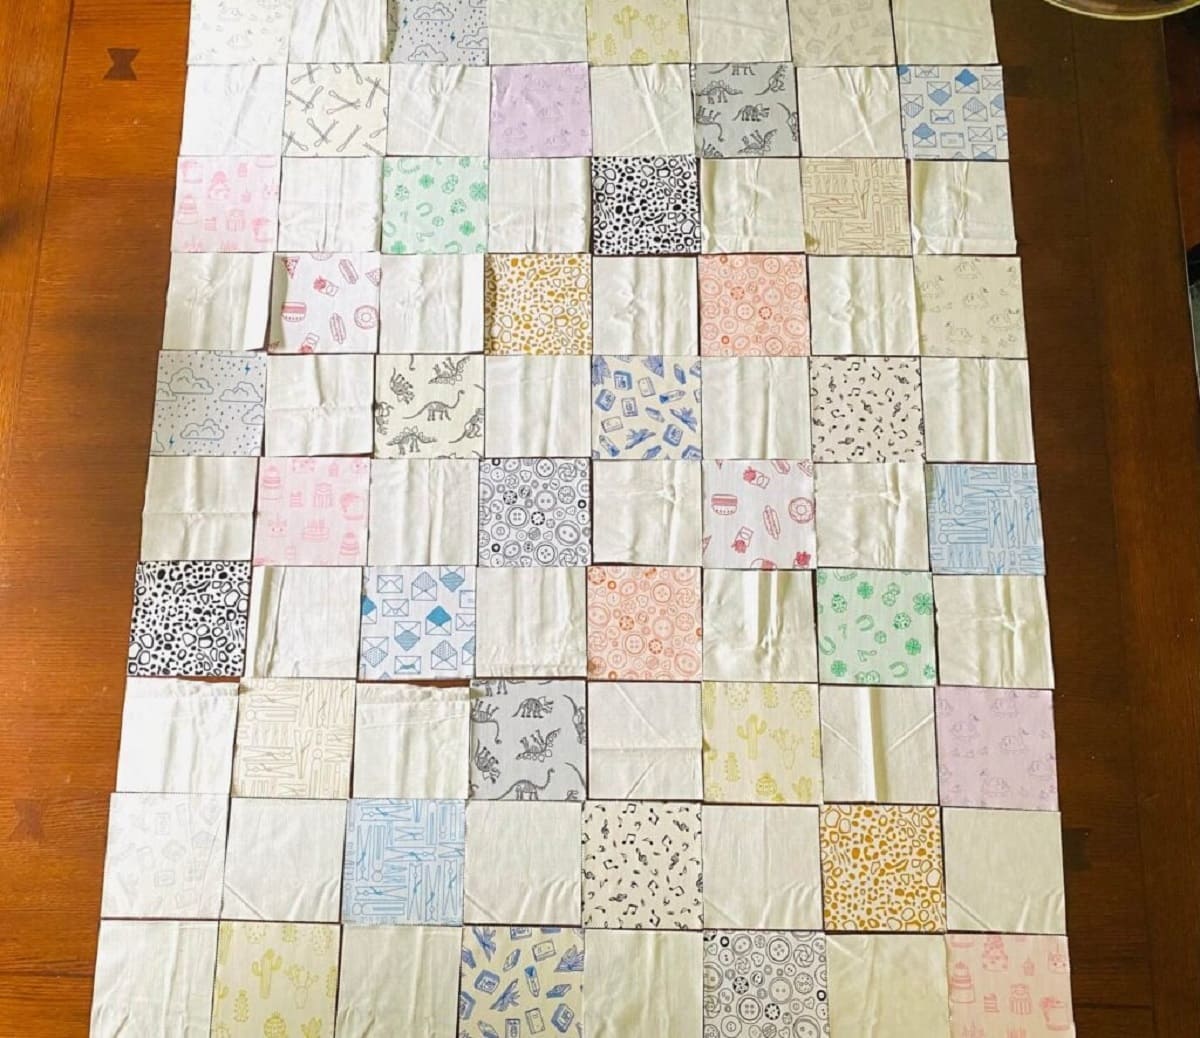
Step 4: Arranging the Crumbs
Now that you have a collection of fabric crumbs, it’s time to let your creativity shine by arranging them in a way that appeals to you. The arrangement of the crumbs will determine the overall design and layout of your crumb quilt.
Here are a few approaches to consider when arranging the fabric crumbs:
- Random placement: Embrace the organic and scrappy nature of crumb quilts by randomly placing the fabric crumbs. This approach allows for a playful and spontaneous design where no two sections are the same.
- Color coordination: If you prefer a more cohesive look, arrange the fabric crumbs by color. Experiment with different color combinations and create sections or blocks in your crumb quilt that feature a specific color scheme.
- Pattern play: Have fun playing with different fabric patterns as you arrange the crumbs. Mix and match stripes, florals, plaids, and solids to achieve a visually interesting and dynamic design.
- Creating focal points: Consider creating focal points or focal areas within your crumb quilt. This can be achieved by using larger or bolder fabric crumbs to draw attention to specific sections of the quilt.
Don’t be afraid to experiment and try different arrangements before settling on one that speaks to you. Lay out the fabric crumbs on a design wall or a large flat surface to visualize how they will come together. Play around with different configurations until you find the arrangement that resonates with your artistic vision.
Remember, the beauty of crumb quilting is in its imperfections and eclectic charm. Don’t worry about achieving perfection; instead, focus on creating a quilt that reflects your unique style and showcases the diversity of your fabric collection.
Once you’re satisfied with the arrangement of your fabric crumbs, it’s time to move on to the next step: sewing the crumbs together to form the quilt top.
Step 5: Sewing the Crumbs
With your fabric crumbs arranged in a pleasing layout, it’s time to bring them together by sewing them into a cohesive quilt top. This step will require your sewing machine and some basic sewing skills.
Follow these steps to sew the fabric crumbs together:
- Start with the first two fabric crumbs that you want to sew together. Place them right sides together and align the edges.
- Using a 1/4-inch seam allowance, sew the two fabric crumbs together. Backstitch at the beginning and end to secure the seam.
- Continue adding more fabric crumbs one by one, sewing them together in the desired order. Take your time to ensure that the seams line up and the fabric crumbs are sewn securely.
- As you sew, press the seams open or to one side to reduce bulk and create a flatter surface.
- Continue adding fabric crumbs until you have sewn all the pieces together to form the complete quilt top.
Remember to maintain an accurate 1/4-inch seam allowance throughout the sewing process. This will ensure that your pieces align properly and your quilt top stays square.
If you’re working with irregularly shaped fabric crumbs, don’t worry about matching up every edge perfectly. The charm of crumb quilting lies in the creative freedom and playful nature of piecing together fabrics of different shapes and sizes.
Throughout the sewing process, admire the unique combinations of colors, patterns, and textures that emerge. Each seam you sew brings your crumb quilt one step closer to completion.
Once all the fabric crumbs are sewn together, step back and marvel at the beautiful quilt top you’ve created. The fusion of fabric scraps has transformed into a work of art that tells a story of creativity and resourcefulness.
Next, let’s explore an optional step: adding borders to your crumb quilt, which can enhance its visual appeal and provide a finished look.
Step 6: Adding Borders (Optional)
Adding borders to your crumb quilt is an optional step that can give your quilt a polished and finished look. Borders can frame the quilt top, add a pop of color, or provide additional design elements to complement the fabric crumbs.
If you decide to add borders to your crumb quilt, follow these steps:
- Measure: Measure the length and width of your quilt top. Decide on the desired width of your borders.
- Cut border fabric: Cut strips of fabric for the borders, making sure they are long enough to fit the sides of the quilt top. The width of the strips should correspond to the desired width of the borders.
- Attach side borders: Place the border strips right sides together with the quilt top’s side edges. Sew the border strips to the sides of the quilt top, using a 1/4-inch seam allowance. Press the seams towards the border fabric.
- Measure and cut top and bottom borders: Measure the width of the quilt top, including the newly added side borders. Cut strips of fabric for the top and bottom borders, making sure they are long enough to fit across the width of the quilt top. The width of the strips should correspond to the desired width of the borders.
- Attach top and bottom borders: Place the border strips right sides together with the quilt top’s top and bottom edges. Sew the border strips to the top and bottom of the quilt top, using a 1/4-inch seam allowance. Press the seams towards the border fabric.
Once the borders are attached, take a step back and admire the transformation of your crumb quilt. The addition of borders can provide a sense of completion and create a visually appealing frame for your quilt top.
Keep in mind that borders can be as simple or as elaborate as you desire. You can choose to add multiple borders, vary the widths, or incorporate additional design elements like cornerstones or piping. The choice is yours, and it’s an opportunity to further personalize your crumb quilt.
Finally, it’s time to move on to the last step: quilting and finishing your crumb quilt.
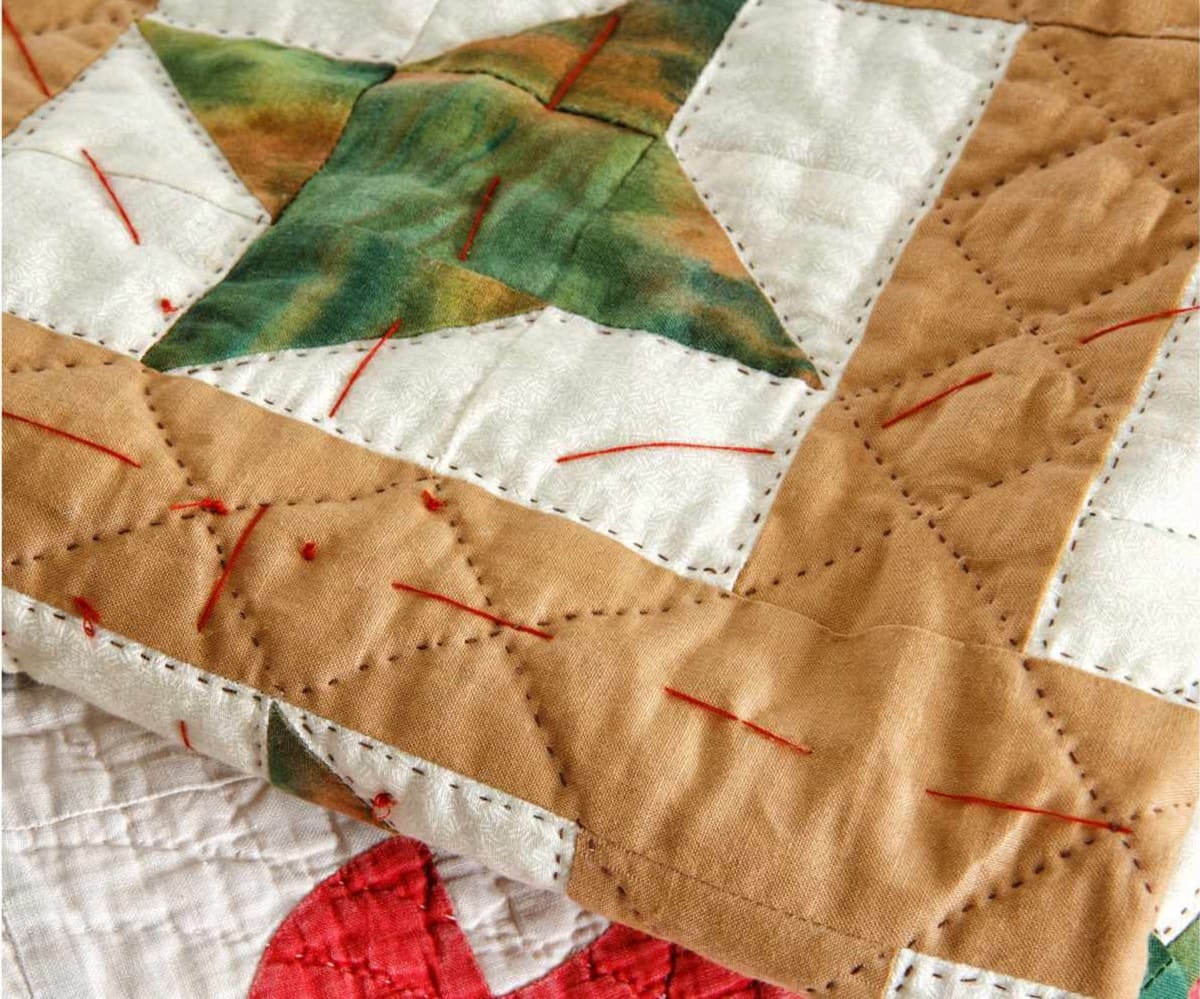
Step 7: Quilting and Finishing
With the quilt top complete, it’s time to move on to the final steps of quilting and finishing your crumb quilt. Quilting is the process of stitching the three layers of the quilt together to add durability and create a beautiful texture.
Here’s how you can quilt and finish your crumb quilt:
- Layer the quilt: Place the quilt top right side up on a flat surface. Add the quilt batting on top of the quilt top, smoothing out any wrinkles or folds. Finally, place the quilt backing fabric right side down on top of the batting. Make sure all three layers align at the edges.
- Baste the layers: To hold the layers together during the quilting process, baste them. You can use safety pins, basting spray, or long machine stitches to secure the layers. Start from the center and work your way outwards, making sure there are no puckers or wrinkles.
- Choose a quilting method: Decide on the quilting method you want to use. This can be hand quilting, machine quilting, or a combination of both. Explore different quilting designs and techniques to enhance the overall appearance of your crumb quilt.
- Quilt the layers: If you’re hand quilting, use a quilting needle and quilting thread to stitch through all layers. If you’re machine quilting, use a walking foot and adjust the stitch length and tension according to your desired quilting pattern. Follow your chosen quilting design, whether it’s simple straight lines, free-motion quilting, or custom designs.
- Finish the edges: Once you’ve completed the quilting, trim the excess batting and backing fabric, leaving a 1/4-inch seam allowance around the quilt top. Decide on the finishing method for the quilt edges. You can use binding to enclose the raw edges, create a facing, or even leave the edges raw for a more rustic look.
- Label and care for your quilt: Consider adding a label to your crumb quilt, including your name, the date of completion, and any special details you’d like to include. This will serve as a reminder of your creativity and effort. Finally, follow the care instructions for your specific quilt fabric and batting to ensure its longevity.
As you complete the quilting and finishing steps, take a moment to reflect on the journey you’ve embarked on. Your crumb quilt showcases your resourcefulness, creativity, and dedication to preserving the beauty of fabric scraps.
Now, find the perfect spot to display and enjoy your crumb quilt. Whether it’s on a bed, draped over a couch, or proudly hung on a wall, your crumb quilt will be a testament to your quilting skills and the unique story it tells through the fabric crumbs.
Congratulations on completing your crumb quilt masterpiece. Your quilt is a true work of art, and it will surely be cherished for years to come.
Read more: How To Make A Patchwork Quilt
Conclusion
Congratulations on completing your crumb quilt! Through the process of selecting fabrics, cutting them into crumbs, arranging and sewing them together, adding borders, quilting, and finishing, you have transformed ordinary fabric scraps into a beautiful, unique, and meaningful quilt.
Crumb quilting is not only a creative way to repurpose fabric scraps, but it also allows you to tell a story through your quilt. Each fabric crumb carries its own history and brings a special touch to the overall design. The randomness and eclectic charm of the crumb quilt make it a true reflection of your personal style and resourcefulness.
Throughout this journey, you have tapped into your artistic instincts, experimented with color and pattern combinations, and explored different techniques to bring your crumb quilt to life. Your dedication and attention to detail have resulted in a quilt that is not only visually captivating, but also holds sentimental value with every stitch.
As you take a step back and admire your finished crumb quilt, remember to appreciate the process as much as the end result. Each seam, each fabric crumb, and every decision you made along the way has contributed to the unique character of your quilt. It’s a testament to your creativity and passion for the art of quilting.
Now, you have a stunning crumb quilt that can bring warmth and beauty to your home or serve as a heartfelt gift to someone special. Share the story behind your crumb quilt, about the memories and fabrics that went into its creation, and watch as it becomes a cherished heirloom for generations to come.
So gather your fabric scraps, ignite your imagination, and embark on your own crumb quilting adventure. Let your creativity soar, and enjoy the process of transforming fabric bits into a work of art. Happy crumb quilting!
Frequently Asked Questions about How To Make A Crumb Quilt
Was this page helpful?
At Storables.com, we guarantee accurate and reliable information. Our content, validated by Expert Board Contributors, is crafted following stringent Editorial Policies. We're committed to providing you with well-researched, expert-backed insights for all your informational needs.


0 thoughts on “How To Make A Crumb Quilt”