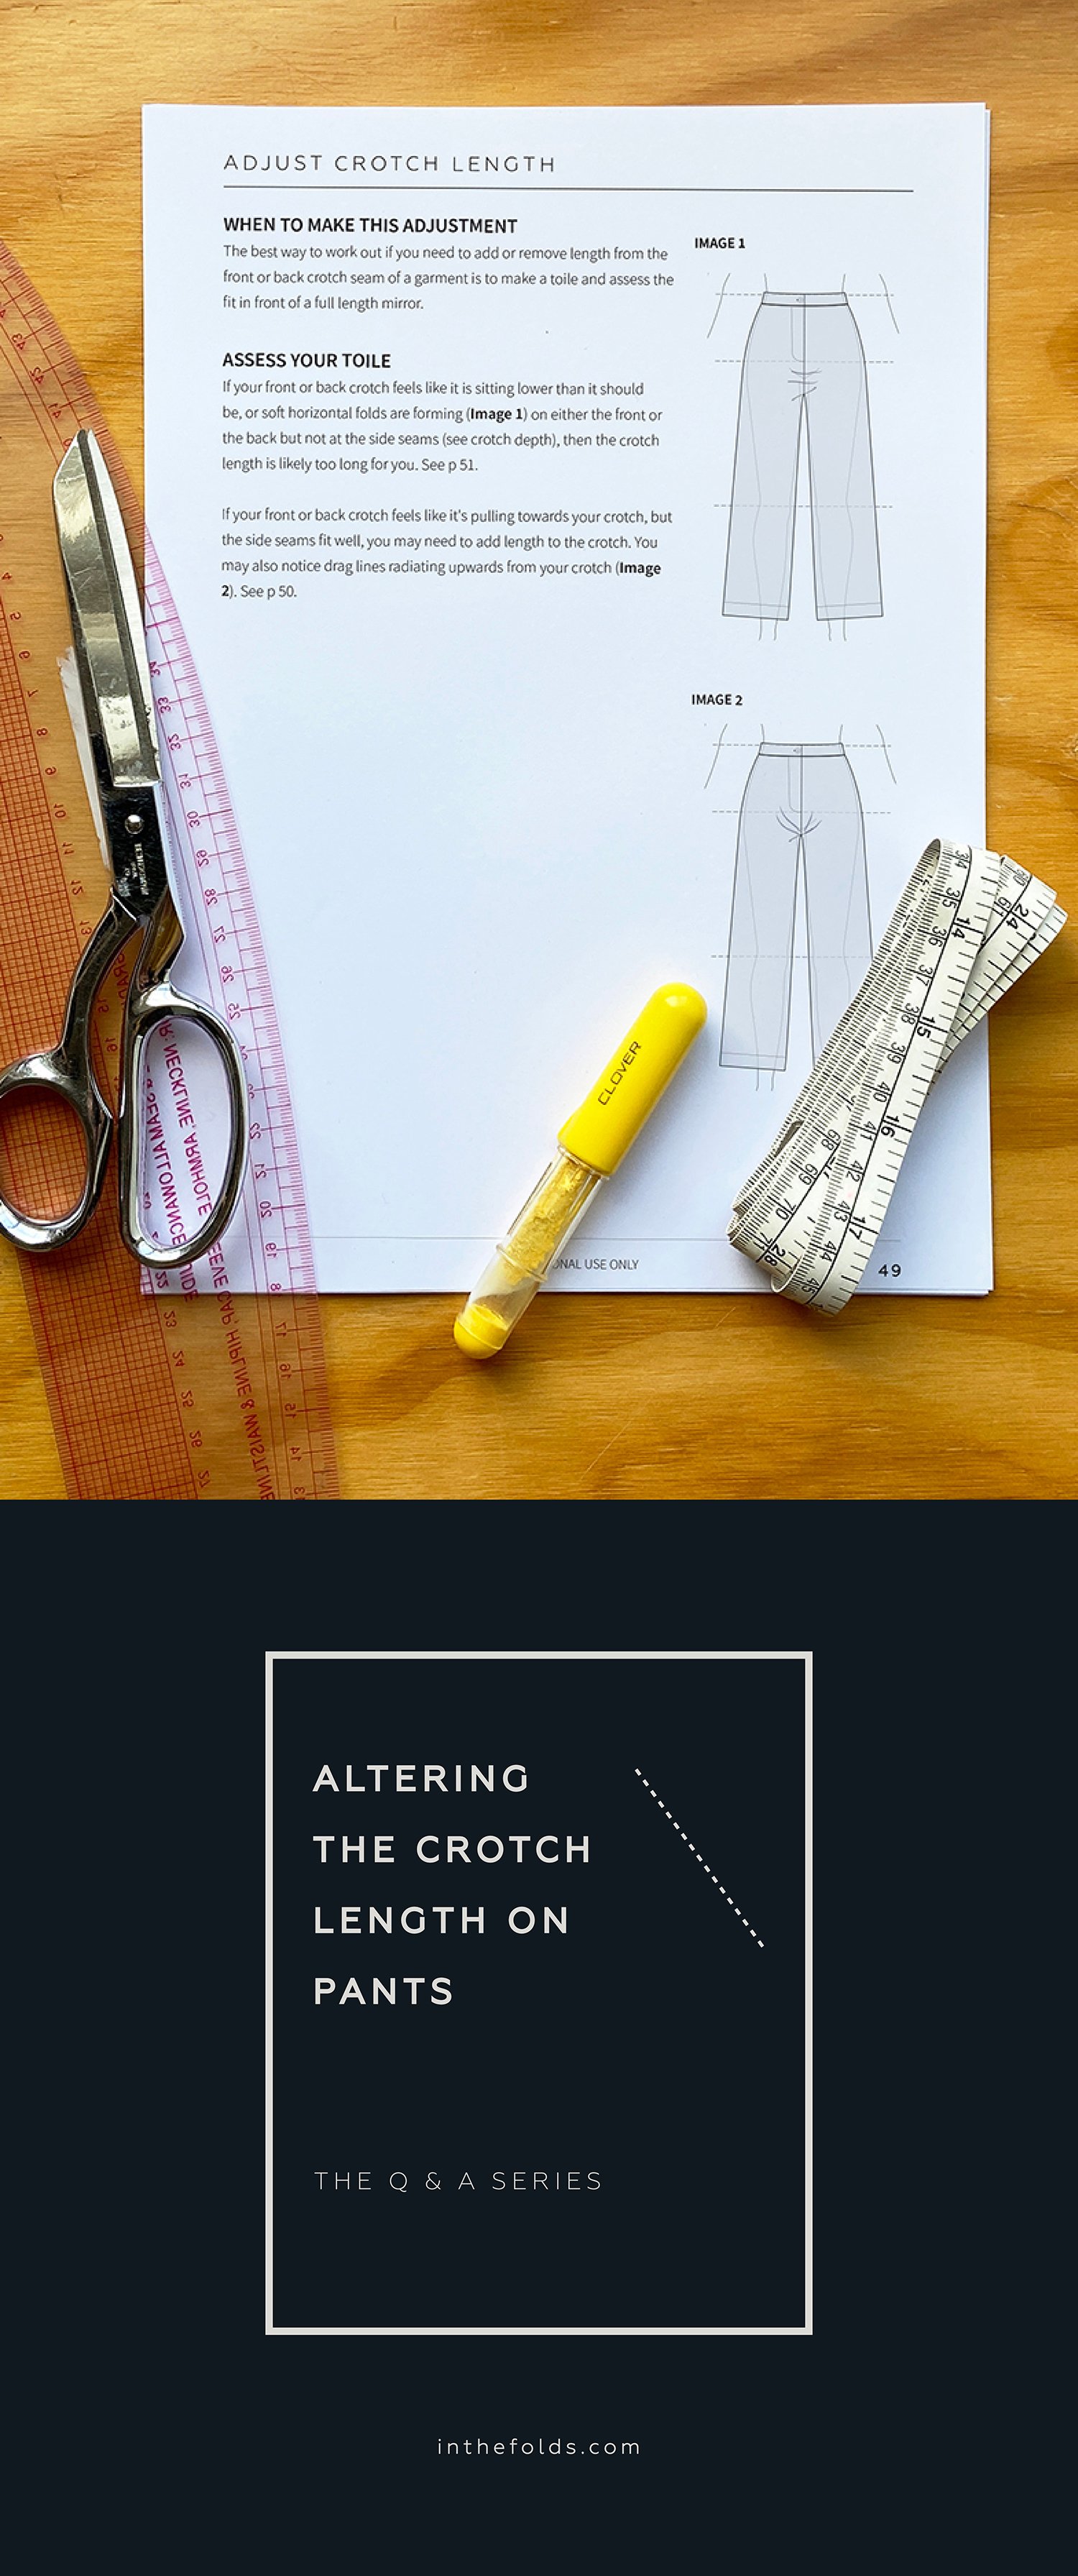
THE Q & A SERIES
HOW TO ALTER THE CROTCH LENGTH ON PANTS
My biggest challenge is how to alter to crotch/rise in pants. I need to lengthen the crotch in back without adding width and shorten rise in front. I'm a size 6 US / 10 British so the issue for me is not adding more room. It's all about the fit!
Thank you and so grateful for this series.
Best regards,
Mary
Bend, USA
Hi Mary,
What’s great about your question is that you already know what changes you need to make to a pants pattern to achieve a great fit. Often diagnosing the issue is the trickiest part of the pants fitting process. Once you know what you need to do, it’s just a matter of working through the alterations methodically.
You can definitely alter the crotch length in different ways on the front and the back of pants.
As the alteration is made only to the crotch curve (and not the side seam), it’s fine to remove crotch length from the front and then add crotch length to the back.
WHEN TO ADJUST CROTCH LENGTH
The best way to work out if you need to add or remove length from the front or back crotch seam is to make a toile and assess the fit in front of a full length mirror while it’s being worn.

If the front or back crotch feels like it is sitting lower than it should be, or soft horizontal folds are forming (Image 1) on either the front or the back but not at the side seams, then the crotch length is likely too long for you.
If the front or back crotch feels like it's pulling towards you, but the side seams fit well, you may need to add length to the crotch. You may also notice drag lines radiating upwards from your crotch (Image 2).
HOW TO LENGTHEN CROTCH LENGTH
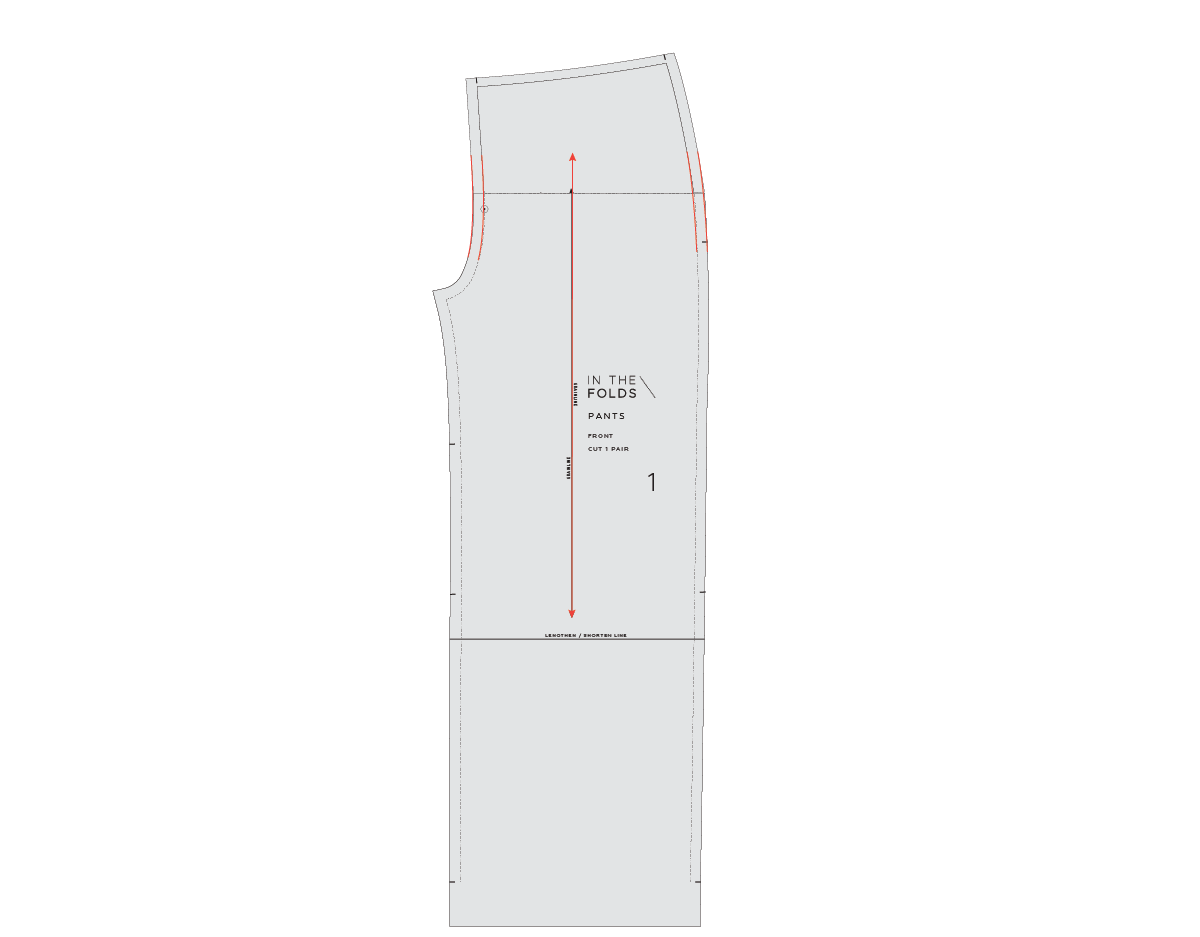
The steps are the same for the FRONT [1] and BACK [2] pattern pieces. You may need to alter one or both.
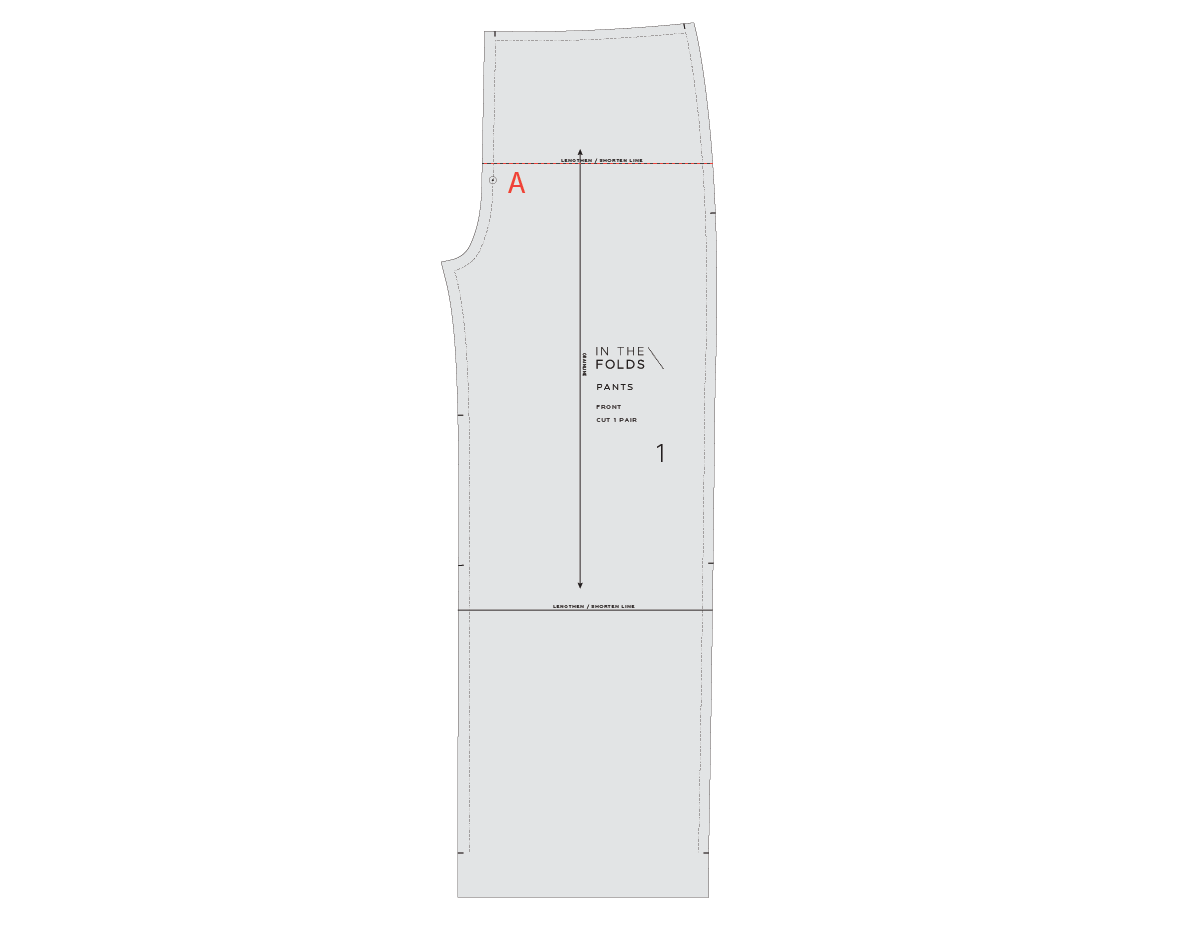
Step 1
Mark a line through the pattern piece perpendicular to the grainline in the section above the crotch curve. We don't want to change the curve, just the length of the CENTRE FRONT / CENTRE BACK seam.
We will refer to this as line A. If your cut line goes through notches (such as for fly placement), keep a note of their original locations so you can redraw them later.
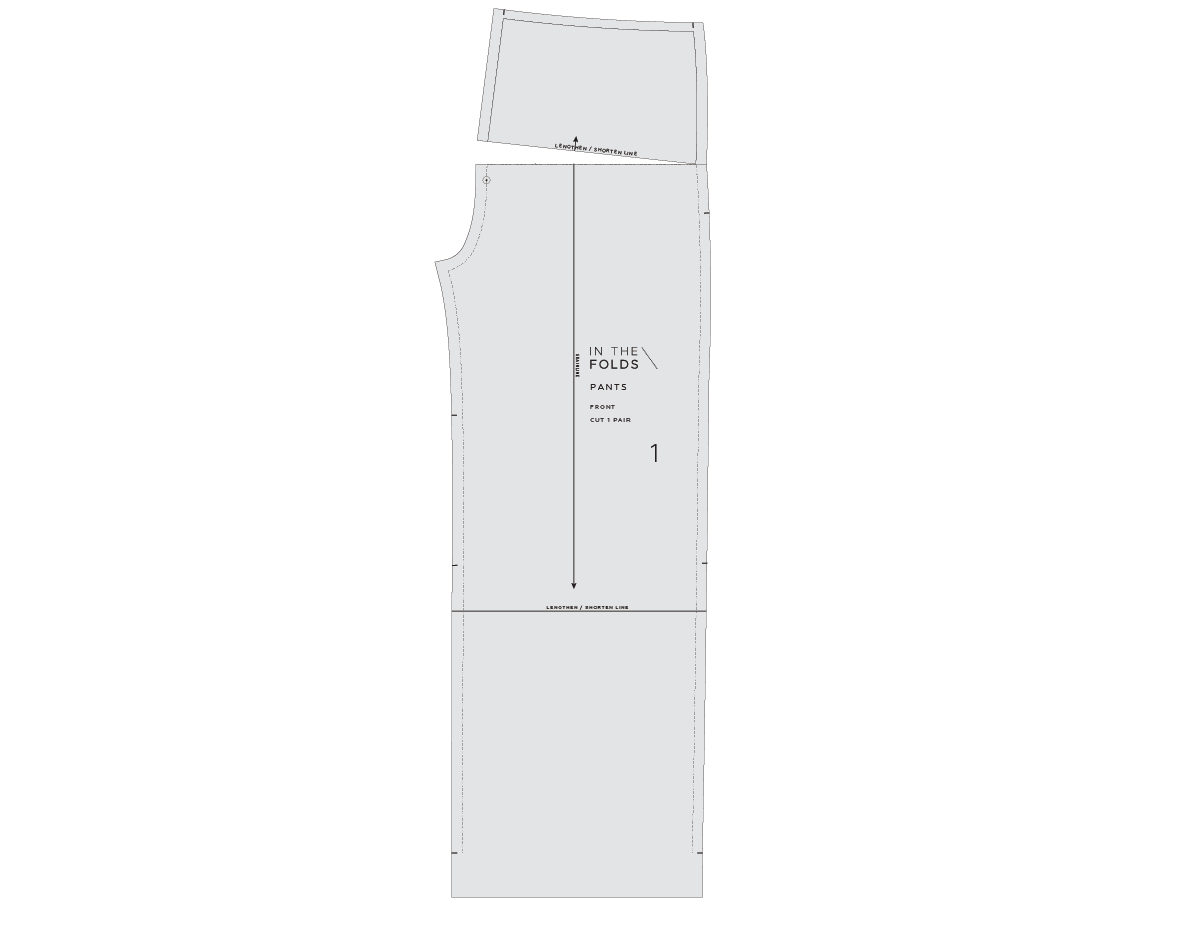
Step 2
Cut along line A from the CENTRE FRONT.
Slow down as you approach the STITCH LINE on the side seam and stop when you are 1-2mm from the STITCH LINE. Cut in from the side seam on line A towards the point where you stopped cutting. Stop cutting when you are 1-2mm from the STITCH LINE to create a hinge.

Step 3
Determine how much you would like to add to the crotch length.
The best way to find this is by making a toile and cutting into the fabric across the crotch. You can pin some fabric into the opening and reassess the fit.
Take a piece of pattern paper slightly larger than the amount you would like to add and mark a horizontal line. We will refer to this as line B. Mark a line below line B, parallel to line B and equal to the distance you will be adding. We will refer to this as line C.

Step 4
Slide the paper under the pattern. Line up line A (pants section) with line C and tape in place.
Carefully rotate the top section of the pattern until the CENTRE FRONT STITCH LINE hits line B. Tape or glue in place.
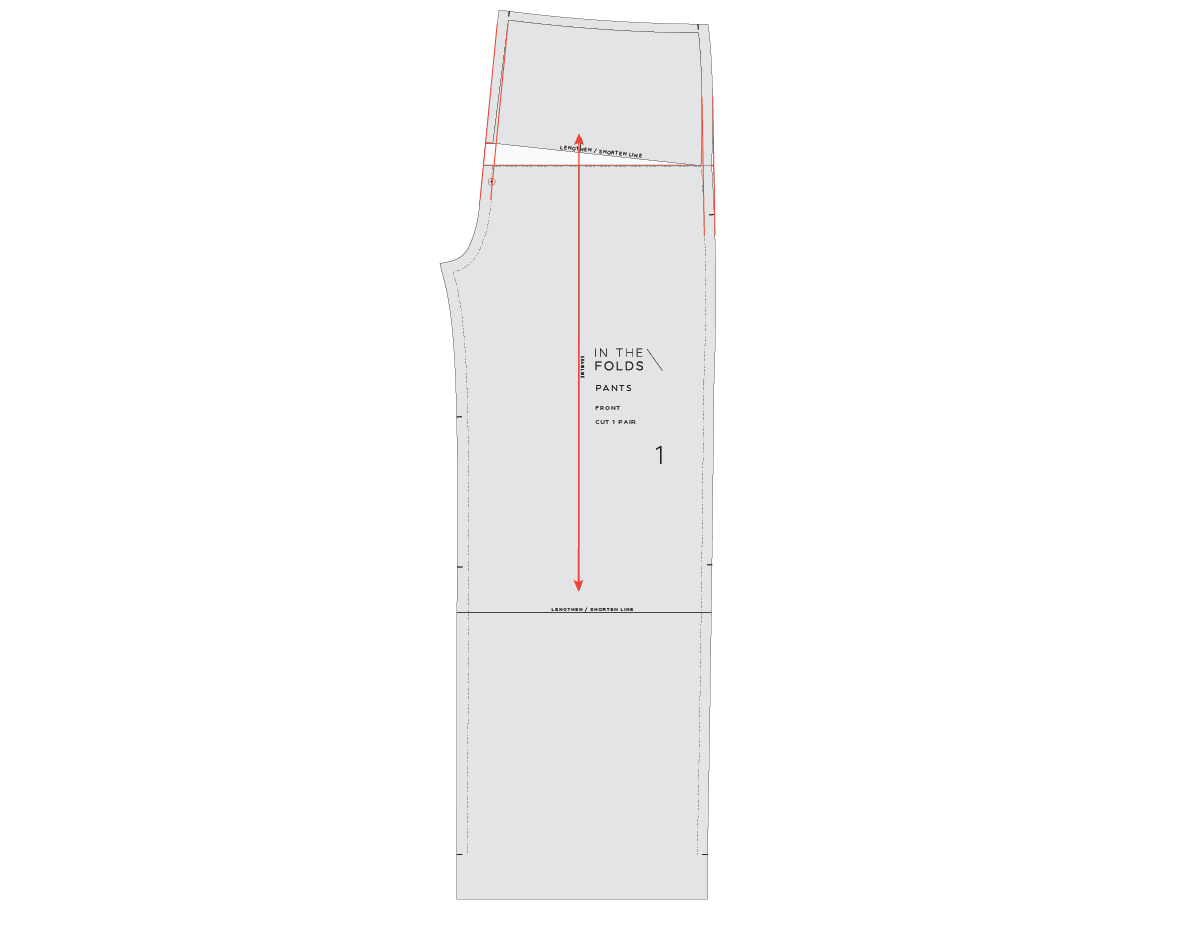
Step 5
Re-draw the side seam and CENTRE FRONT seam with nice smooth curves.
Redraw the grainline following the grainline on the leg of the pants. Cut off excess paper.
HOW TO SHORTEN CROTCH LENGTH
To shorten the crotch length, the steps are the same for the FRONT [1] and BACK [2] pattern pieces. You may need to alter one or both.
Repeat STEPS 1 and 2 above.

Step 3
Consider how much you would like to remove from the crotch. The best way to find this is by making a toile and assessing the amount by pinning out a wedge from the crotch and checking the fit.
Once you know the amount, measure up from line A on the CENTRE FRONT STITCH LINE and mark a point equal to the amount you would like to remove. We will refer to this as point B.

Step 4
Carefully rotate the top section of the pattern so that point B meets with line A.
Tape or glue in place.
Step 5
Re-draw the side seam and CENTRE FRONT seam (CUT and STITCH LINES) with nice smooth curves. Redraw the grainline following the grainline on the leg of the pants.
This month for our Curated by ITF project we are working with our community to make toiles, conduct fittings and determine what alterations to make.
Our latest issue, the Pants Fitting pattern and Fit Kit, guides you through the whole process and then we’re right there in our online sewing community to answer all your questions, assess your toile photos and guide you through the process. If you’re interested to learn more about the pants sewing, fitting and design process, sign up to Curated by ITF now!
Happy fitting,
Emily
RESOURCES MENTIONED IN THIS ISSUE
The Pants Fitting pattern & Fit Kit is the second part in our Pants Sewing project series, which is available through our Curated by ITF subscription. Past issues are also now available for purchase by subscribers. More information can be found here.
For more issues of the Q & A series, you can check out the archive here.
WHAT YOU’VE BEEN MAKING


Neale jumpsuit made by @len.blueskystitch


