12 Tips For Perfect Dahlias
Plant when the soil is around 60 degrees and not soggy
Plant 4-6 inches under the ground and cover the tubers completely.
Start your dahlias out with a little bit of bonemeal worked into the hole where you plant your dahlia tuber.
All dahlias over 3 feet tall should be given a stake at planting time
Don’t water your tuber at planting time unless the soil is bone dry. Begin watering once you see green sprouts above the soil.
Use snail bait throughout the growing season because slugs and snails love to munch dahlias!
When plants reach just under 2 feet tall cut off the top 8-10 inches to produce more blooms
Fertilize once a month with a low nitrogen fertilizer like seaweed. Too much nitrogen will give you big leafy green plants with few flowers.
Deep water for an hour 3-4 times a week during the hot and dry summer
Watch for pests. It’s best to use preventative measures to keep pests off your dahlias.
In the fall protect your tubers from freezing underground. This will likely mean digging your tubers and storing them in a cool dry place or in warmer climates covering them with a thick layer of protective mulch above the ground where they lye.
Divide your tubers every year to increase your stock or every 2-3 years to keep your dahlias at max health.
And that’s it! We hope you love your gorgeous dahlias!


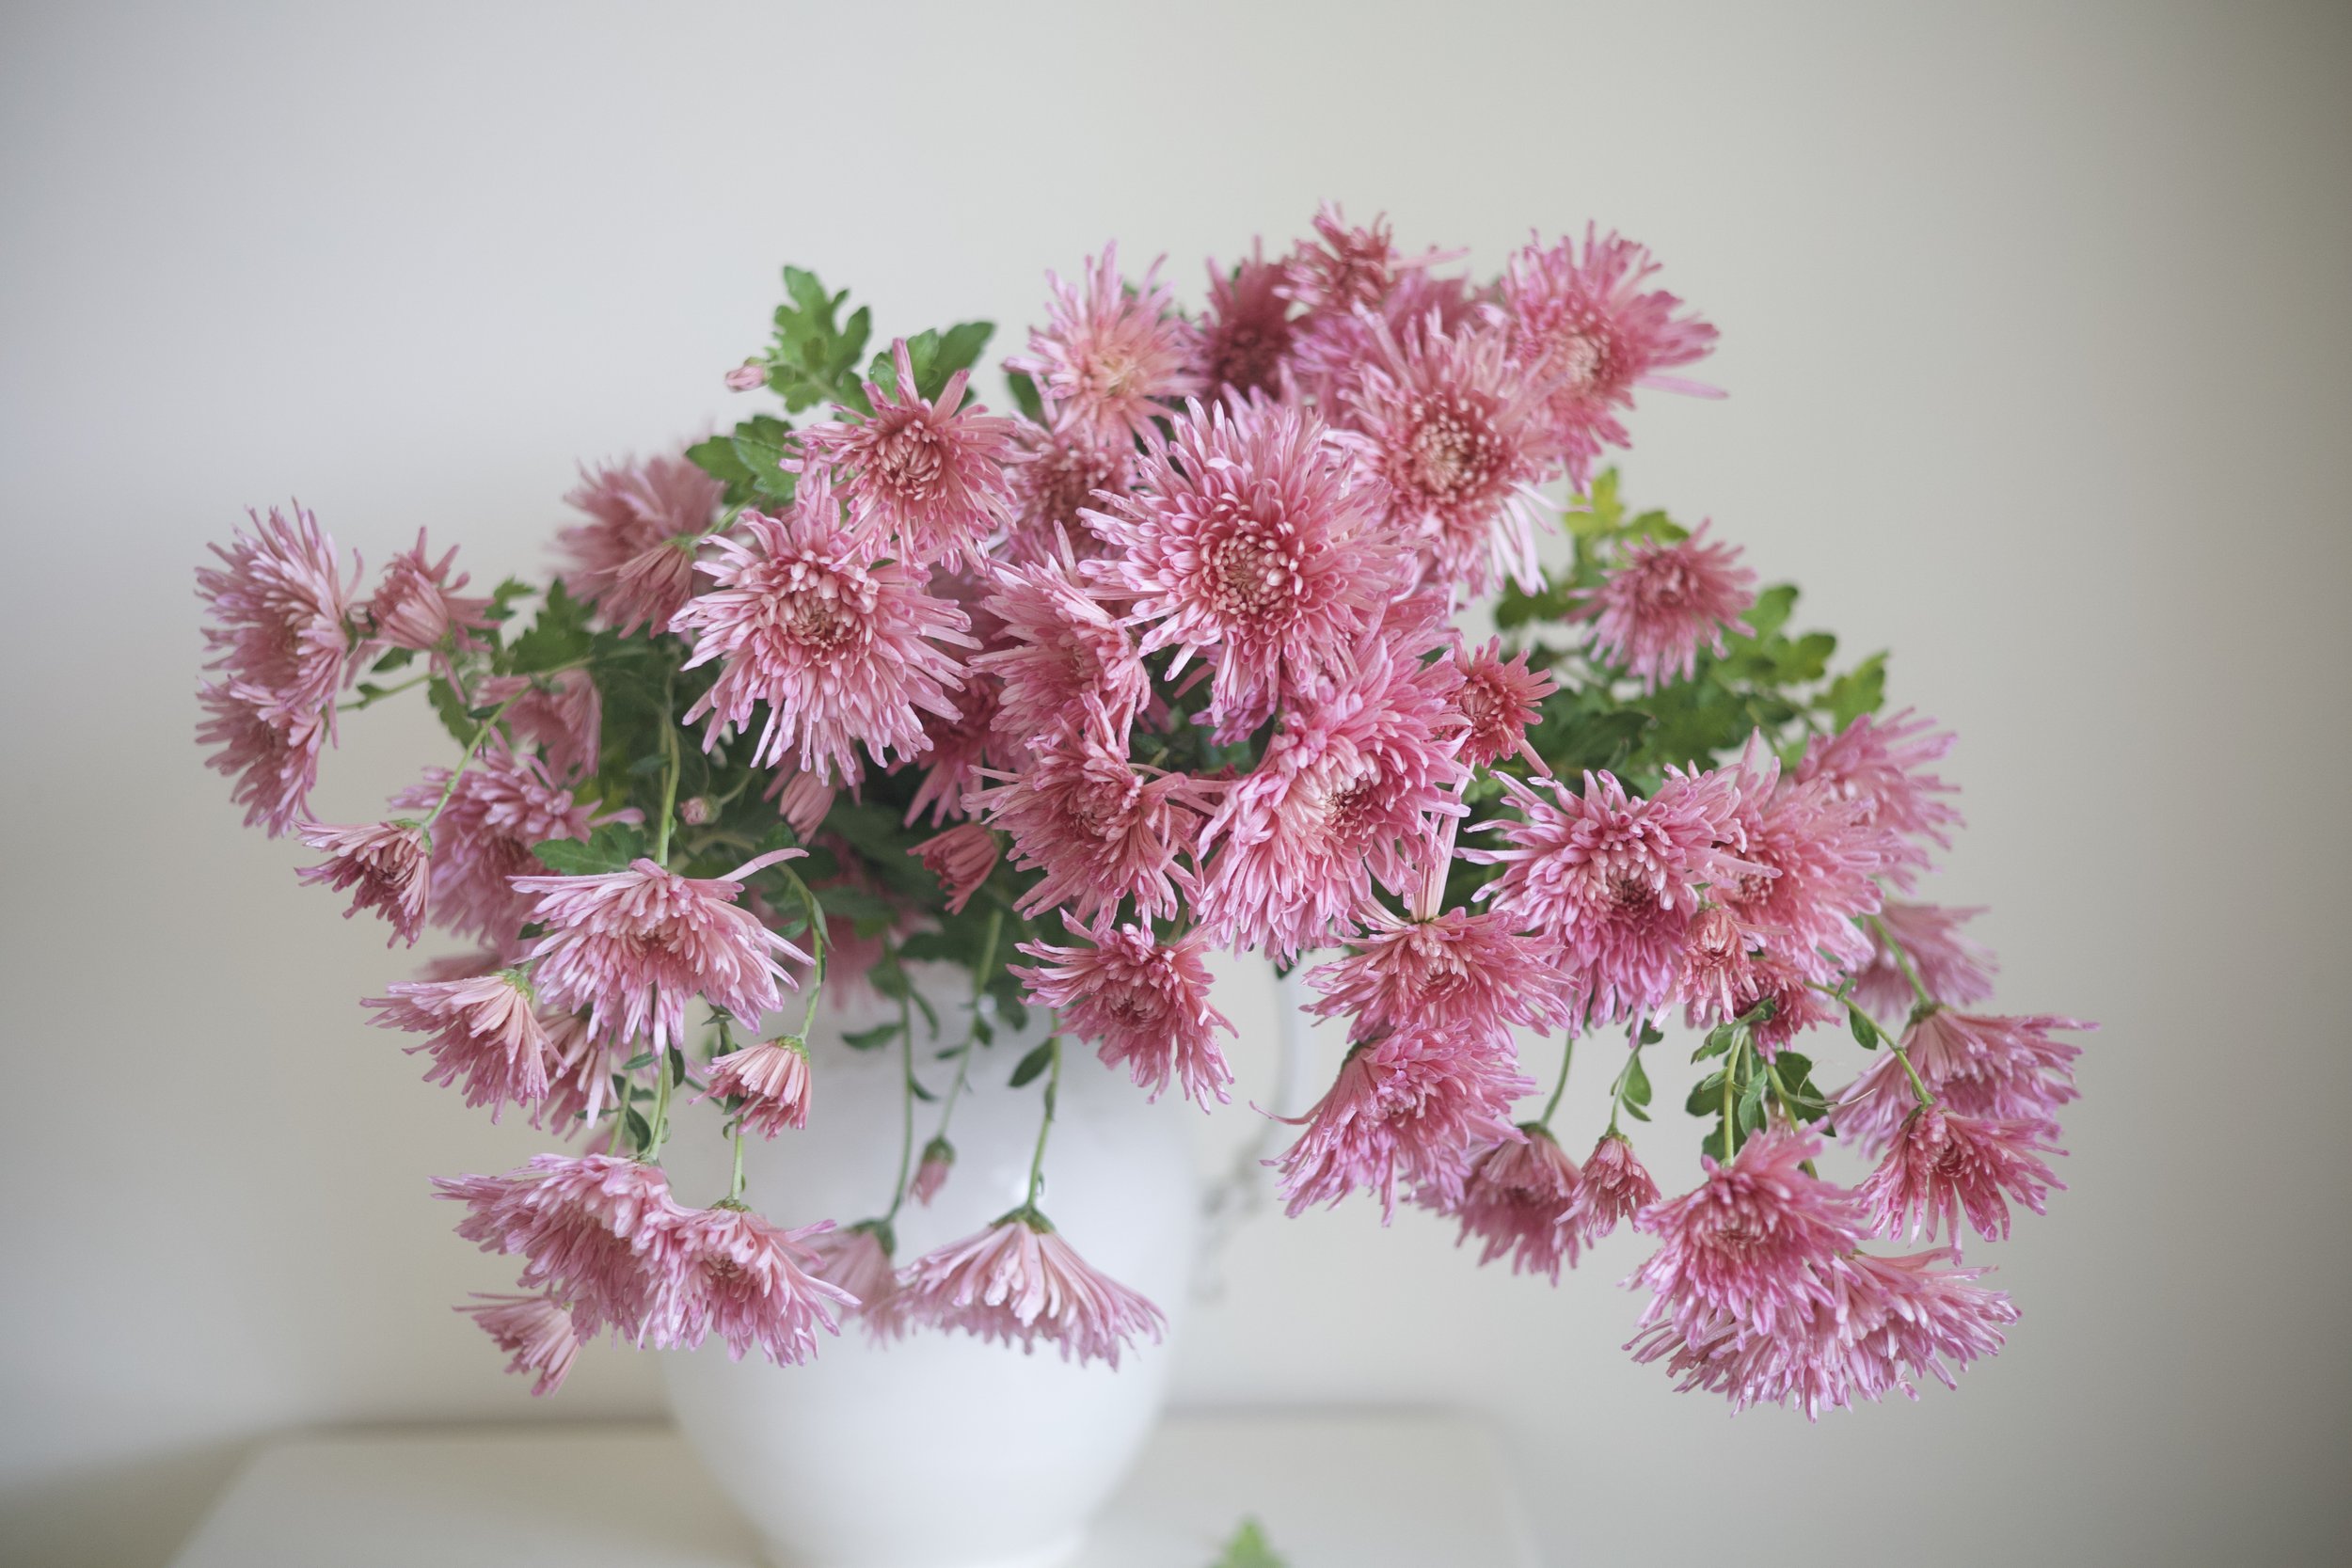
Where Can You Grow Chrysanthemums?
Chrysanthemums can be grown in all 50 states and in all zones. They will do the best in zones 4-9 but can grow in tropical or very hot regions with special care.
Quick Answer: Chrysanthemums can be grown in all 50 states and in all zones. They will do the best in zones 4-9 but can grow in tropical or hot regions with special care.
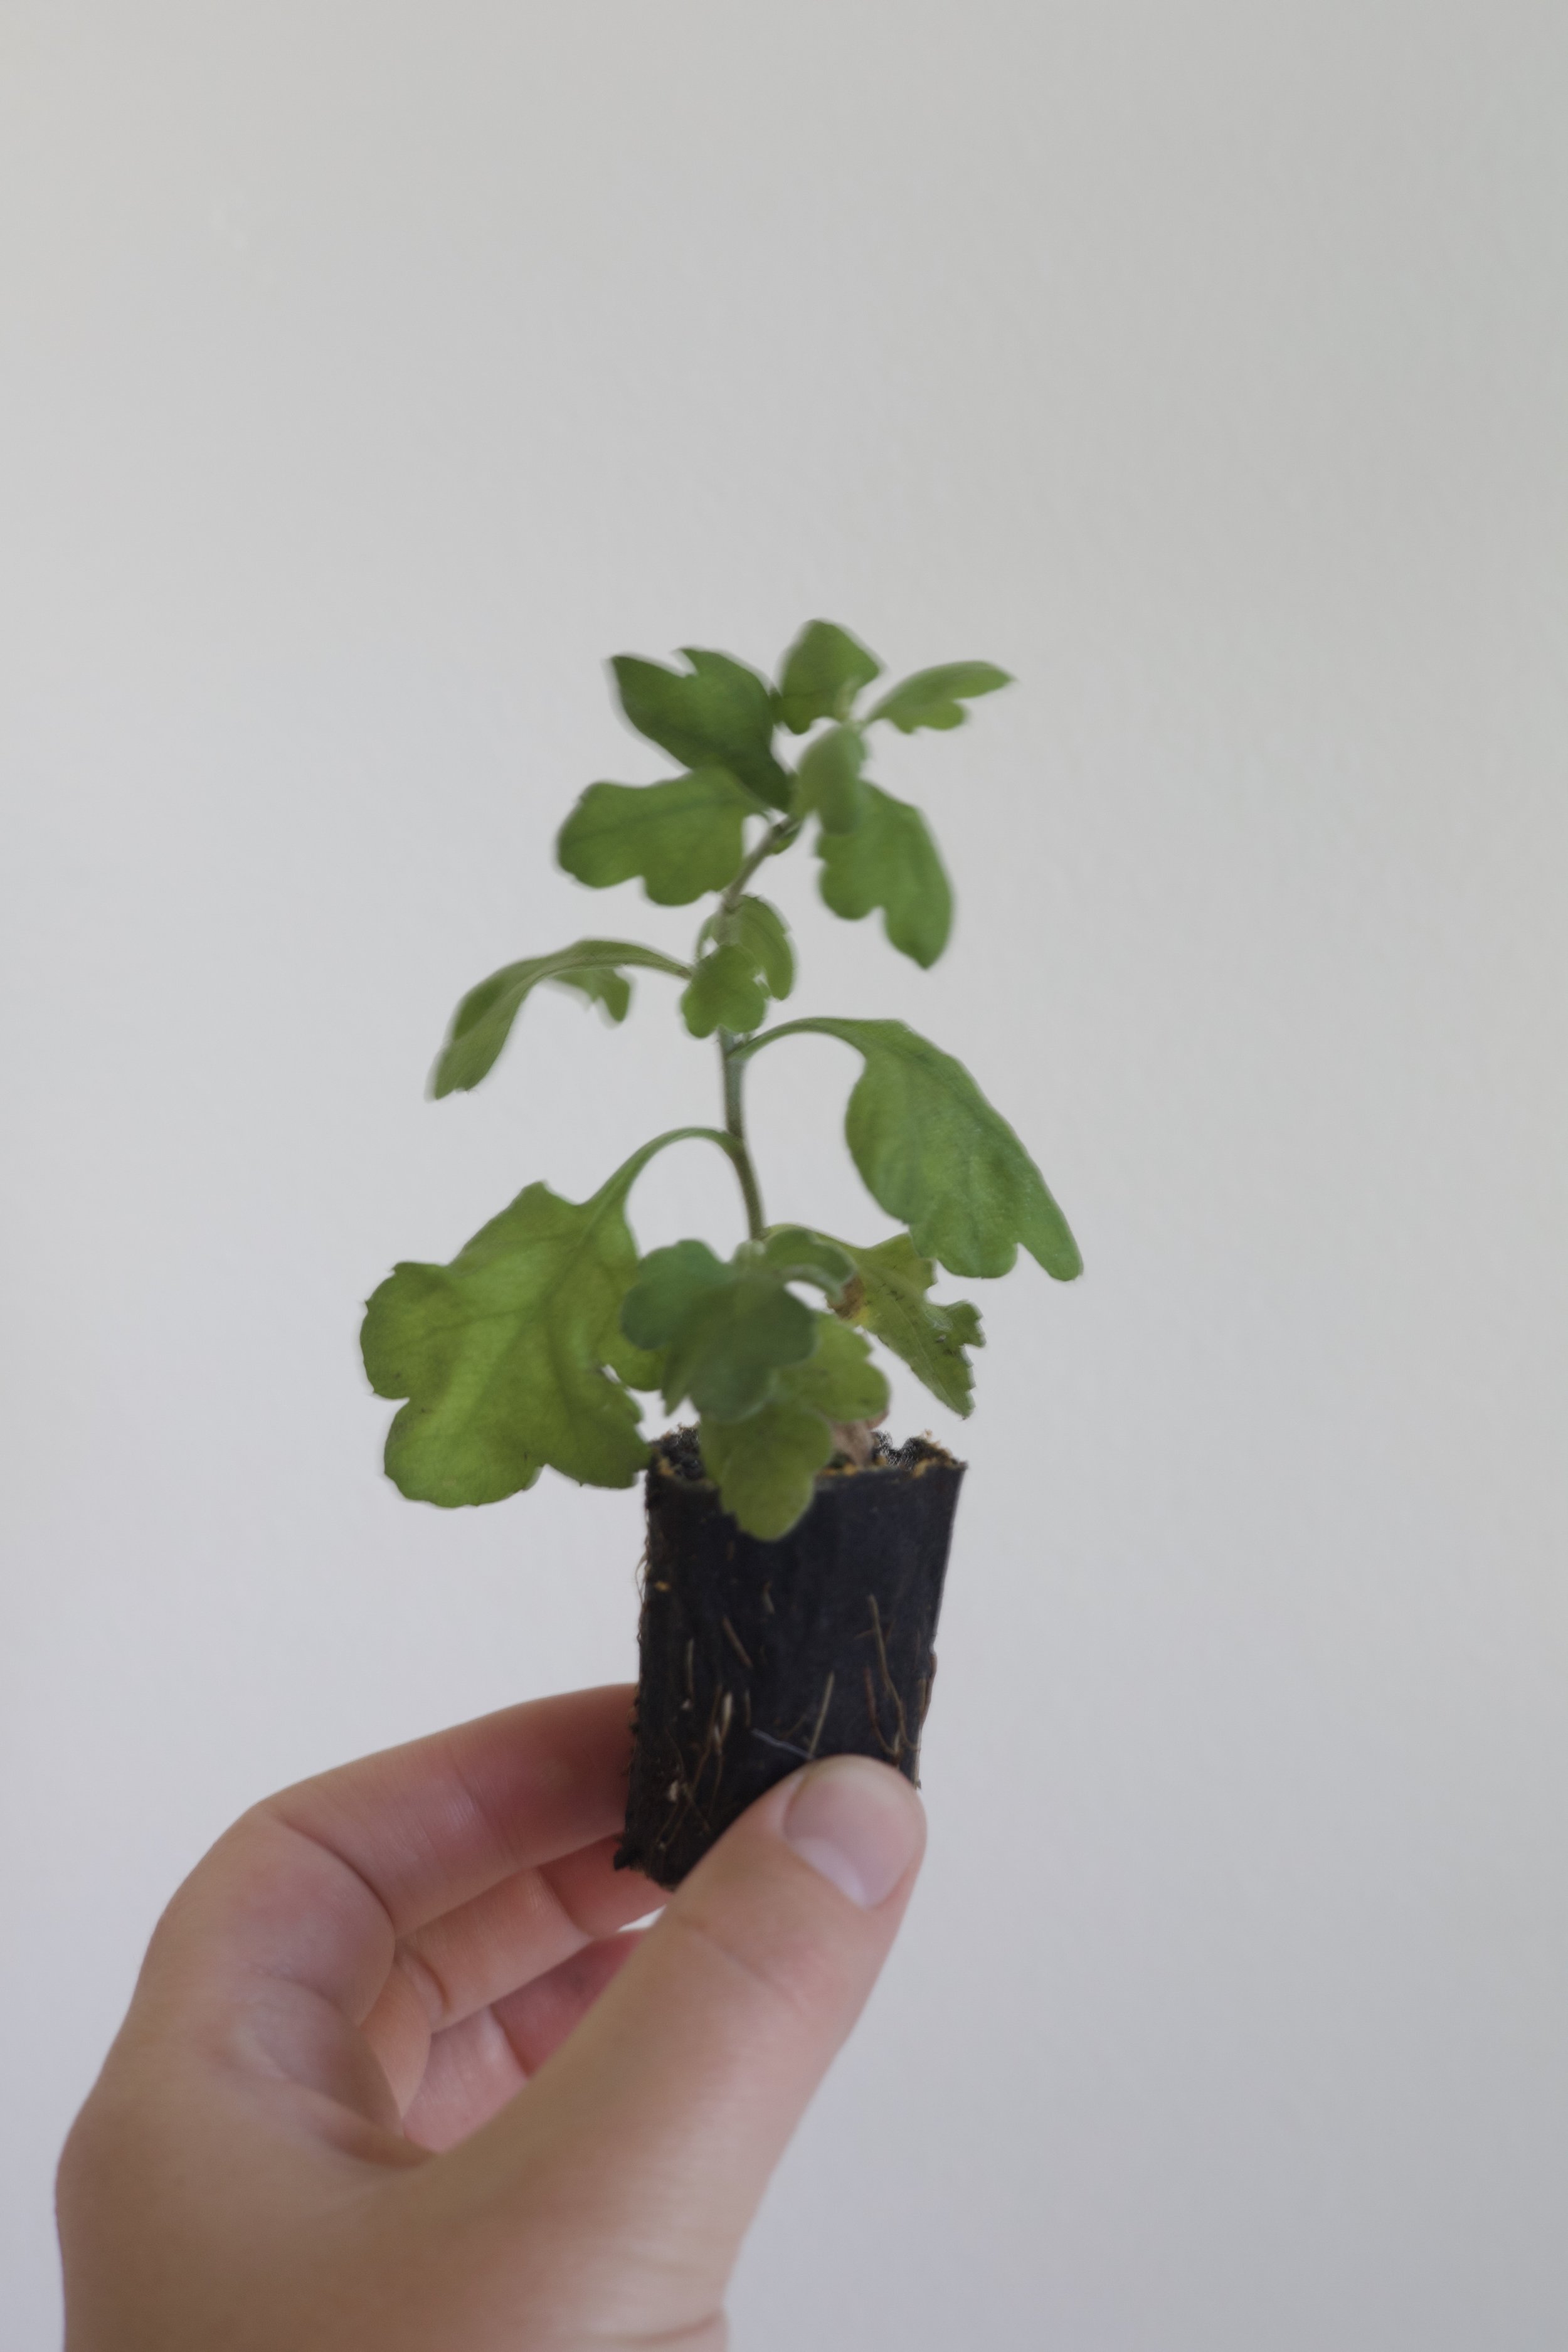
Chrysanthemums are grown from cuttings which ship throughout the year. You can grow your own by getting cuttings here.
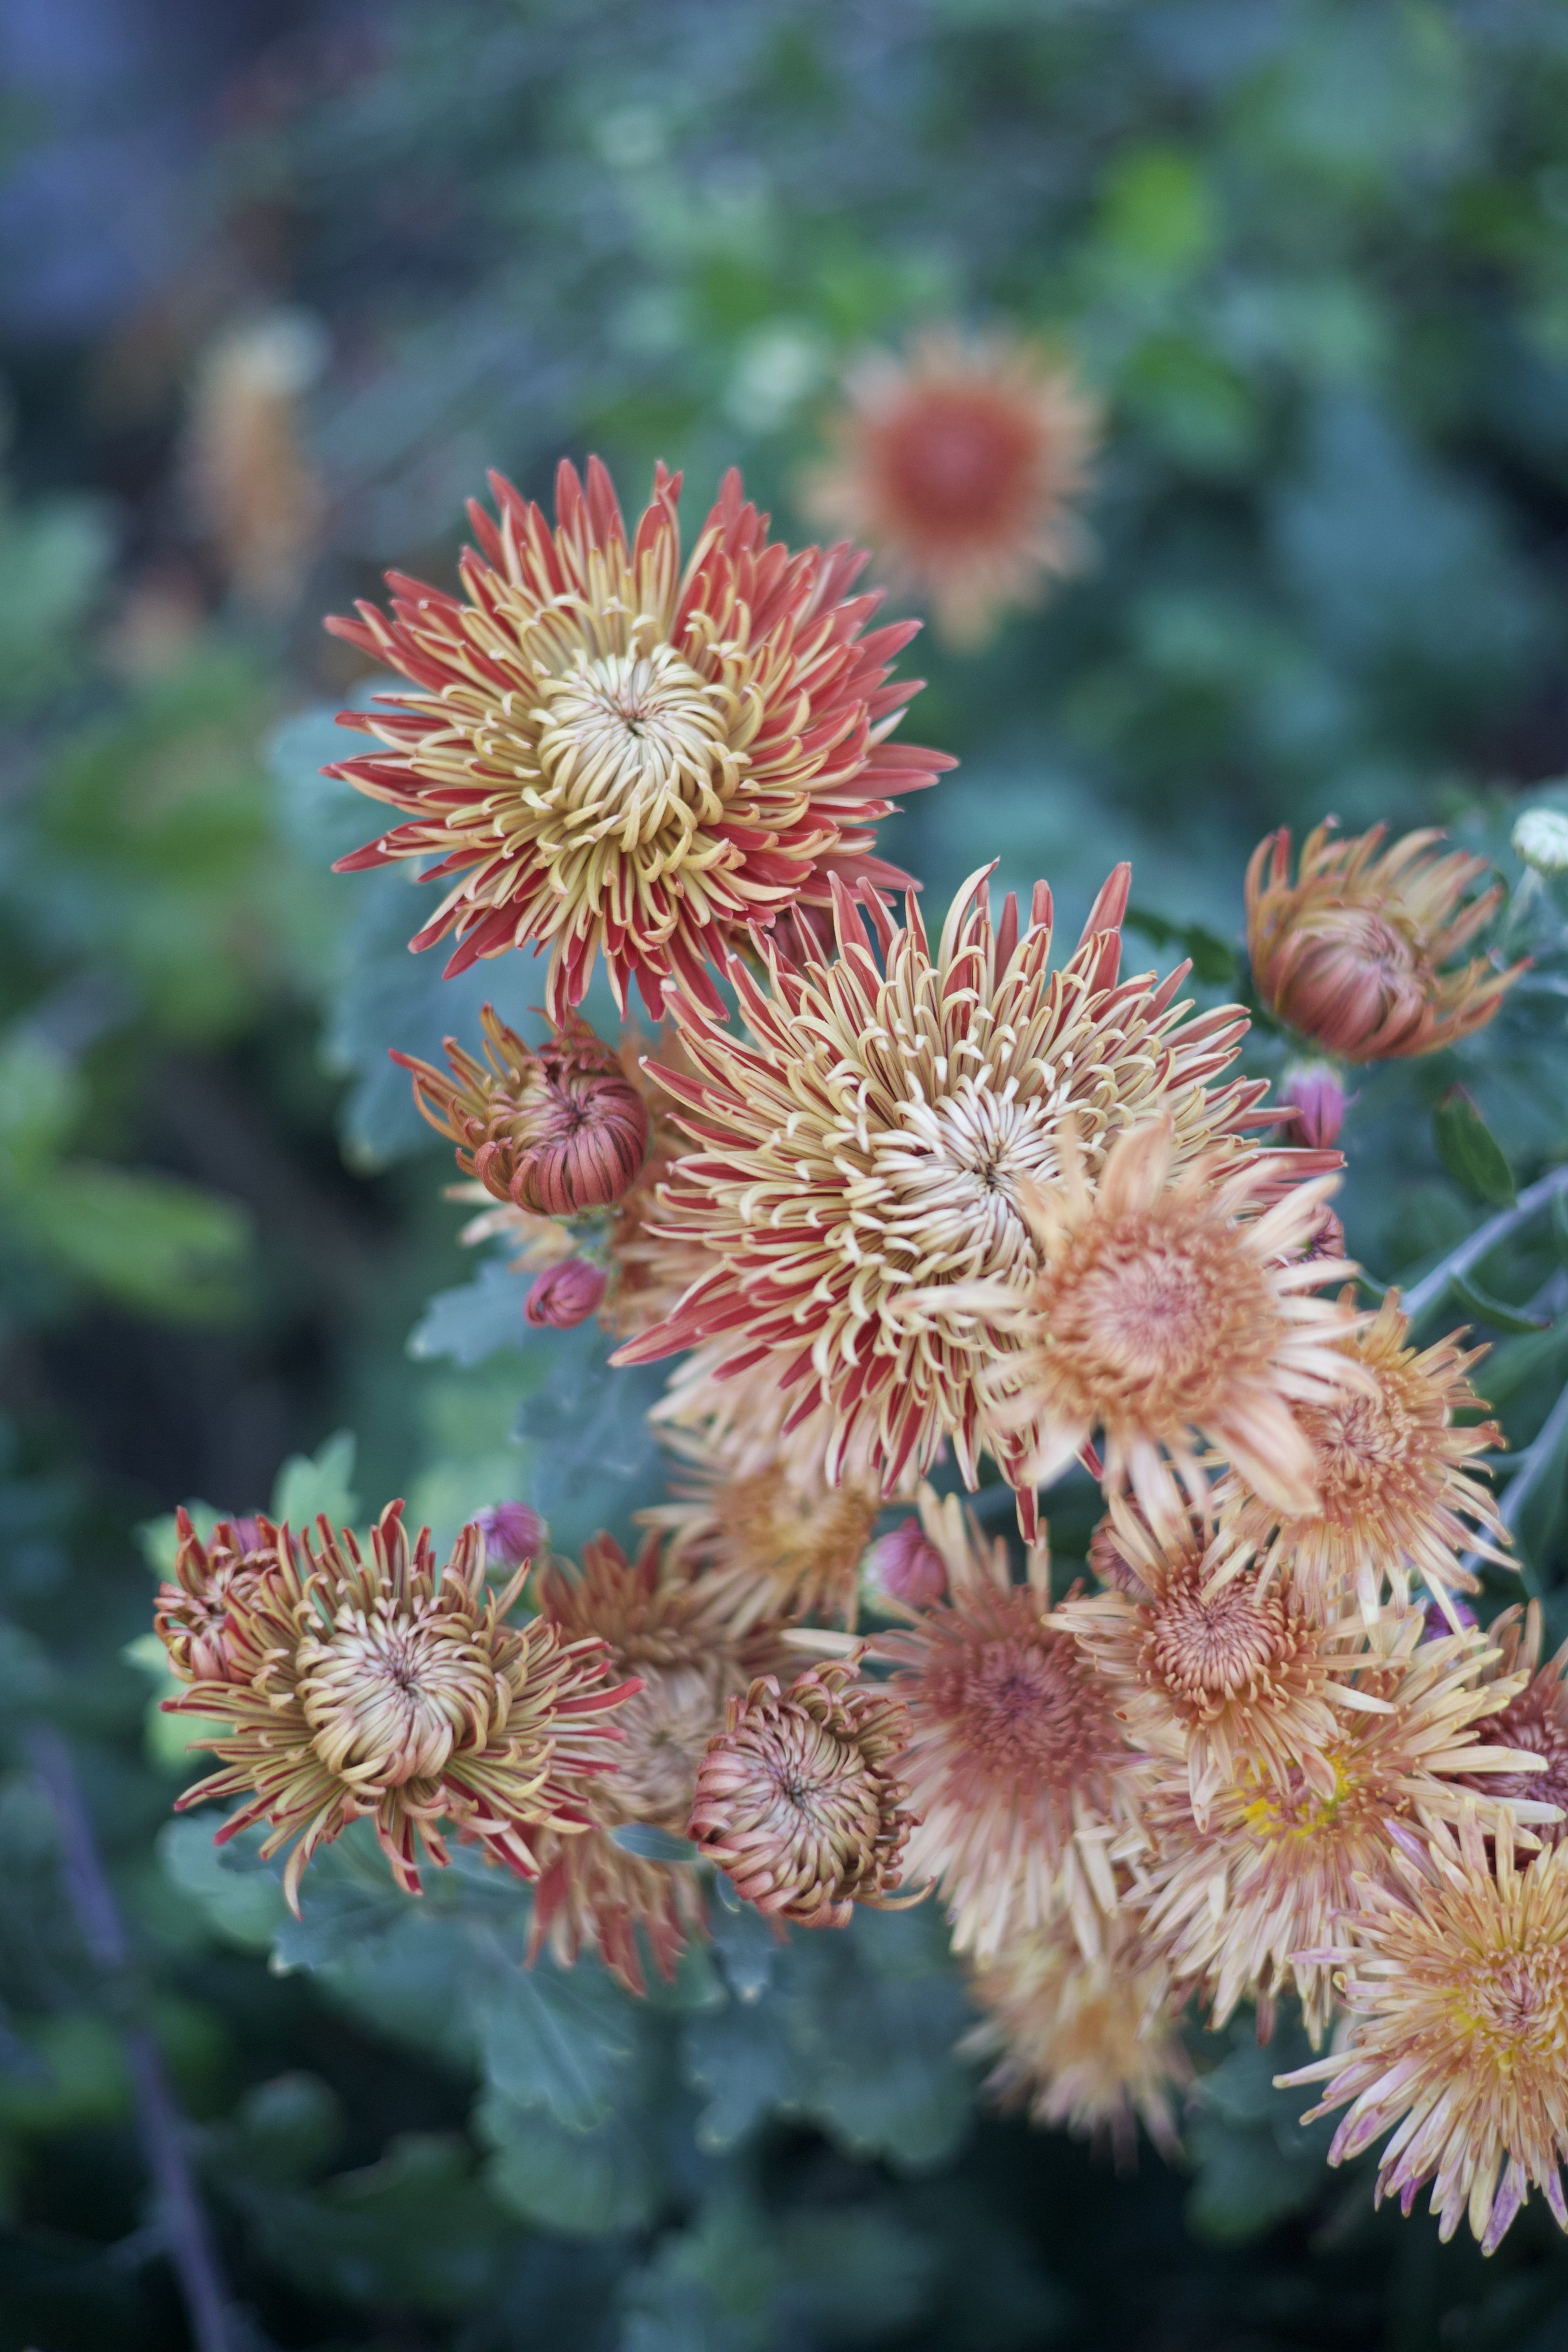
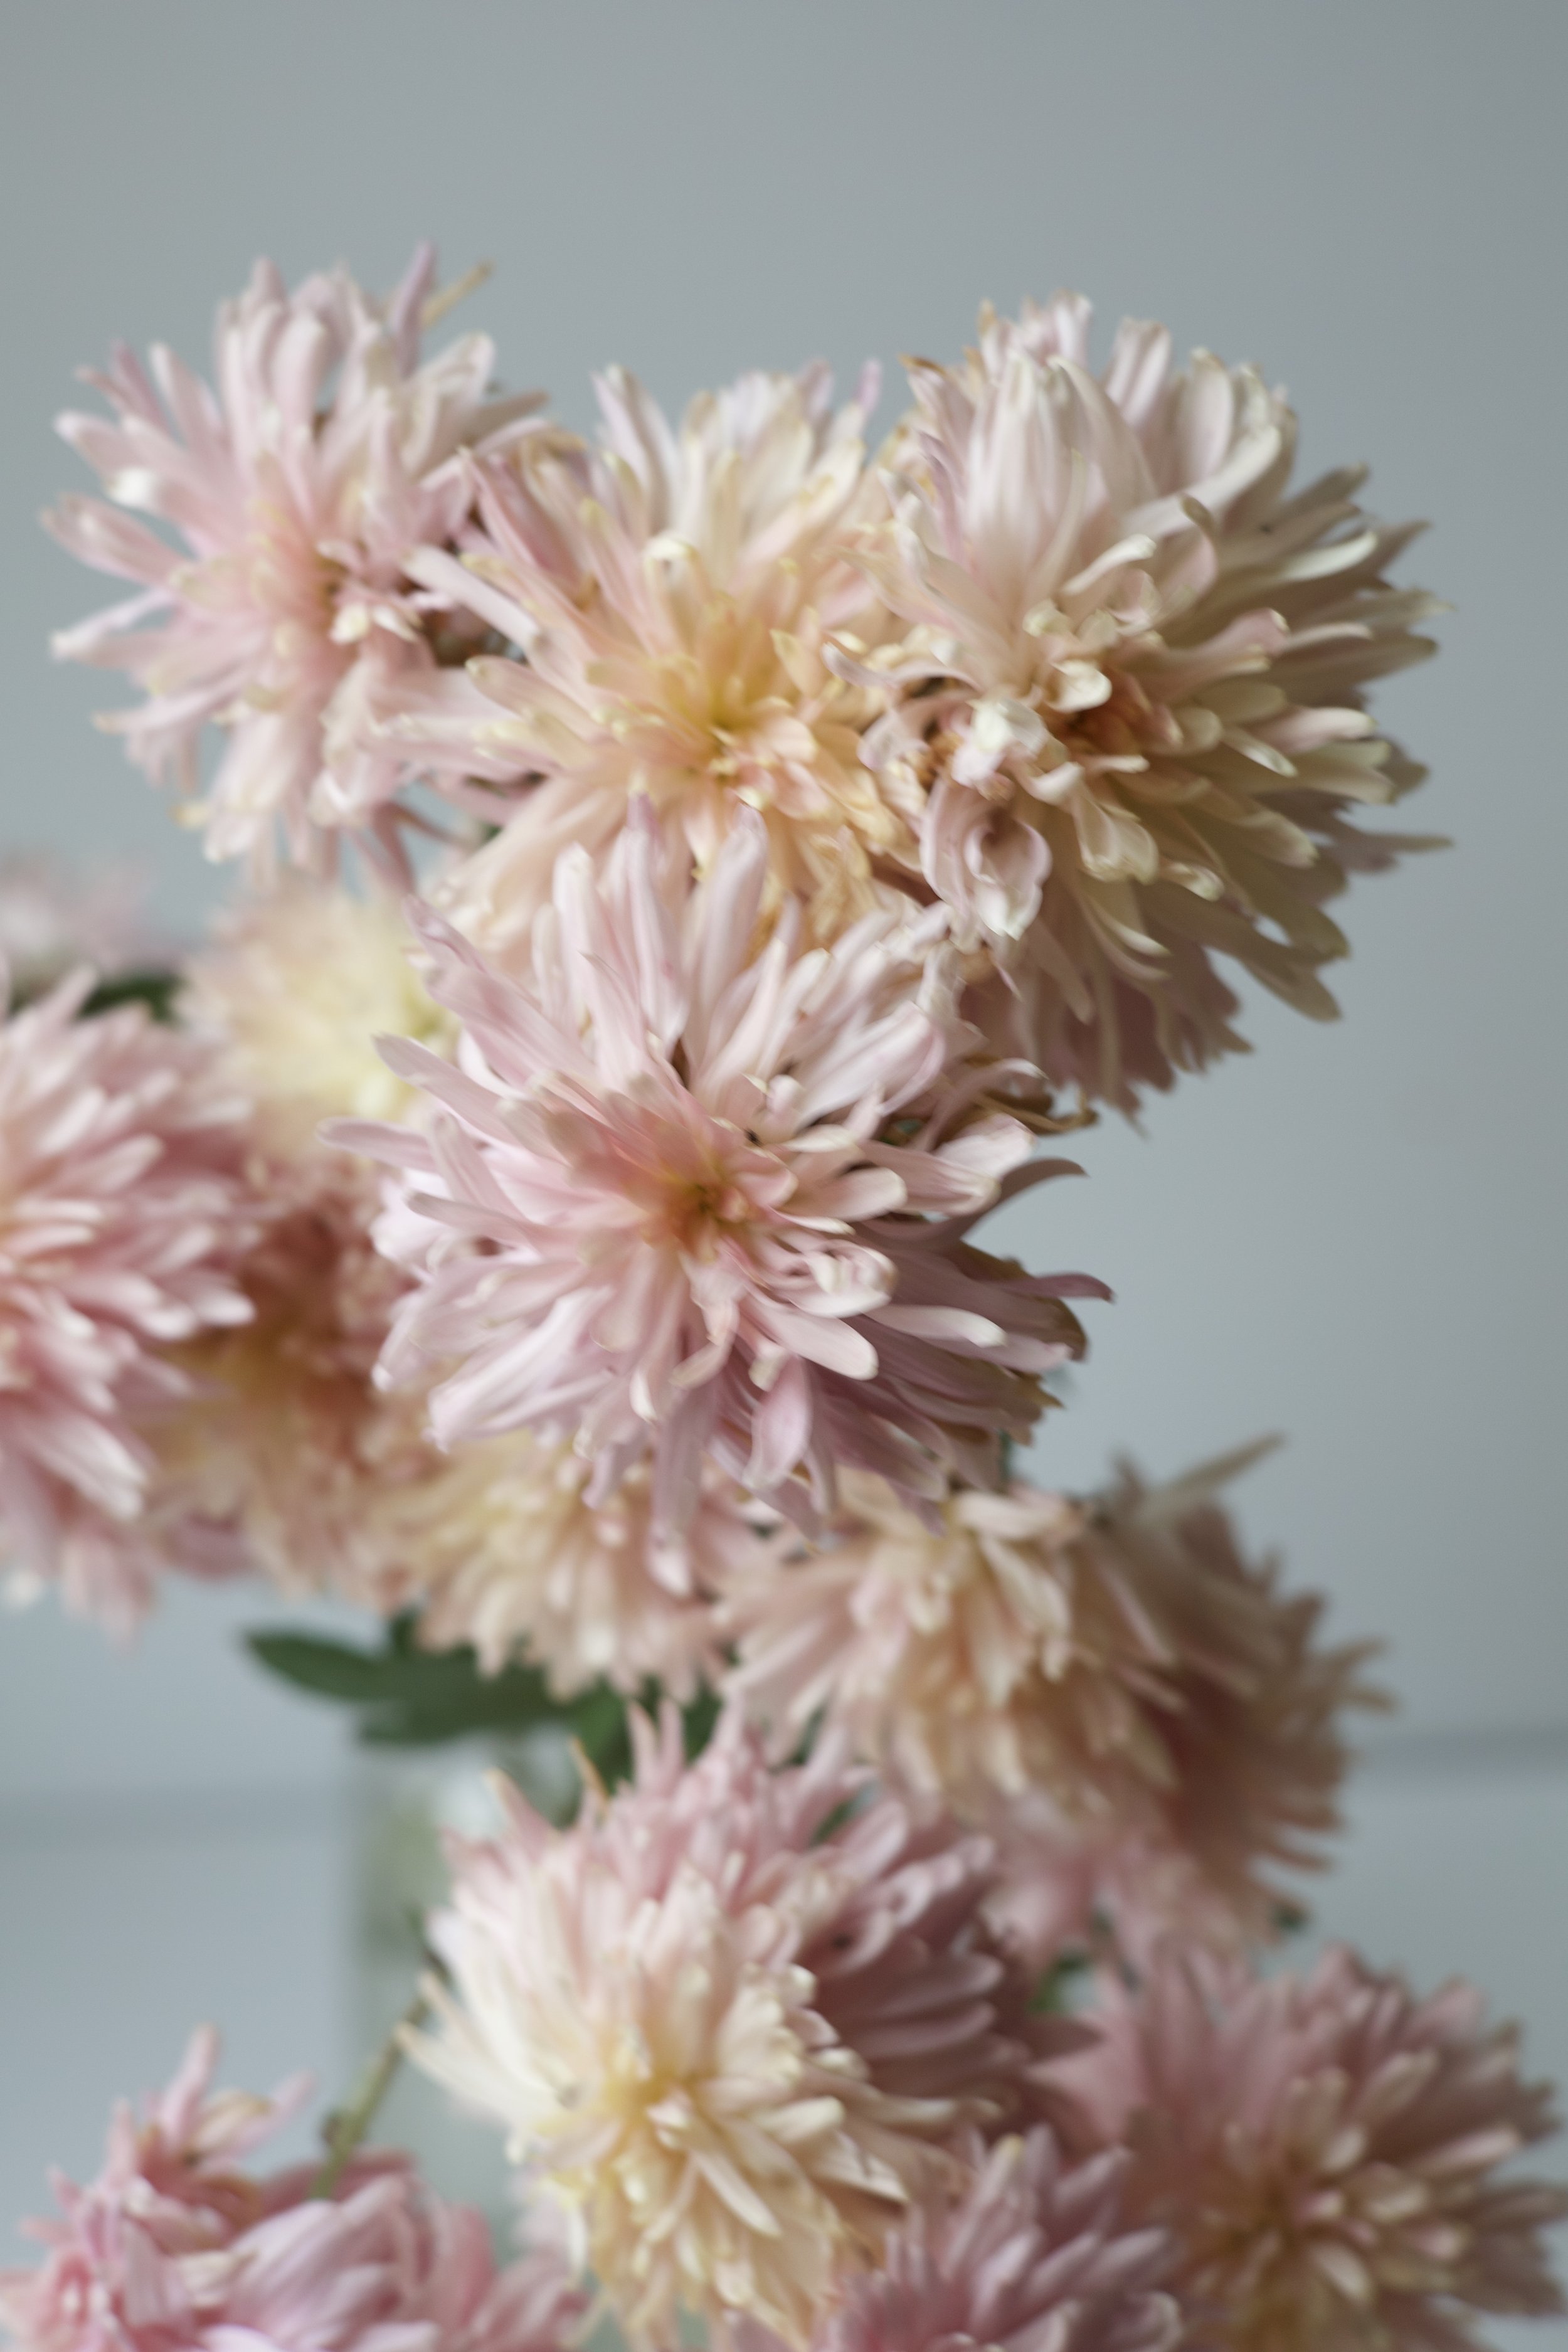
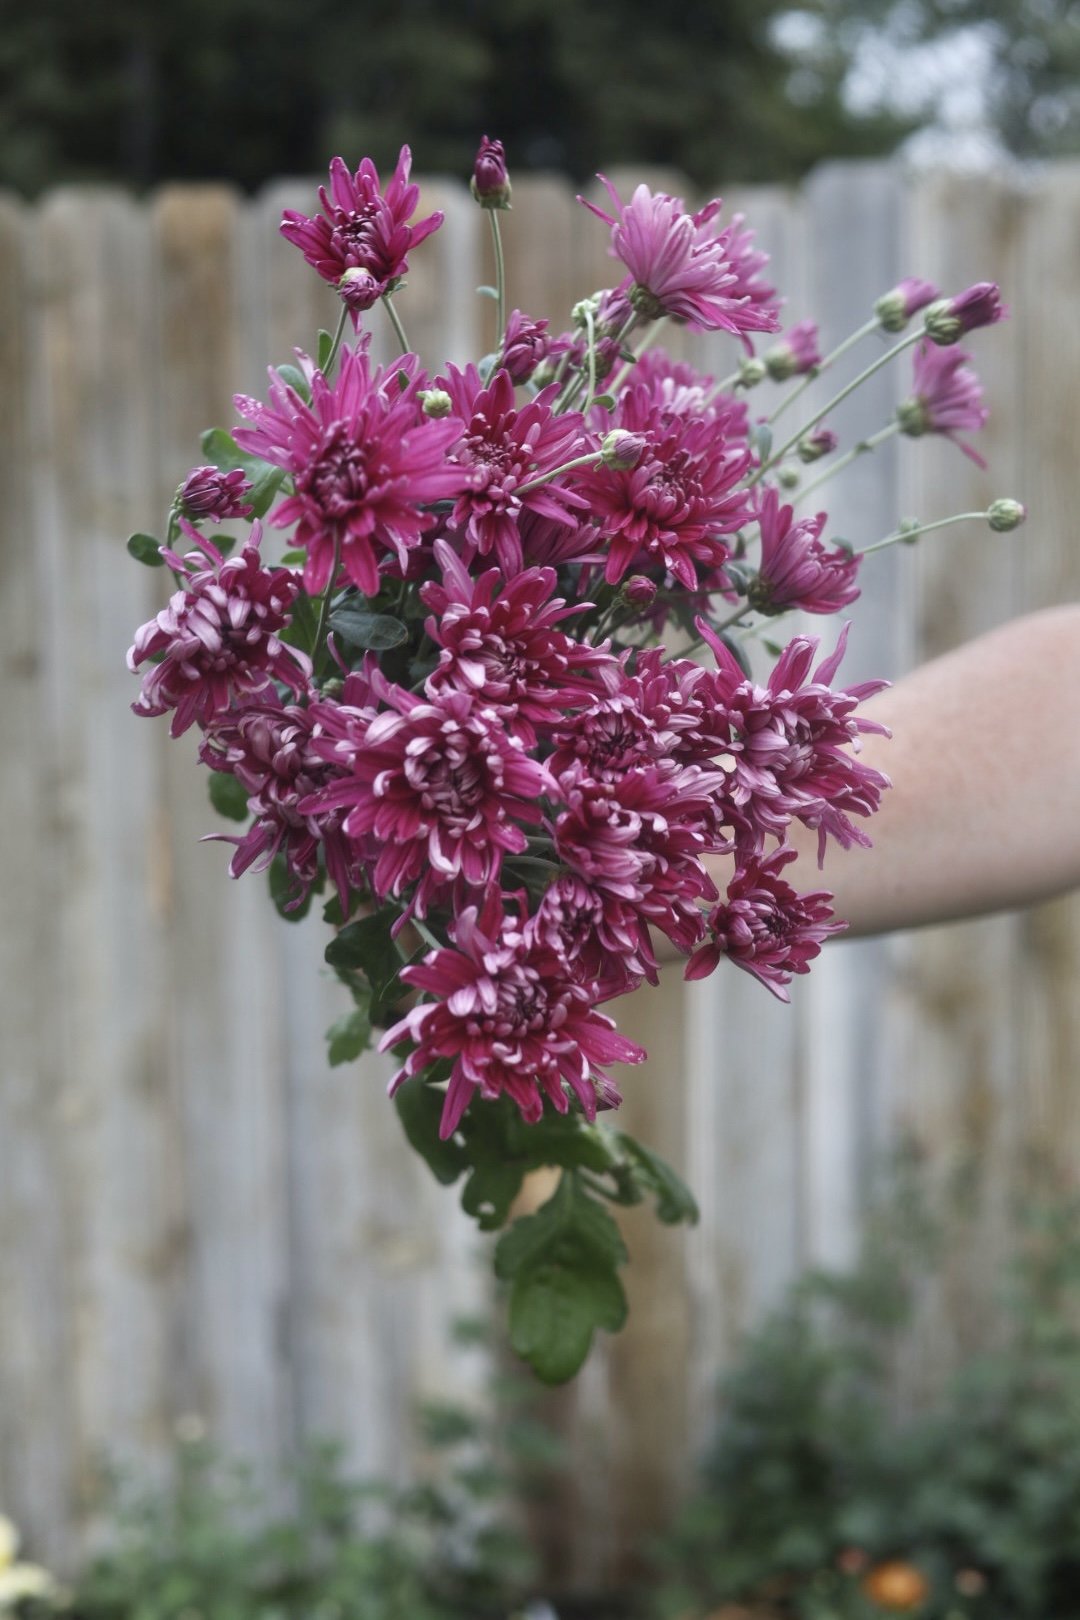
This is the chrysanthemum ‘Talisman’. A great cut flower with mysterious colors as it matures.
In zones 4, 5 and 6 you will want to choose early varieties so your mums don’t freeze before they bloom. For more specific growing information for your region and variety suggestions see this blog post: How To Grow Chrysanthemums in zones 4 and 5

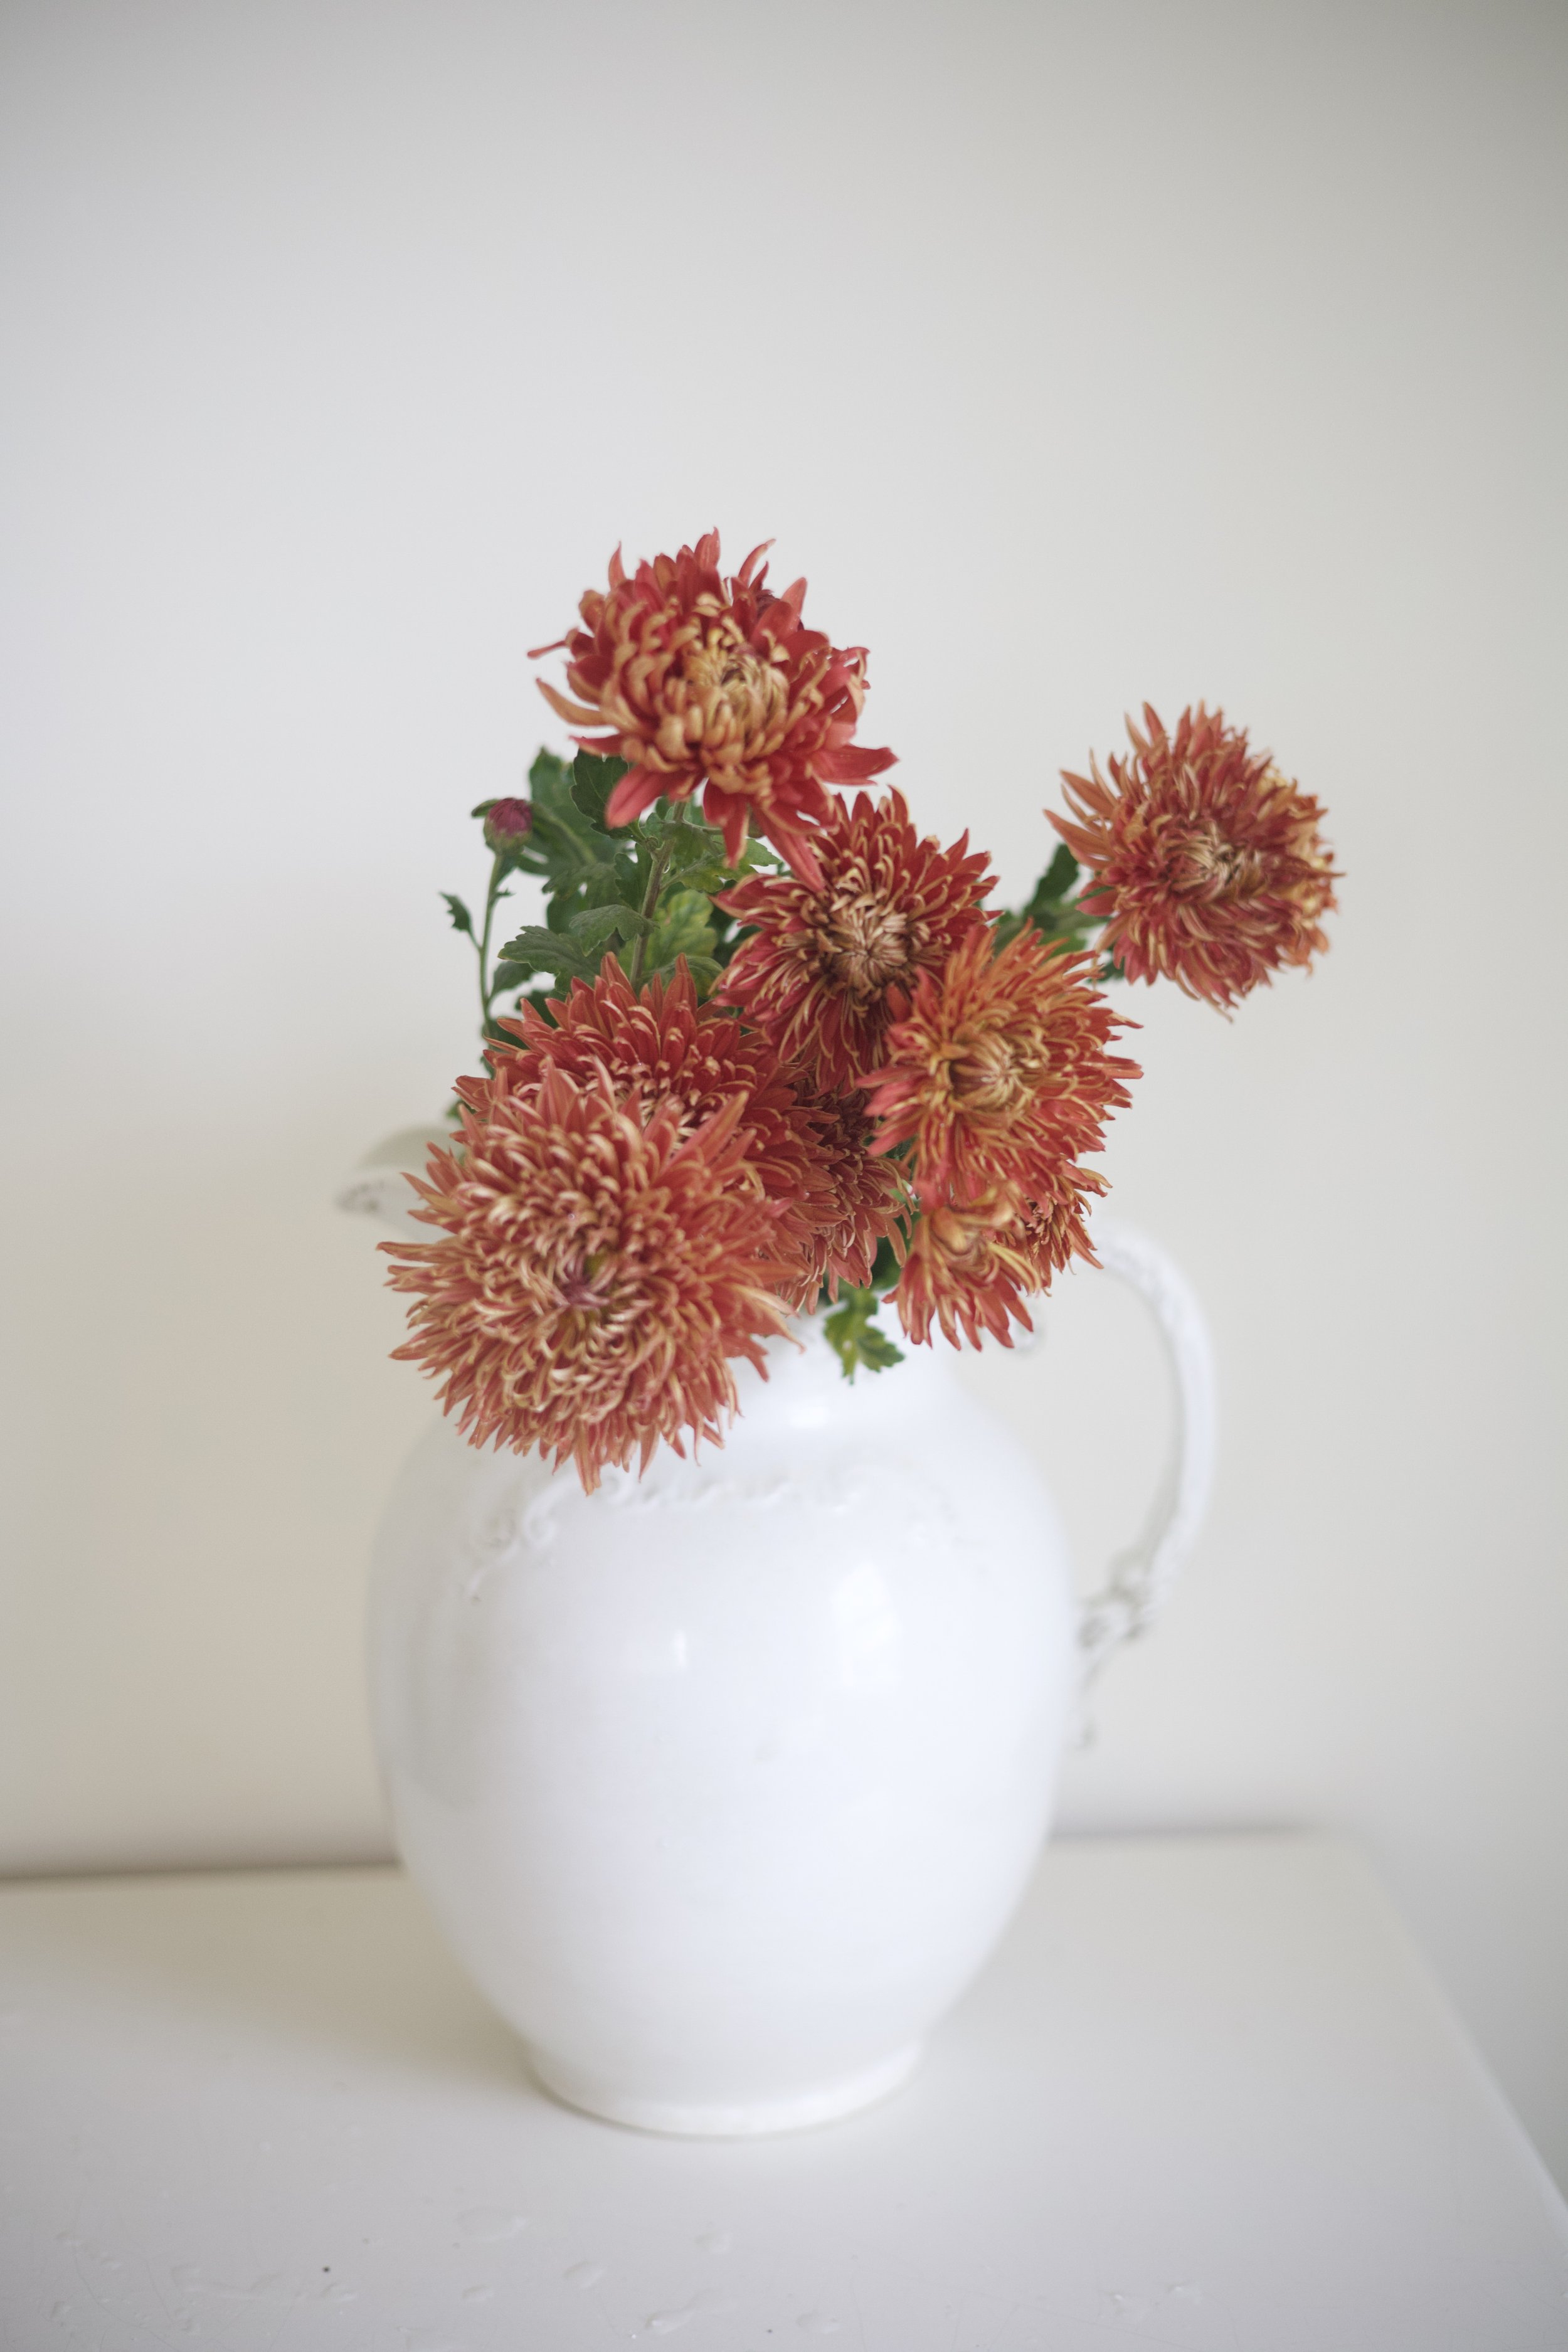
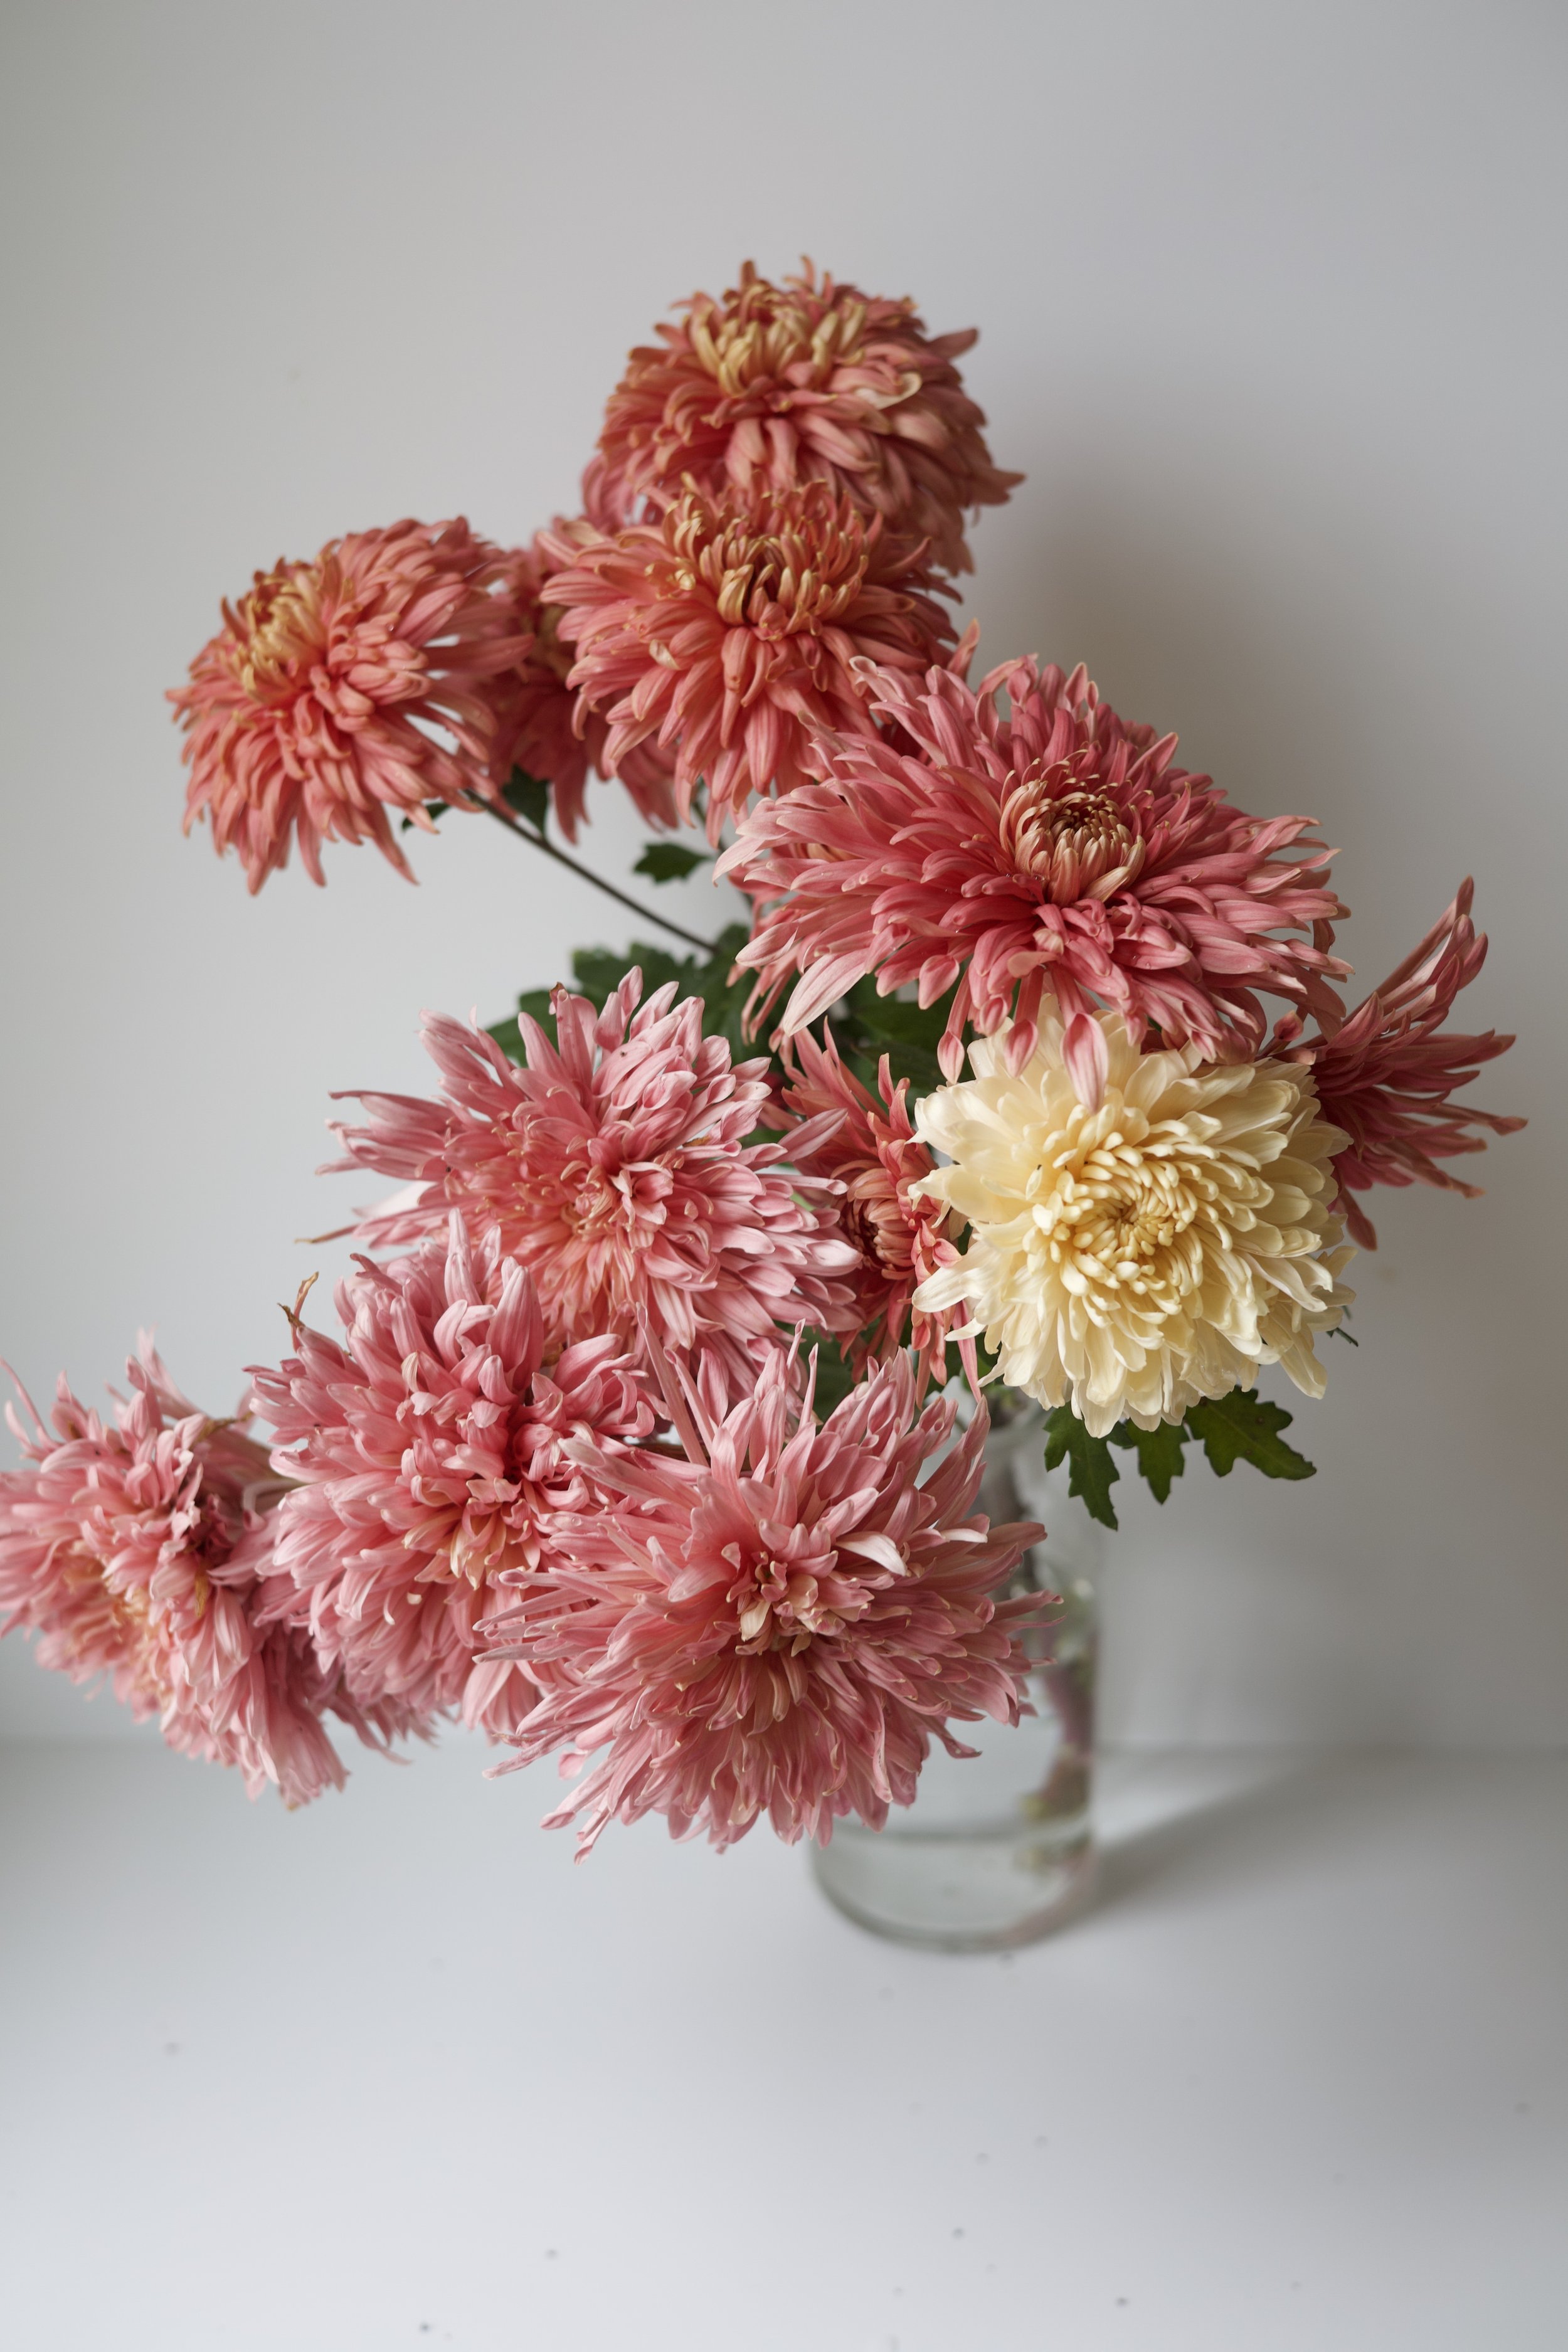
This is the spider mum ‘Carousel’ which also a beautiful red sister named ‘Red Carousel’
In zones 7 and 8 you’ll have the easiest time growing mums. Plant cuttings in spring or late summer in a place that gets full sun and cut back faded branches once winter sets in. And that’s it! For more specific growing information to your zone see the blog post: How To Grow Chrysanthemums in zone 6 and 7
In hot and arid places you might plant your mums into pots that can be moved to shade for the hottest months of the year. You can plant your cuttings in fall, December or early spring. For more specific growing information and variety suggestions see the blog post: How To Grow Chrysanthemums in zones 8, 9,10 - Hot/Arid
For those in hot, humid tropical places you’ll want to make sure you are planting in a place with good drainage. Plant mums in fall, spring or even summer in places that have mild summers like Southern California or Hawaii. For more specific growing information see the blog post: How To Grow Chrysanthemums in zones 8, 9,10 - Tropical/Southeast:
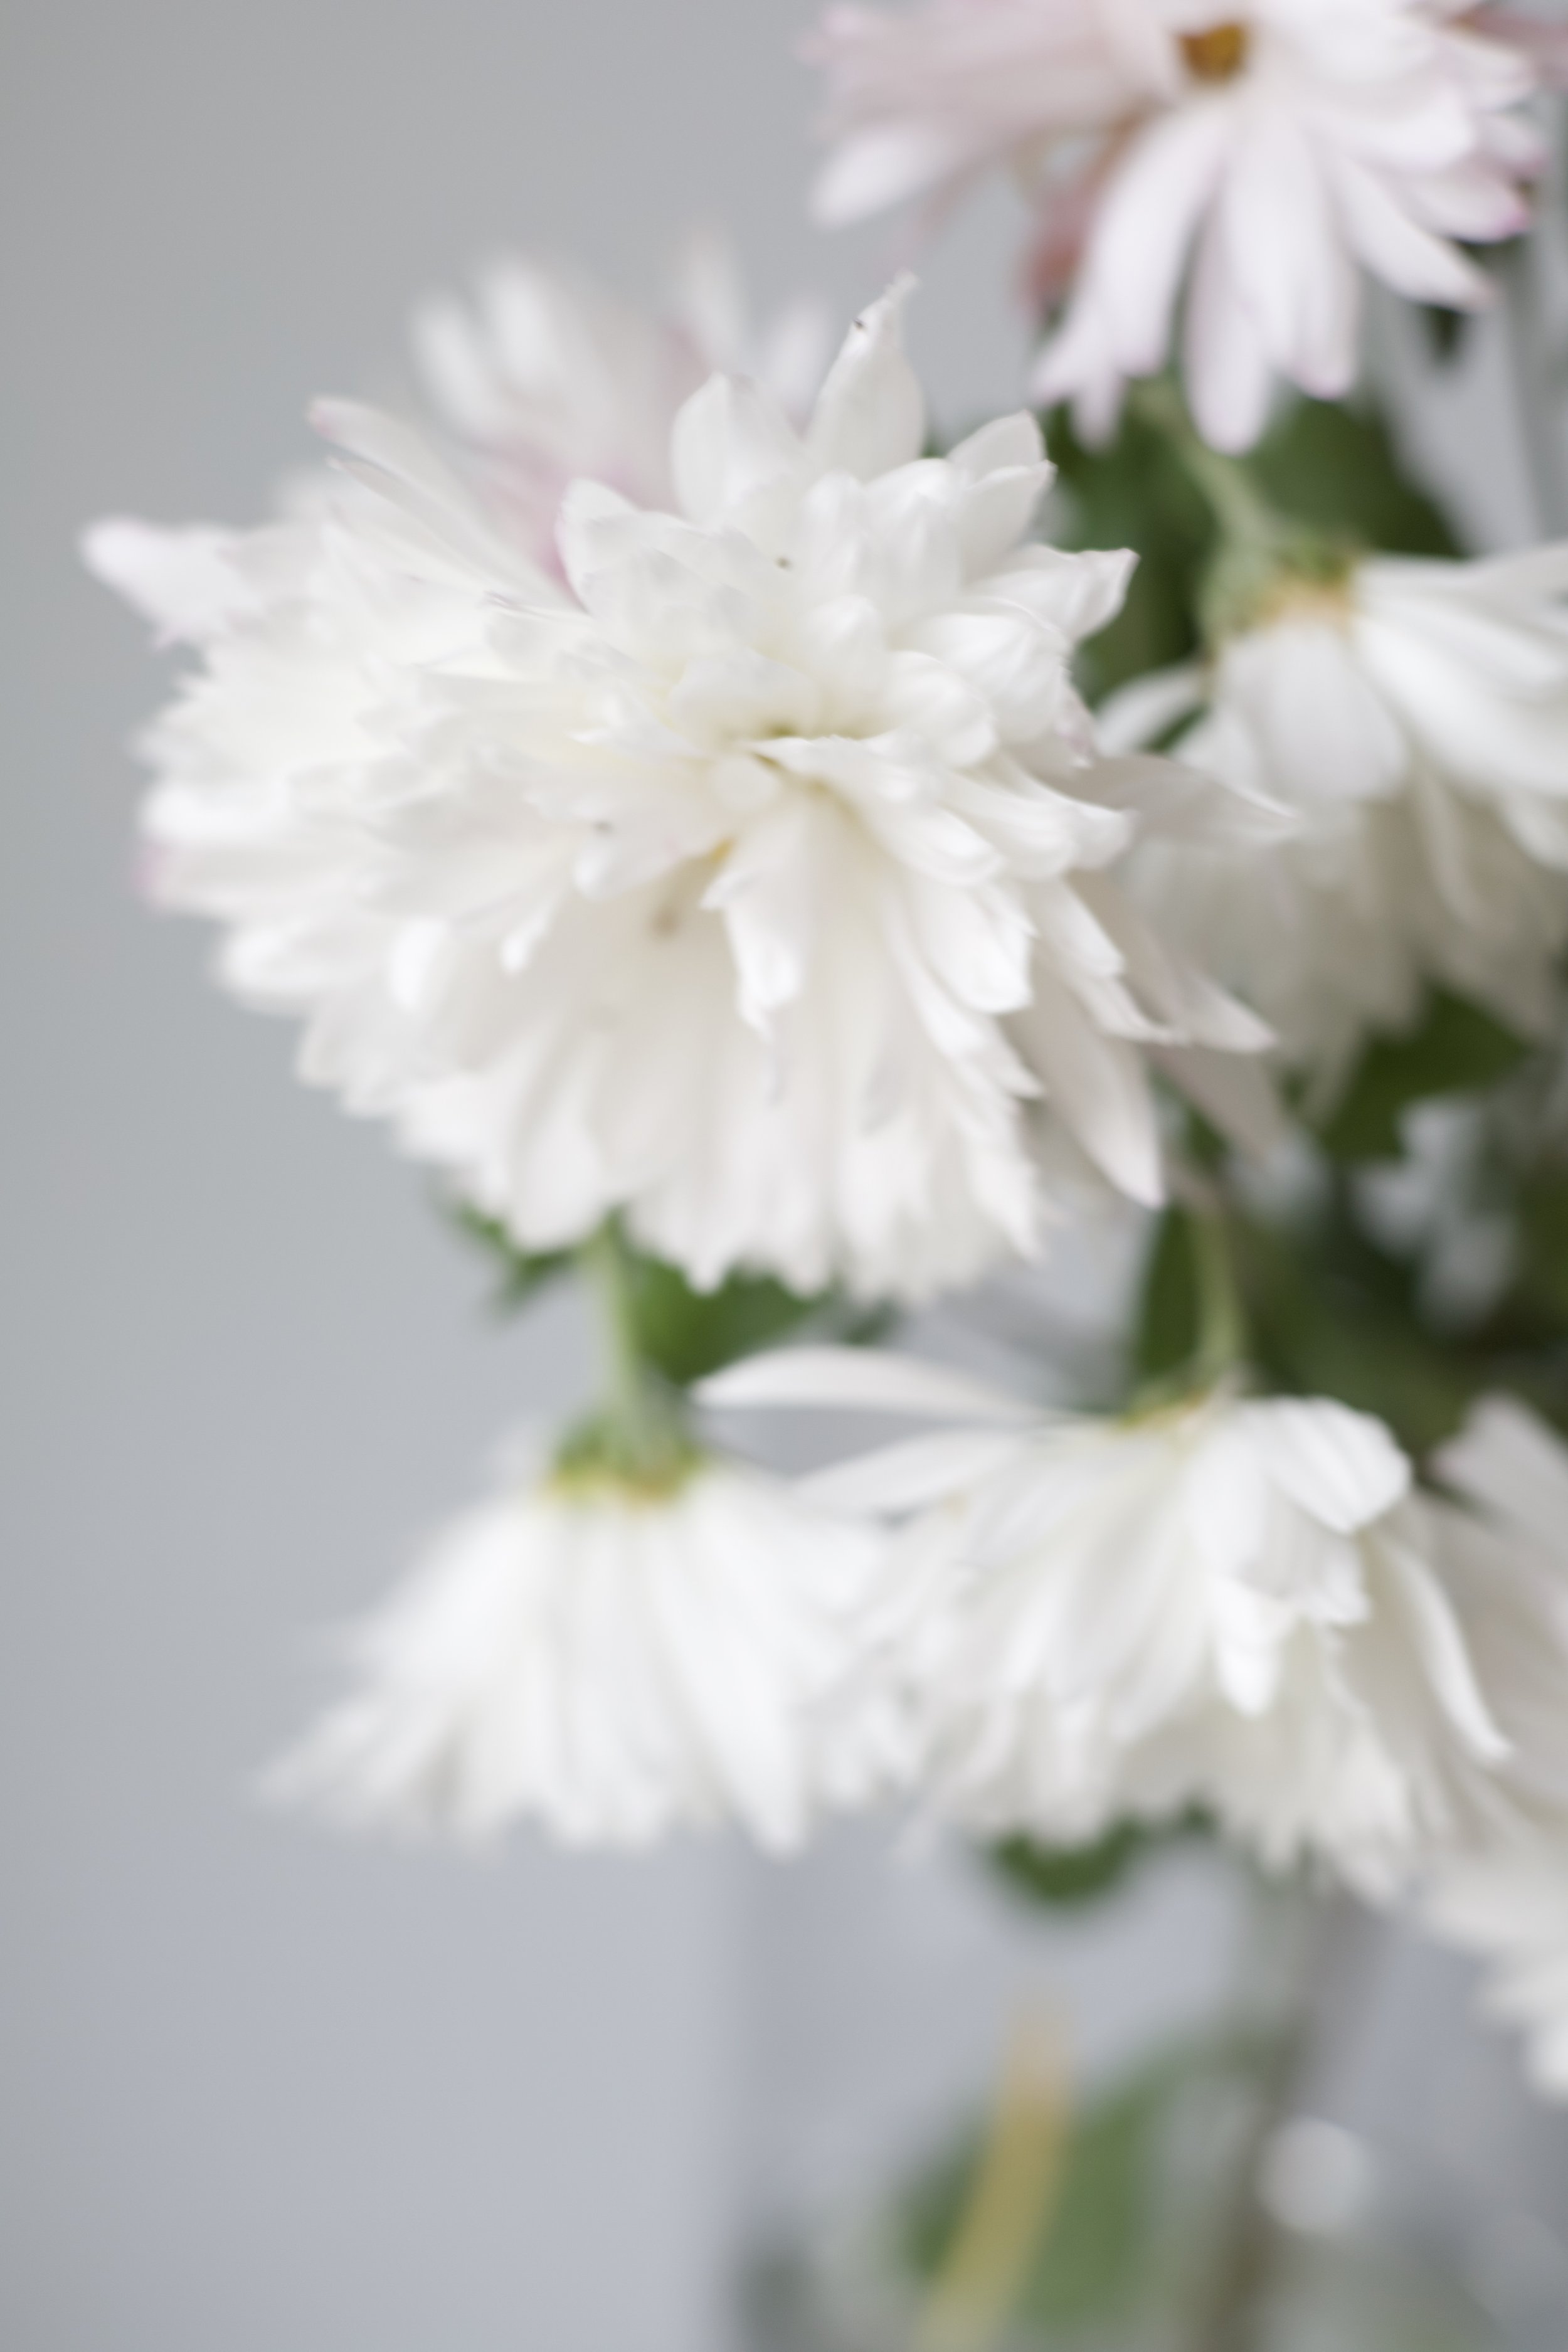
Shop our whole selection of chrysanthemums here. Shown below are (from left to right: Snowscape, Football Mum Set of 6 and Powder River

How To Grow Chrysanthemums in Zones 6 and 7
In zones 6 and 7, if you want your mums to come back every year you’ll need to select varieties that were bred to be able to withstand the frozen ground of winter. All of our varieties are winter hardy and will perennialize in zones 6 and 7.

If you’re working with cold hardy varieties like ours then maintenance will just involve cutting back all branches to the ground either at the end of fall or in earliest spring before new spring growth starts to come on.
Especially in zone 6 you’ll be rewarded if you choose a little bit earlier varieties. In both zones but especially in zone 7 you do have some wiggle room and can plant the long season varieties as well - they’ll just have a little shorter bloom window depending on when your hard frost hits. Temperatures below 20F for a long period will end your mum season but these guys can withstand some frosty temperatures. You can use frost cloth to prolong the season if need be.
Plant your mums in full sun and they will thrive. They can withstand shade but the plants will be much smaller and have less flowers the less sun they get. They should do fine in a situation with half day sun. In the summer be sure to water deep at least once a week - twice a week when temps are over 100. If you water nice and deep from the time they are young you will train the roots to go down vertically rather than spreading out along the surface. This will make your plants more drought resistant and you will be able to get away with watering less but when you do water you’ll want to water long and slow so that water can reach deep deep down to those deep roots.
Plant your cuttings in the spring just after your last frost date or in late summer about 6-8 weeks before the first frost. That will give them time to establish roots before the winter. You can also plant new cuttings all through the summer but you run more of a risk of cuttings drying out since their roots will be so small and shallow. If you’re an attentive gardener planting cuttings in the summer will work fine. You’ll get a small crop of flowers that first fall if you plant in the summer and then plants will reach their mature size that 2nd year.
Some of my favorite varieties for you to try are: Autumn Sunset, Centennial Sun is a very prolific early landscape variety, Doliette is a pretty novelty variety and Bronze Giant and Red Headliner are fun for cut flowers. If you’d like to shop our entire selection of cuttings you can shop them here. At the time of checkout you’ll be able to choose when you would like the cuttings shipped to you. We have cuttings available to be shipped from January to October and you can order year round.
How To Grow Chrysanthemums in Zones 8, 9, 10 - Humid/Tropical
In hot and humid climates, spacing your mums correctly and making sure your soil has good drainage will help a lot. Also plant in places that get afternoon sun if you get consistent temps above 100 midsummer.
This advice applies to places like Florida, Georgia, and Southern Texas but also Hawaii. If it’s hot and humid then this advice is for you.
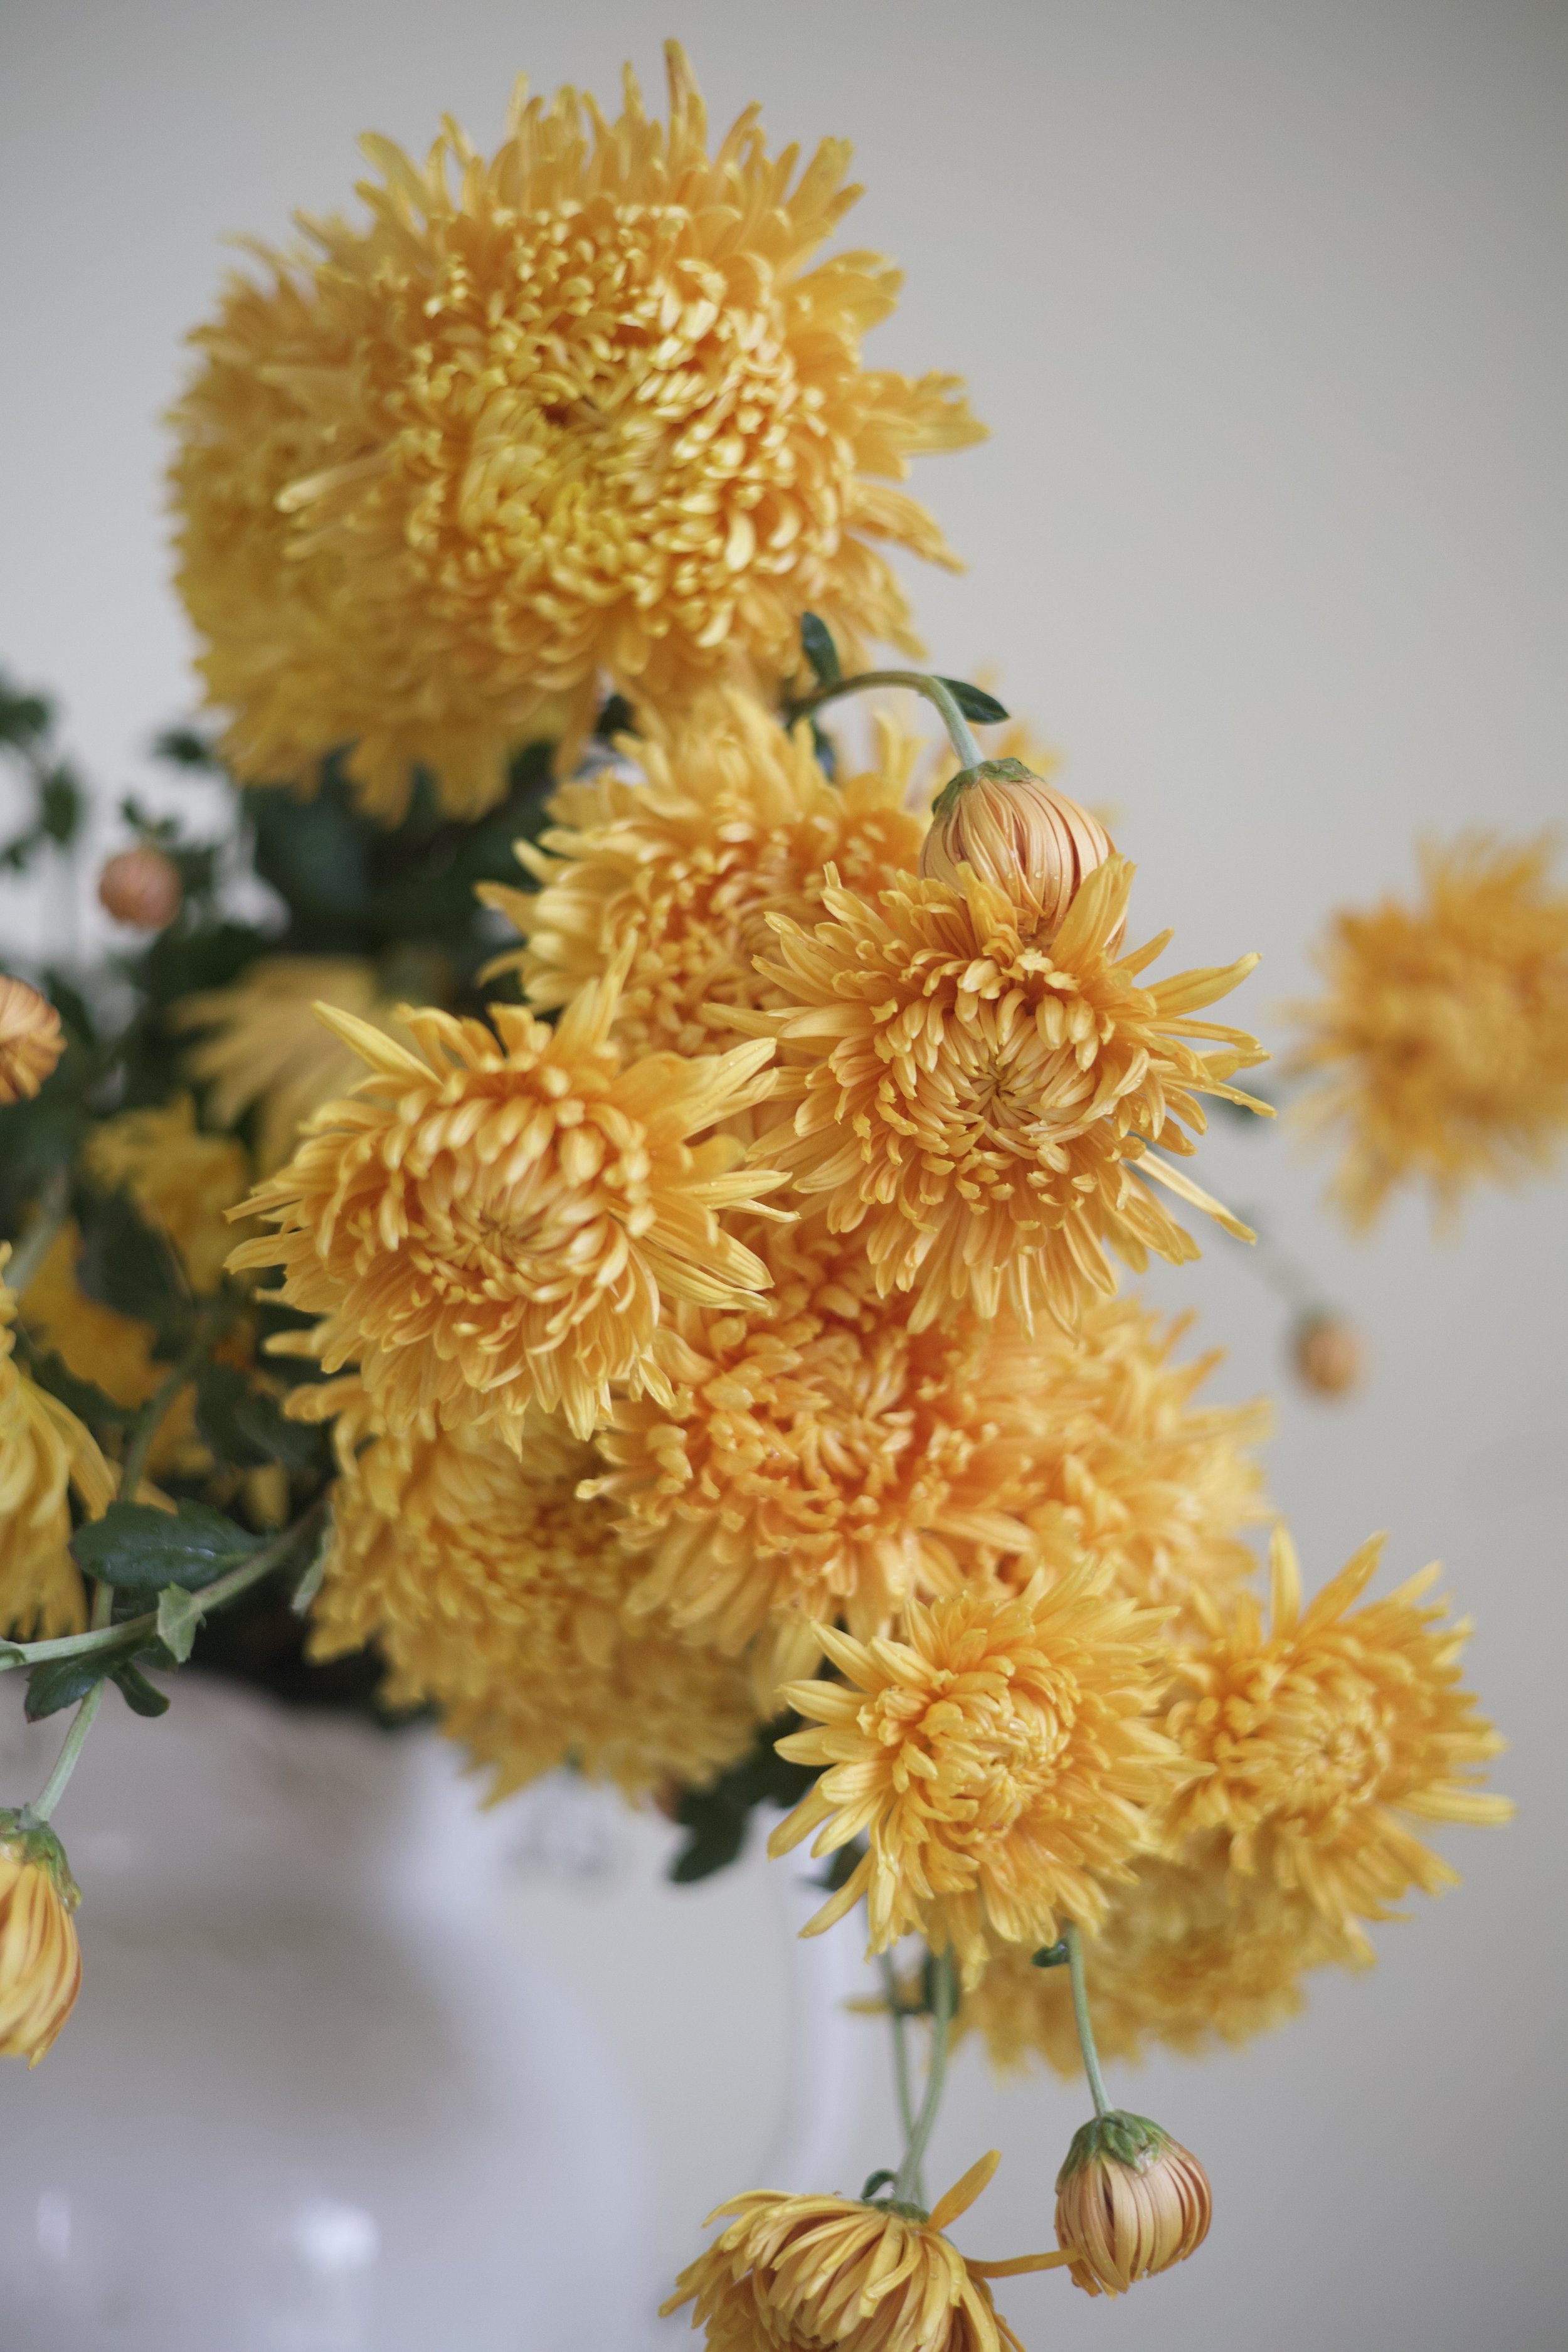
This is a mix of the varieties: Quarterback, Torchsong and Irish Linen
In warmer zones that are tropical you can plant your cuttings into the ground in spring or plant in the fall to get a head start so as to get roots nice and deep into the ground before the heat of summer. In particularly humid places, you will need to give your mums a little space to reduce rot and insects - how far you space the plant will depend on the size of the varieties you pick to plant. Just don’t really squeeze them in or the humidity can cause mold to start growing, and bugs will go crazy in the overcrowded foliage. Another thing you’ll need to watch for is root rot. If your soil lacks drainage and keeps your roots warm and soggy that’s a perfect recipe to rot your roots and they will fail to thrive or die. Growing in pots and raised beds is probably the solution if you live in a place that struggles with bogs and/or is below sea level.
Grape Glow
If your plants tend to struggle with heat, plant your mums in a place that gets afternoon shade. If your summers are particularly hot you might plant your mums into pots that can be moved to shade during the highest heat of summer - temps consistently above 100F. Some of my favorite varieties for cut flowers are: Irish Linen, Torchsong and Grape Glow. For landscape I love ‘Minnpink’ ‘Red Daisymum’ and ‘Rosyglow’ but there are lots of beauties beyond these. Shop our entire selection here.
For all my hot/humid chrysanthemum growers, add your growing tips in the comments!
How To Grow Chrysanthemums in Zones 8,9, 10 - Hot/Arid
This is growing advice for US regions that are hot and dry. Think Phoenix, Arizona and Las Vegas, Nevada type climates.
How To Grow Chrysanthemums in zones 9,10 - Hot/Arid: This is for US regions that are hot and dry. Think Phoenix, Arizona and Las Vegas, Nevada type climates.
Mums can grow in your region with a little extra care and attention to timing. What you will need to watch for is that your mums are staying hydrated and that you plant them in the right places at the right time. I would suggest planting your mums into pots that can be moved out of the heat. Plant 4 to a pot for a pincushion look or 1 or 2 to a pot for a less symmetrical planting.
Plant cuttings in early fall or late summer - once temps have started to drop below 90F or late winter - January, February. At the end of spring/early summer when temps start getting above 100F every day, move your pots to a shady place or where they are shaded from the afternoon sun and be sure that they’re getting enough water, probably daily or every other day during that high heat.

After they have bloomed and have passed through a full annual cycle and are looking ratty, cut them to the ground. The deeper the roots, the more drought tolerant your mums will be. In your zone it will be especially important that you water long and deep from the very beginning to train your roots to grow down rather than spreading out along the top 6 inches of top soil where they are prone to dry out.
Any of our varieties will do beautifully in your zone with a little extra care and love. Here are some of my favorite longer season varieties that I would recommend: Cheerleader, Talisman, Wayzata for landscape, Stadium Queen and Sunny Morning. There are many others which would be so beautiful grown in your long season which you can shop here.
How To Grow Chrysanthemums in Zone 4 and 5
Plant cold hardy cuttings in the spring after last frost or 6-8 weeks before the first frost so as to give your plants time to establish roots before they go dormant for the winter.
Choosing varieties that are cold hardy will make chrysanthemum growing infinitely easier in cold regions. We own the famous Lehman chrysanthemum stock which was primarily bred by the Lehman family in the 1950’s and 60’s. They lived in Minnesota and were especially interested in breeding cold hardy varieties that are perennial down to zone 4 for use in the landscape and as cut flowers. You can shop our cold hardy mum varieties here.
From left to right are some early bloomers that are wonderful when grown together in the landscape or for bouquets: Fancy Free, Cameo, and Centerpiece.
Plant cold hardy cuttings in the spring after last frost or 6-8 weeks before the first frost so as to give your plants time to establish roots before they go dormant for the winter. In zones 4 and 5 especially you would be able to get away with planting cuttings even in the middle of summer if you are careful to keep your little cuttings hydrated. If you live in zones 4 or 5, cut your mums to the ground after first frost and cover them with a thick layer of mulch and leaves for winter protection.

You will also do well to choose varieties that are early blooming so as to enjoy your blooms as long as possible. My very favorite cold hardy early bloomers are: Belle O The Ball, Cameo, Gold Country, Centerpiece, Peach Centerpiece and Quarterback. We also sell our Early Set of 8 Mix which is fabulous. Also all of the Mammoth mums such as Grandchild were bred to withstand winters down to -30F for Minnesota winters. Those will grow in a huge mass of color in the landscape. They’re exceptional. There are many others with all kinds of uses - cut flowers etc.
All of our varieties are cold hardy. You can shop our full selection here.

Where Should You Plant Chrysanthemums?
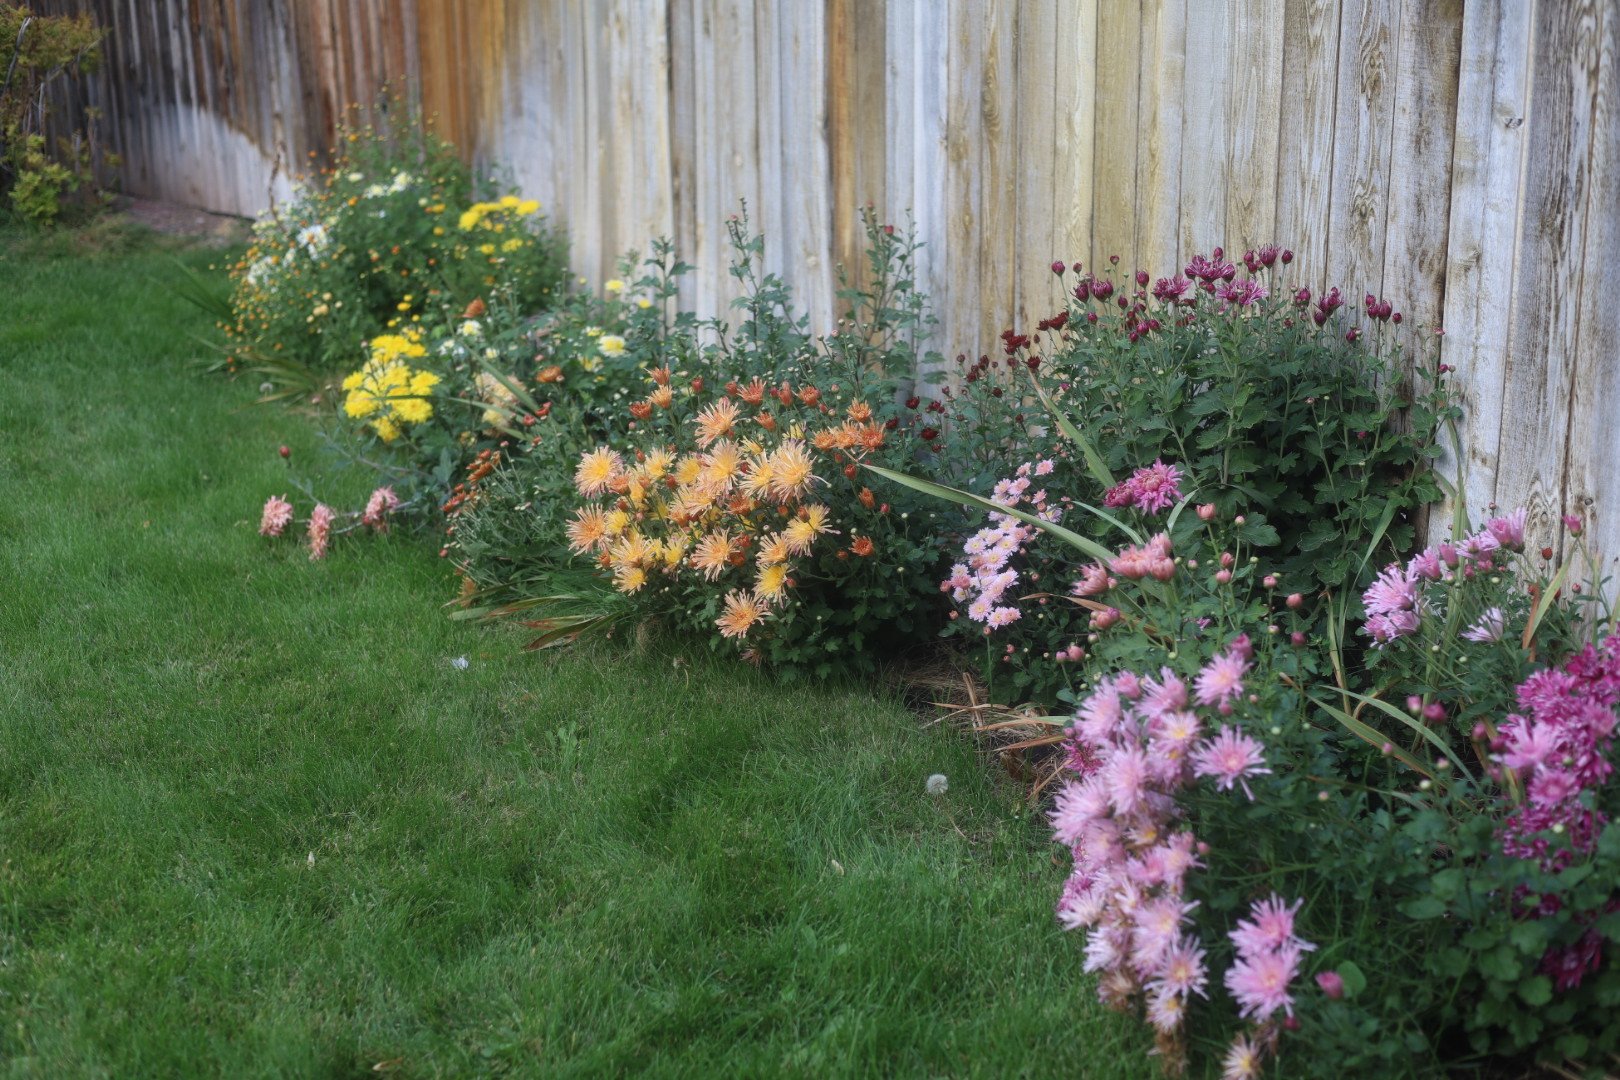
Quick Answer: Chrysanthemums can grow in many conditions but they will perform best planted in a location with full sun.
Chrysanthemums in the garden prefer to be planted in an open sunny location and should not be shaded by buildings, large shrubs or trees for more than three or four hours per day. They CAN grow in shade but the plants will be much smaller and have less blooms.
Any fairly rich soil, be it sandy, clay, or loam, that will grow other flowers and vegetables well will also grow good Mums. There is no soil that Mums particularly favor; they will grow equally well in all.
They do love humus such as peat, leaf mold, or barnyard manure. They will struggle to thrive in a hard baked and cracked soil. Loosen it up with peat and add a nice thick layer of healthy topsoil over the top so the water will penetrate and not run off when applied.
Here are a few very healthy and high performing varieties that we recommend:

GRAPE GLOW: A beautiful violet bloom with a silver reverse. An early bloomer with a free blooming habit and large flowers. The stocky plants grow to 15” tall with a 20” spread. A great cut flower.
BELLE O’ THE BALL: Bloom Date-Sept. 20. Exquisite 5 inch rich lavender flowers on a very dark green 24 inch plant.
MINNRUBY: One of the owner, Sara’s very favorites because it pairs so beautifully with almost all the other colors - especially with ‘Autumn Fire’ and ‘Autumn Beauty.’
If you’d like to see all of our varieties you can shop our chrysanthemums here.
Lavender Pink Dahlia Arrangement
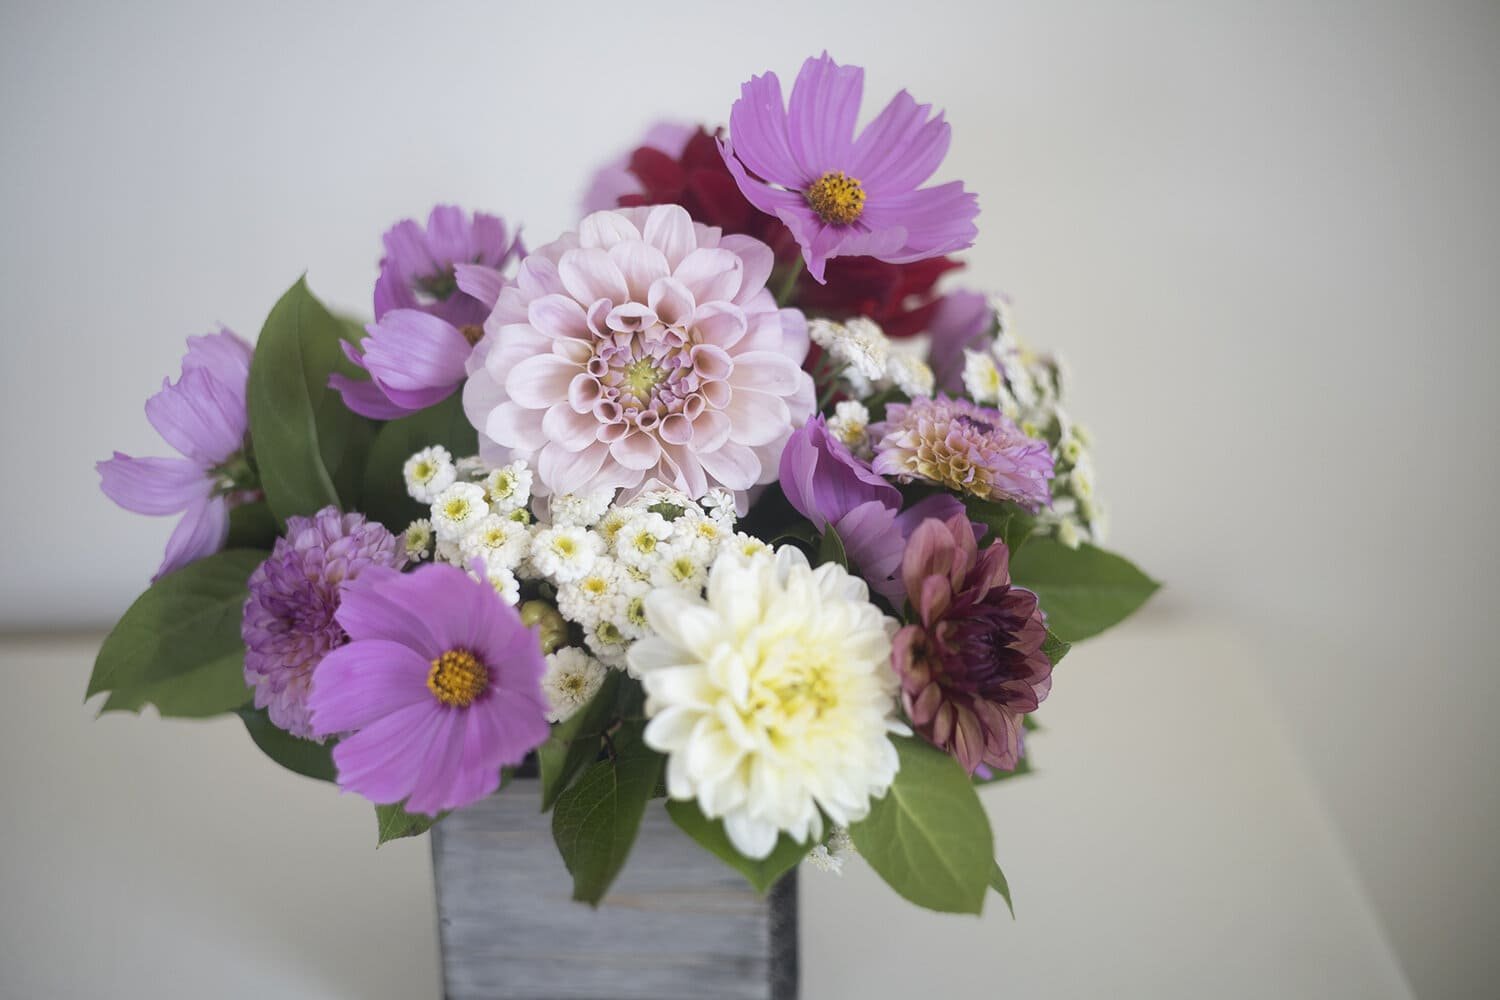
For this arrangement you will need:
Cosmos ‘Pink Popsocks’
Chamomile ‘Tetra White’
Dahlia ‘Creme de Cognac’
Dahlia ‘Dianas Memory’
Dahlia ‘Mingus Alex’
Dahlia ‘Wine Eyed Jill’

Lavender petals fade into deep pink towards the middle that pops against the bright yellow center. Cosmos are drought tolerant and attract pollinators of all kinds making them a great companion plant in your vegetable garden.
Depending on your zone, there may still be time to start seed at least 13 weeks before the first frost date.
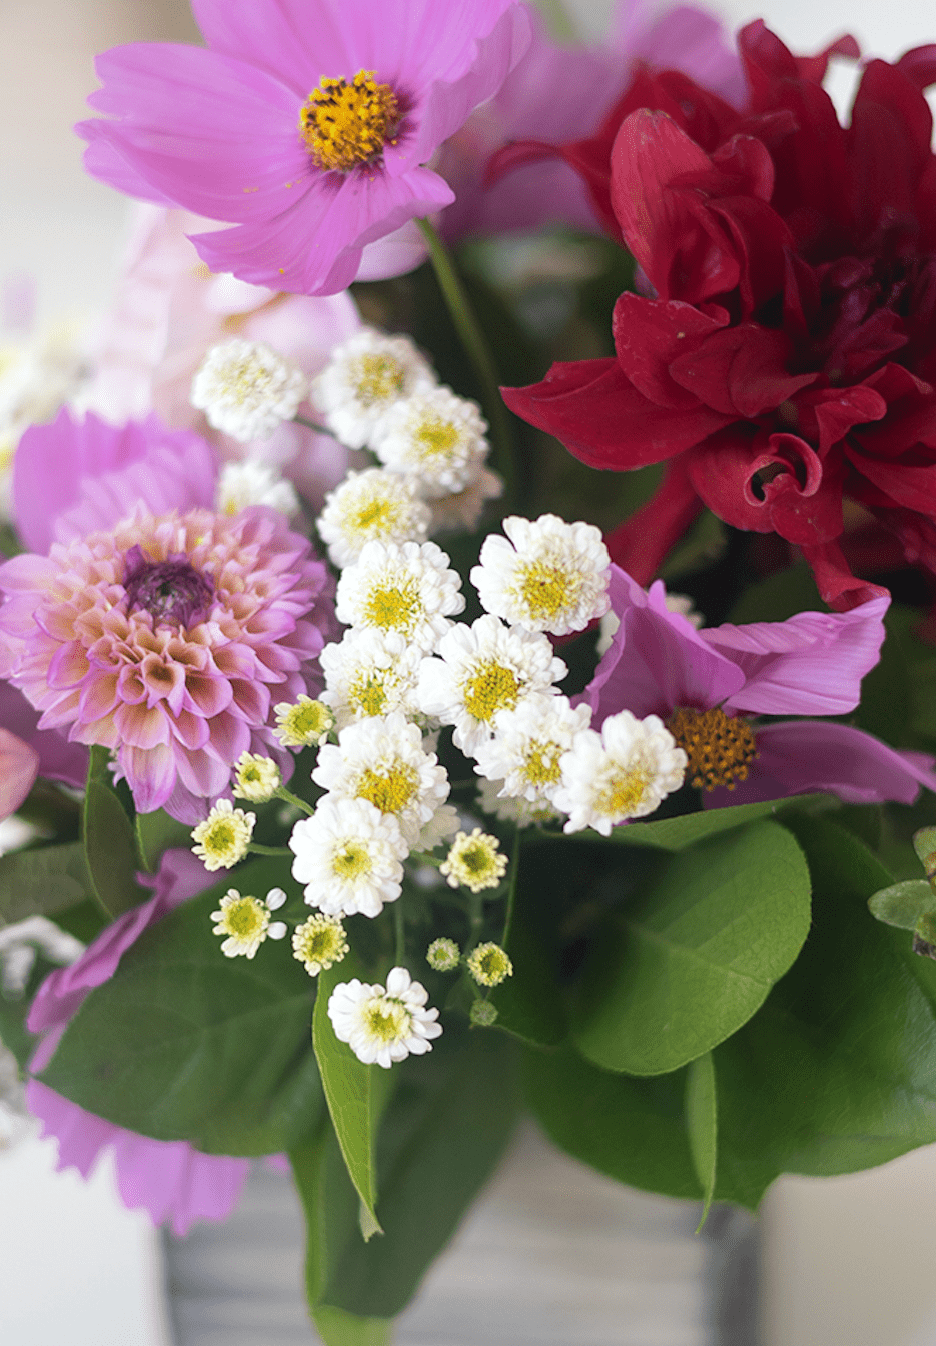
Chamomile ‘Tetra White’
These tiny blooms will add a bit of joy to anyone’s day. Their soft yellow-green centers pair perfectly with their delicate white petals.
View our available varieties of Chamomile.

Petals are pale peach with raspberry tones on the underside.
Dahlias will be available for presale this fall and will be included in the Halden Flower Box in April 2022.

The soft yellow and pink tones of these petals compliment each other beautifully.
Dahlias will be available for presale this fall and will be included in the Halden Flower Box in April 2022.

This is one of the most romantic dahlias with the deepest of red petals and a slight twist as they unfurl.
Dahlias will be available for presale this fall and will be included in the Halden Flower Box in April 2022.

This beautiful dahlia looks to be dusted in golden yellow and dipped in lavender magenta.
Dahlias will be available for presale this fall and will be included in the Halden Flower Box in April 2022.


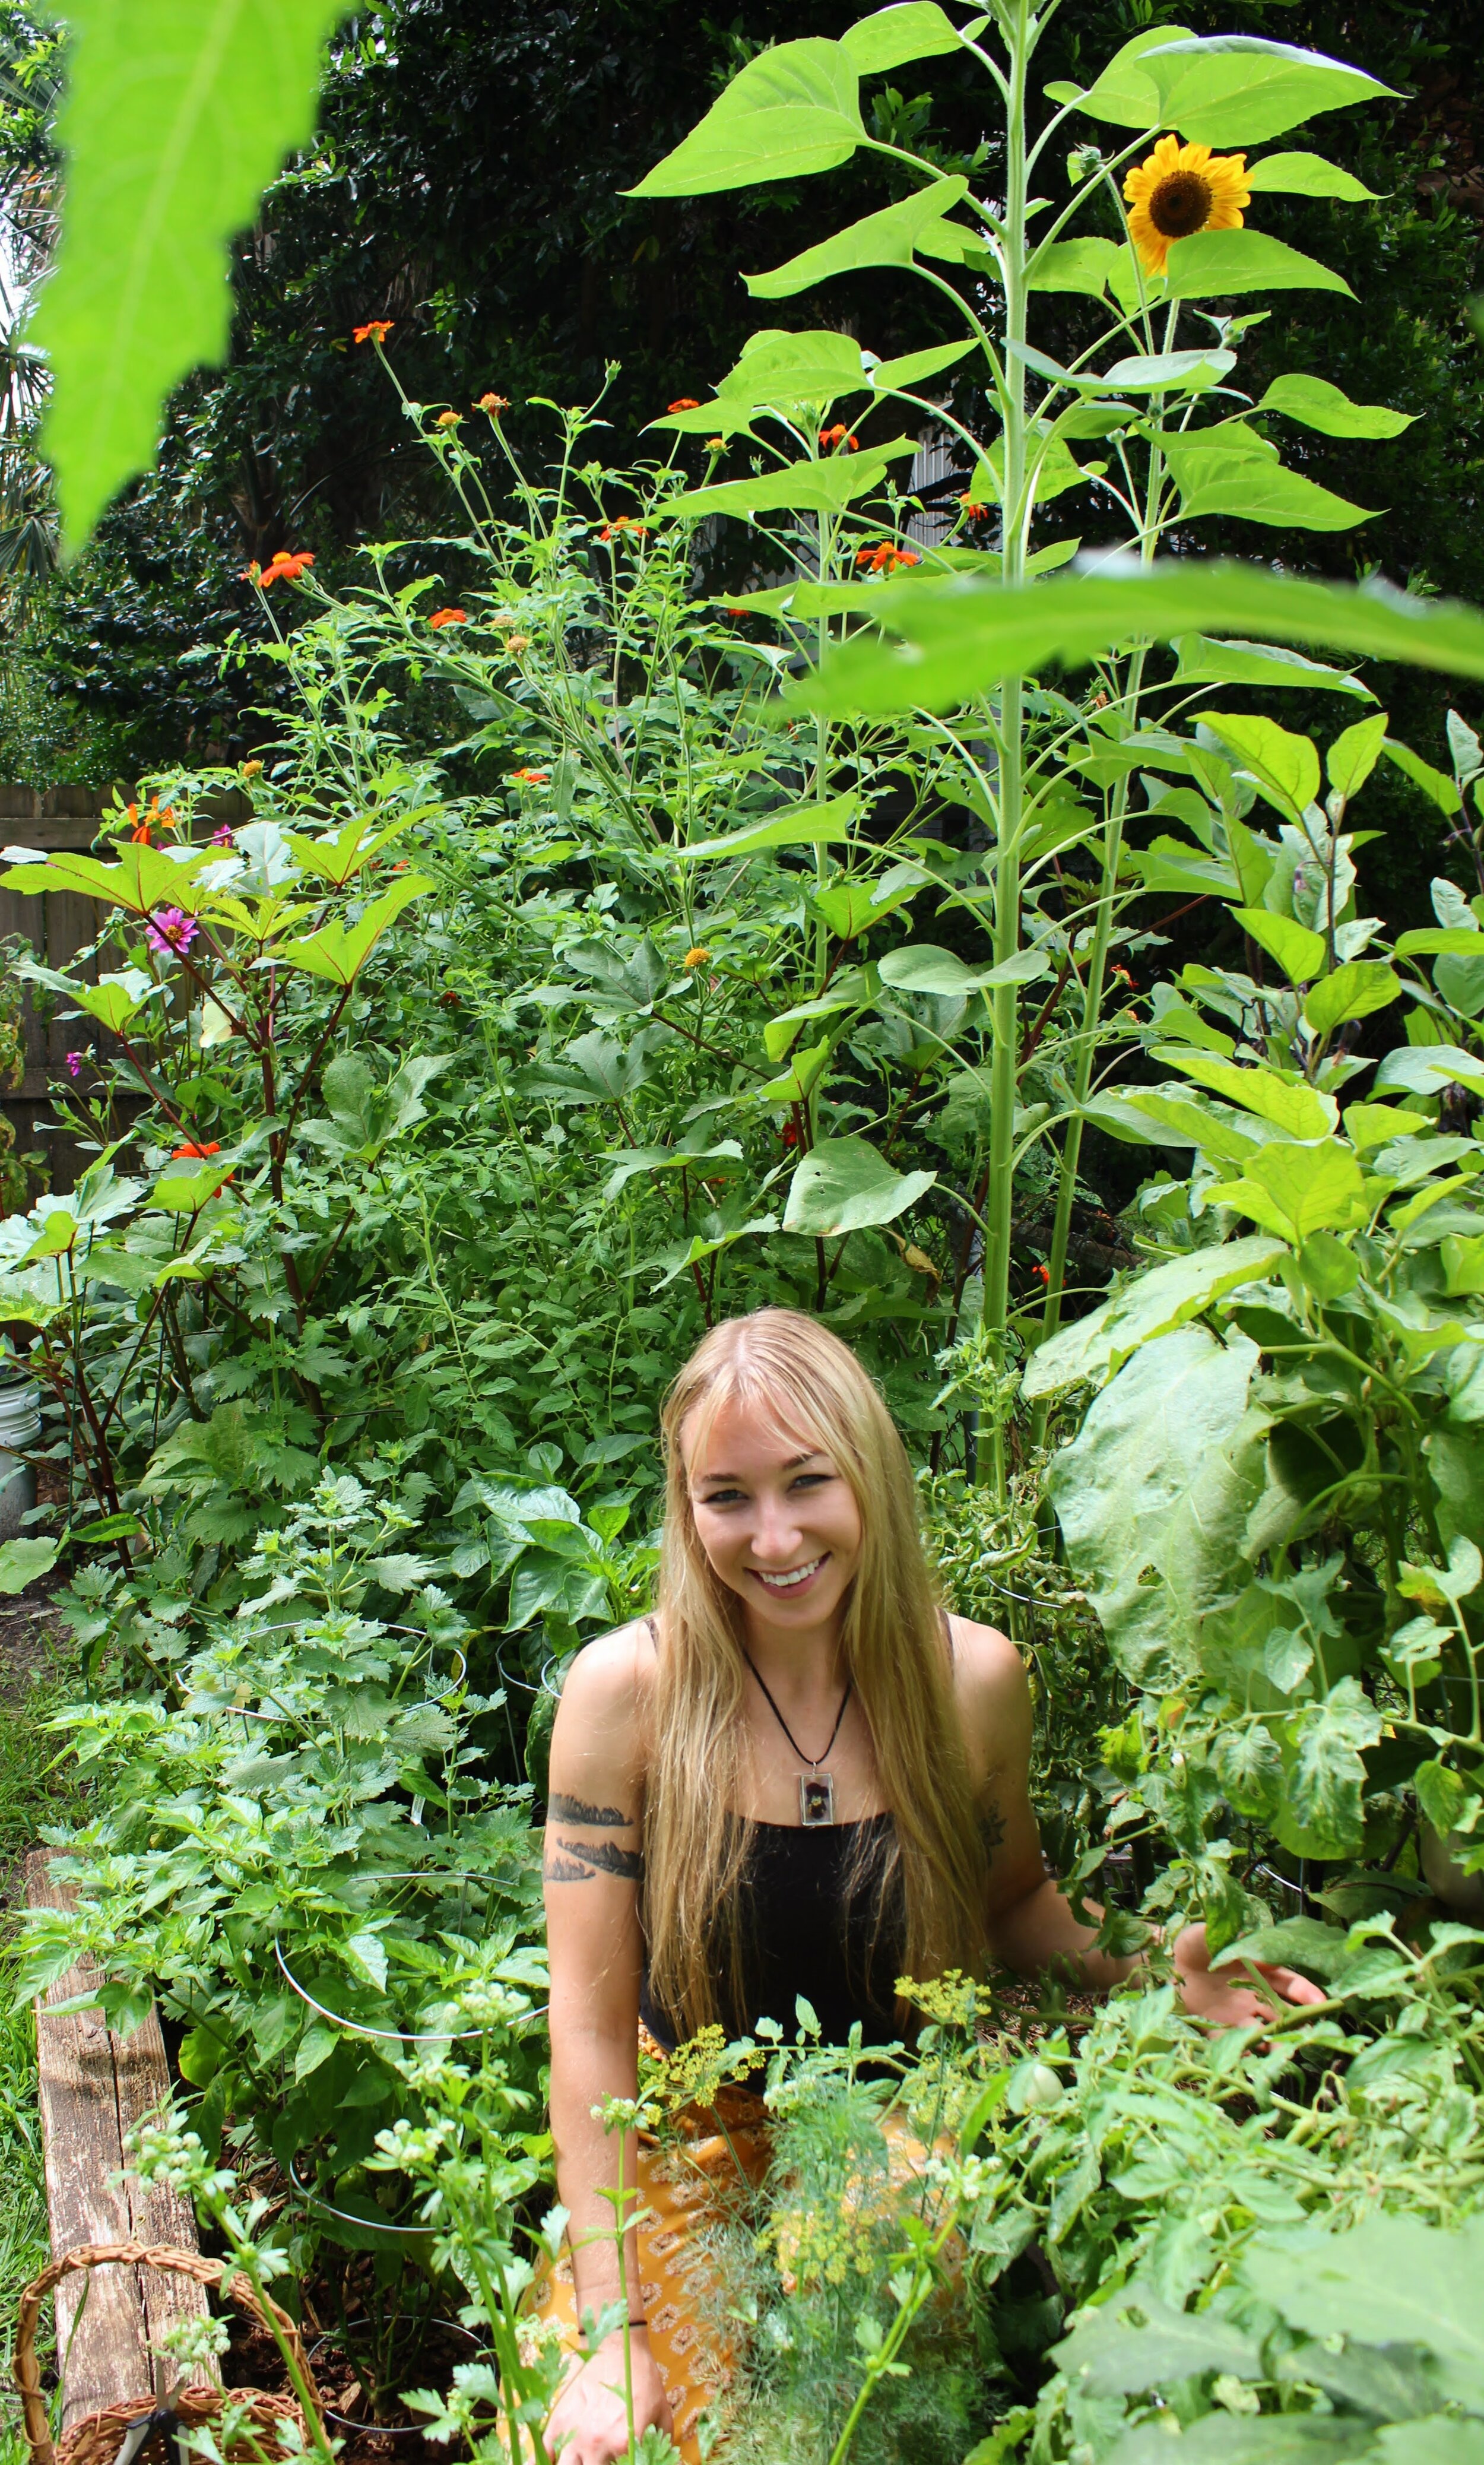
Flowers from the garden of Sara Haller
Photos by Sara Haller
Annie Rose and the Elephant

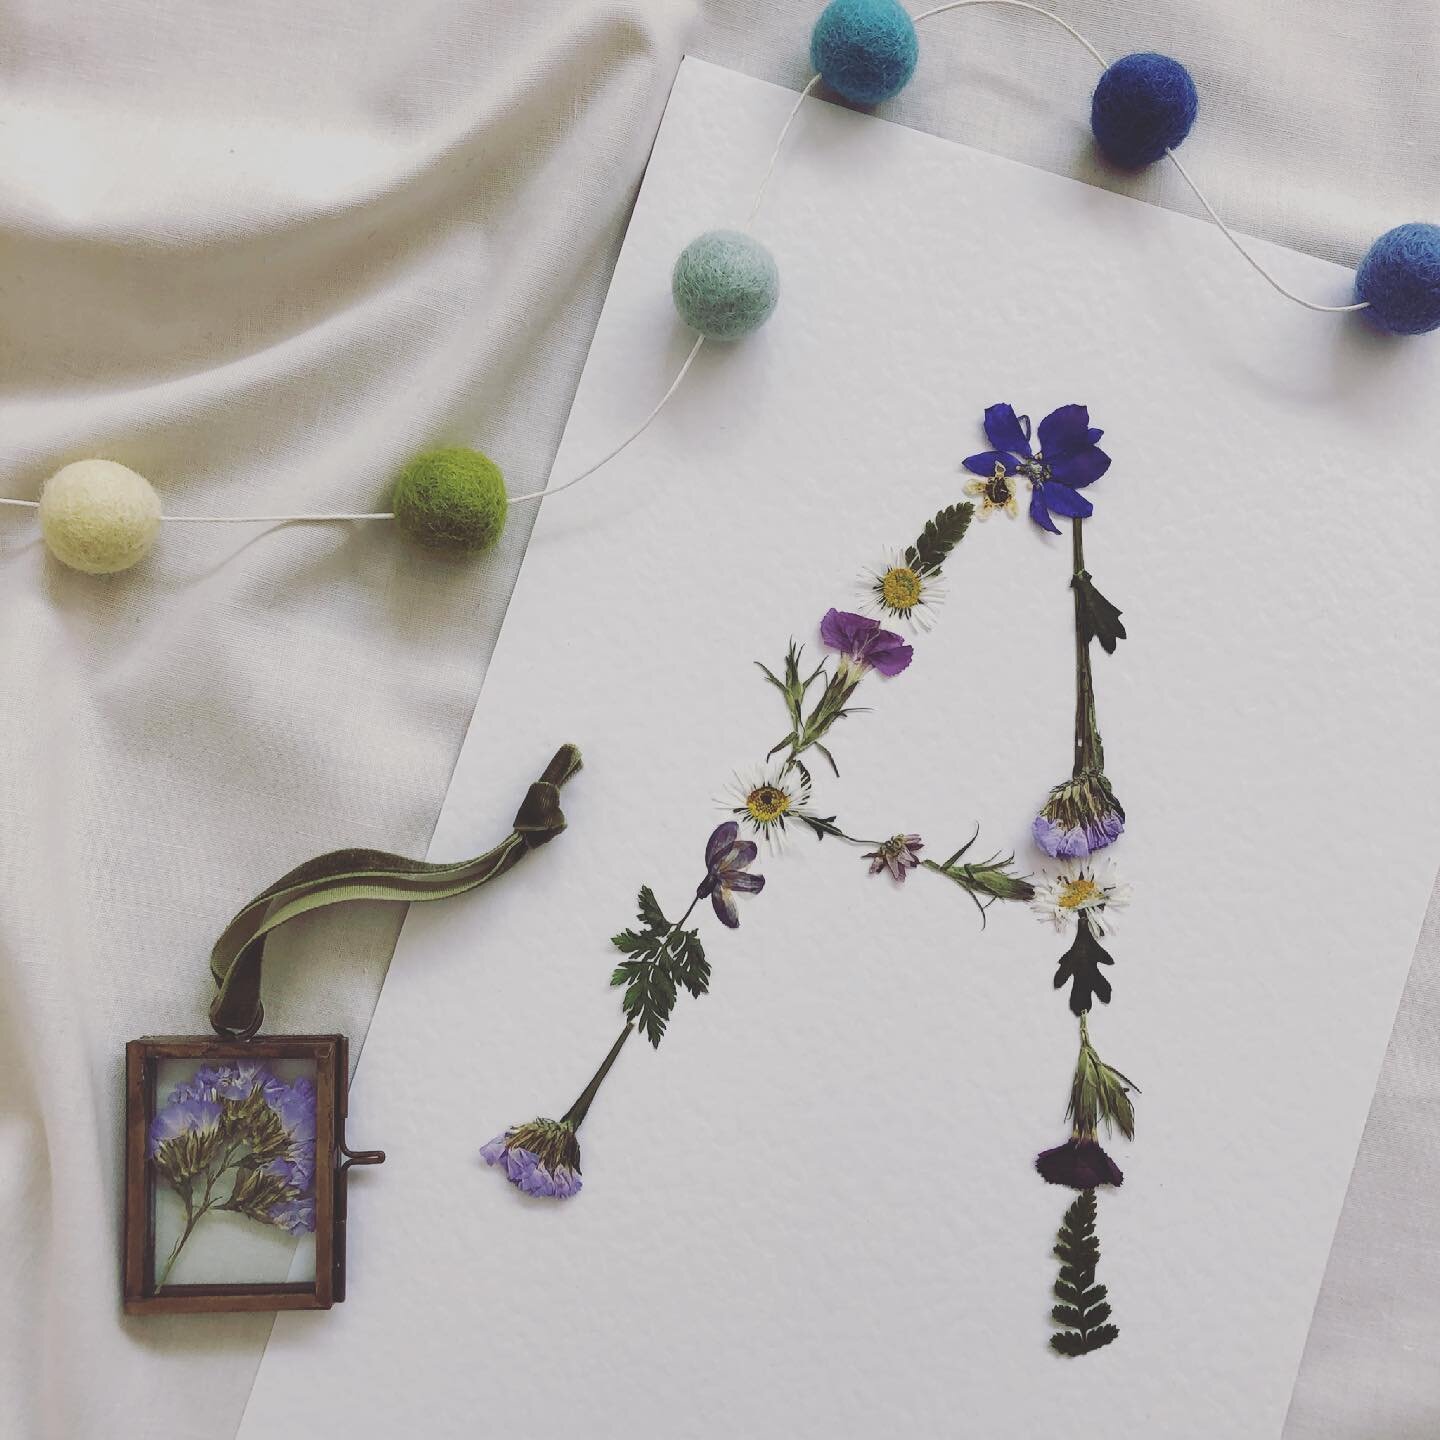
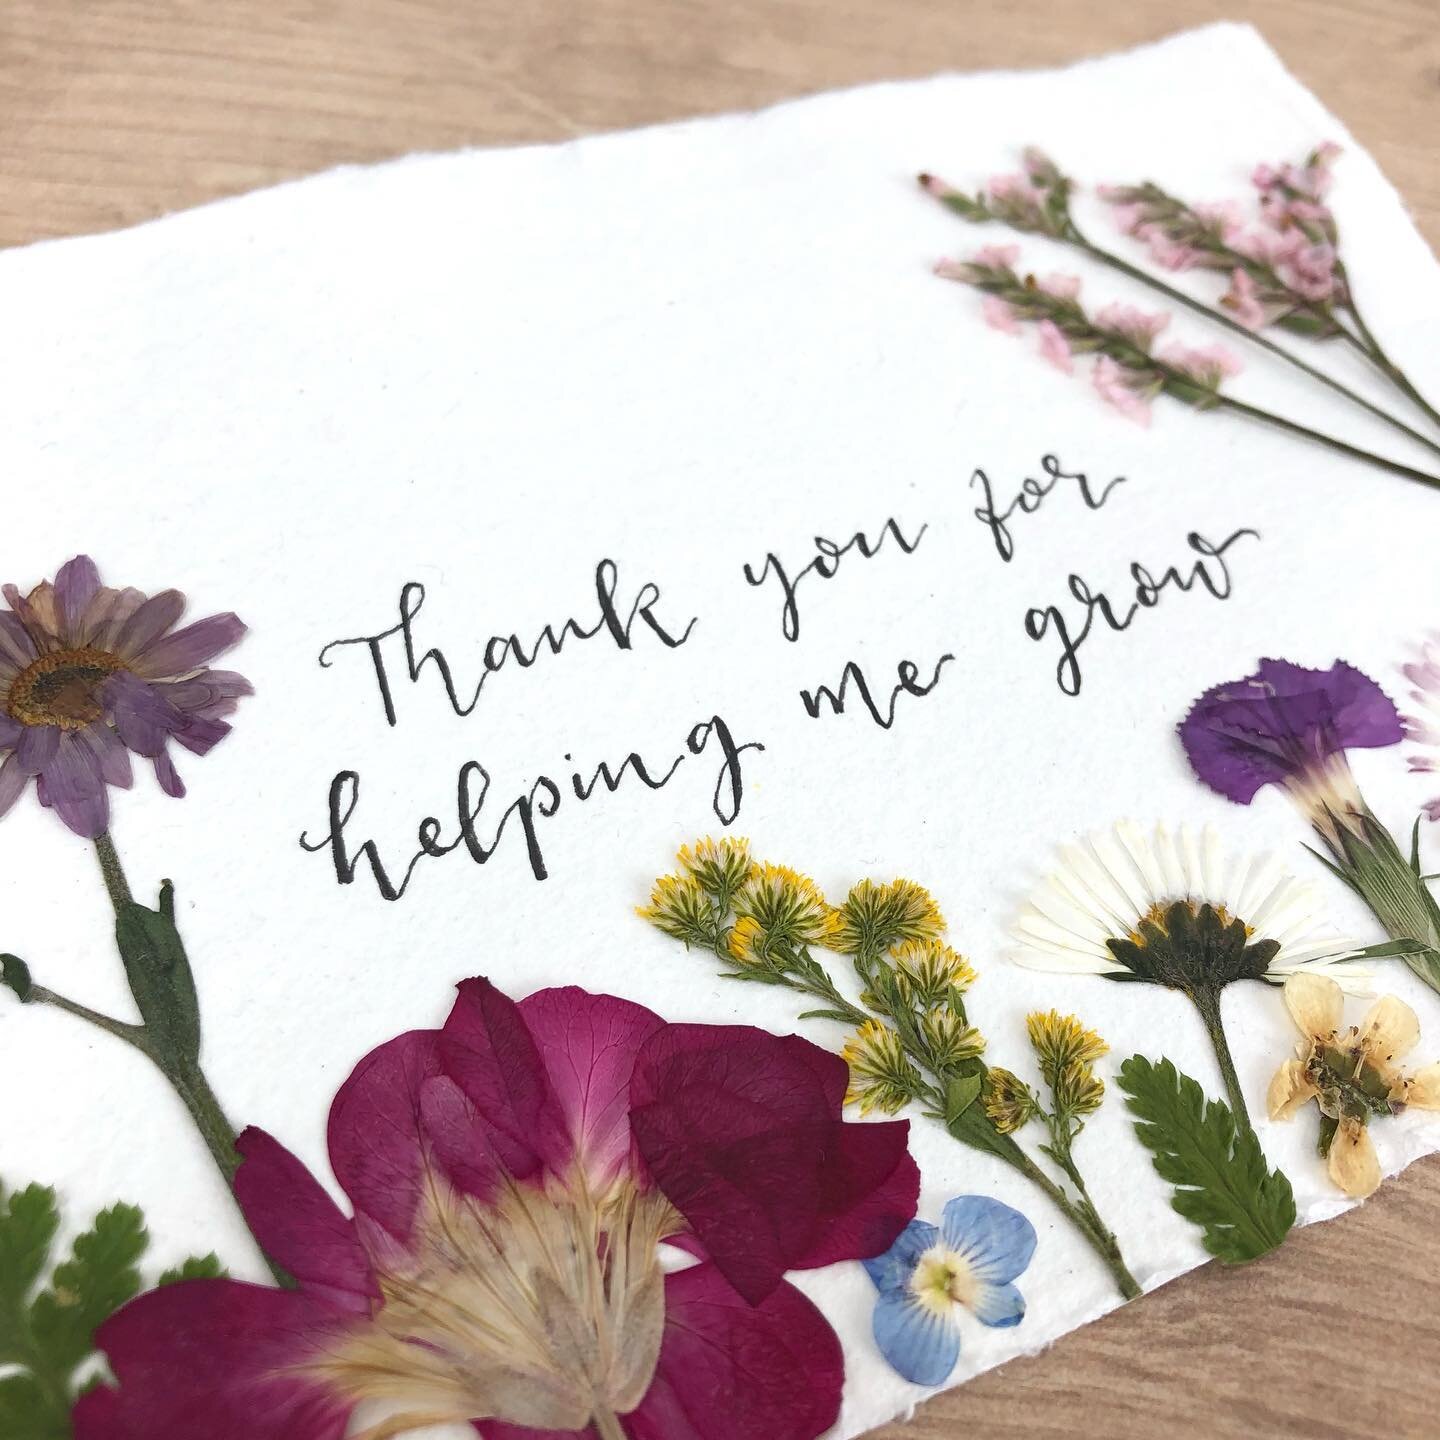
This week’s feature is about Katie, creator of Annie Rose and the Elephant and mum of two from Chester, England. As a nature loving artist, “All flowers that I use in my work are lovingly home grown, pressed and created into unique works of art in my home studio.”

Introduction to Pressed Flowers
“I have loved art ever since I was young & have always been keen to incorporate flowers into my work. My passion for homegrown flowers began during the first lockdown when I enjoyed daily walks to the local country park with my two girls, collecting the wildflowers & preserving them as lockdown memories. I had the time to learn more about gardening and growing my own flowers from seed, to then use in my work.”
Photo courtesy of Annie Rose and the Elephant

Inspiration
“A lot of my inspiration comes from being outdoors. I love exploring the amazing colour palettes and shapes designed by nature! I also enjoy visiting public gardens to improve my knowledge & gain inspiration for both my garden and artwork.”
Photo courtesy of Annie Rose and the Elephant

A Favorite Creation
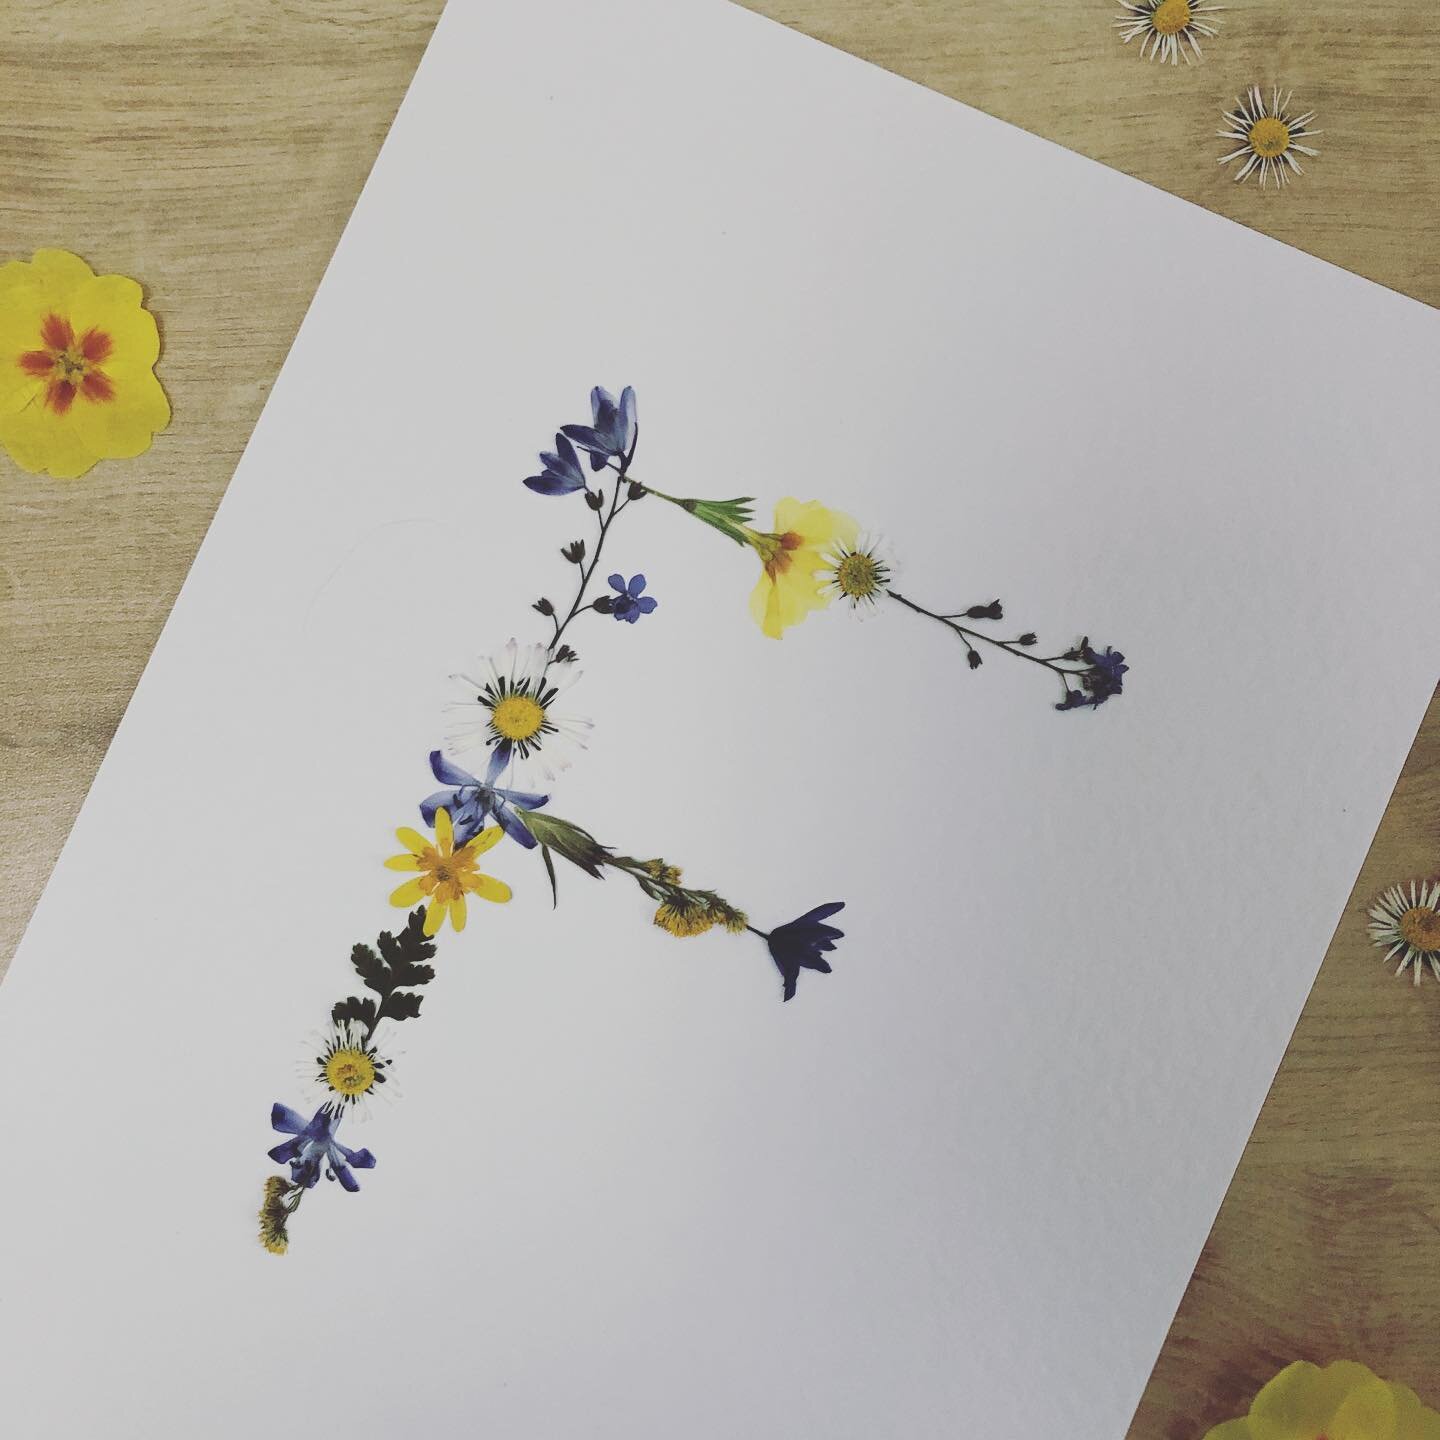
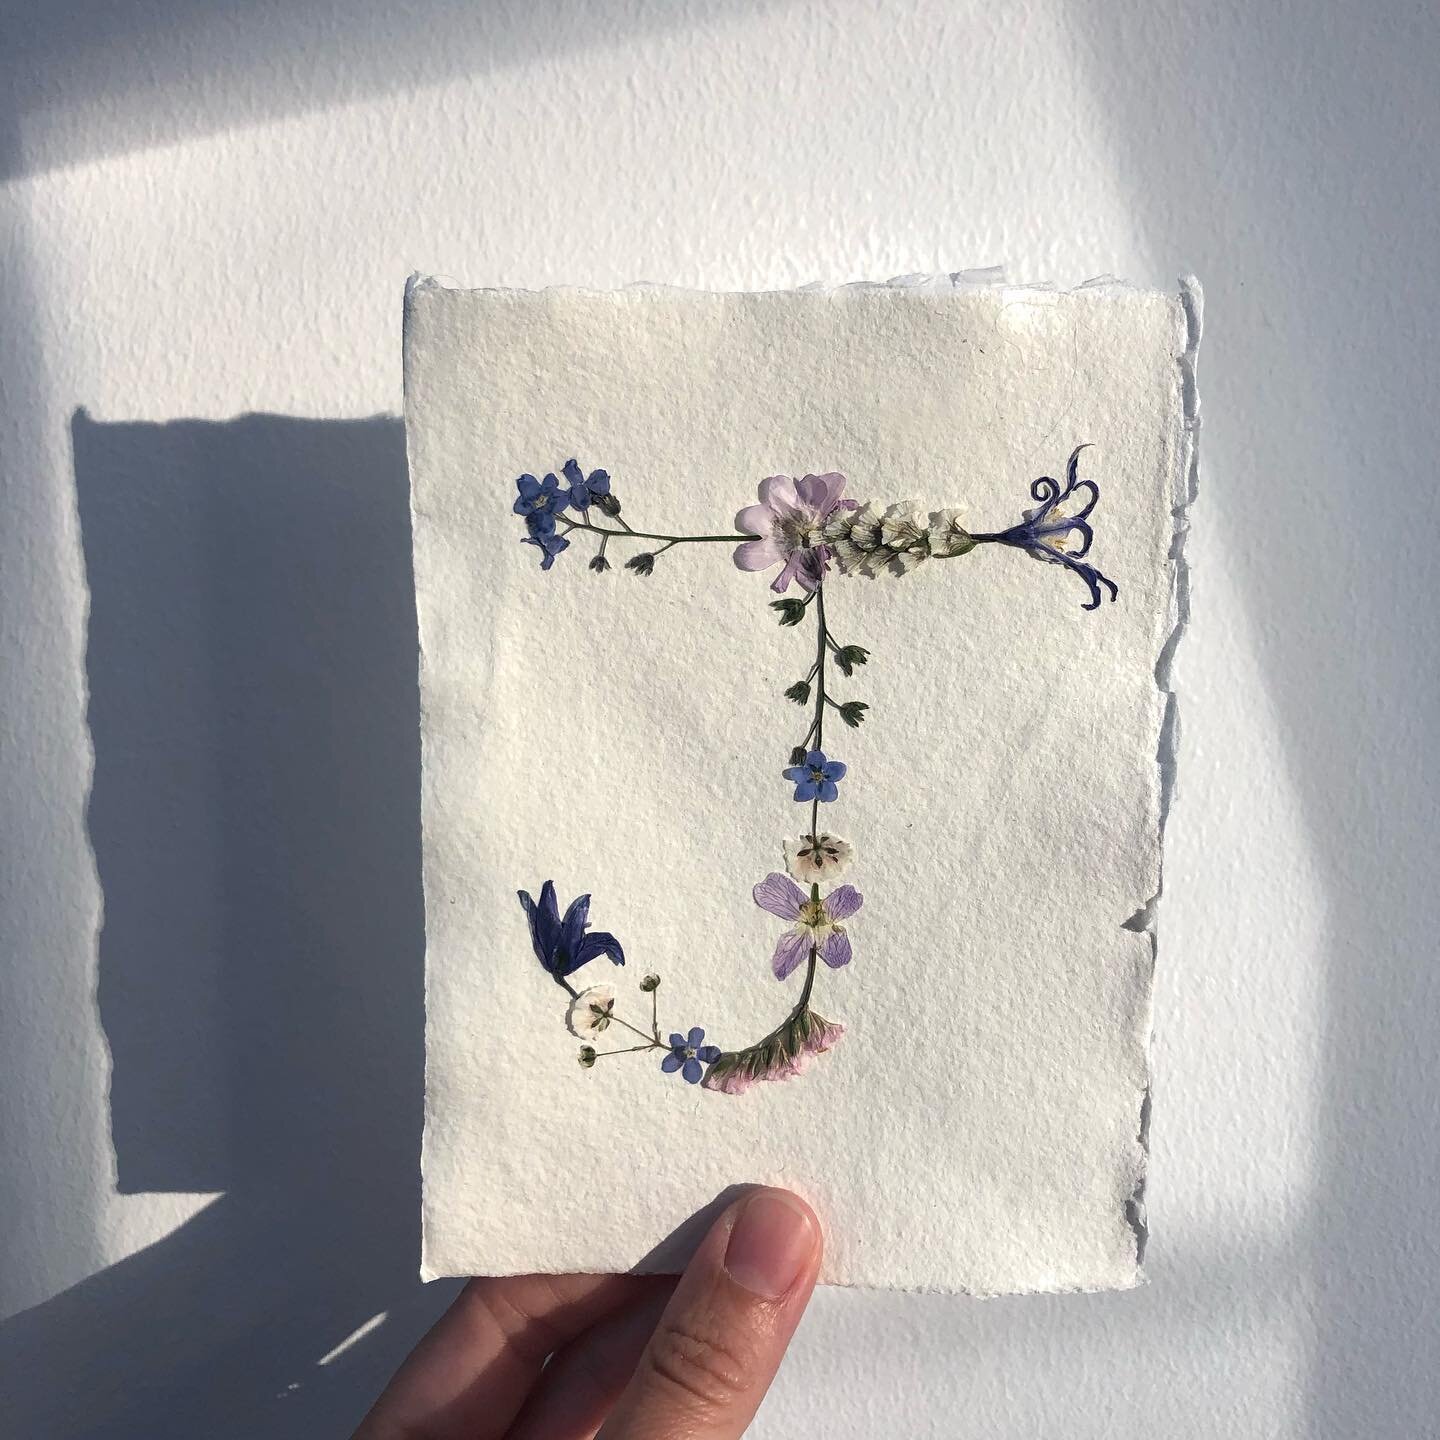
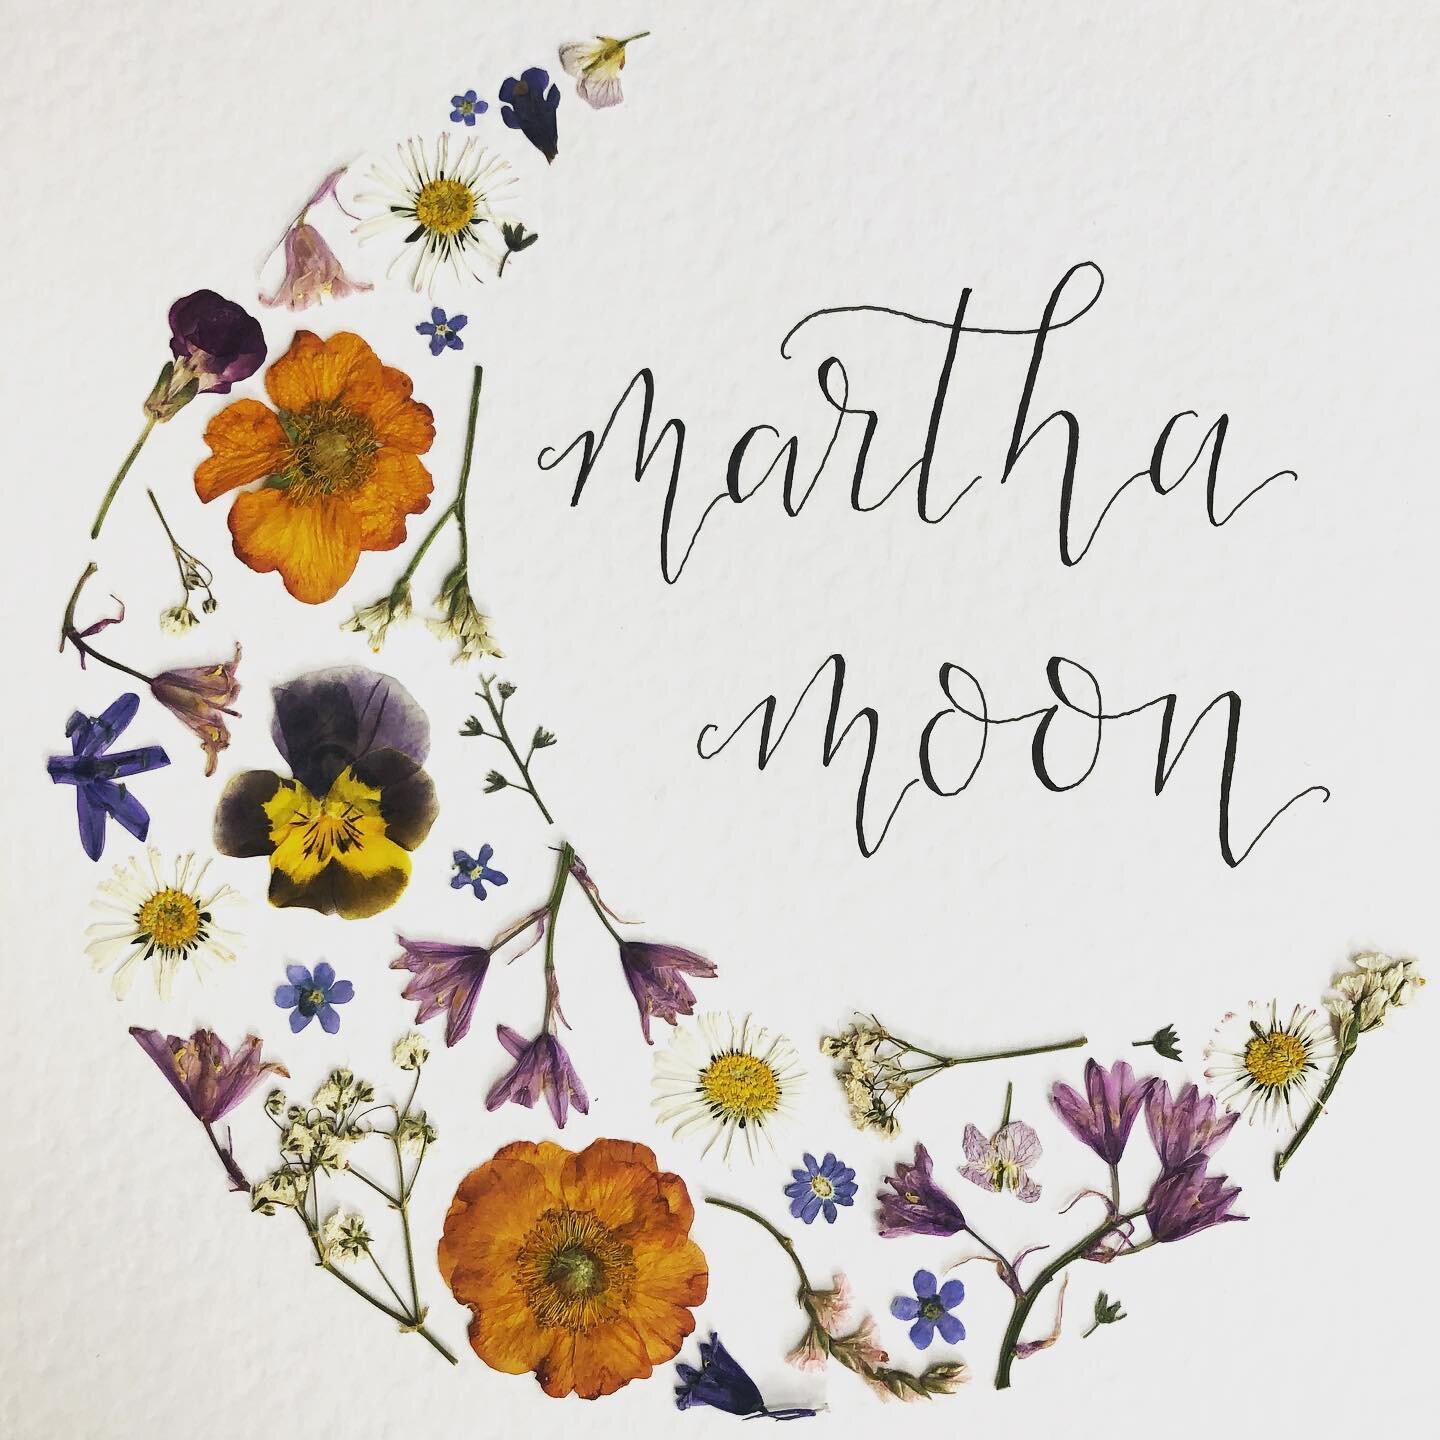
“I absolutely love creating the floral letters! I really enjoy the challenge of selecting the right flower to create the shape of the letter, whilst ensuring the colour palette works; attention to detail is key.
A lot of these orders are customised gifts for new babies, so it’s always nice to hear about new arrivals & their gorgeous names!”
Photo courtesy of Annie Rose and the Elephant

Learning From the Process
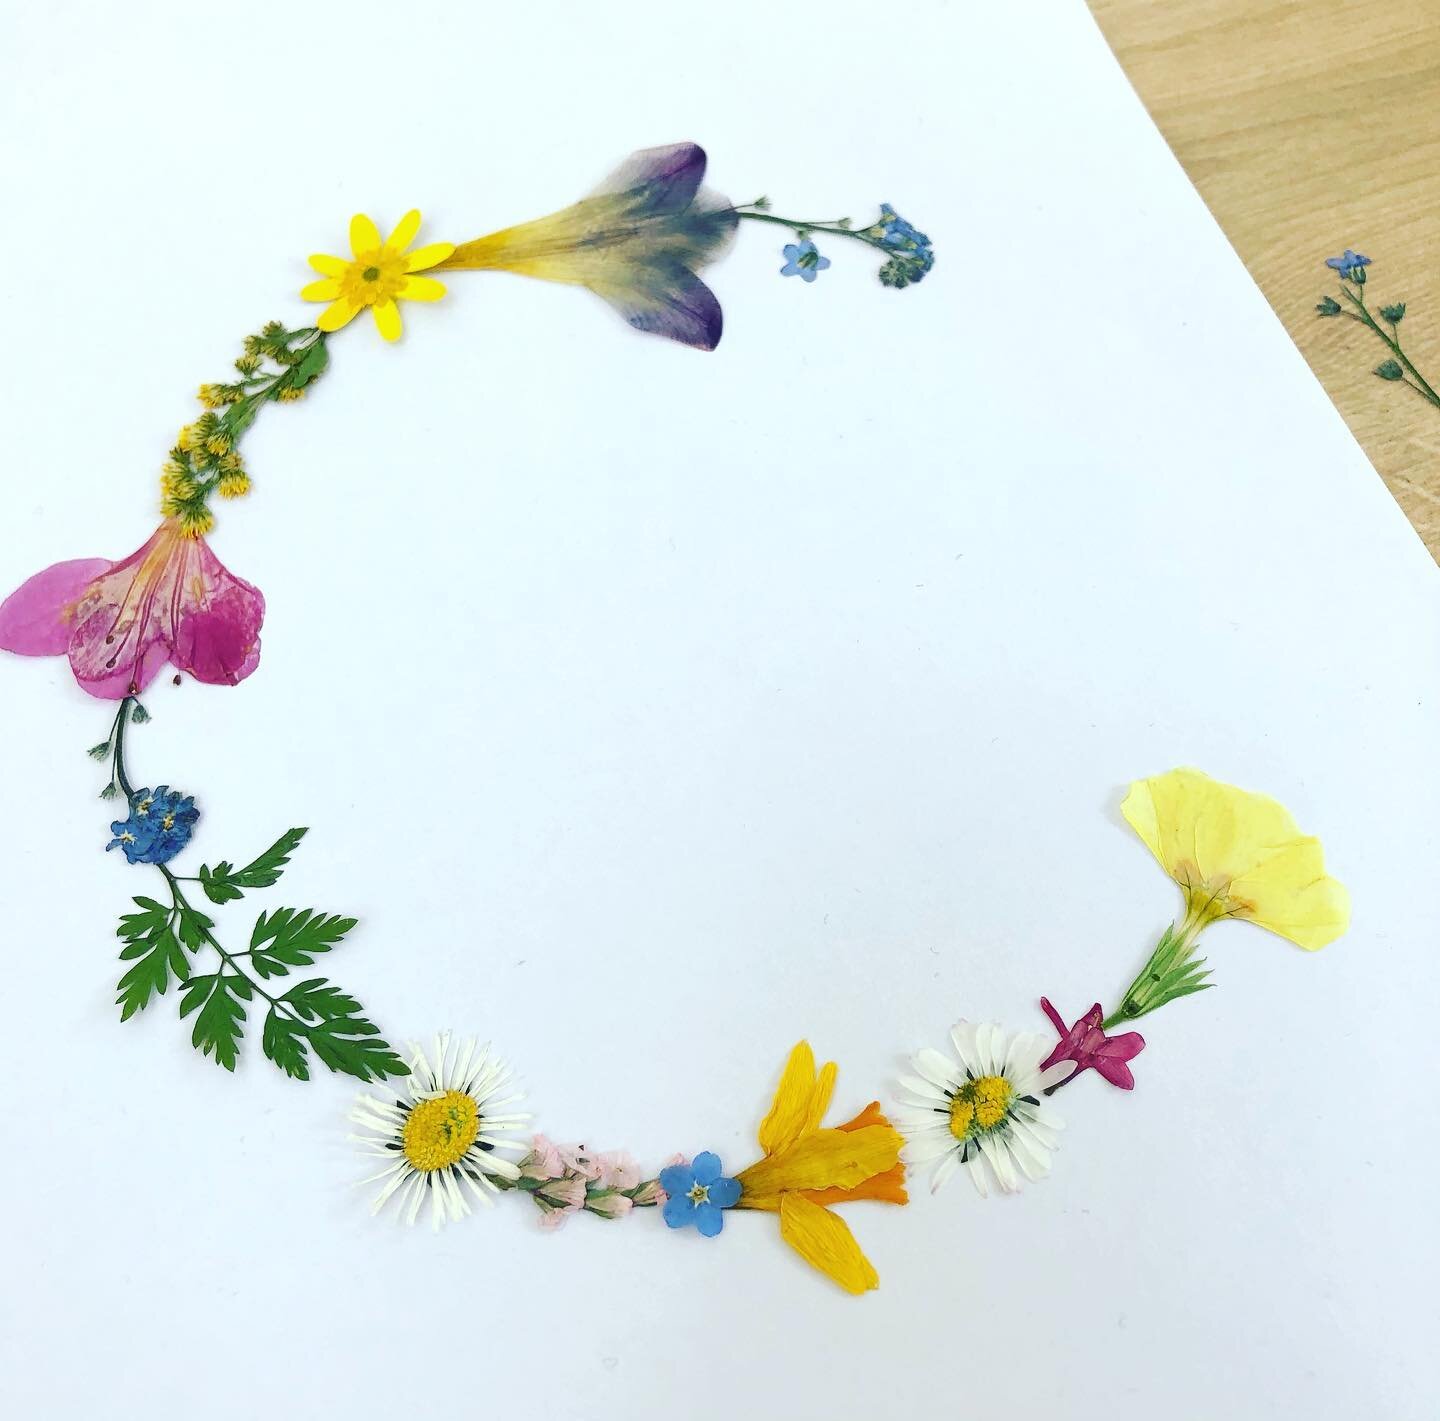
“The whole process has been a learning curve and I have learned a lot through trial and error! The biggest lesson I have learnt is that, unfortunately not every flower presses how you’d like it to, there are always going to be failures as well as successes, and it’s all about just learning as you go!”
Photo courtesy of Annie Rose and the Elephant

Making Something Unforgettable
“I’m constantly growing and learning about new flowers every day, so my favourite flower to use changes all of the time! I do love forget me nots, as they have a special meaning to not only myself, but to lots of people - which I have found out recently from selling so many of the forget me not hearts.”
Photo courtesy of Annie Rose and the Elephant

Final Remarks
“I would strongly encourage people to spend as much time in their garden/outdoors as they can! Not only is it beneficial for your mental health, it is enjoyable and incredibly rewarding when you see all of your hard work pay off.
I’d also like to add that if anyone is considering setting up their own business, and has a passion for something they think can turn into a career, go for it!”
Photo courtesy of Annie Rose and the Elephant
View more of Katie’s work on her etsy shop or on Instagram at @annieroseandtheelephant
All photos courtesy of Annie Rose and the Elephant
Golden Heiress Arrangement

For this arrangement you will need:
Gladiolus ‘Platini’
Chamomile ‘Tetra White’
Dahlia ‘Doris Duke’
Dahlia ‘Lady Nathalie’
Dahlia ‘Rancho’

Gladiolus ‘Platini’
Each beautiful bloom on the tall cluster of flowers is marked with a bleeding red line “painted” on the center.
Our Halden Flower Box subscribers will receive this in May 2022.

Chamomile ‘Tetra White’
These tiny blooms will add a bit of joy to anyone’s day. Their soft yellow-green centers pair perfectly with their delicate white petals.
View our available varieties of Chamomile.

Explosive hot pink flower petals curve around the back of the bloom creating a perfect ball shape. The bright yellow center adds a lovely contrast once the pink petals are fully open.
Dahlias will be available for presale this fall and will be included in the Halden Flower Box in April 2022.

This is an outstanding selection for a pure white dahlia that is very symmetric in shape.
Dahlias will be available for presale this fall and will be included in the Halden Flower Box in April 2022.

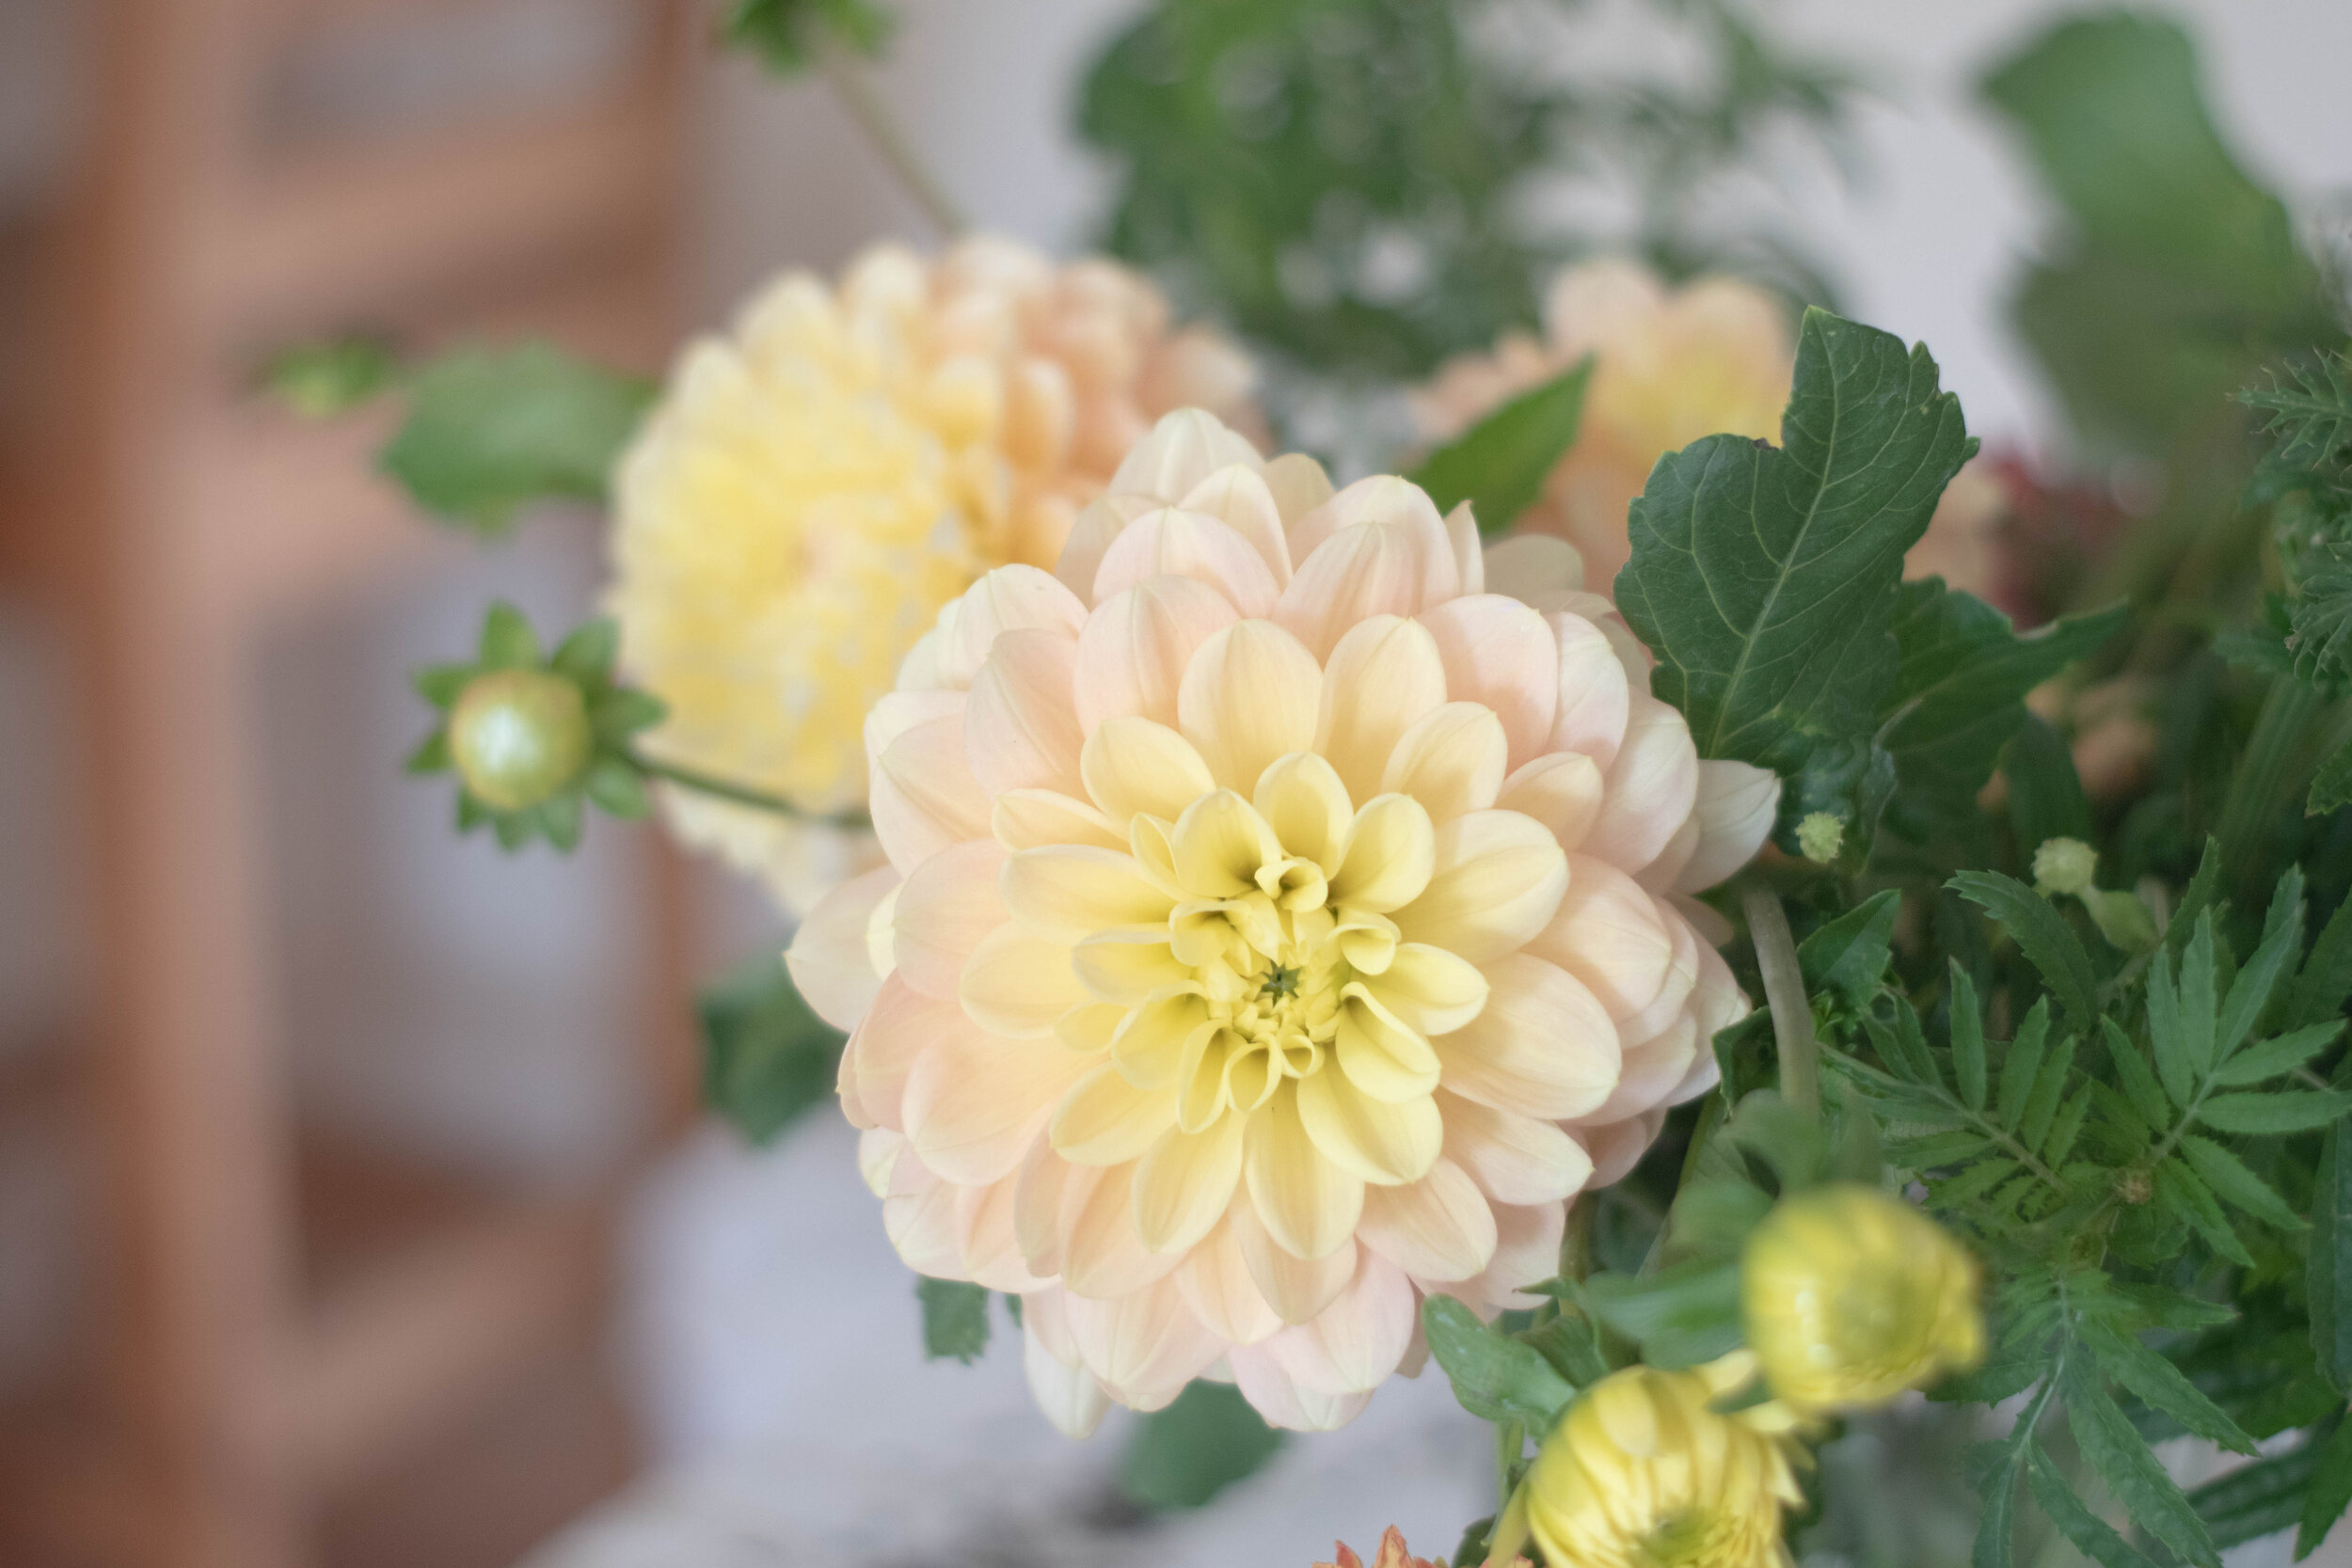
These apricot-yellow flowers are the perfect color for bright summer and deep fall hued arrangements. The waterlily shape of the blooms and bright color are the perfect contrast against green foliage.
Dahlias will be available for presale this fall and will be included in the Halden Flower Box in April 2022.


Flowers from the garden of Sara Haller
Photos by Sara Haller
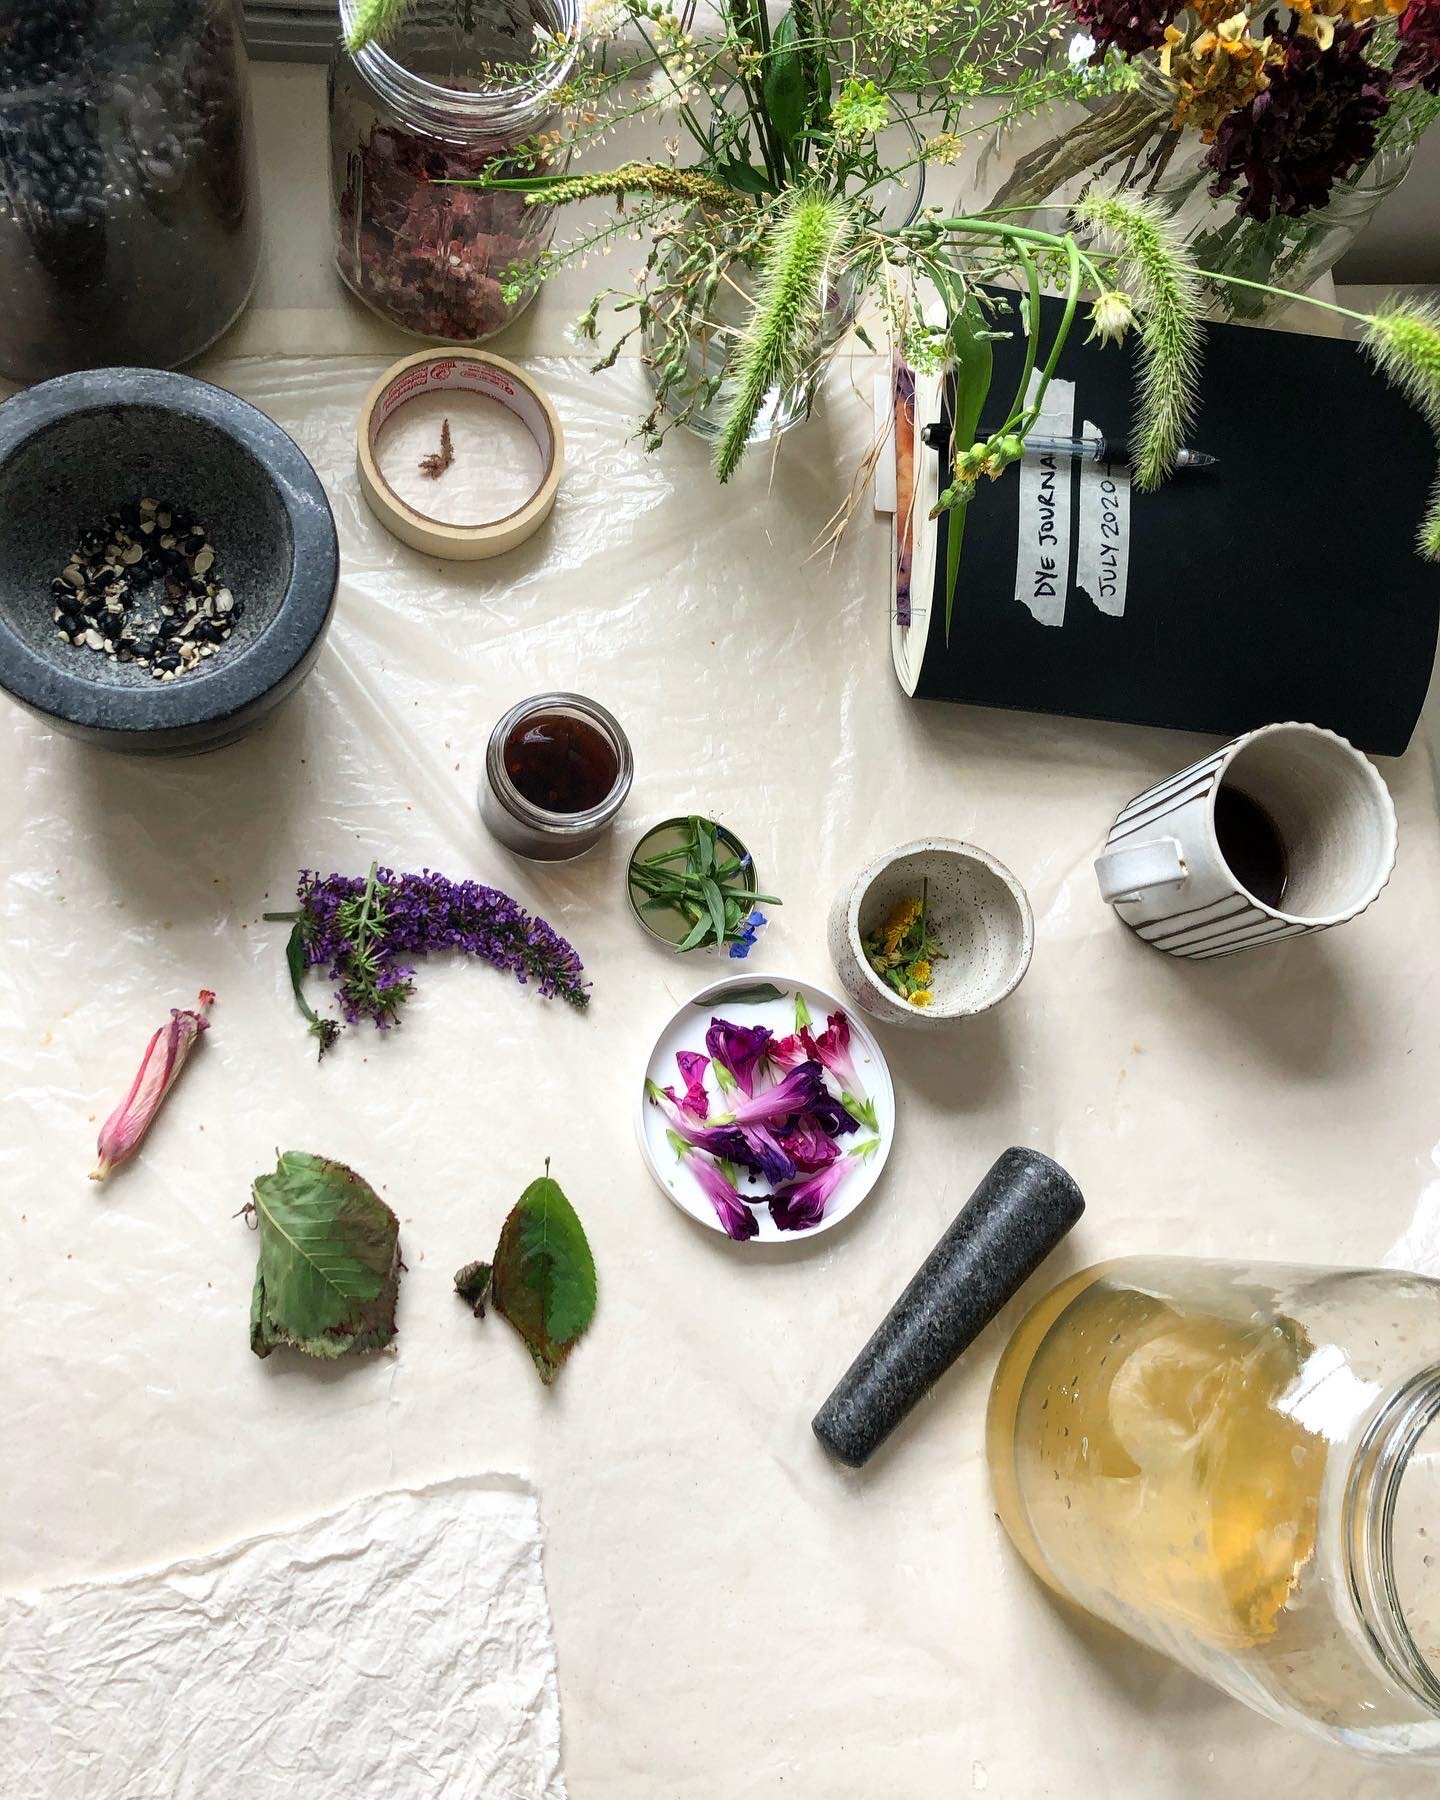
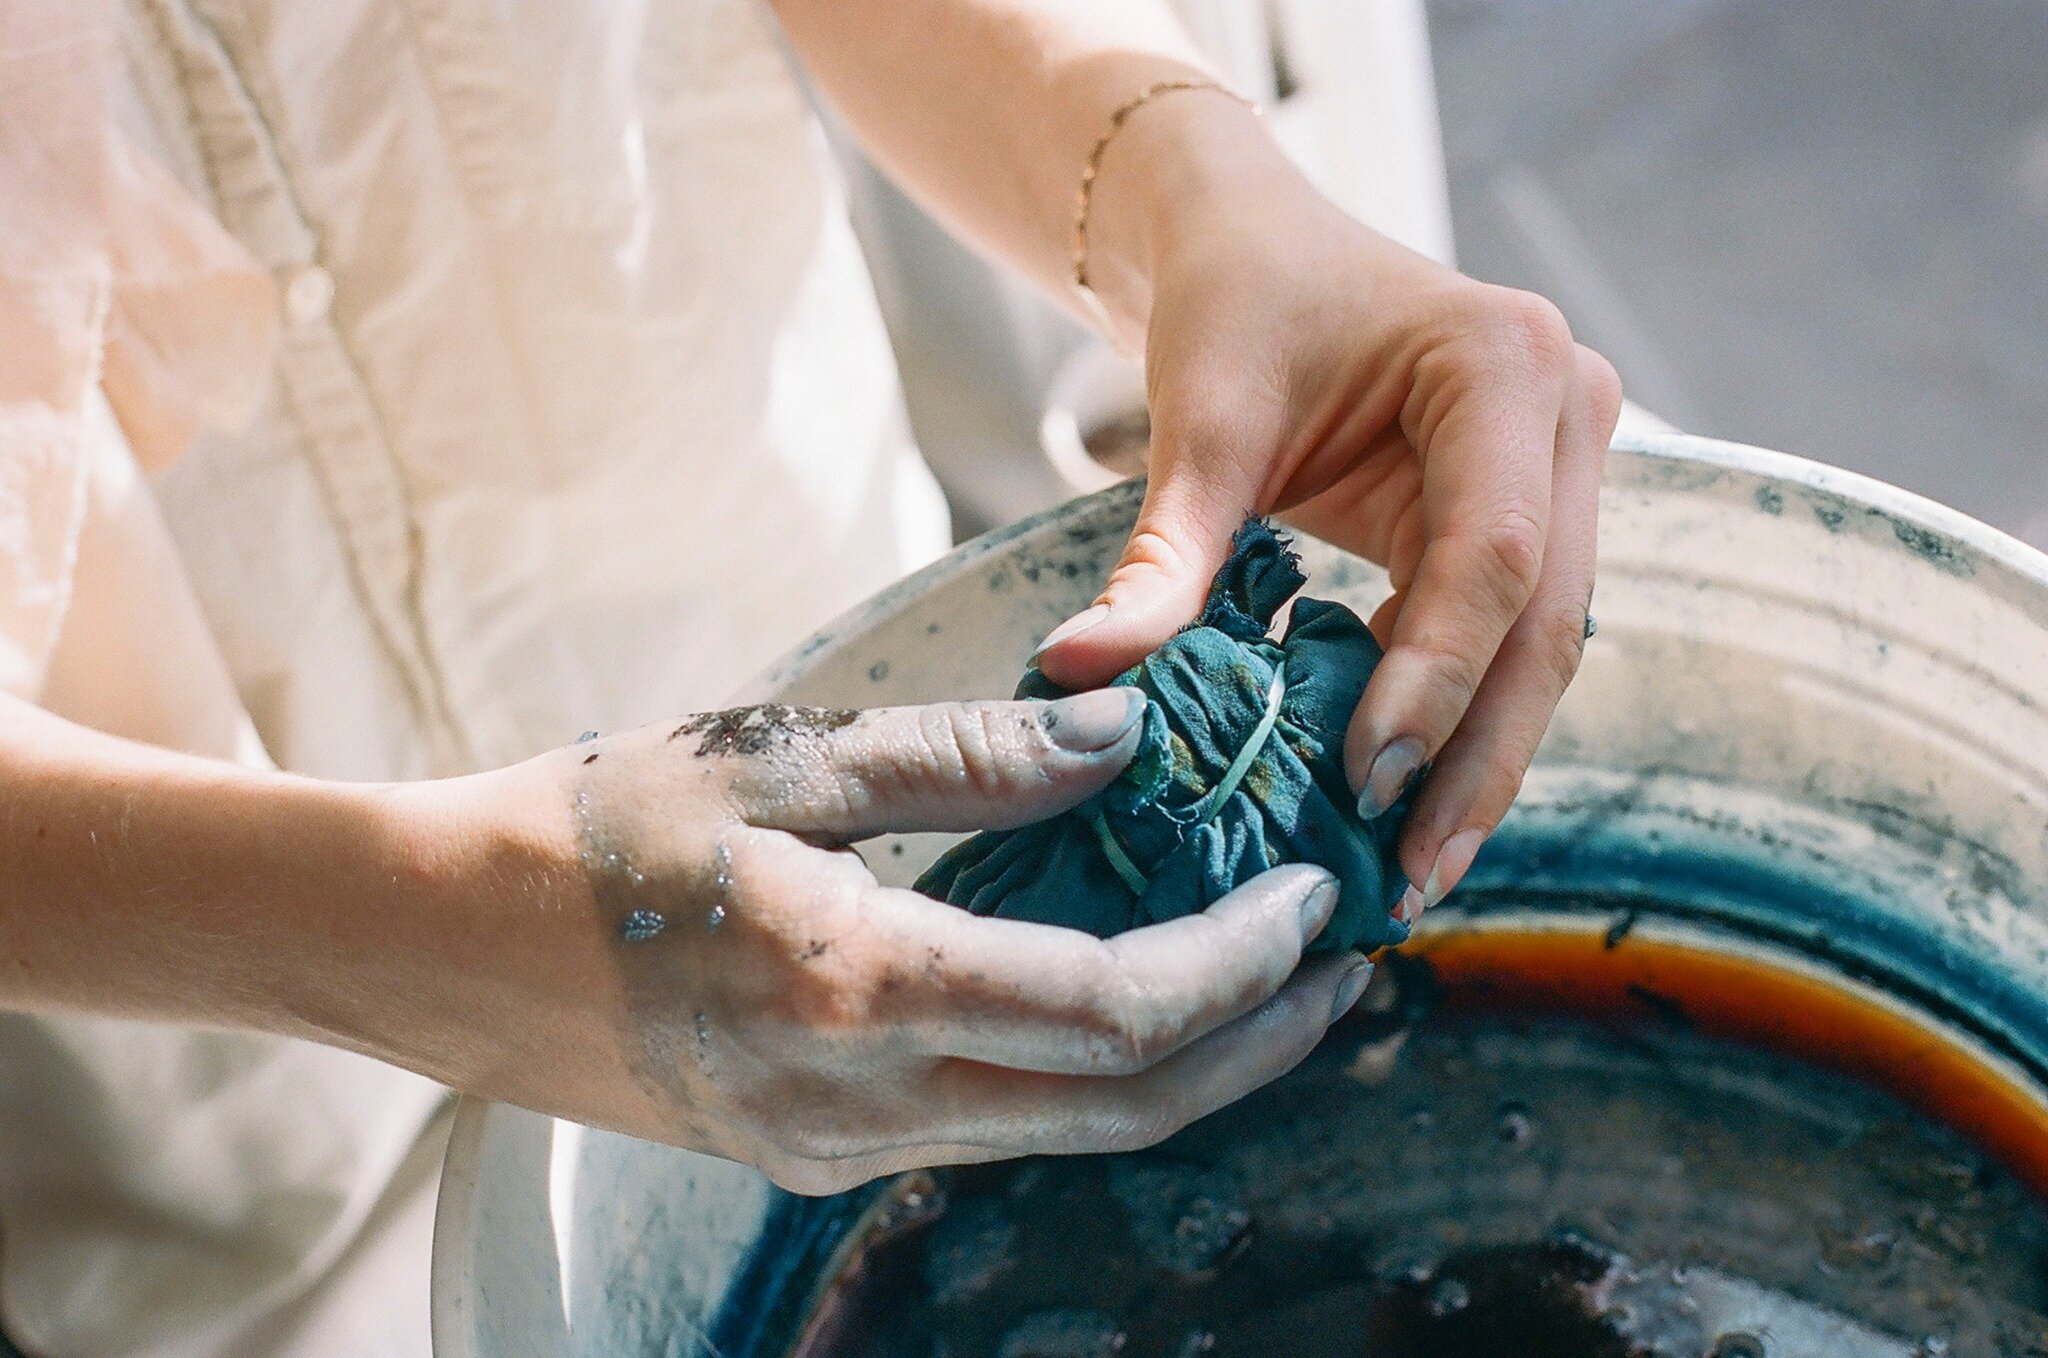
Exploring Natural Dye - Part 1: ‘Connection’ with Mad Provost
Not only do flowers and plants provide beauty and health, but they can also produce methods of discovery and experimentation. Natural dye is an art with a variety of methods, forms, and purposes. We’ve interviewed a handful of natural dyers to showcase this art. Each post will feature a different guest — exploring how to use our gardens to bring unexpected color into our lives. Our first guest is Madeleine Provost, a textile artist and natural dyer from New Jersey.

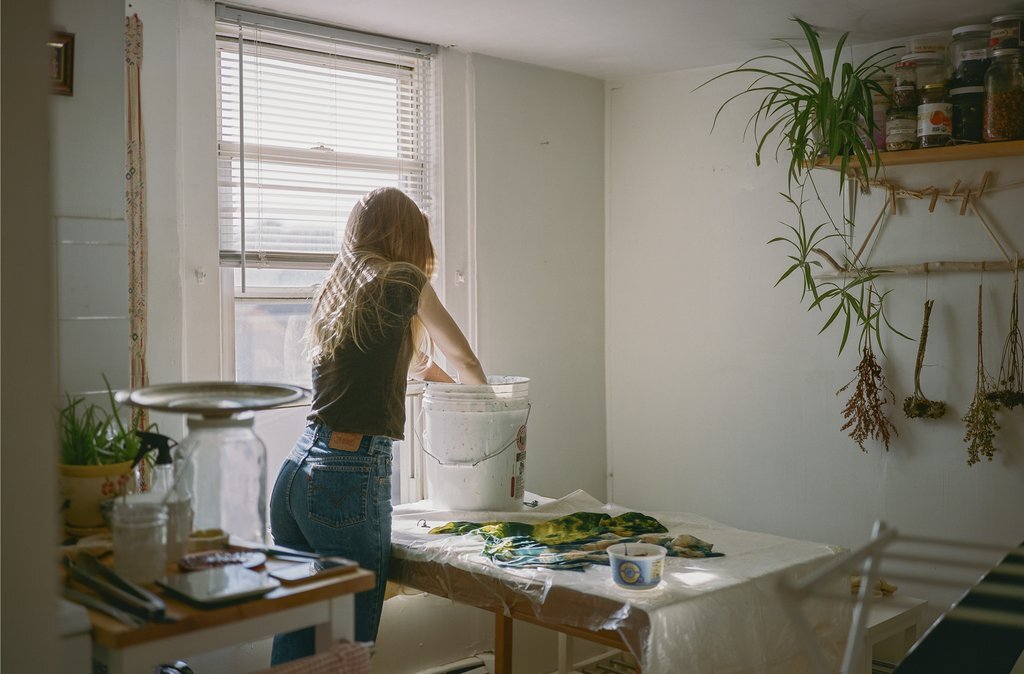
Introducing Mad Provost
Madeleine, or ‘Mad’, grew up in an “intersection of nature and concrete” in Denville, New Jersey. “I approach natural color from a fine arts angle, and am obsessed with finding new ways to push plant dyes as a medium. I am on a mission to get as many people as possible thinking about where color and fibers come from, and to reconnect with nature and work with their hands. I think the more we value and pay attention where our resources come from, the more we will be able to heal our planet and ourselves.”
Photo courtesy of Greeshma Chenniveetil
Mad’s Introduction to Natural Dye
“My first memory of working with natural color was as a kid making finger paint from the mulberry tree in our backyard,” Mad reminisces. “I always was obsessed with making things with my hands, all things art and color related. I went on to study fashion design in NYC at Parsons School of Design, fascinated by how individuals and cultures express their intangible essence and character through wearable color and shapes, a visual language I wanted to learn. My senior thesis collection explored natural dyes and handcraft and how they relate to sustainable design practices, everything was hand dyed and sewn with zero waste construction.”

“After college I quickly became involved in the corporate fashion industry where I saw that design and craft was not as important as money and speed. I became interested and obsessed with natural dyes again, as a way to hold on to my humanity and stay connected with the earth and the resources that we were brutally exploiting in the industry. I was mostly self taught up until this point, and then I took a course with Liz Spencer (known as the Dogwood Dyer) who is a wonderful teacher and studying with her gave me a vision for how to make a living and a better life for myself through working with natural dyes.”
Photo courtesy of Mad Provost
Witnessing Interactions
Like many artisan crafts, learning from an experienced natural dyer is one of the best ways to successfully begin. “ I highly recommend taking a workshop with an artist or dyer whose work you admire. There is no amount of reading or youtube videos that can replace the experience of learning from another individual, and watching the nuances of how they interact with plants and fibers and physically move through the process. Some of the most impactful experiences I have had were just watching how someone lovingly placed fabric into a dye pot or massaged a garment as they rinsed it. The most important details are often the simplest, but hardest to communicate with words.”
View Mad’s offered workshops on her website.

Photo courtesy of Greeshma Chenniveetil
A Changed Path
Mad has turned her passion for natural dyes into a successful business, but on top of that, what other benefits has she experienced?
“When I started consistently and seriously working with natural dyes, particularly foraging and growing my own plants to use, it was like my world expanded.” For so many years, I was living like a zombie going from point A to point B without seeing anything or anyone in between. I was commuting to a job where I made things for people I would never meet and worked with people across the world who were just names on an email chain, using fabrics made from plants or proteins whose origins I would never know, dyed with meaningless synthetic lab-made colors. I didn’t even realize how disconnected I was from my surroundings, from the earth, from my neighbors, my clothes, my food, and honestly from myself - until I started paying attention to plants.”

“My life is so much bigger and more vibrant now because when I walk down the street I see familiar faces in the weeds muscling through the sidewalk cracks, and I know their names and the colors that exist within them. Dyeing with plants has grounded me and gives my existence roots. It gives meaning to the word “place” in this increasingly globalized and homogenized world.”
Photo courtesy of Mad Provost

Rhythm of Life
Mad connected herself to her surroundings and the processes that everything goes through.
“I believe it is healing and so empowering for people to make things with their hands - to grow something from seed, harvest it, and make something special with it. This process has taught me patience and hope, and to value all life. My mother died three years ago, and I thought I was dying too. But each time I grow something from seed - watch it grow and bloom, accept their gift of color and beauty, and watch it die to make way for more life next time - I feel a little stronger, and held by this circle of life. I feel grateful to be able to foster new life and honor the passing of old ones.”
Photo courtesy of Mad Provost
Intentional Inspiration
Each artist has his or her own patterns or methods for stimulating creativity. Mad told us she finds inspiration in tension and challenge. “I live in urban Jersey City, just a hop skip and jump away from the Big Apple (Manhattan) and so my interactions with nature have to be intentional,” she elaborated with us. “I like the challenge of finding nature in a city or challenging landscape, and currently am inspired by noxious ‘weeds’ and species that thrive in disturbed and rough environments.“

“In 2019 I went to the most arid environment in the world, the Atacama Desert in Chile, for an artist residency with La Wayaka Current where I studied the natural dyes of endemic plant species and how living color can represent place, time, and climate conditions. I am also a runner and have a routine where I go for long runs around the city to spots off the beaten path where I can forage for plants to dye with.”
Just as one’s physical environment shapes and guides the artistic process, one’s mental state can also have an exceptional influence.
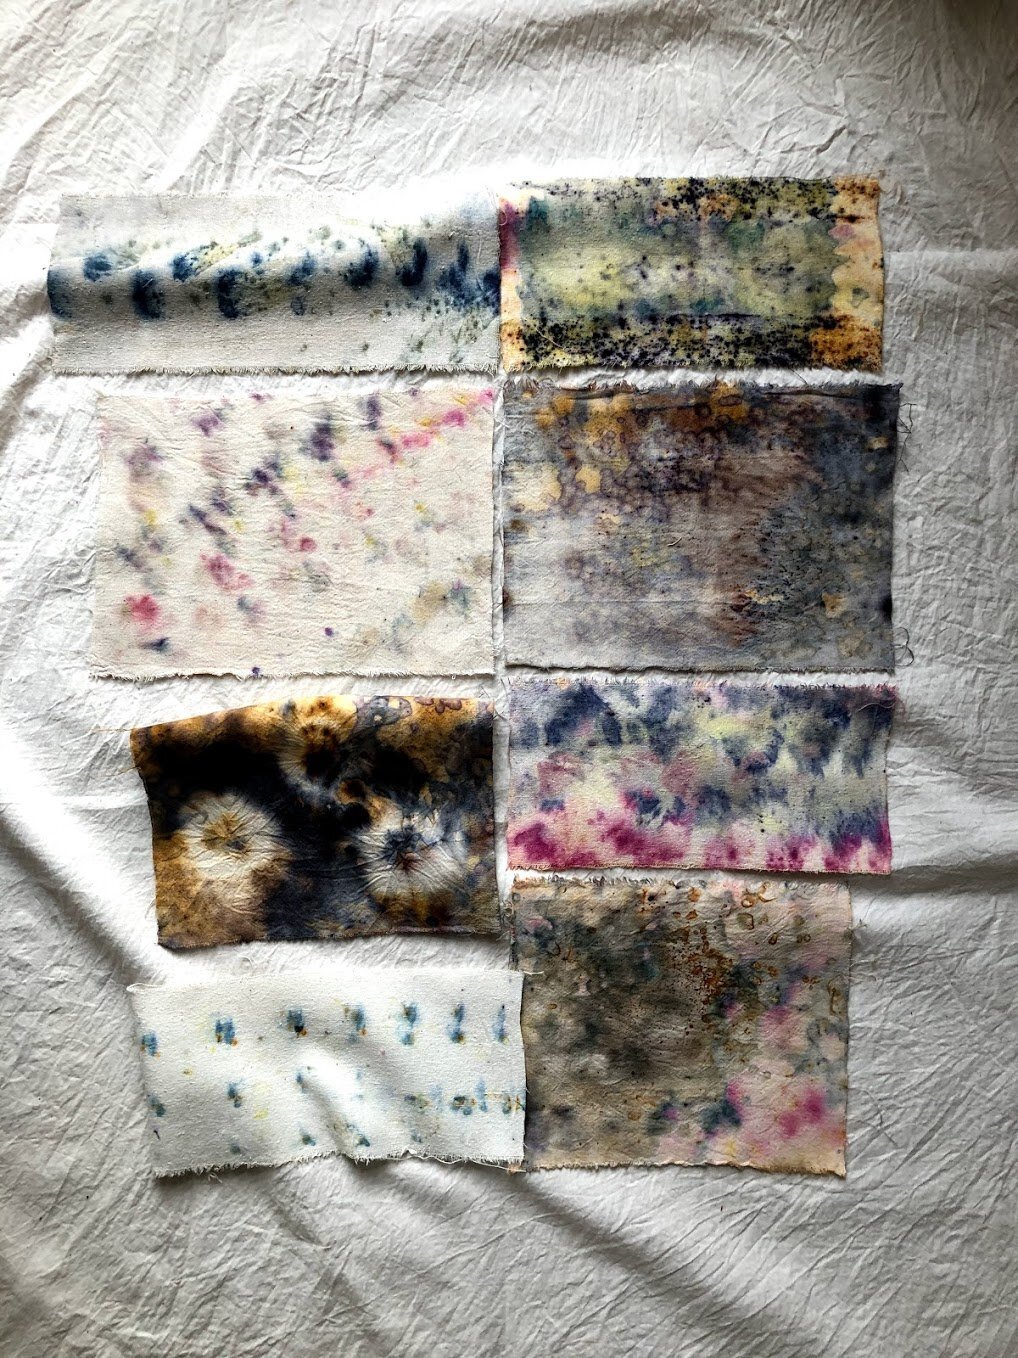
“I like to get into a meditative state of mind with my daily dye practice, which is to create one small dyed piece a day to keep my hands and muscle memory fresh as well as my mind. This process of allowing myself to create something without any expectation or outcome, just letting one mark follow another, acts as an inspiration for me to see that sometimes you learn more from being present and intuitive rather than consumed by thoughts or calculated planning.”

Metamorphic Mistakes
Connecting can sometimes mean continuing.
“My favorite method is accidental creation! Most of my favorite outcomes have been informed by my mistakes. I have learned to lean into them, and it has become a pseudo study of improvisation for me,” Mad laughs.
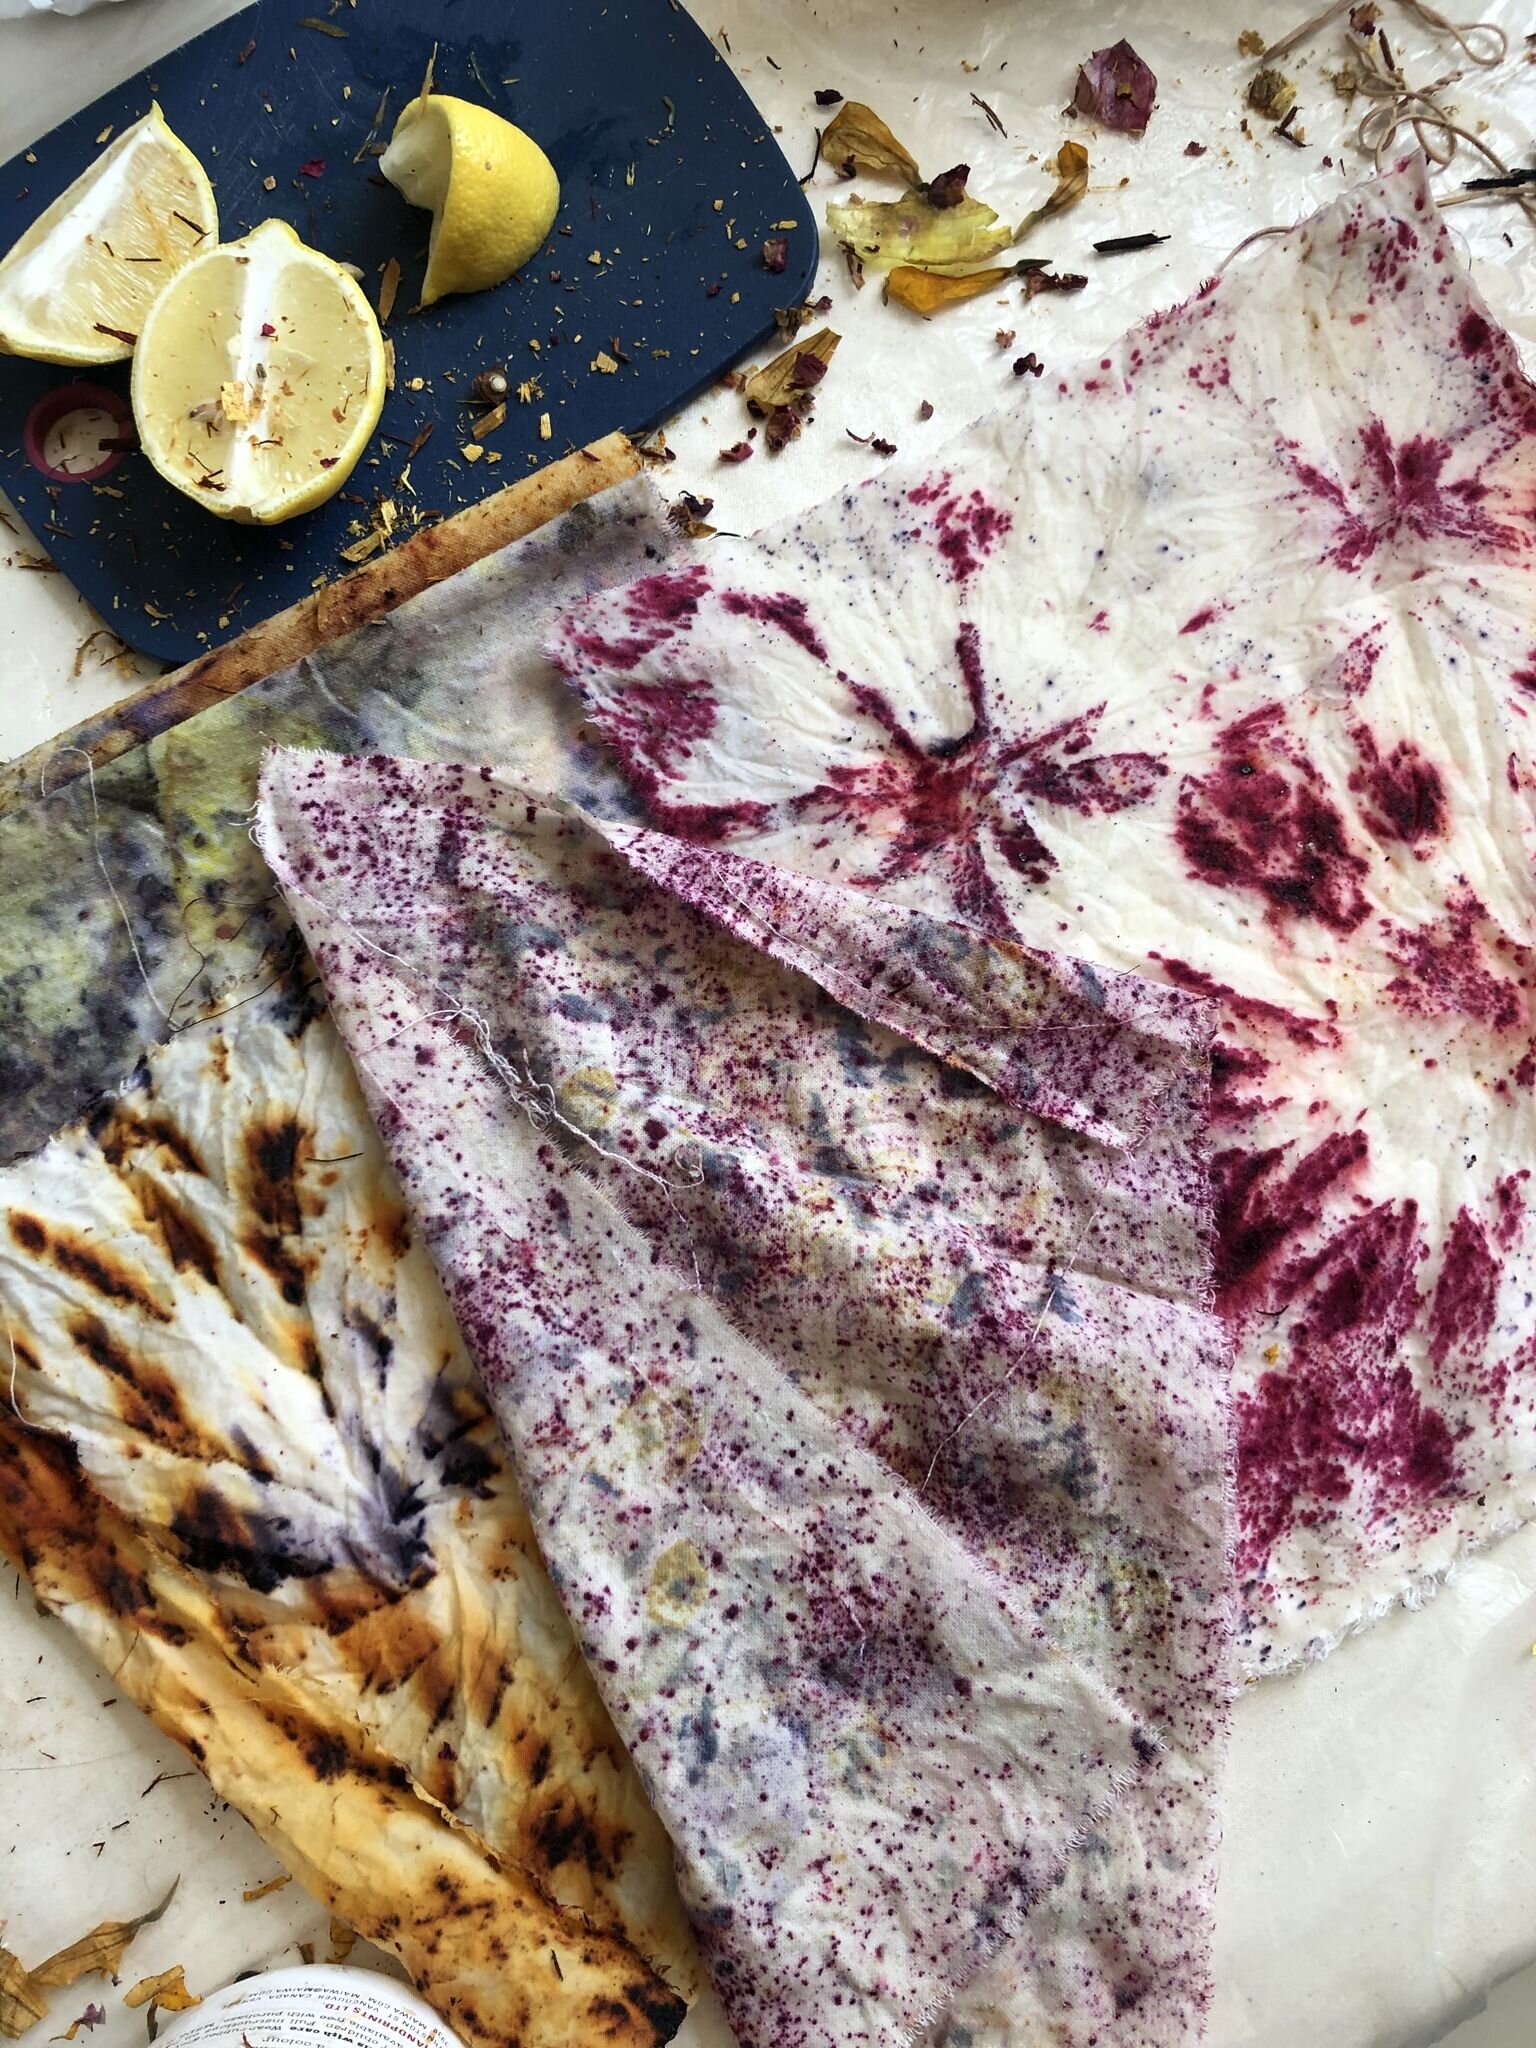
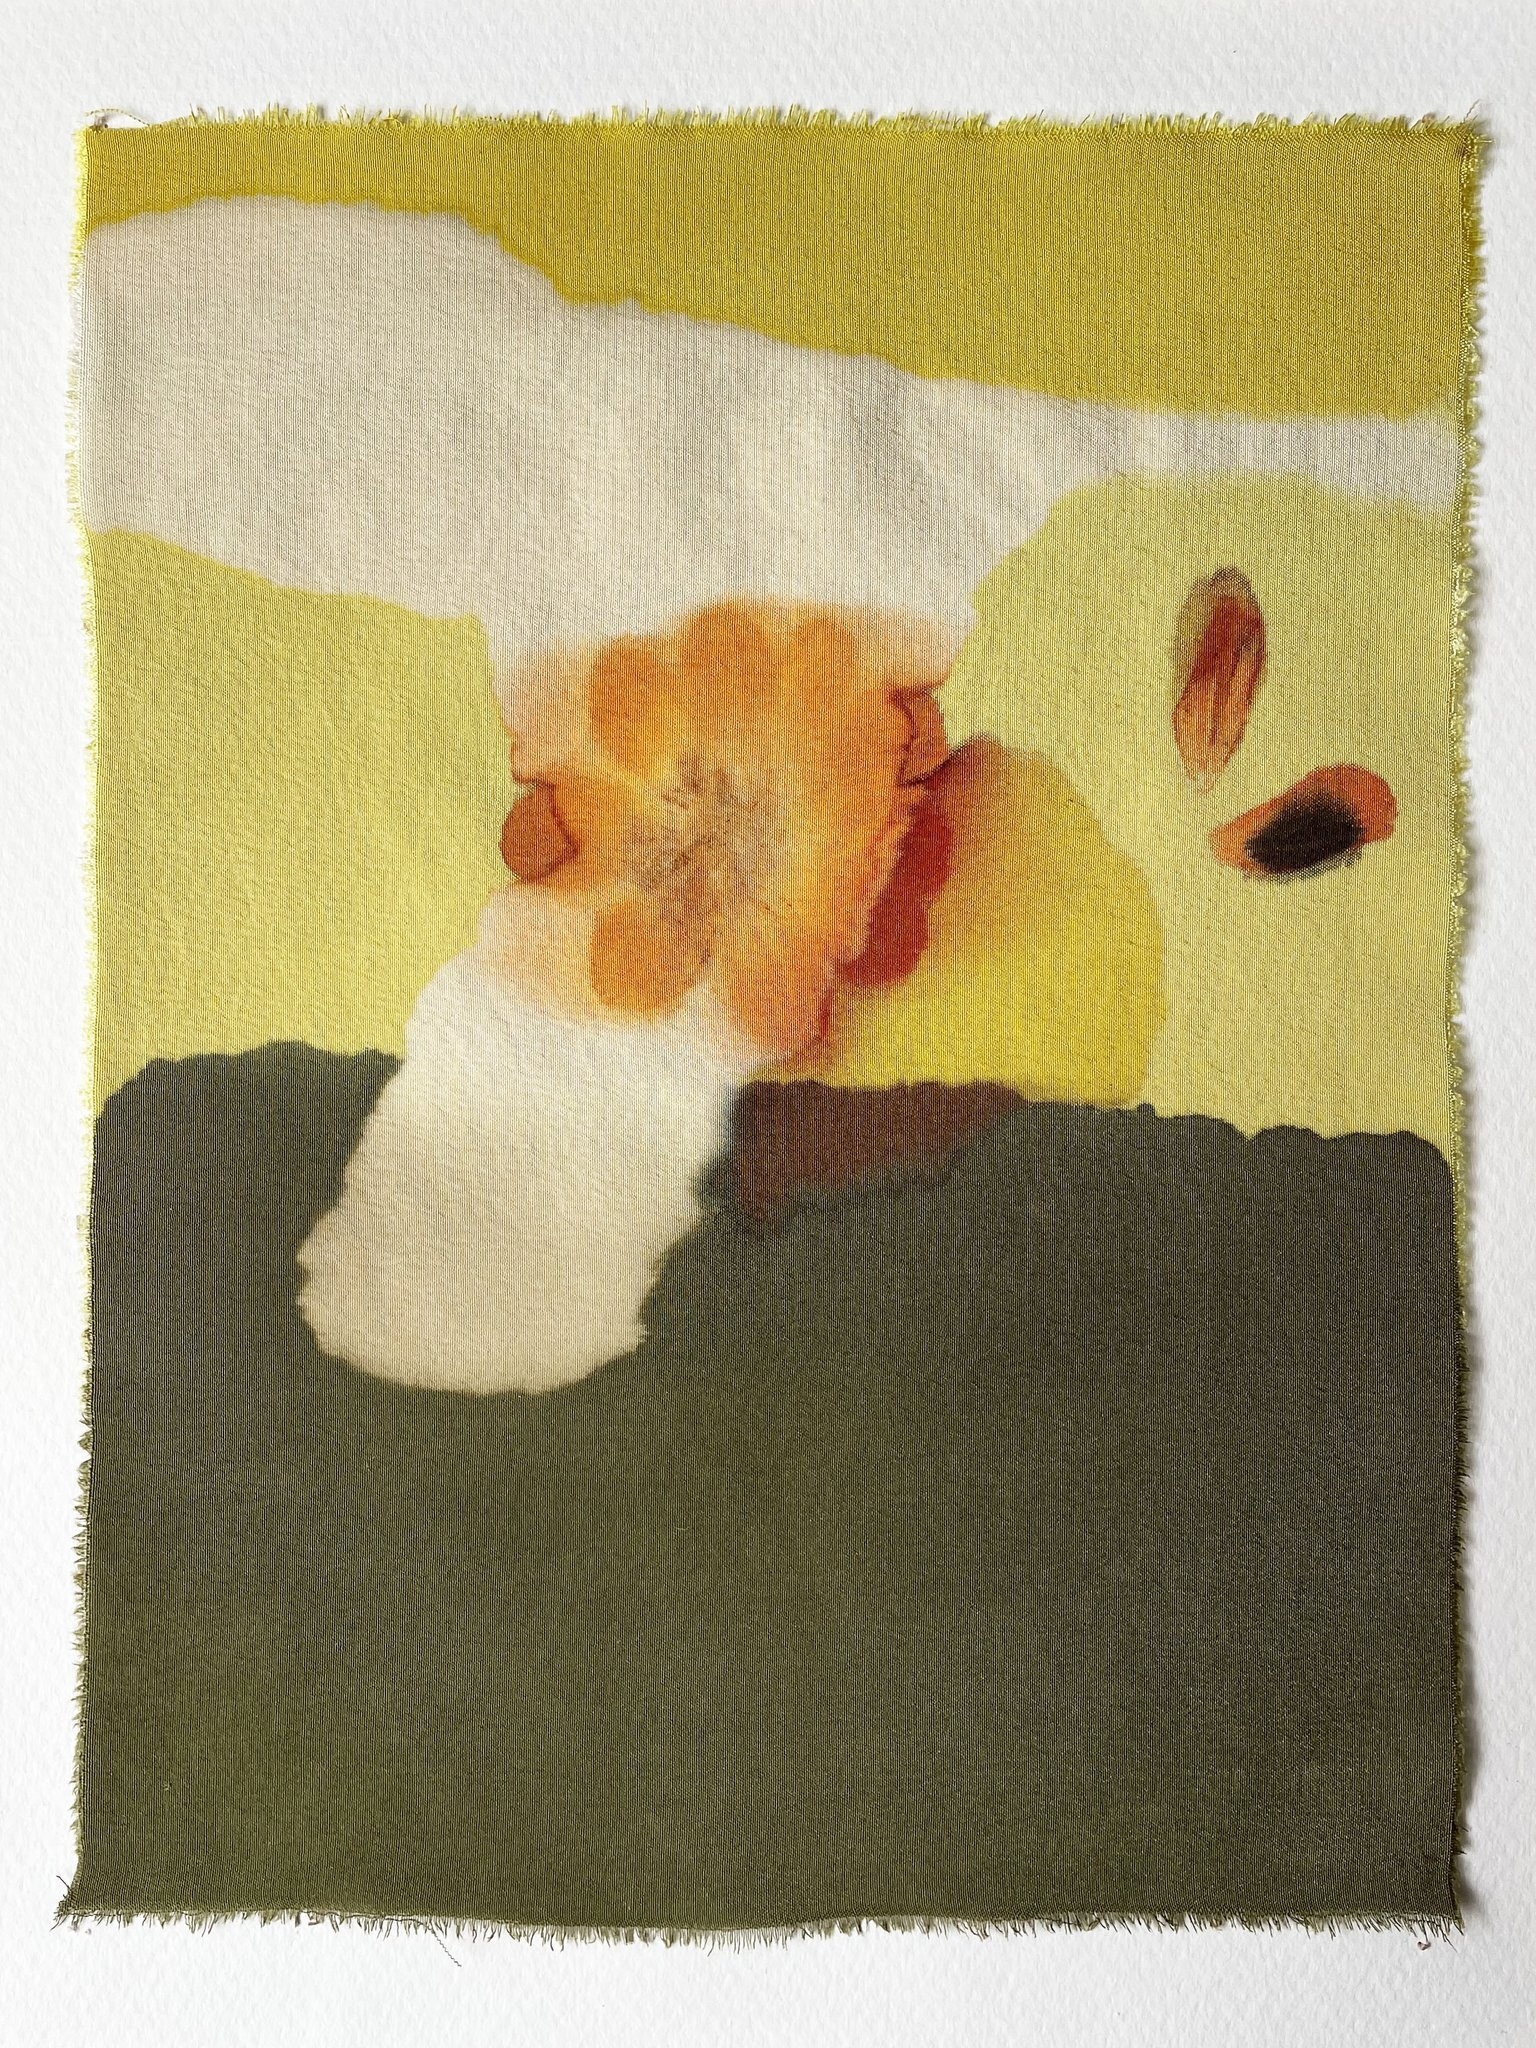
"So much of life is out of our hands but what we can control is how we respond, so I see my work as a way to practice the art of responding. One of my favorite techniques which I refer to as painting with pH, came from spilling an acidic substance on a dyed piece of fabric which altered the pH and thus the color and I realized, hey what if I just go with that and make that spill part of the design?
What I could have initially seen as a mistake and ruined item, I decided to see as an opportunity for innovation.”
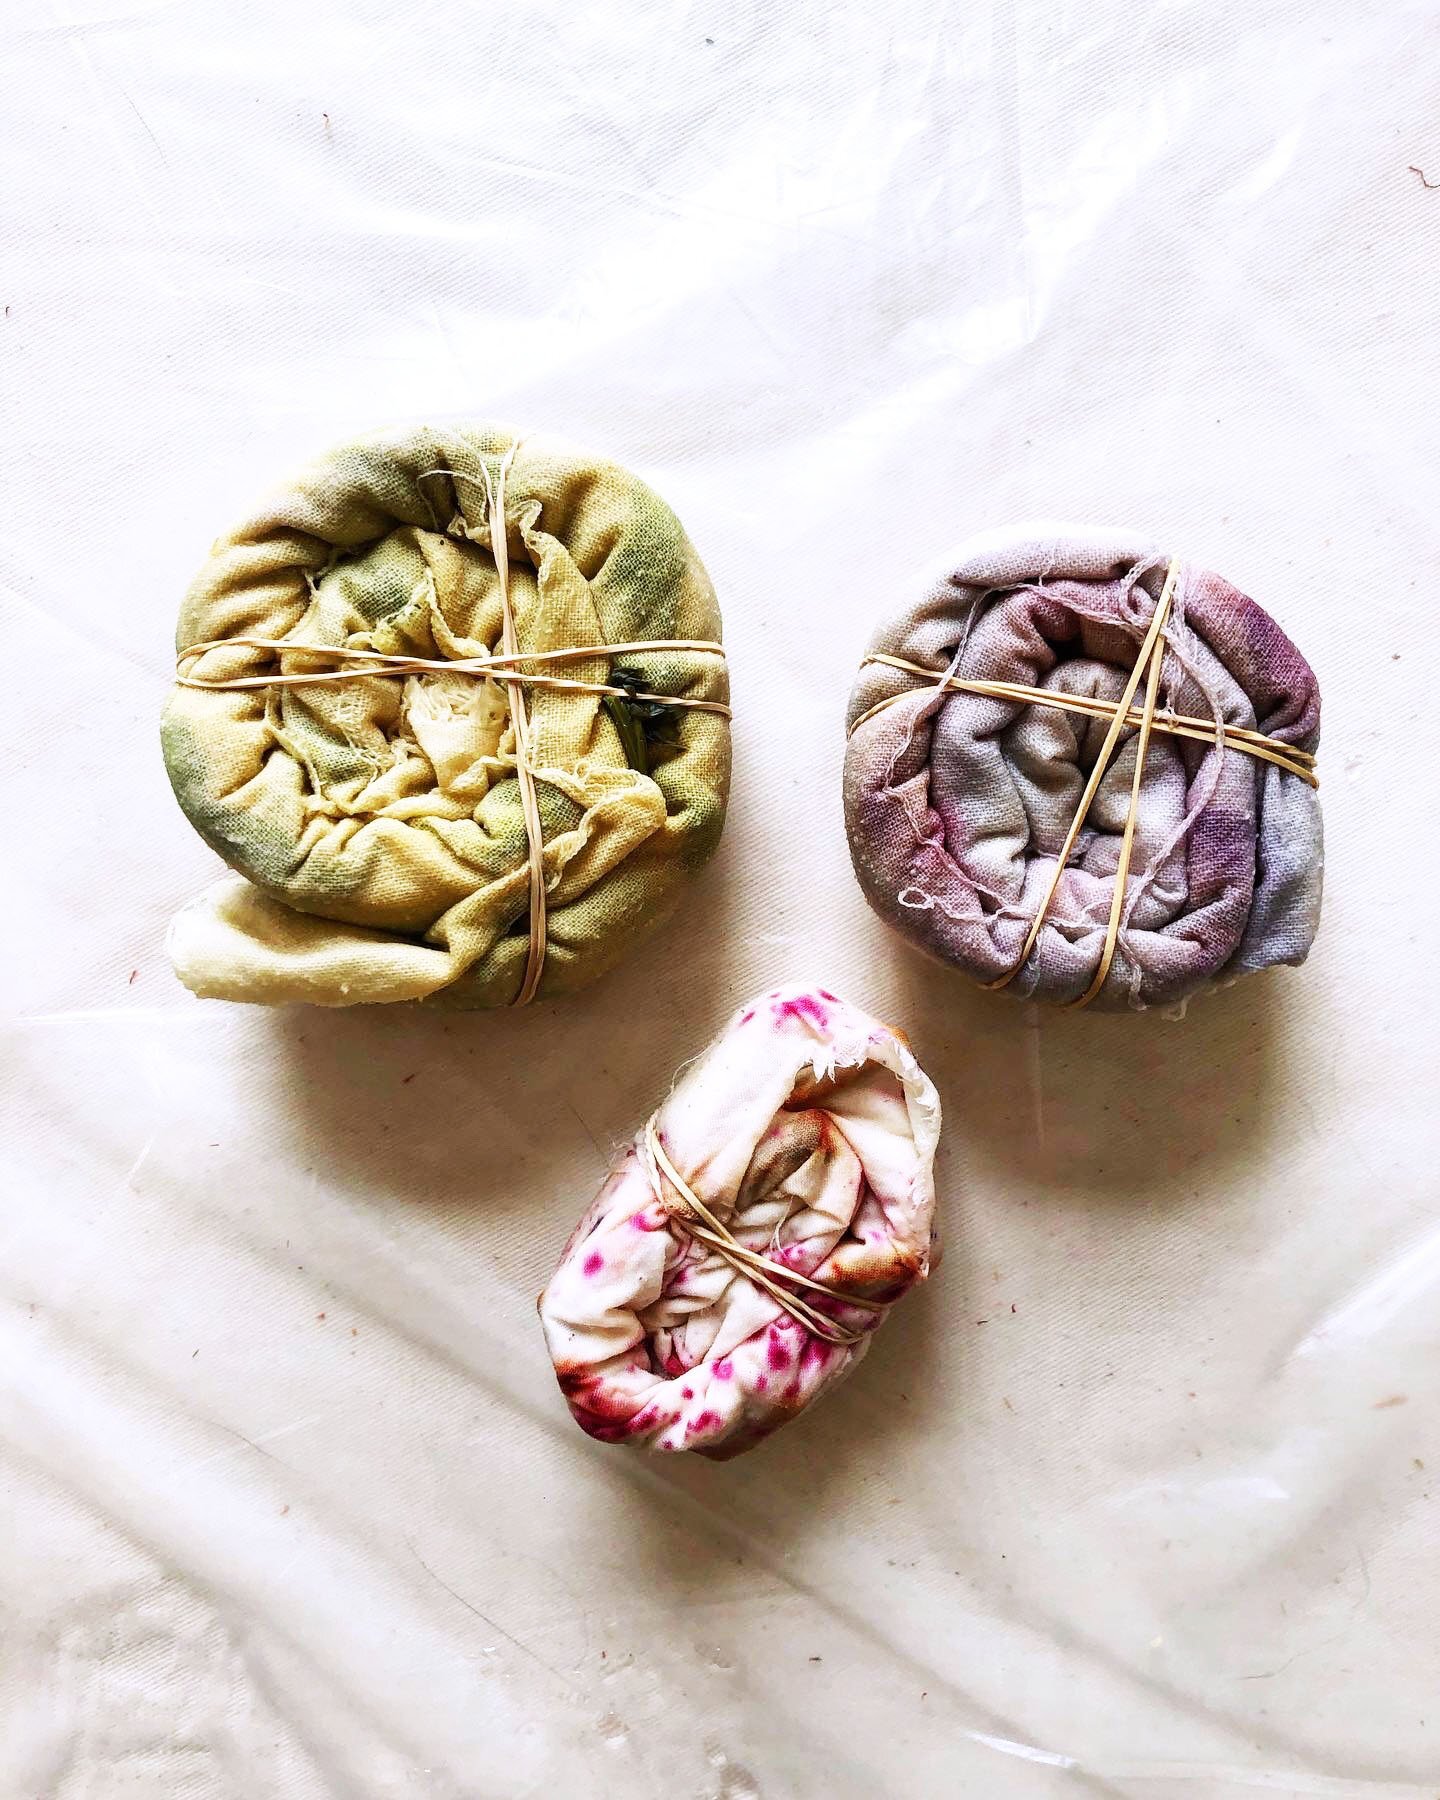
Photo courtesy of Mad Provost
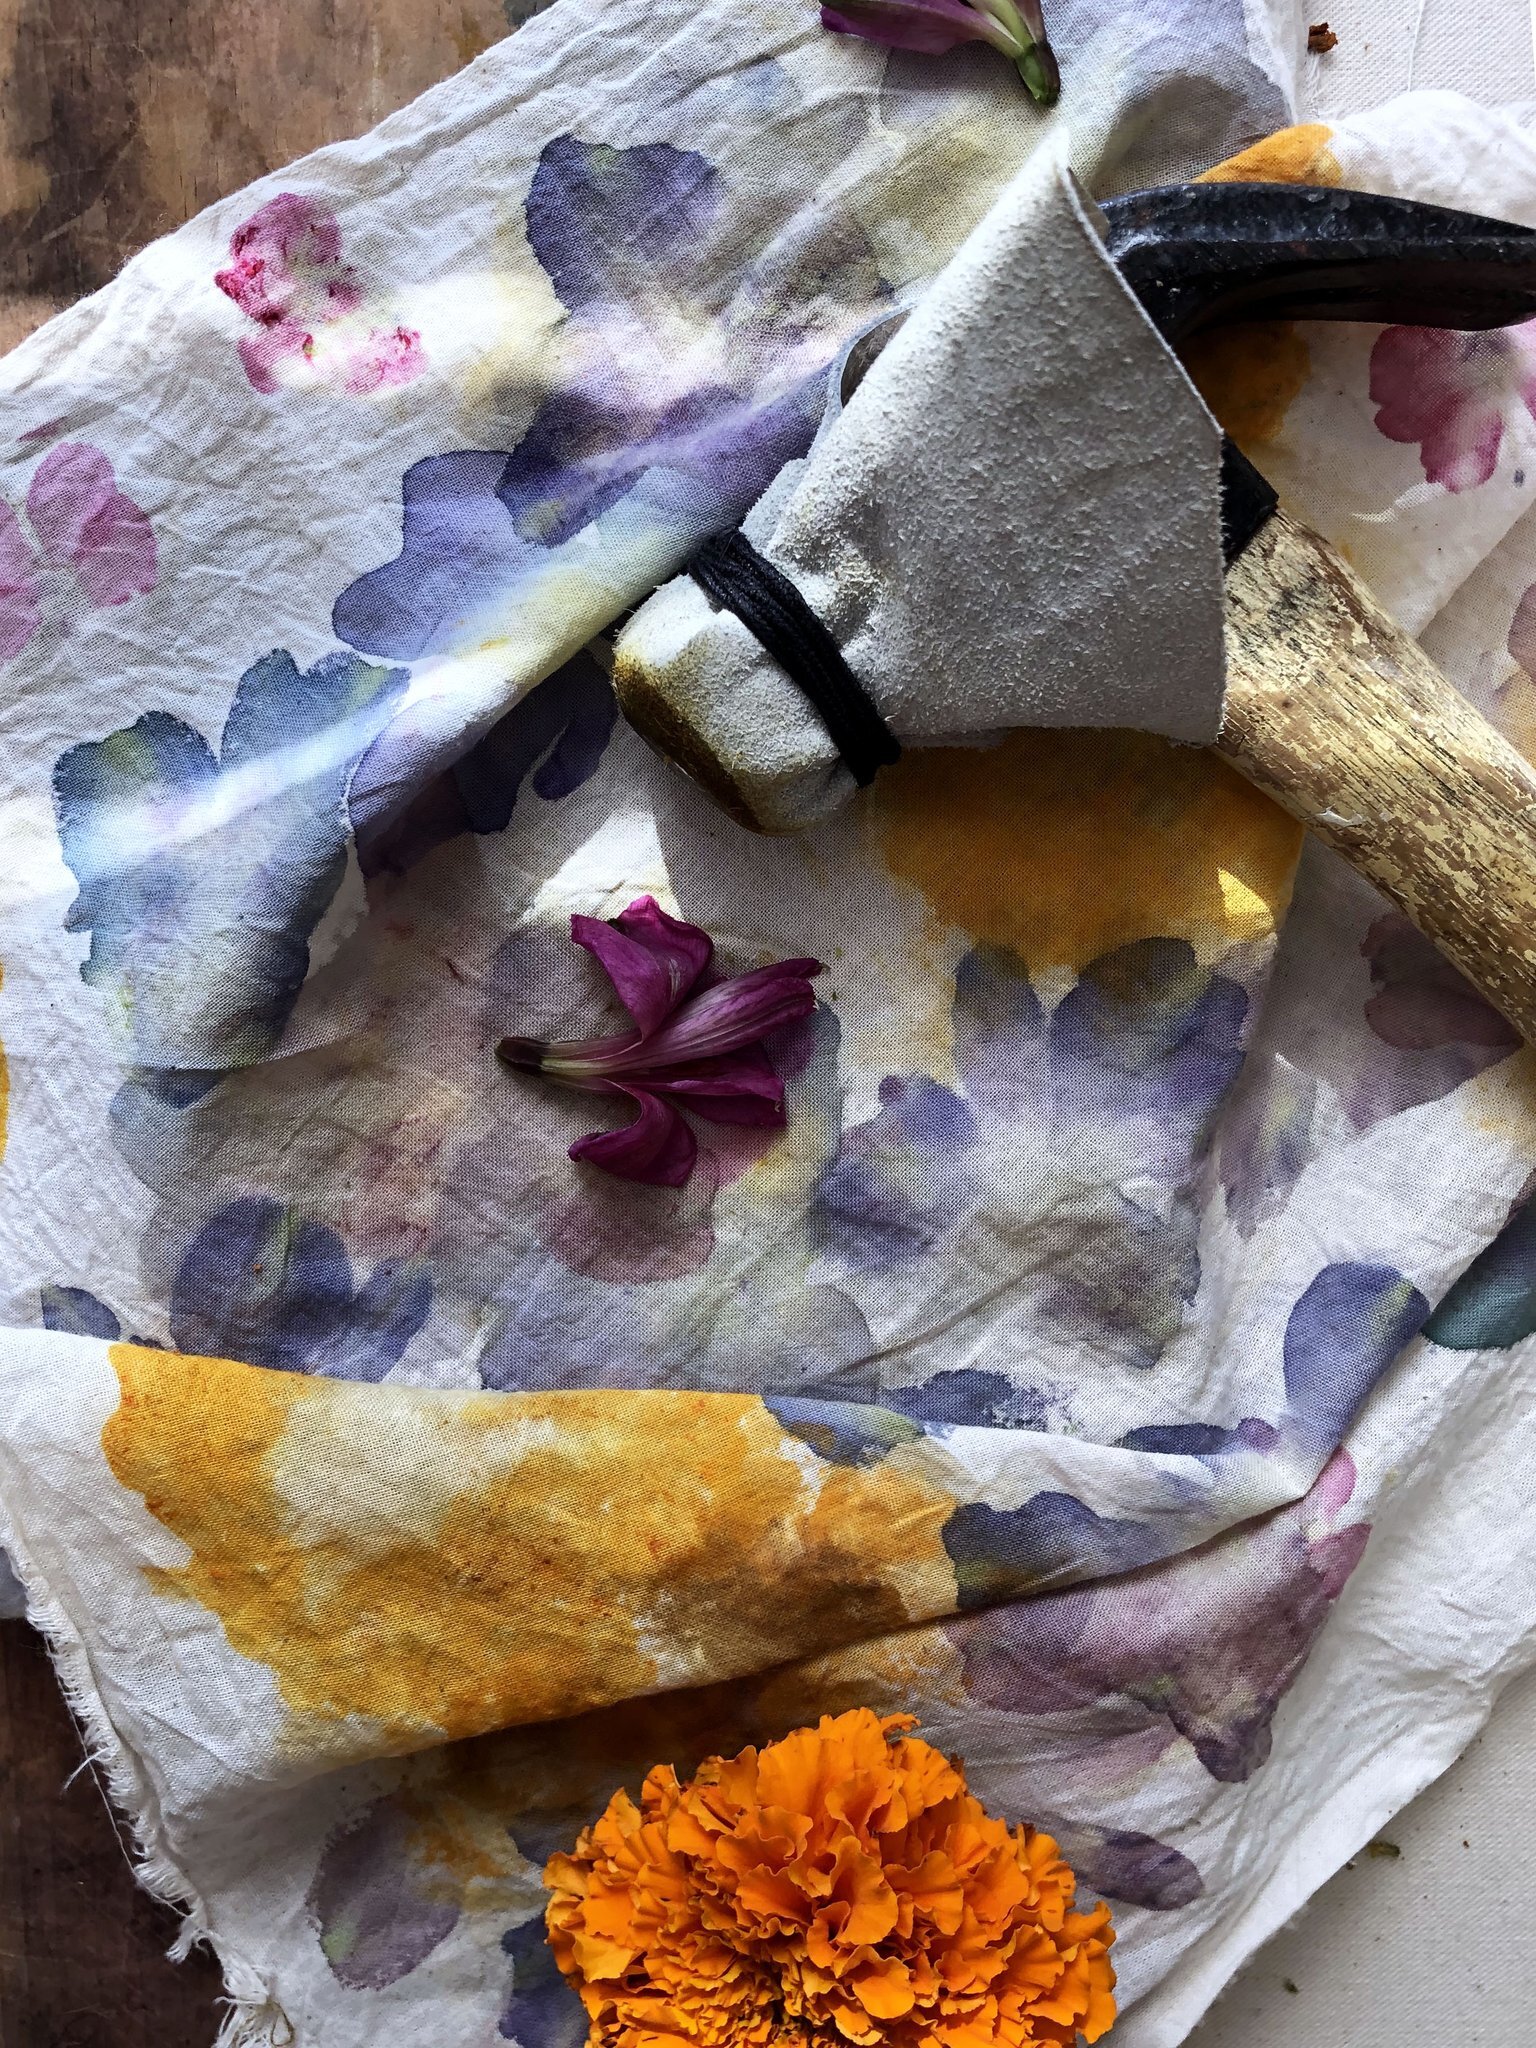
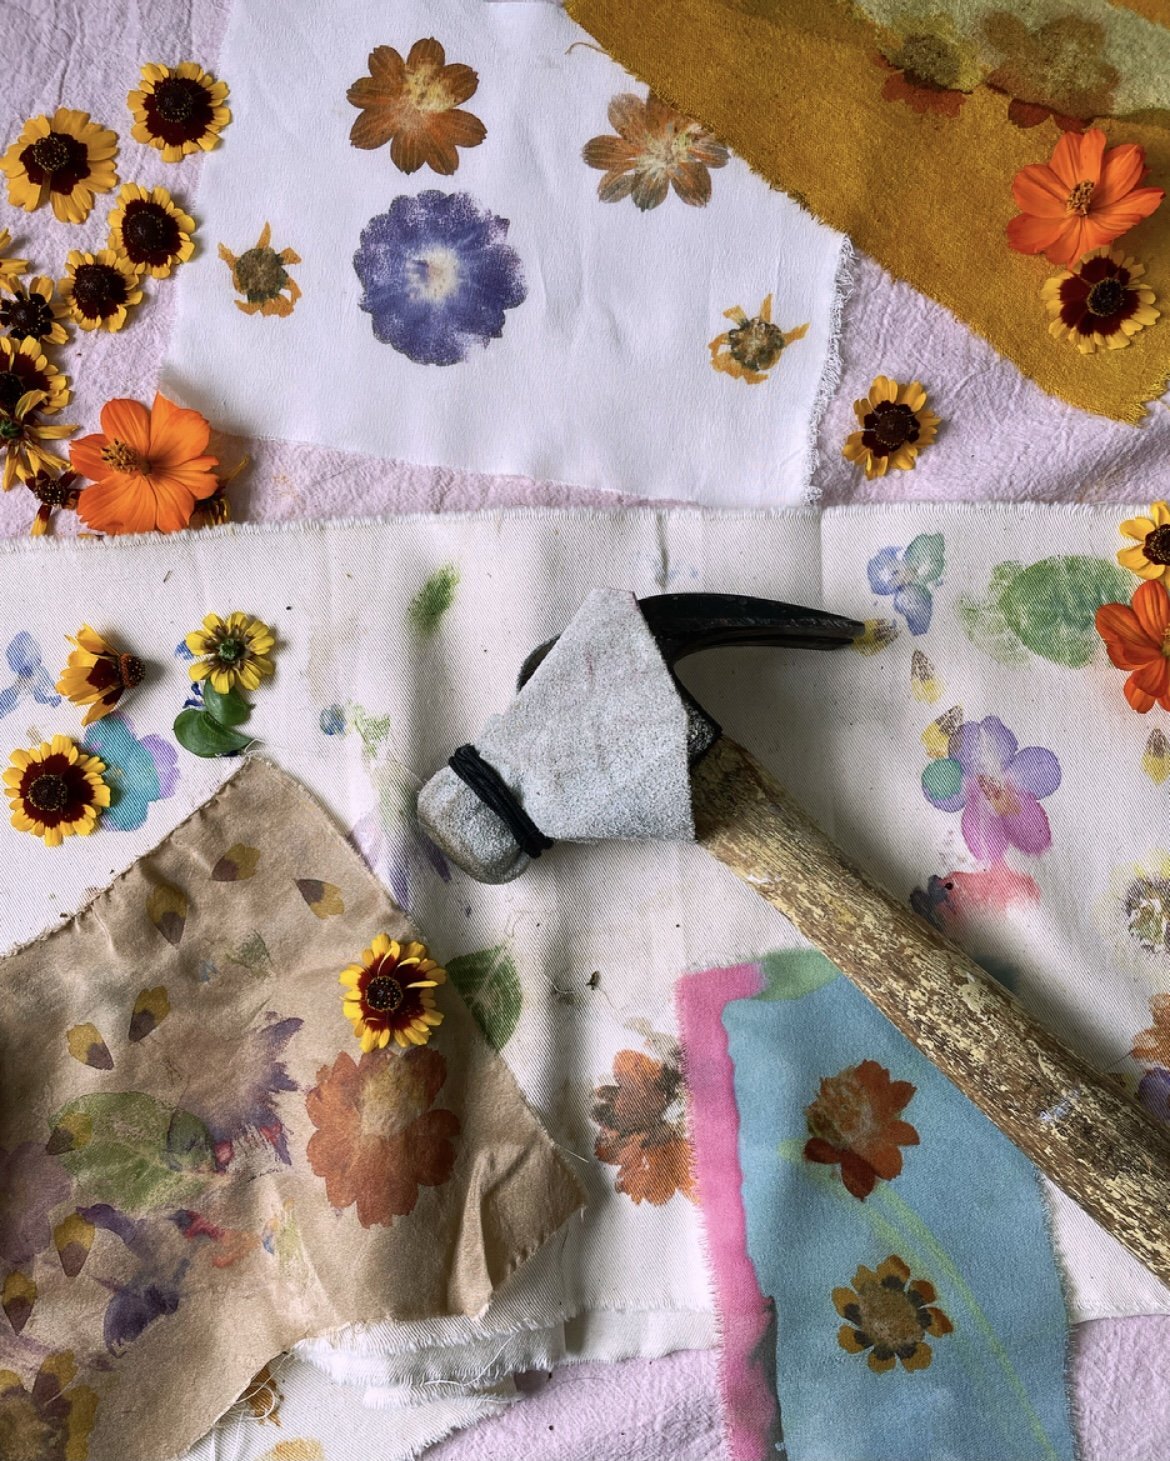
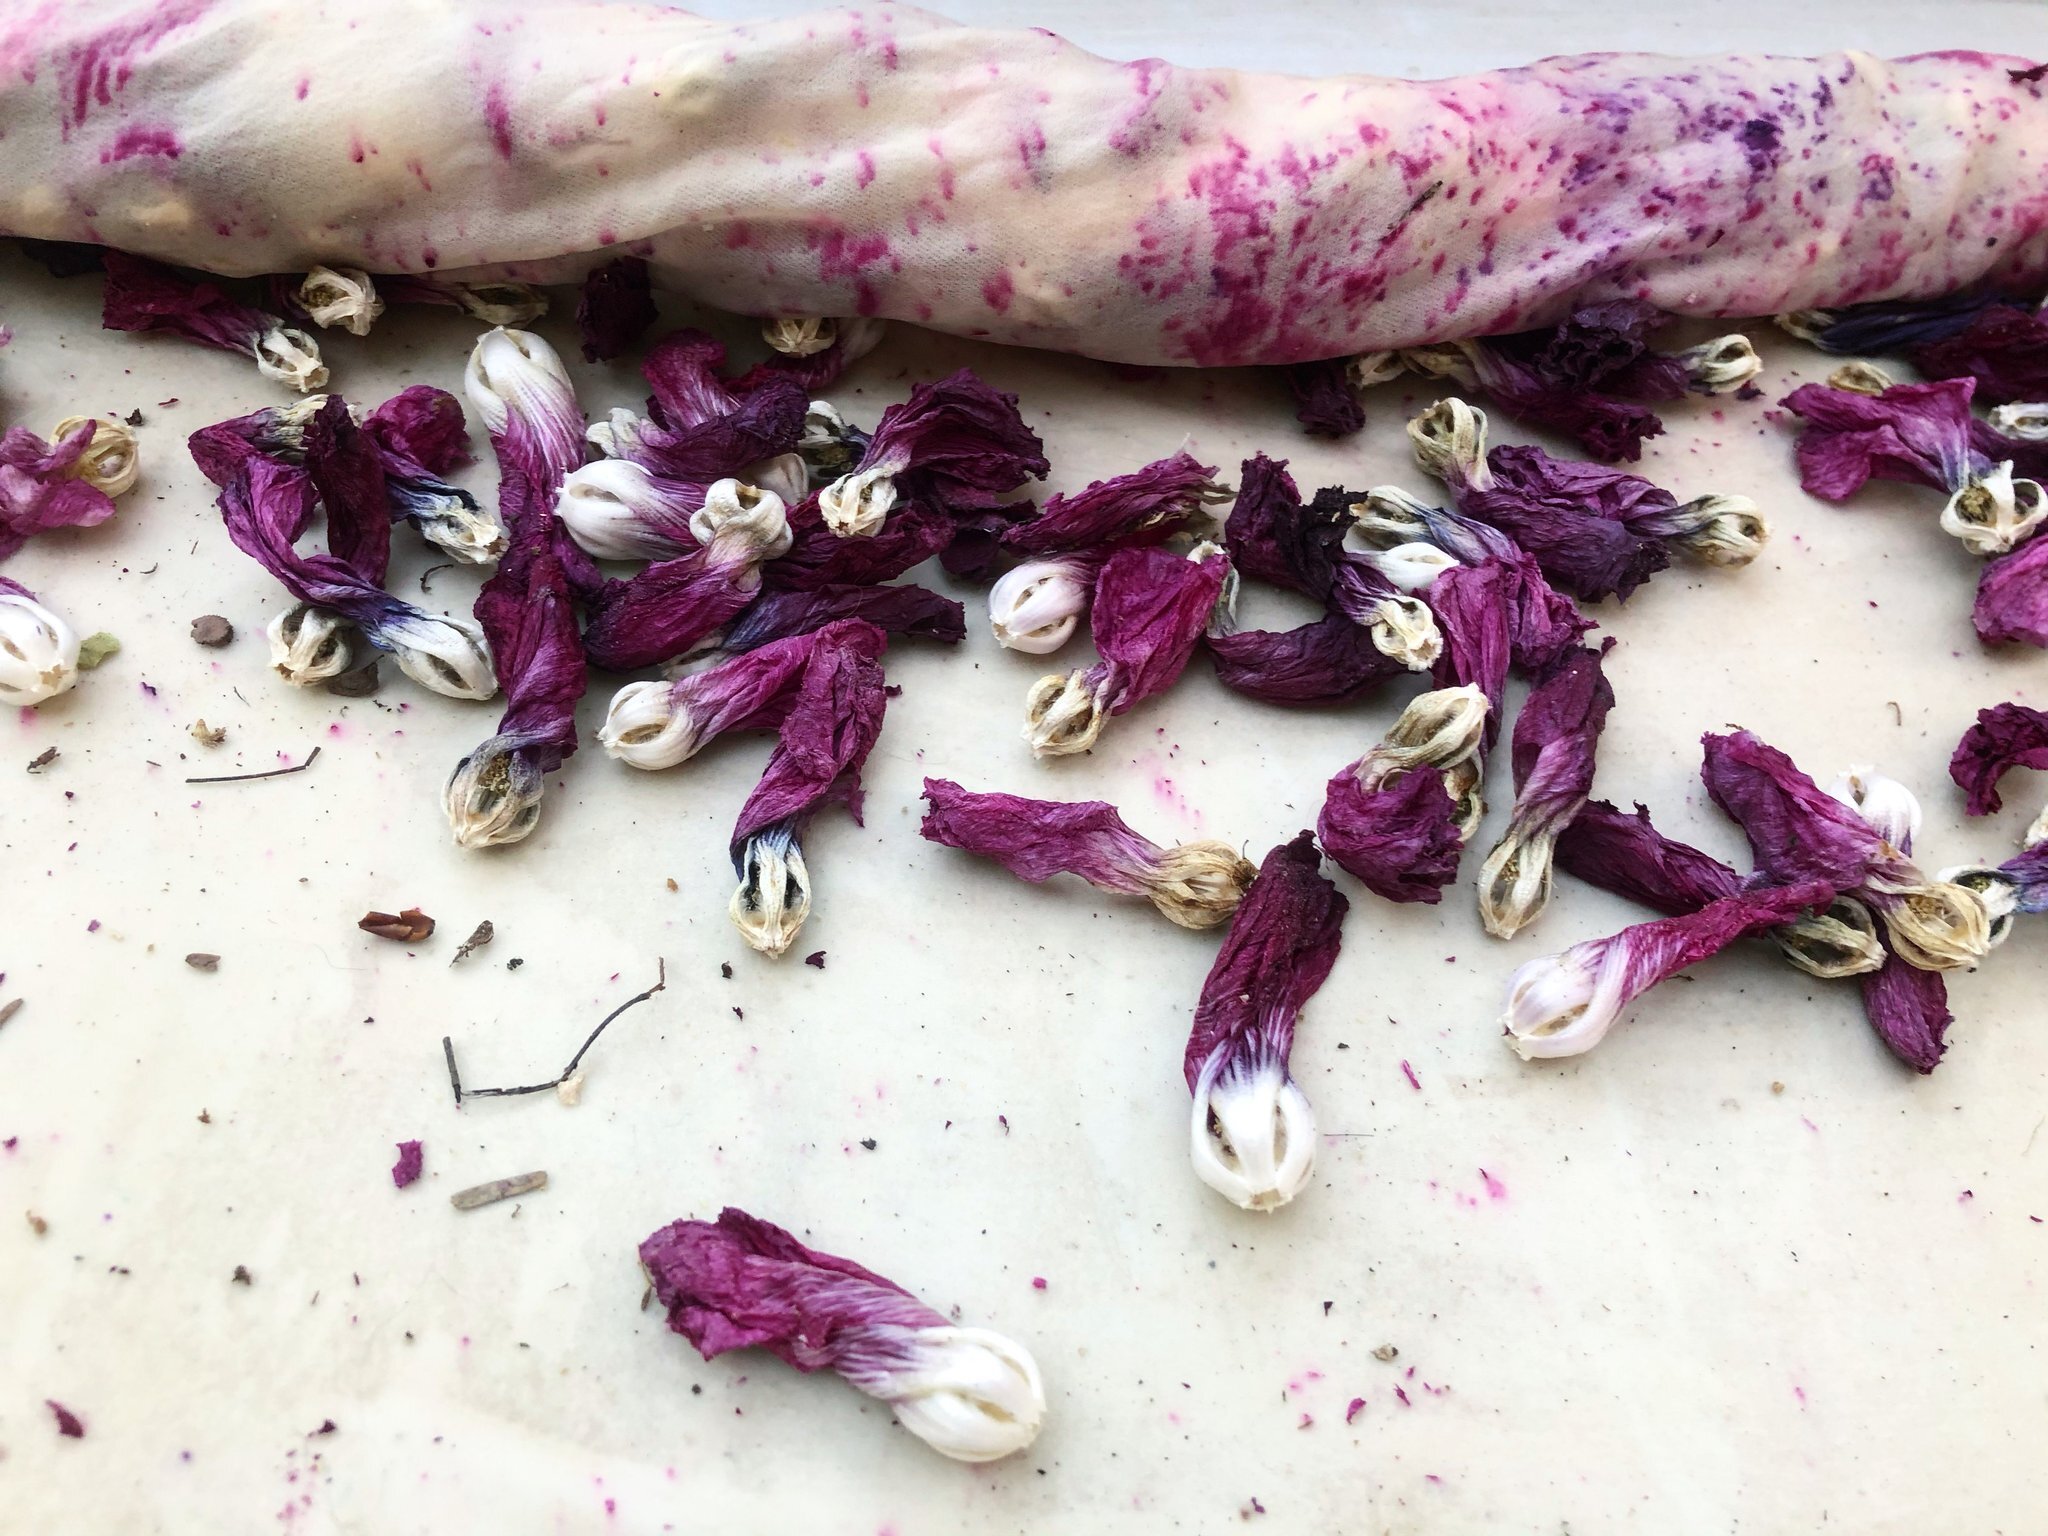
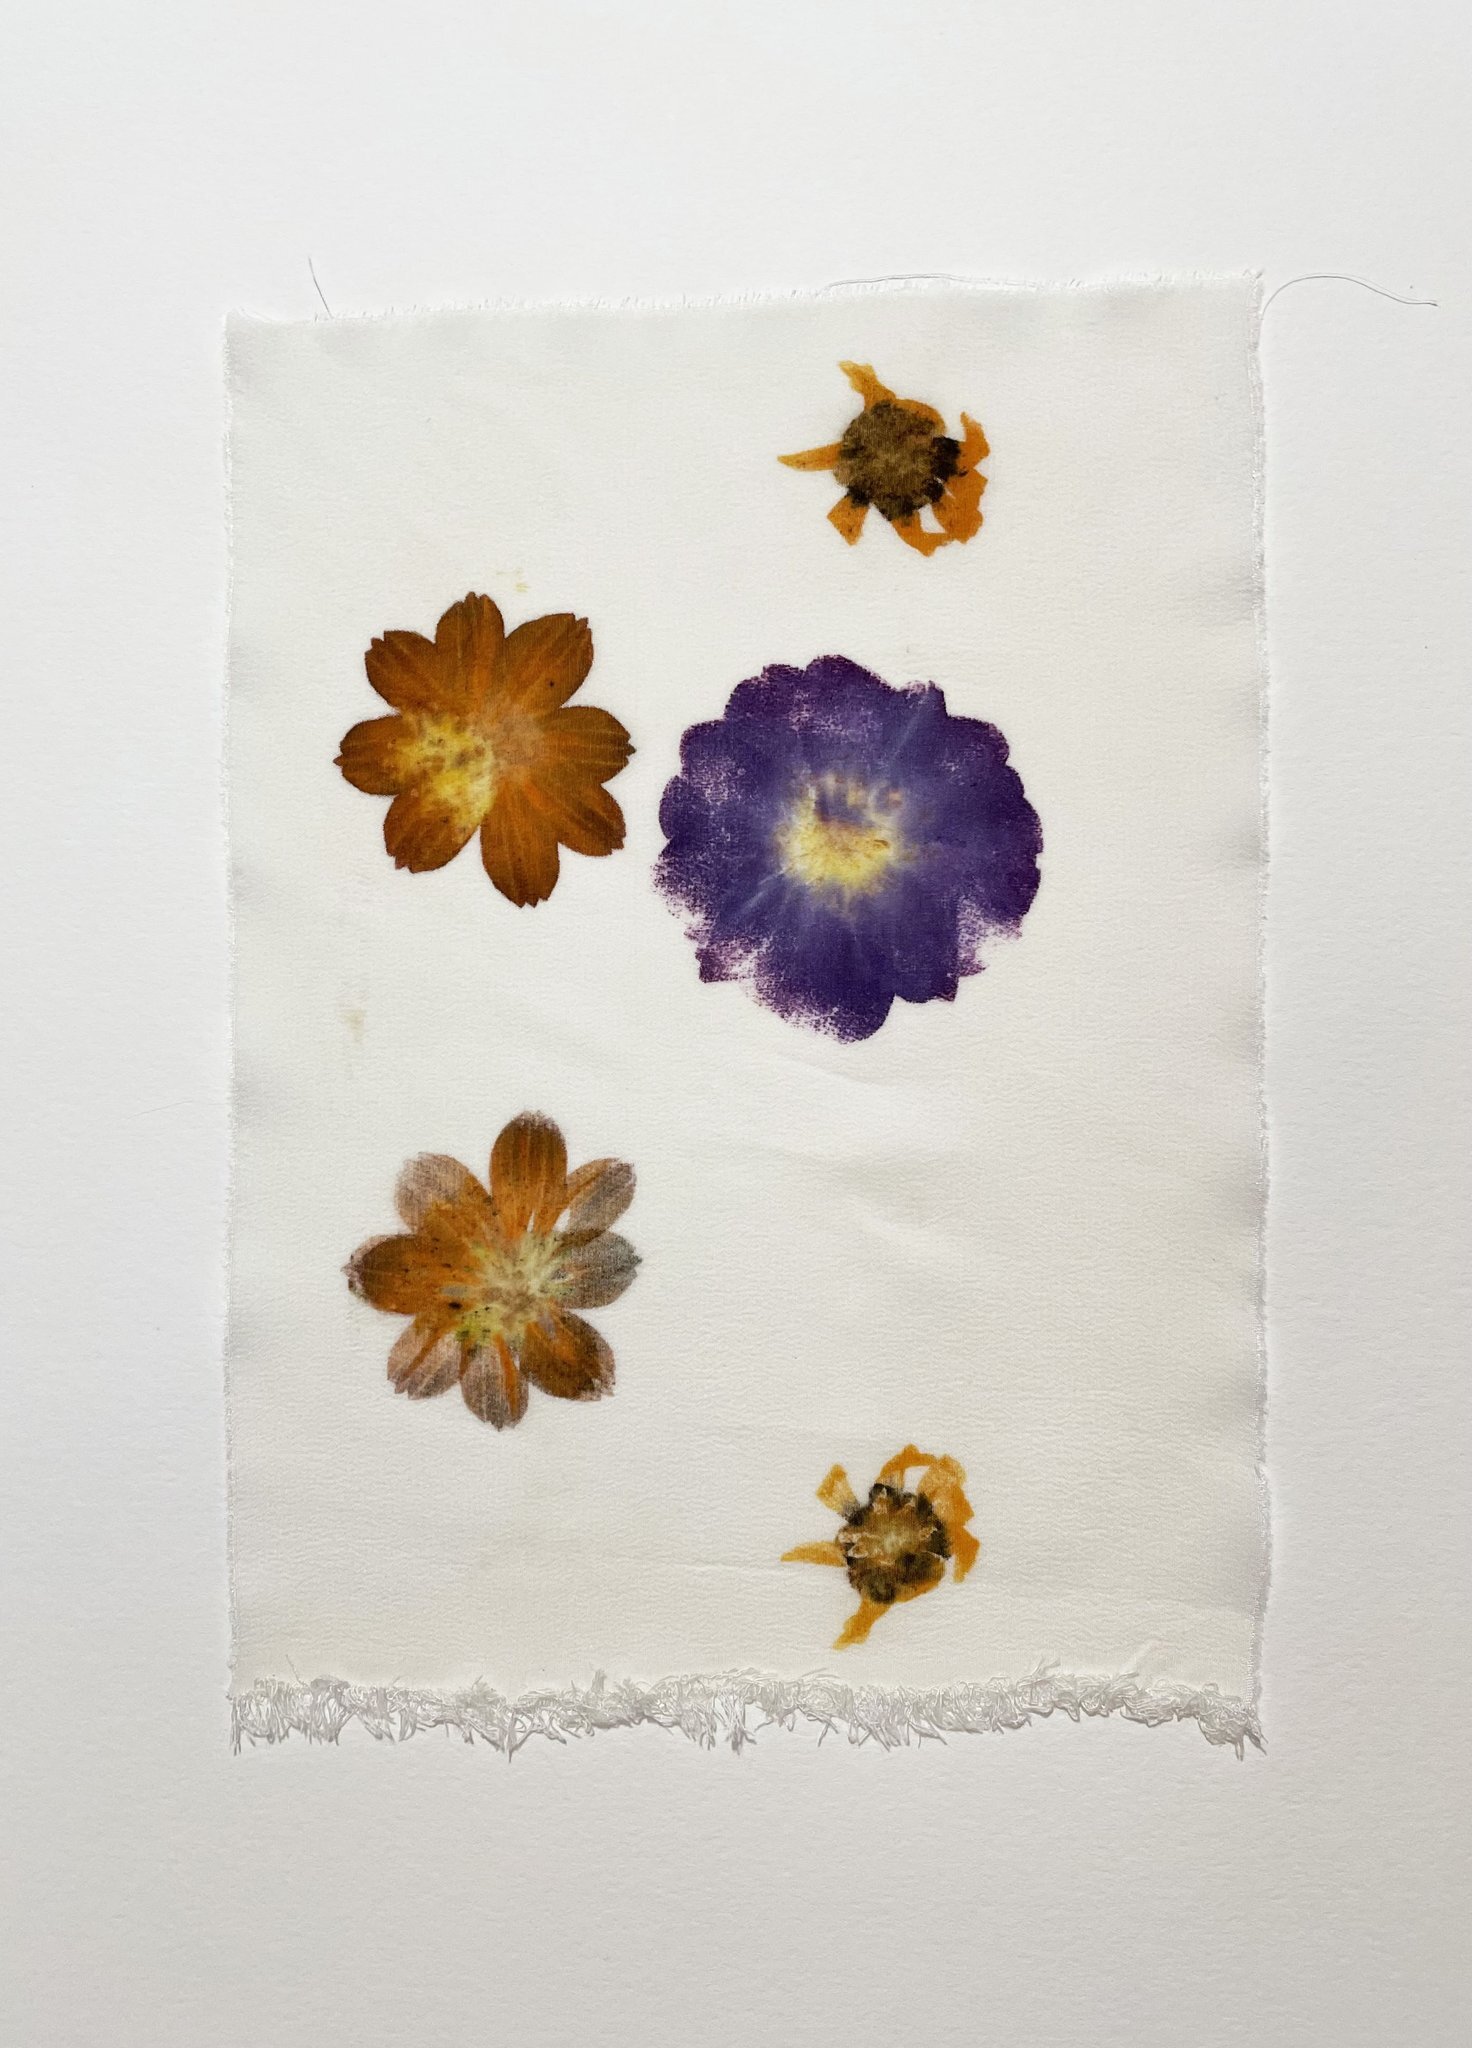
“Lately I have also been enjoying the process of hammering and pounding flowers, a technique known as “hapa zome” which is a Japanese technique of transferring fresh flowers or leaves to fabric, through pounding and creating a stamp-like transfer. I love the almost photographic nature of this process that captures a flower in full bloom, like a snapshot immortalizes a moment in time. I like to layer this technique with others such as immersion dyeing (creating a solid background color to then stamp on top of), or bundle dyeing with dried flowers to create all over impressionist patterns and layering fresh flower stamps on top, mixing lots of different textures.”
Photo courtesy of Mad Provost
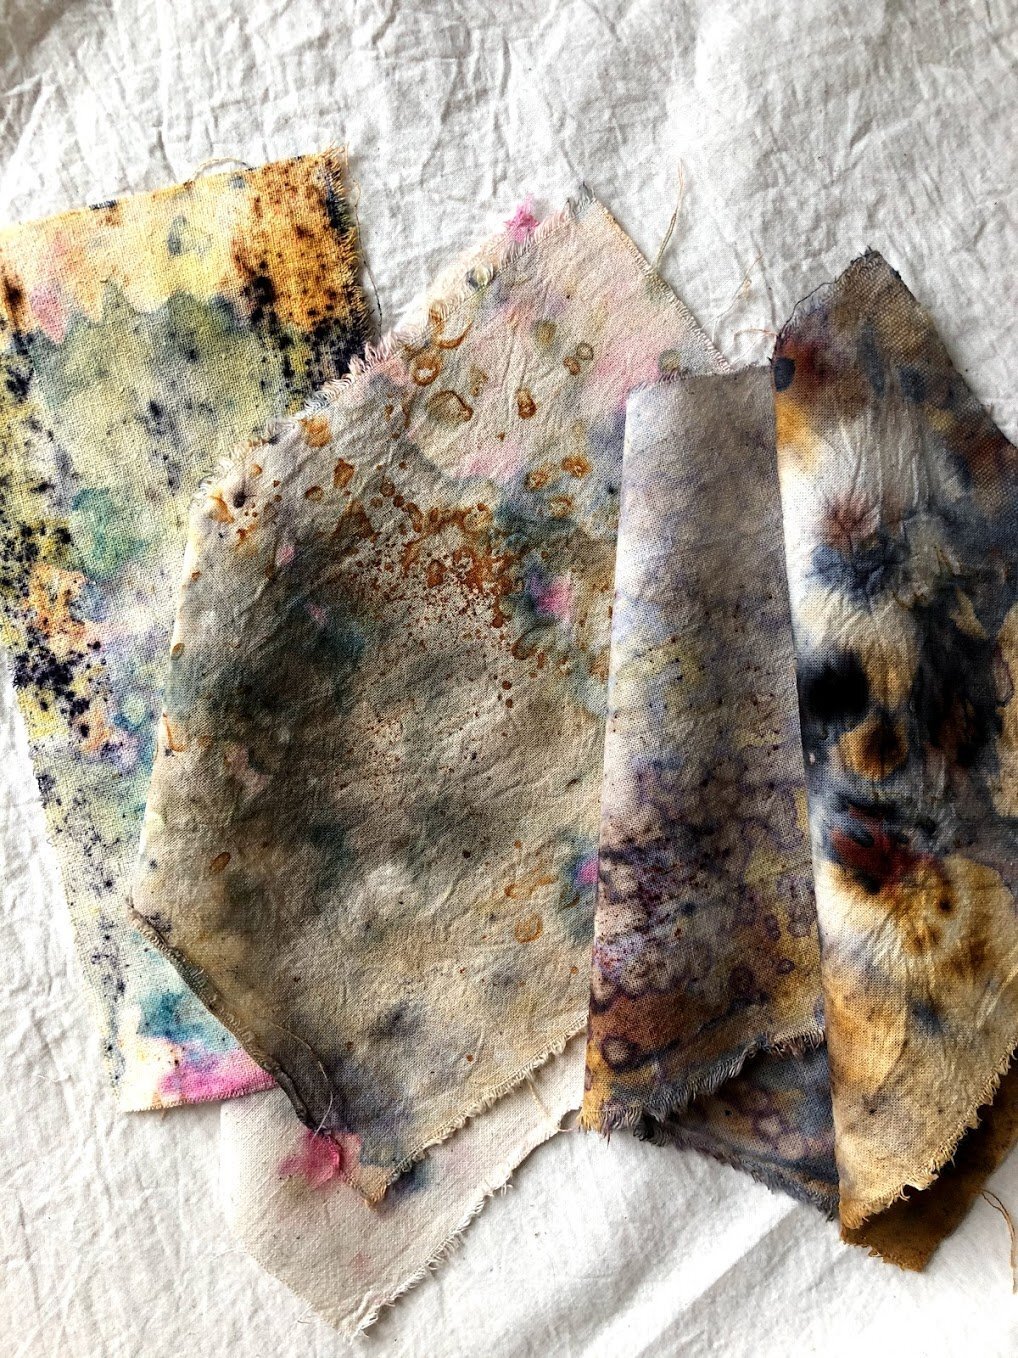
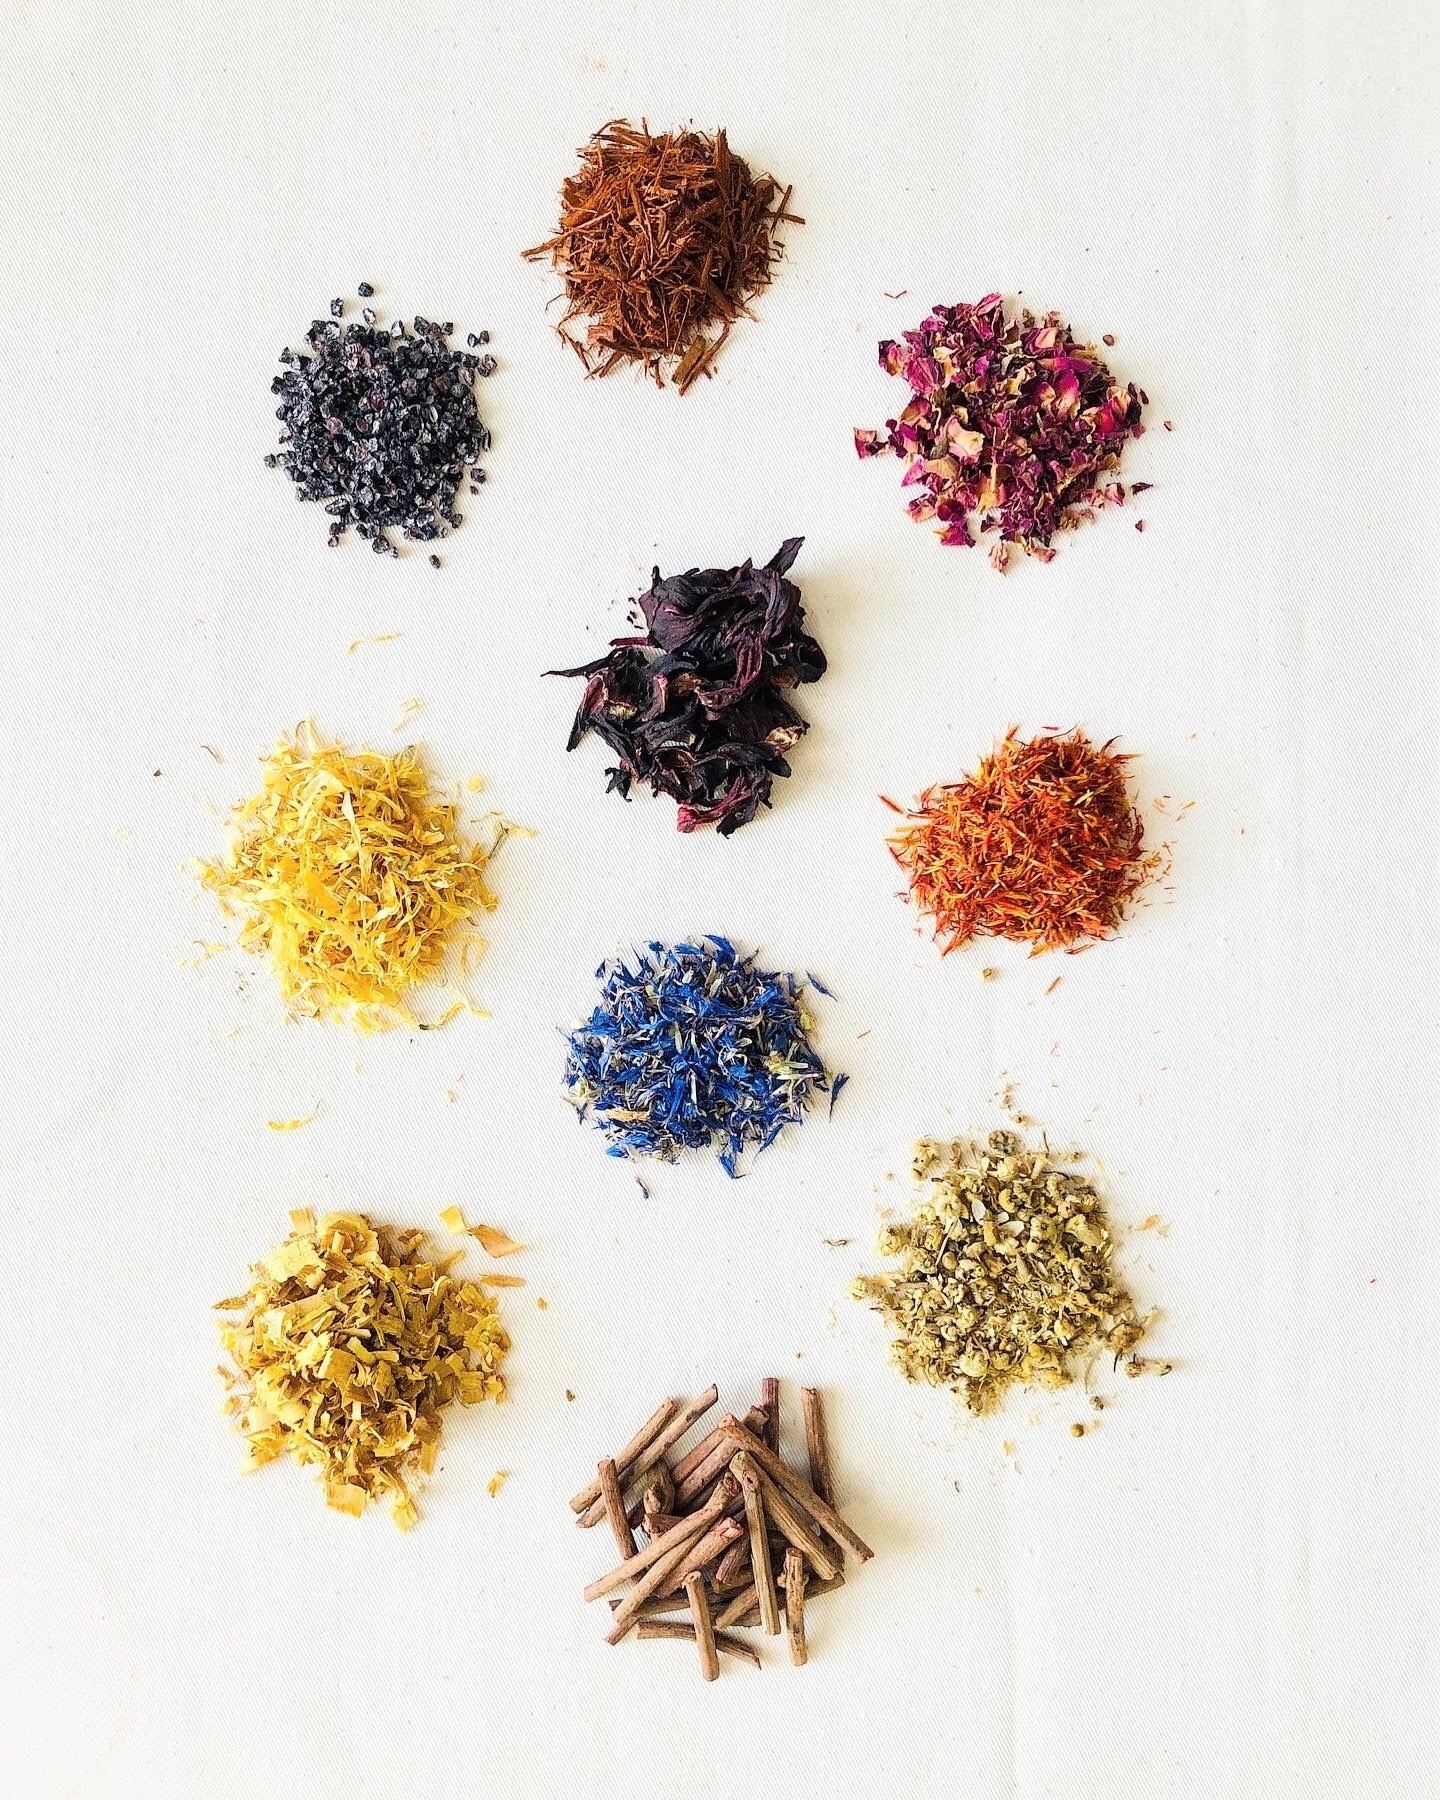
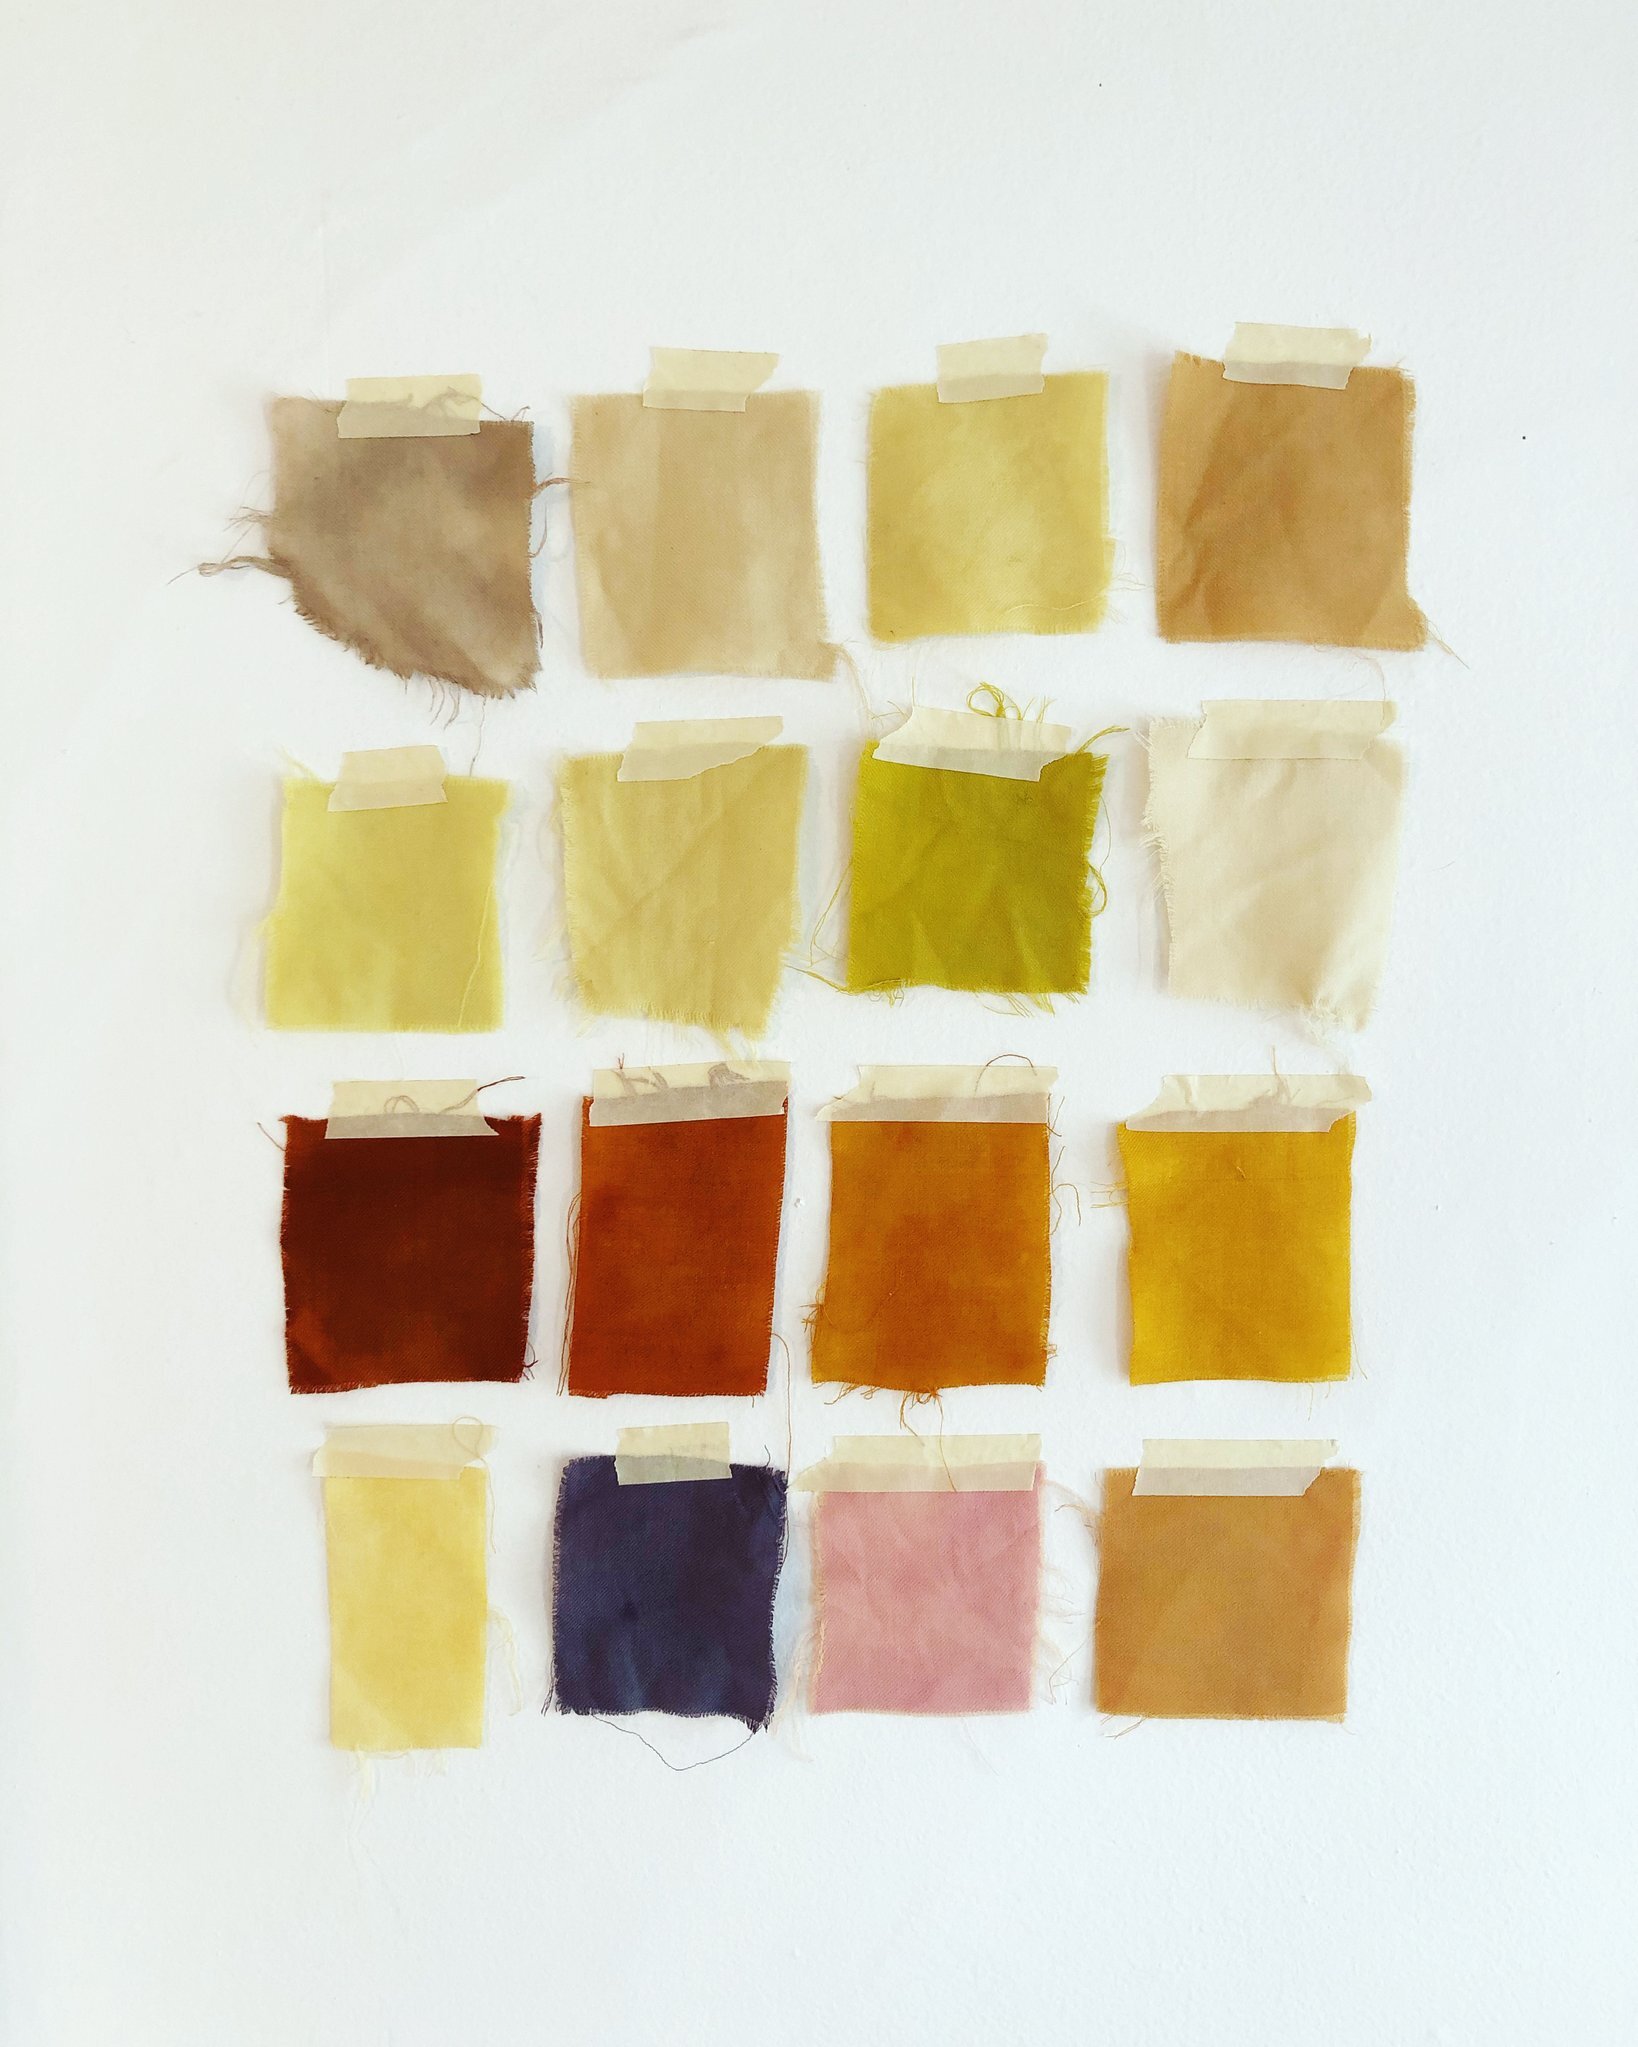
Living Color
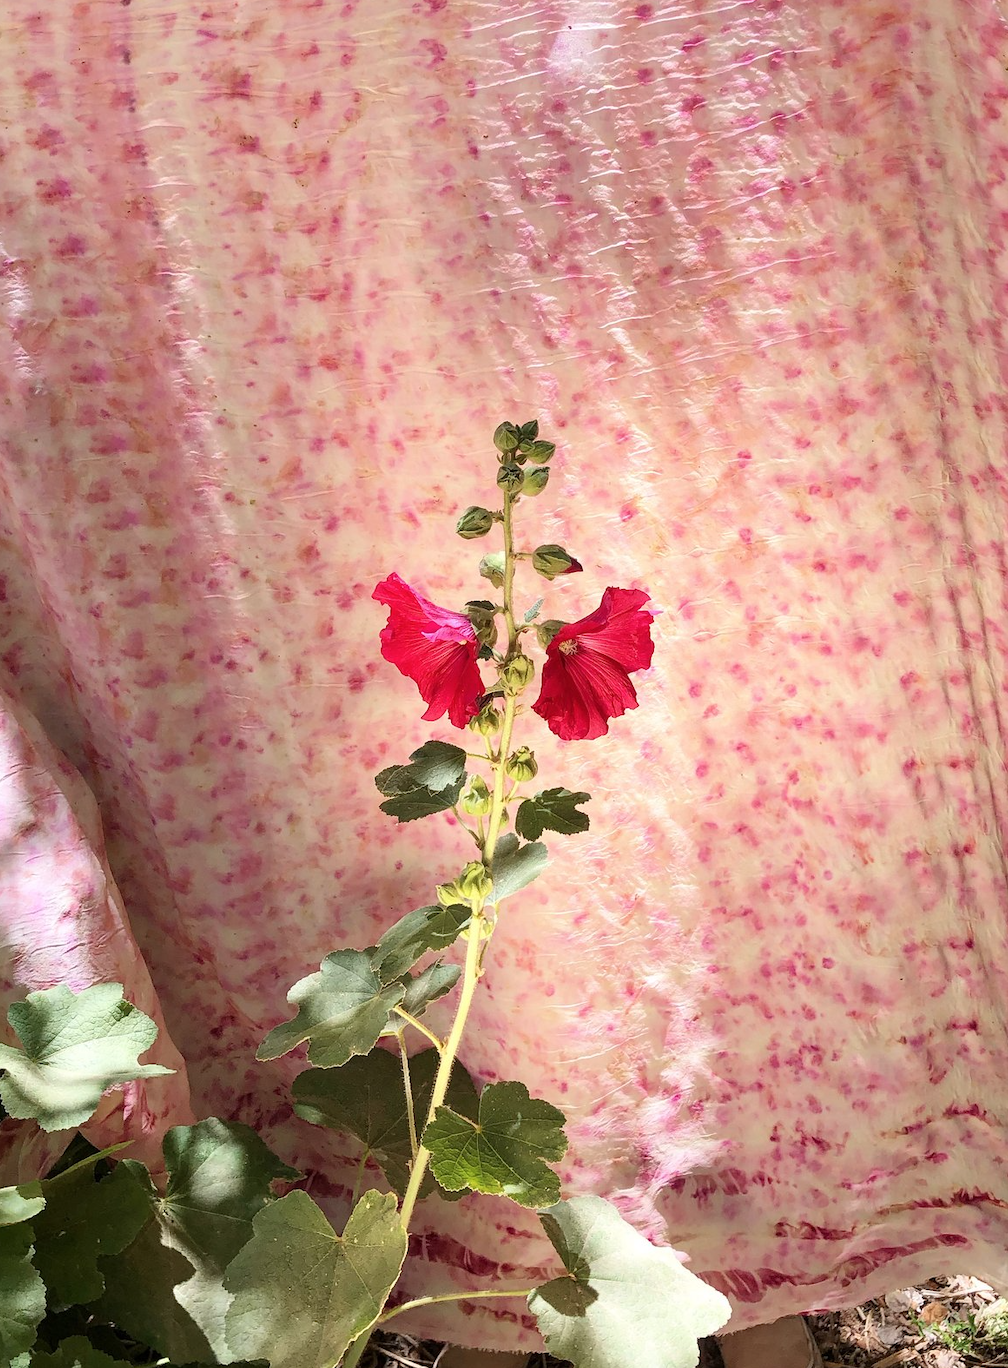
Homegrown flowers are a favorite of Mad’s and we can’t blame her. “There is nothing so satisfying as growing your own living color! … Currently I am using a lot of coreopsis and tango cosmos in my work since I have a lot of blooms, but soon I am expecting to work with my black knight scabiosa (purple pin cushion) flowers and homegrown indigo (persicaria tinctoria) from the garden I have made on my fire escape. I like using my homegrown plants because I feel more connected to them, and can also study the health of the plants through the color outcomes I get and plan to continue experimenting with different conditions moving forward like sunlight exposure, soil composition, symbiotic systems, etc and how these affect my dyes.”
View Halden’s selection of Coreopsis, Scabiosa, and Cosmos Seeds.

A Passion-Led Journey
“Enjoy the process (of whatever your passion is) and allow yourself to be led by it rather than to control it.” Mad passionately advises us all. “When I look back on where I started, I am amazed at where my journey with natural dyes has led me and all of the people I have met and places I have been led by my love of natural color. There is something so freeing about letting nature take hold and trusting it will lead you right where you need to be.”
Photo courtesy of Mad Provost
View more of Mad’s inspiring work on her website or on Instagram at @mad_provost
Photos by Mad Provost, Greeshma Chenniveetil, and Nathan Cyprys
Cognac Arrangement

For this arrangement you will need:
Dahlia 'Creme de Cognac'
Calendula 'Touch of Red Buff'
Zinnia 'Lilliput Mix'
Zinnia 'Mazurkia'
Petunia ‘Red’
Geranium ‘Red’

Petals are pale peach with raspberry tones on the underside.
Sprout tuber indoors 4-6 weeks before the last frost date, transplant after the danger of frost has passed. Plant tubers directly outdoors after the danger of frost has passed. Flowers can be harvested when petals are 3/4 open.
$12.00

Creamy white petals with a rosy red underside that curl inwards towards the dark flower center.
Start seed indoors or direct seed outdoors at least 11 weeks before the first frost date. Can be seeded early-fall in zones 8-10. Harvest when bloom is halfway open for optimal vase life.
$4.95

Pale-pink, peach, magenta, coral, violet, red and orange blooming summer through fall.
Start seed indoors at least 12 weeks before the first frost date. Harvest when the stems are stiff and flowers are opened.
$3.95

Magenta pink flower with peachy-cream tips blooming summer through fall.
Start seed indoors at least 12 weeks before the first frost date. Harvest when the stems are stiff and flowers are opened.
$3.95


Flowers from the garden of Sara Haller
Photos by Sara Haller
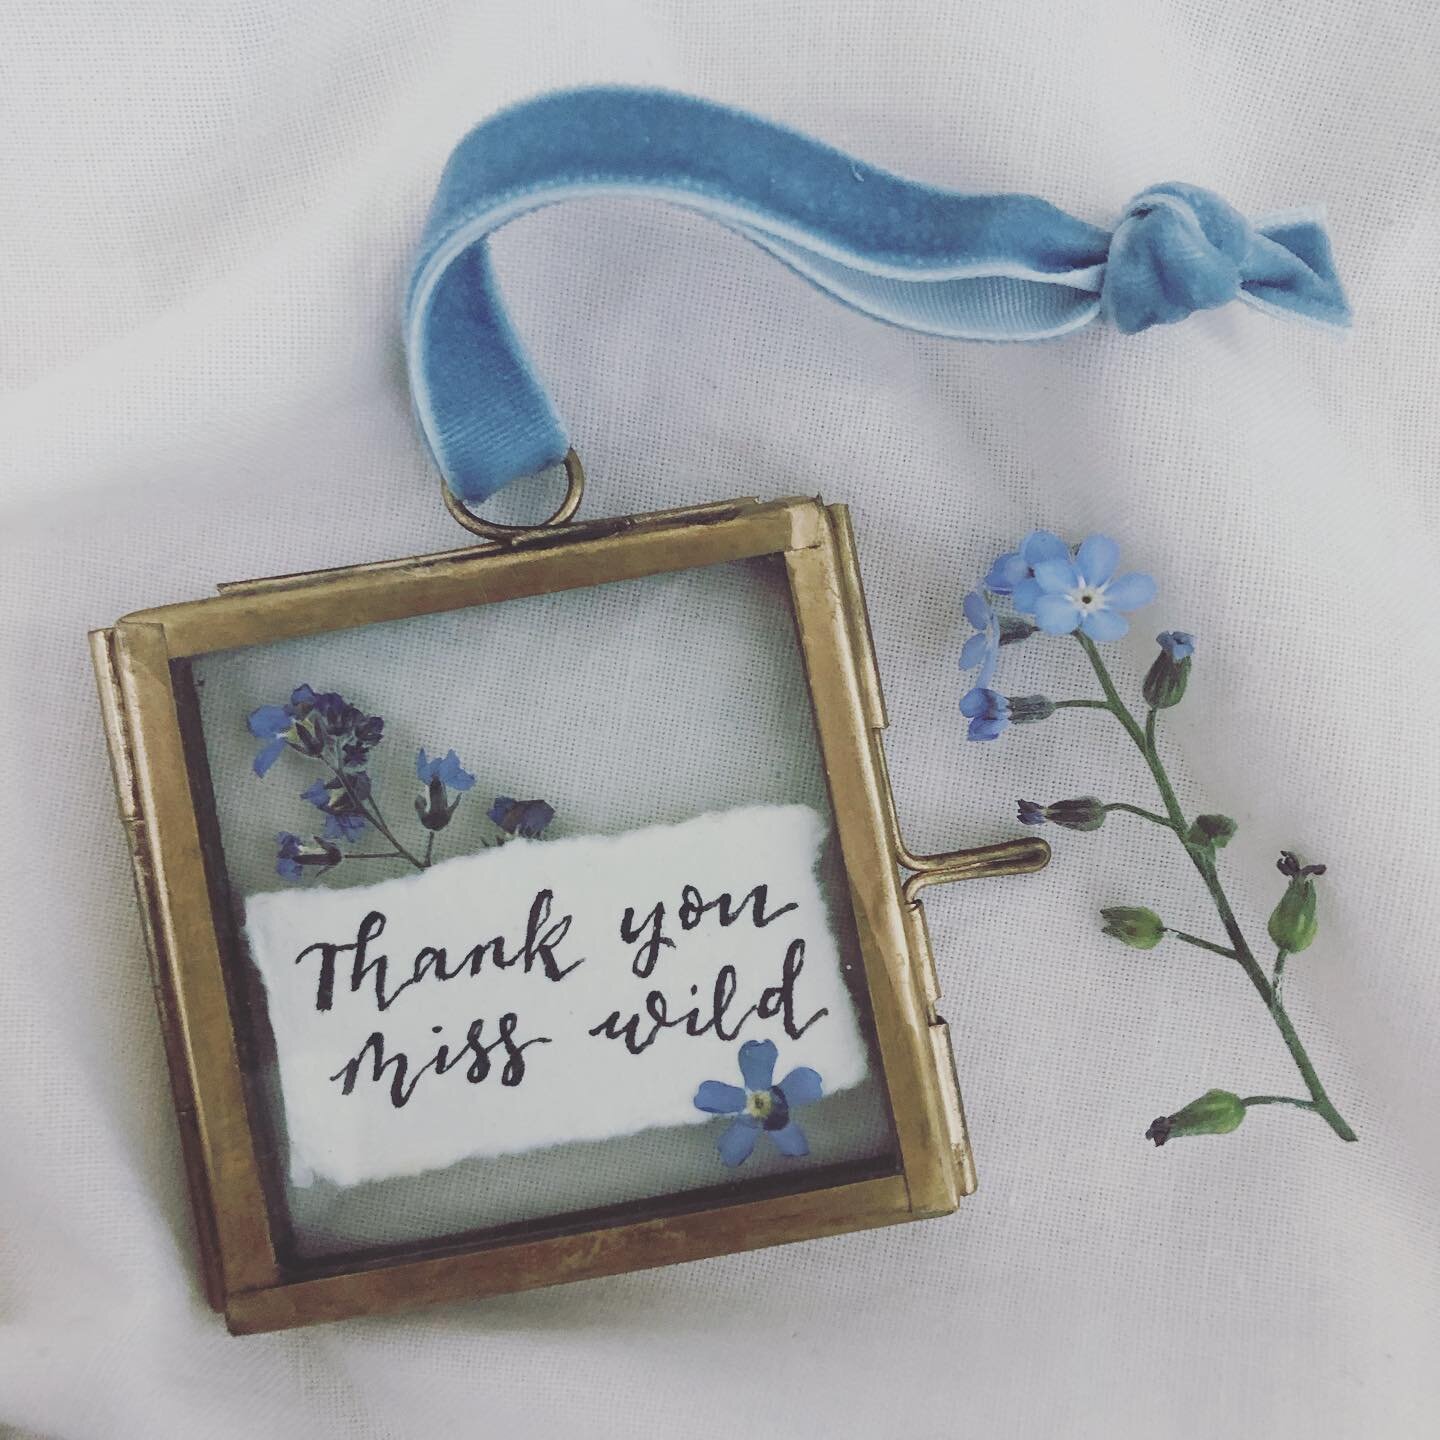
Preserving Garden Memories with The Dandelion Fox

Photo courtesy of The Dandelion Fox
Sometimes a new hobby or skill can come about unexpectedly. In this week’s feature, Carly Gee, a pressed flower artist and the creator of The Dandelion Fox, shares her story of what happened after an image on Pinterest inspired her to begin pressing flowers. It reminds us that wonderful things are out there; we just haven’t learned about them (or grown them) yet.
We’ve included links to some of the flowers mentioned and shown in this article for those interested in growing, pressing, and creating their own floral creations.
The Dandelion Fox: What’s in a name?
When we asked Carly if there is an explanation behind her whimsical business name, she expressed,
“I feel a special connectedness to foxes, and consider them my animal essence. For my first tattoo years ago, I got a red fox with a fluffy dandelion in its mouth on my arm. This tattoo has always represented me, in a sense.
When I first began pressing flowers, dandelion seed heads quickly became one of my favorites to use in my art. As I was dreaming of business names, ‘The Dandelion Fox’ naturally felt like who I was and am. “
Photo courtesy of The Dandelion Fox
Planted as Seedlings
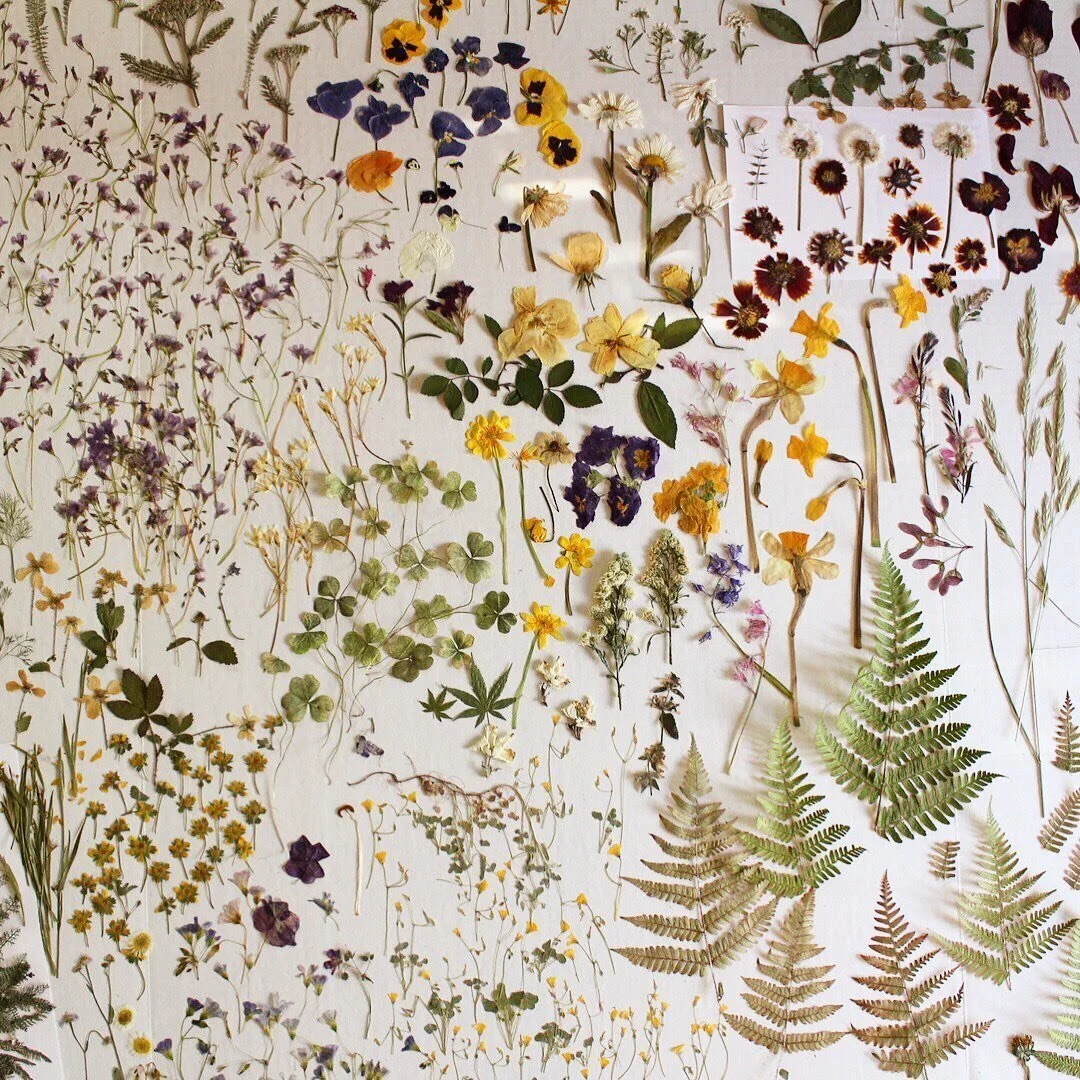
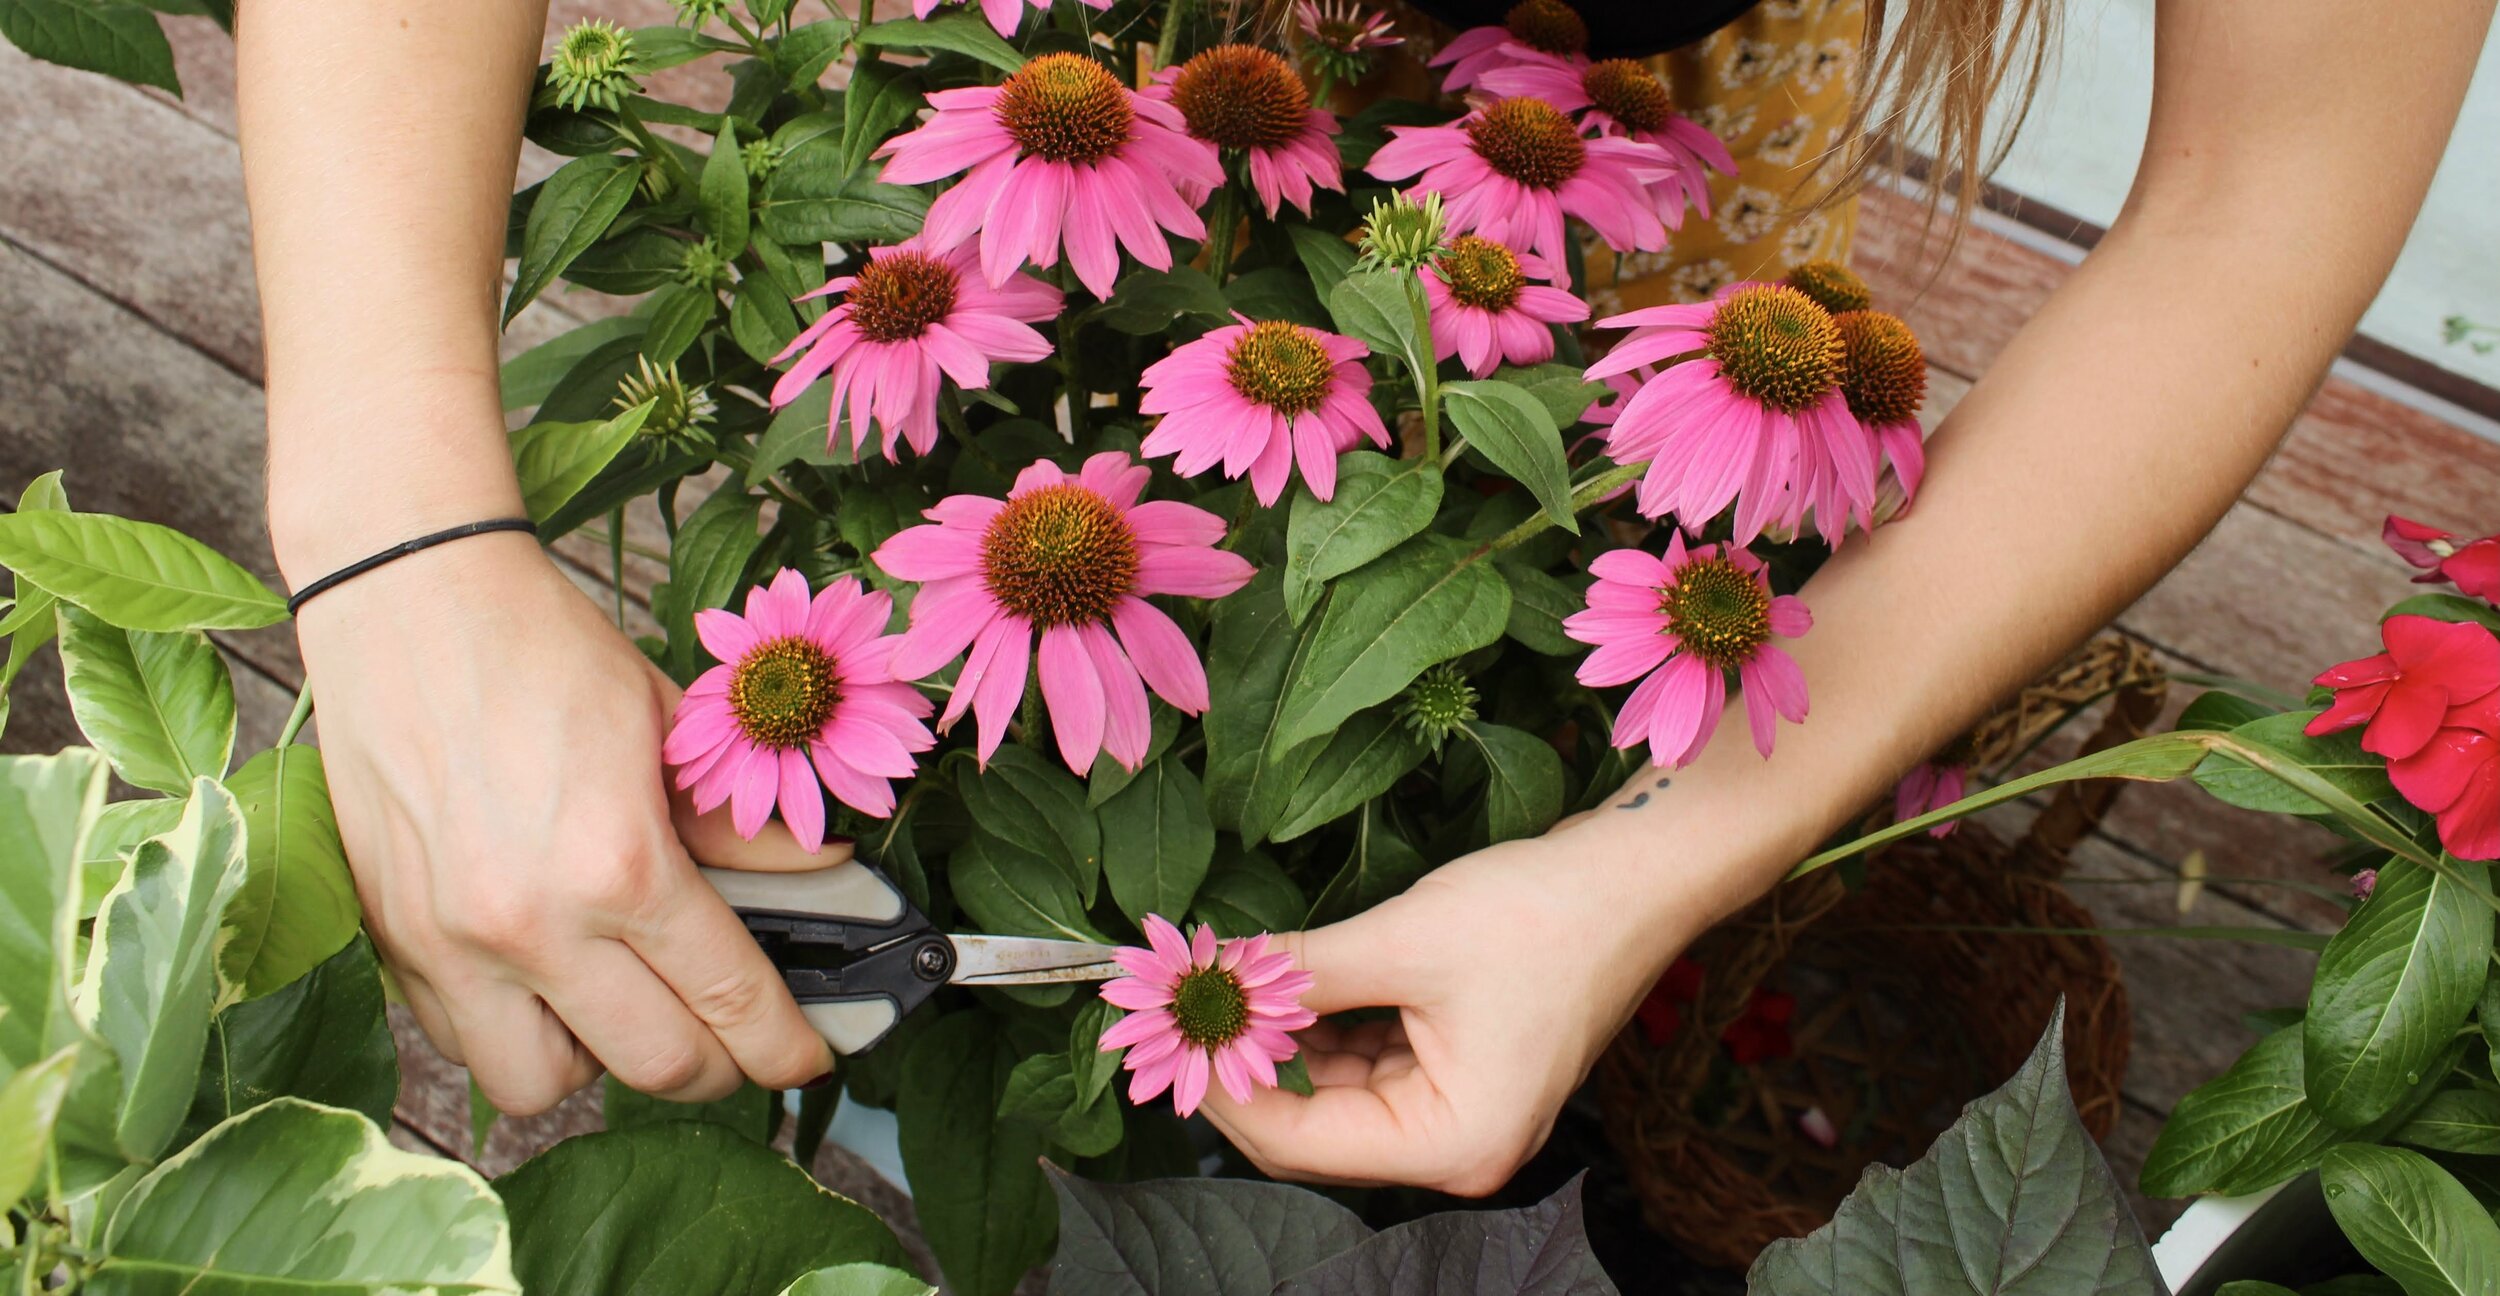
Like many of us, Carly’s fondness for gardens began early on. “My love and passion for flowers and plants stemmed from growing up with a nature-loving, garden growing family. Years ago, I decided to start growing my own small flower garden. While doing some research online, a Pinterest link on ‘pressing flowers’ caught my eye. From there, I went down a rabbit hole experimenting with the process through lots of trial and error. It absolutely blew my mind that through this process, I could keep alive the fleeting moments in my garden! Pressing flowers quickly became a passion, which later bloomed into my business, The Dandelion Fox.”
Carly expanded her work and began helping others hold onto their own floral memories.
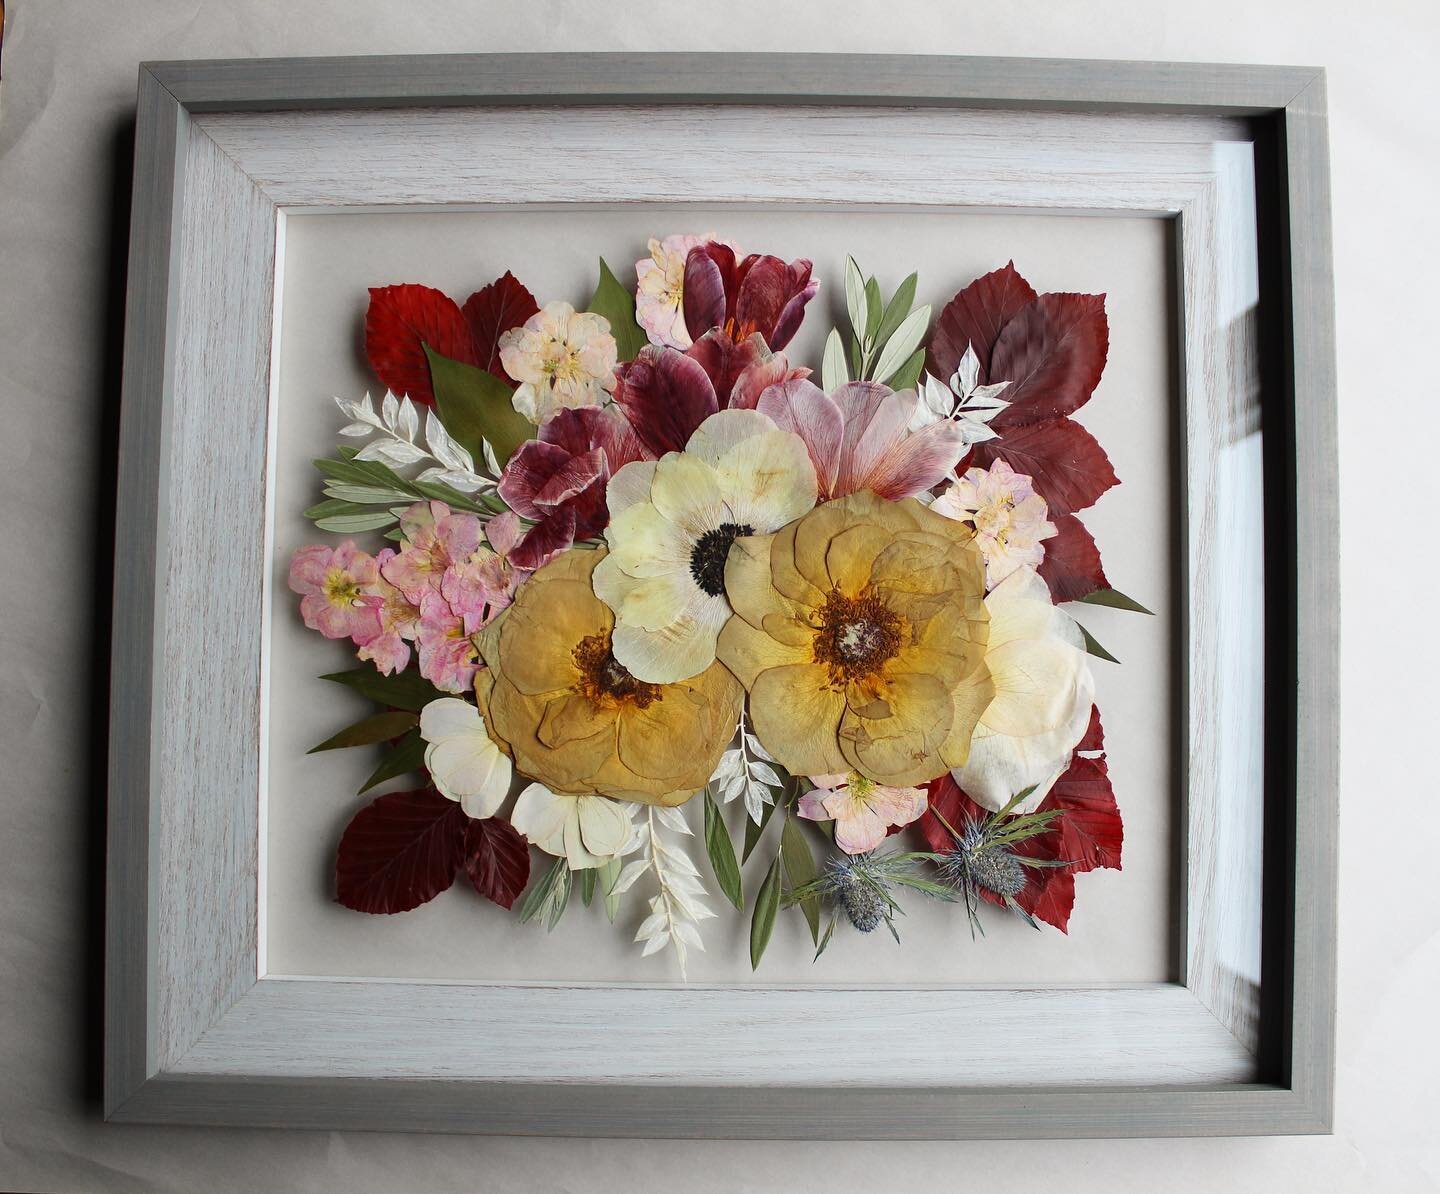
“Bouquet preservation took root a few years later when a friend asked me to press their cousin’s wedding bouquet as a keepsake. Since sharing on social media, friends and couples from around the U.S. began booking their bouquet to be lovingly pressed and framed.”

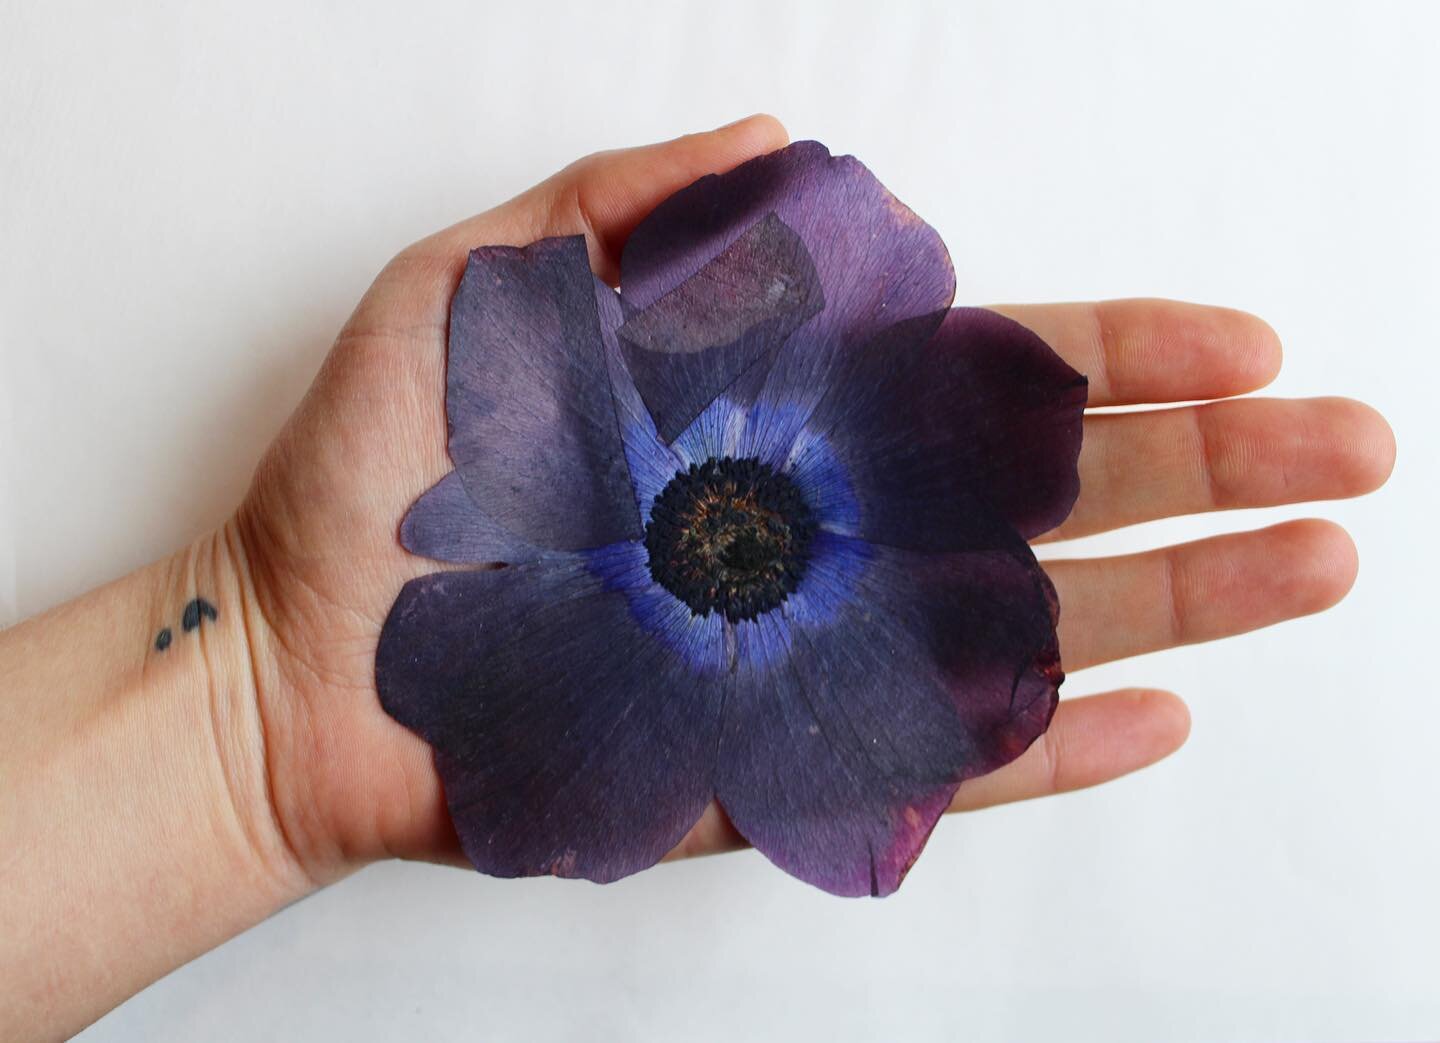
Anemones are one of many types of flowers that are stunning both fresh and pressed. View Halden’s Anemone selection here.
A Place of Inspiration
“I love being in my garden, and local community gardens when in bloom!“ Carly passionately explains.
“Being amongst the vibrant, thriving variety of plants and pollinators always sends me home with a head full of flowery ideas.
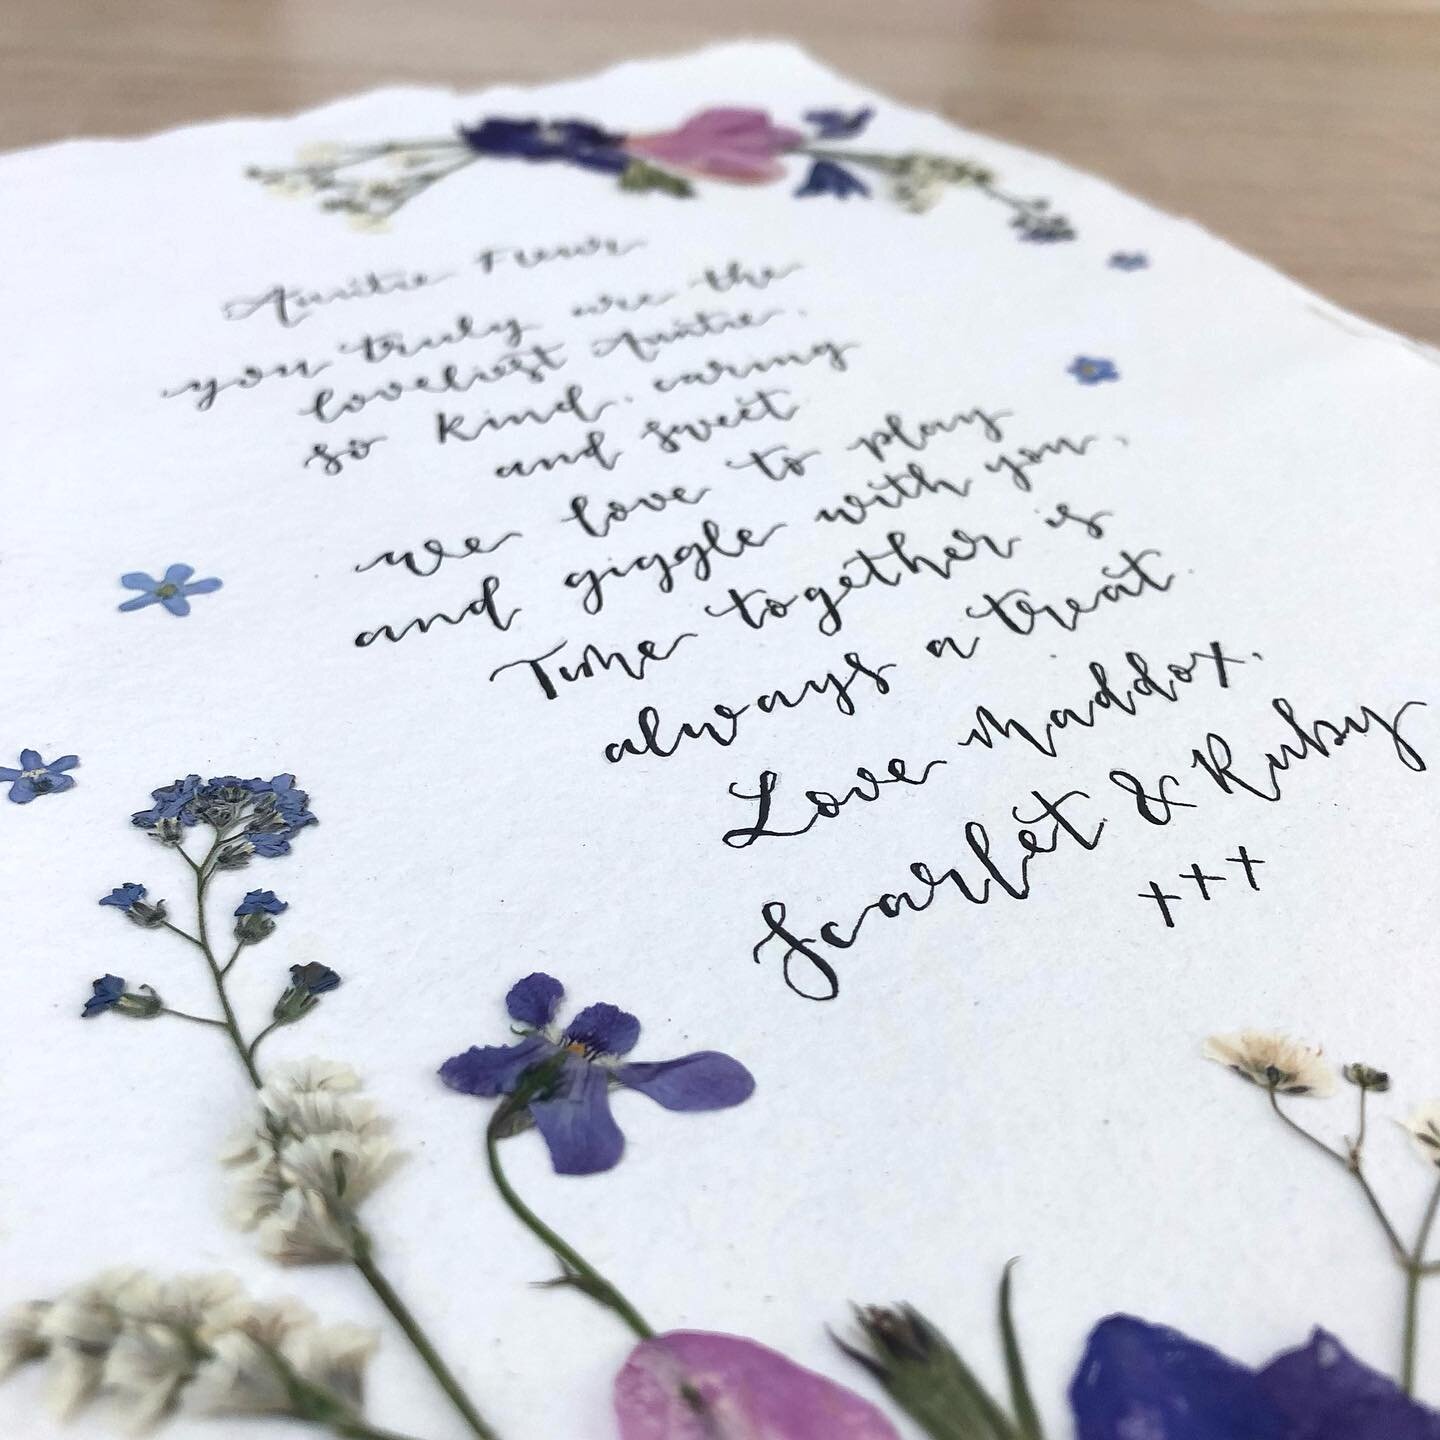
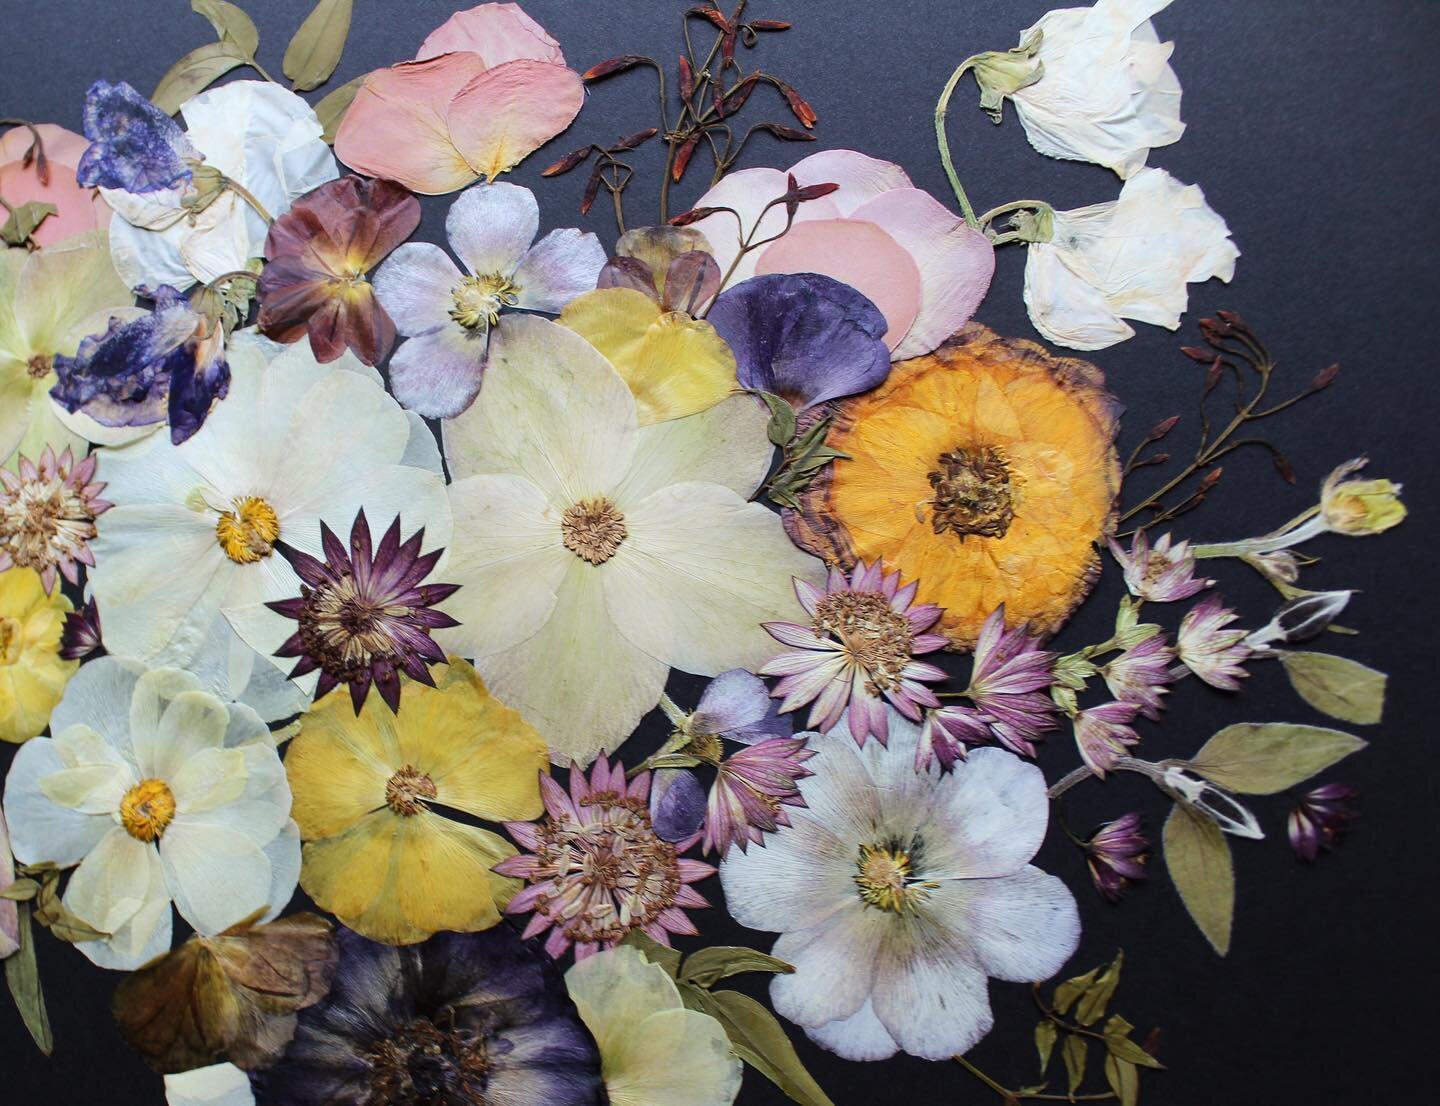
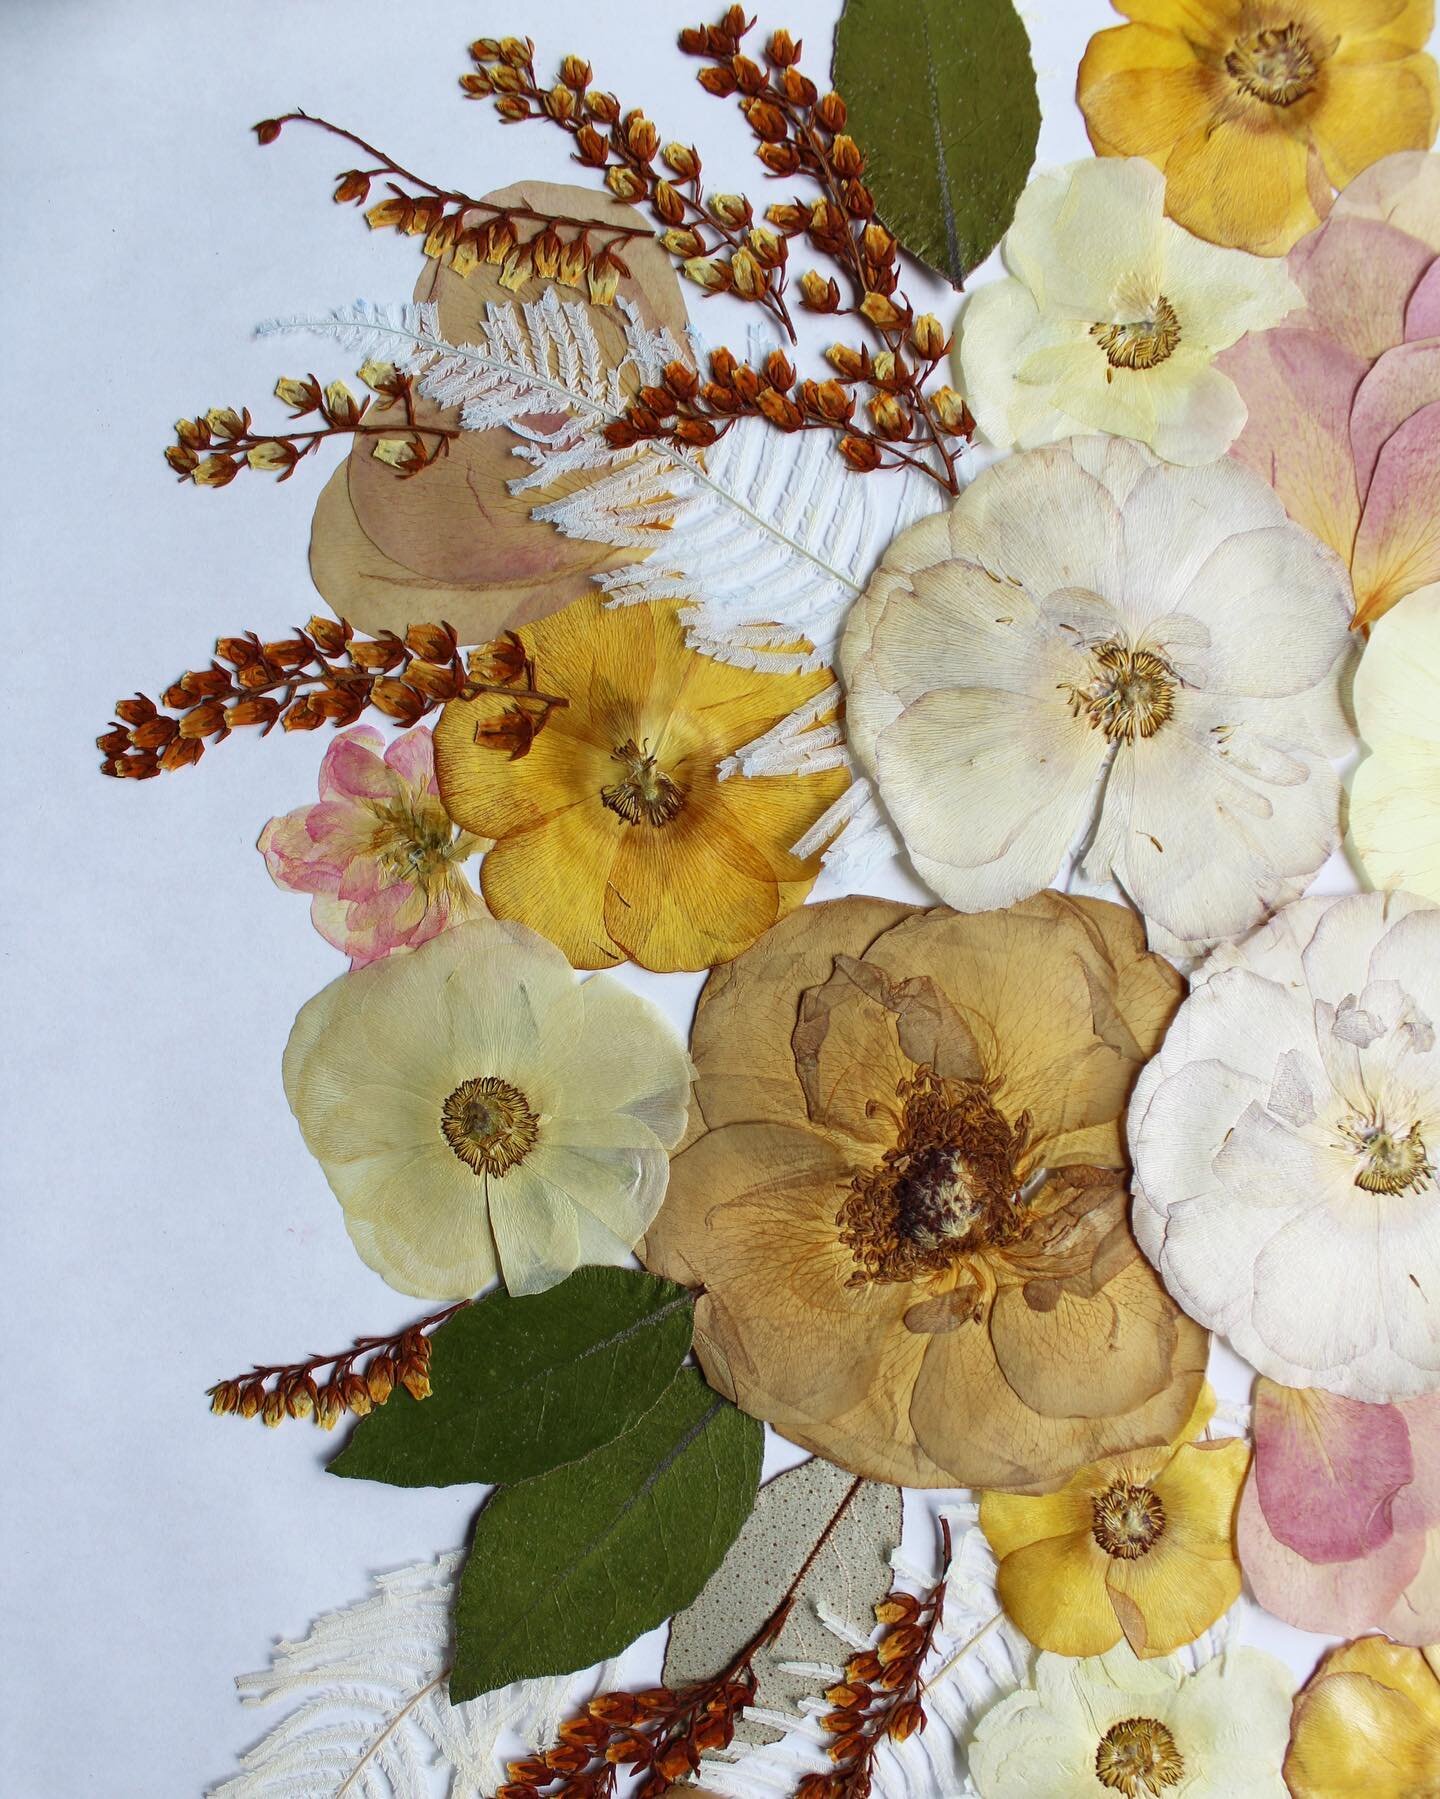
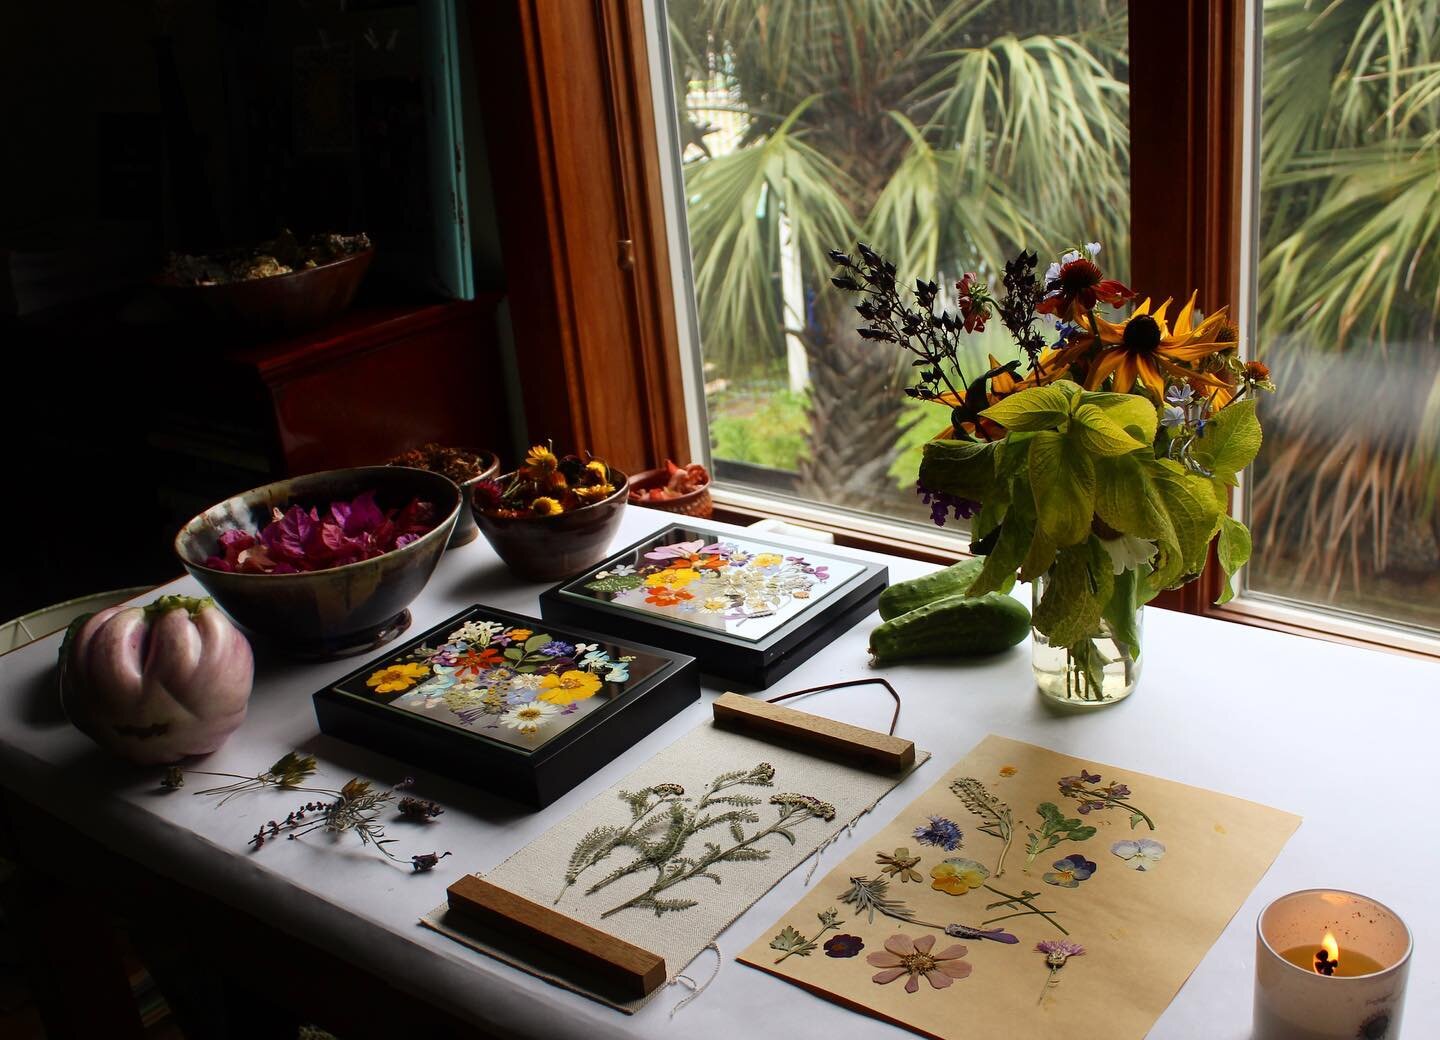
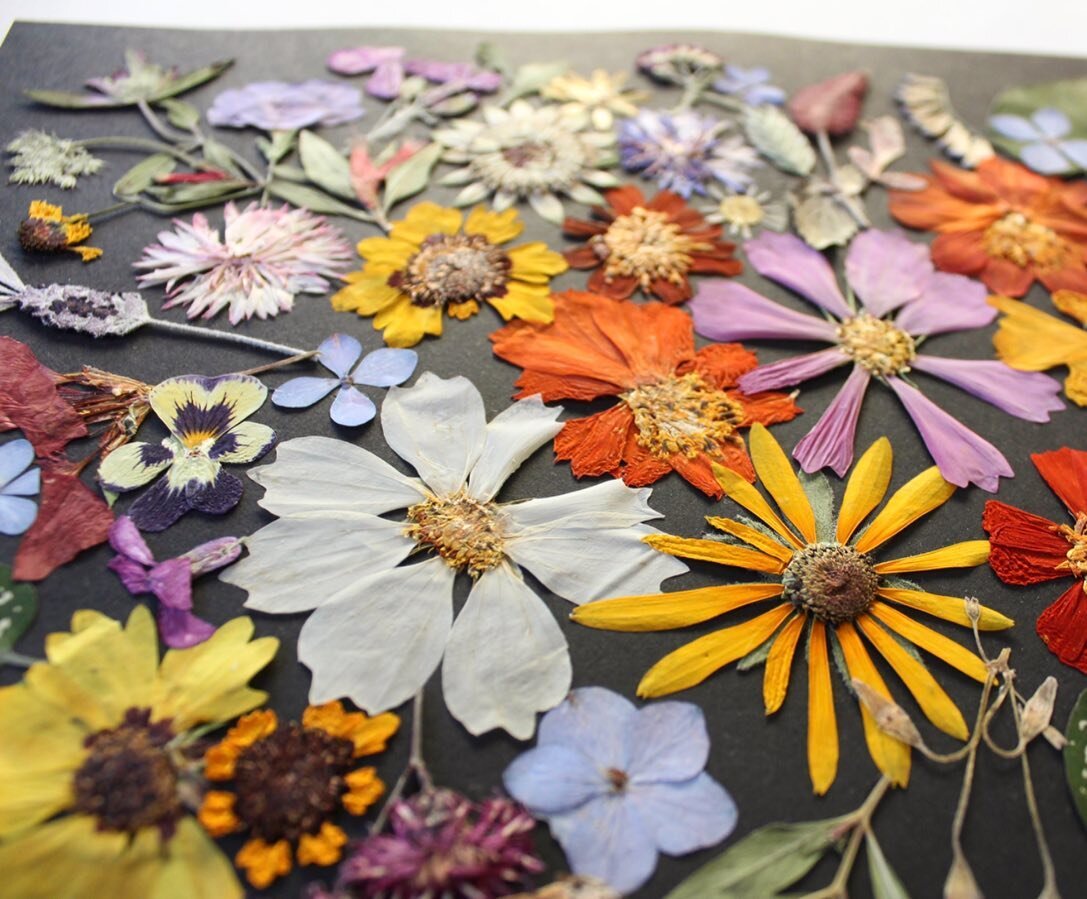
My intention when creating my pressed ‘flowerscapes’ is to mirror a homegrown, wild and bountiful garden. I find inspiration in nature, and love incorporating companion plants and color grouping into my own work. You’ll also find me on hiking trails that promise wildflowers for inspiration.”
Photo courtesy of The Dandelion Fox
The Dandelion Fox Favorites
So you might be asking, what does a talented and nature-loving artist grow and use most often?
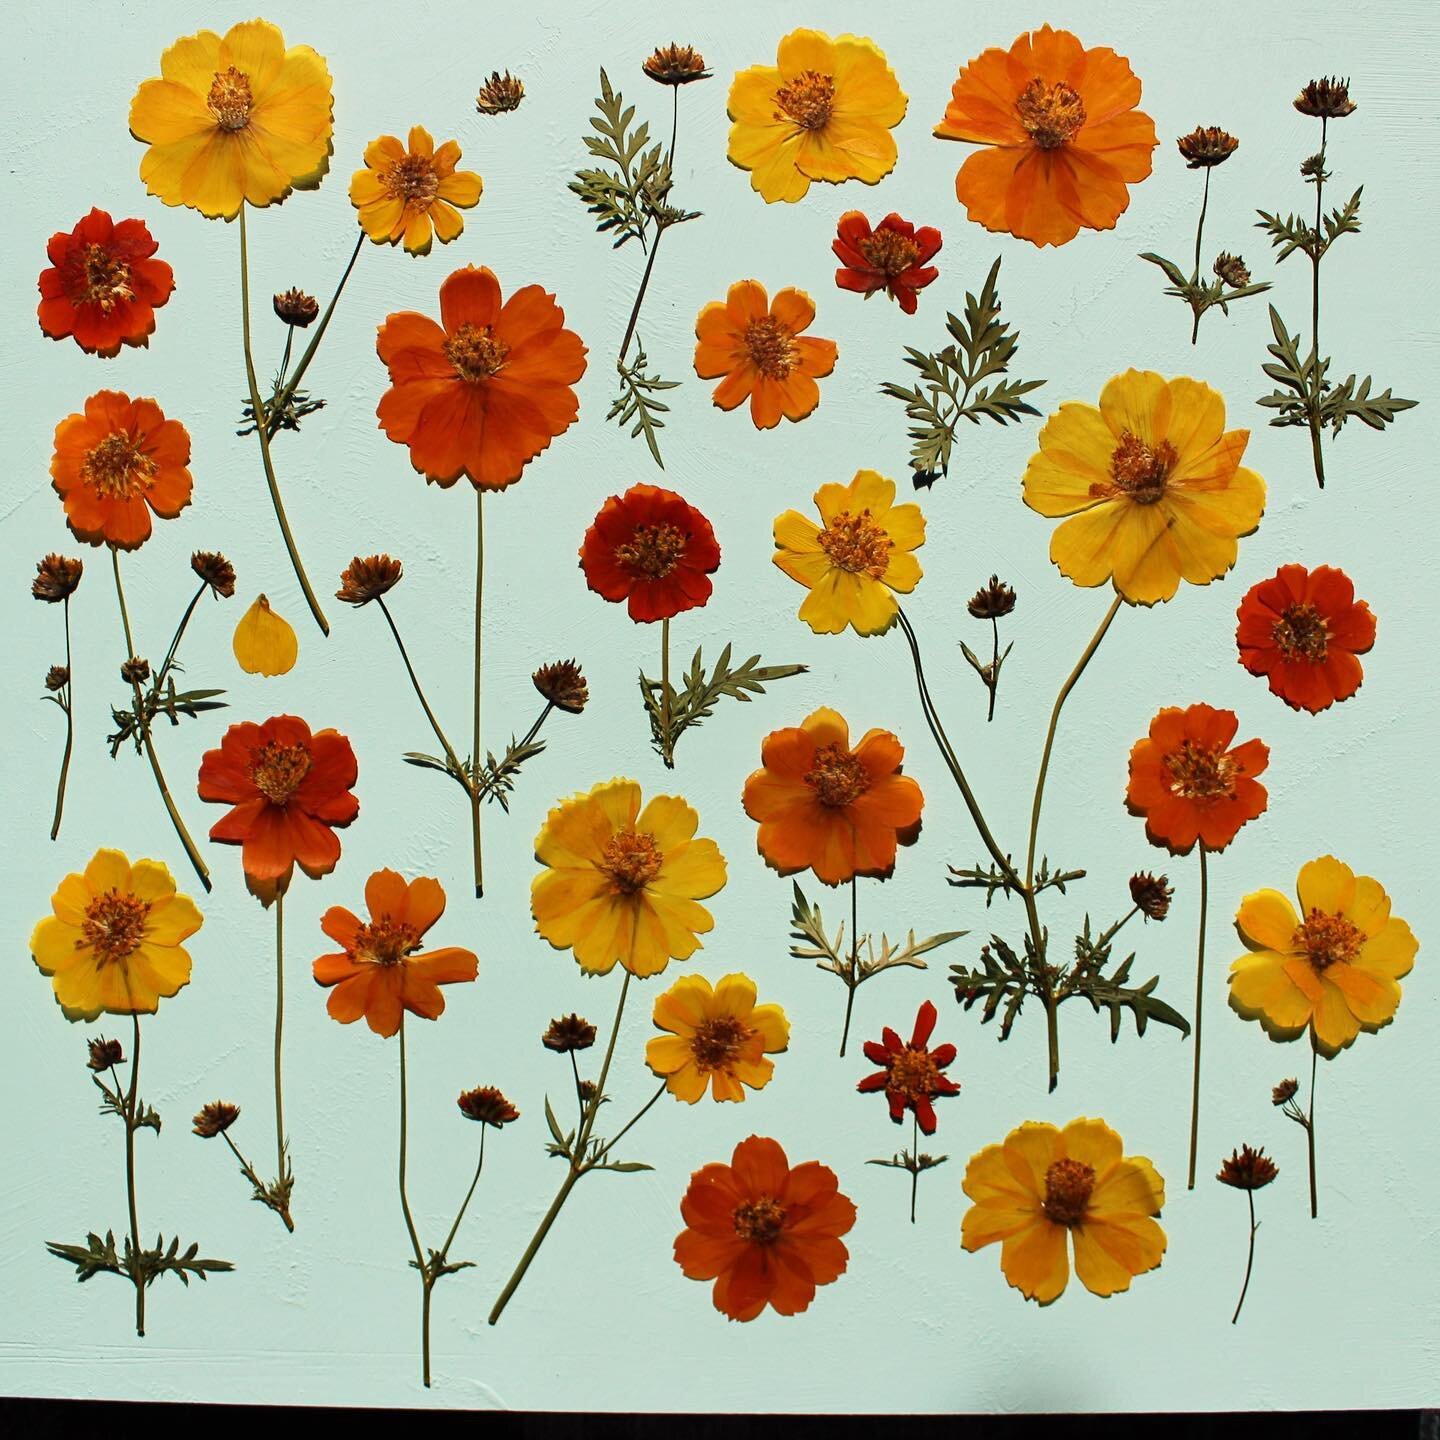
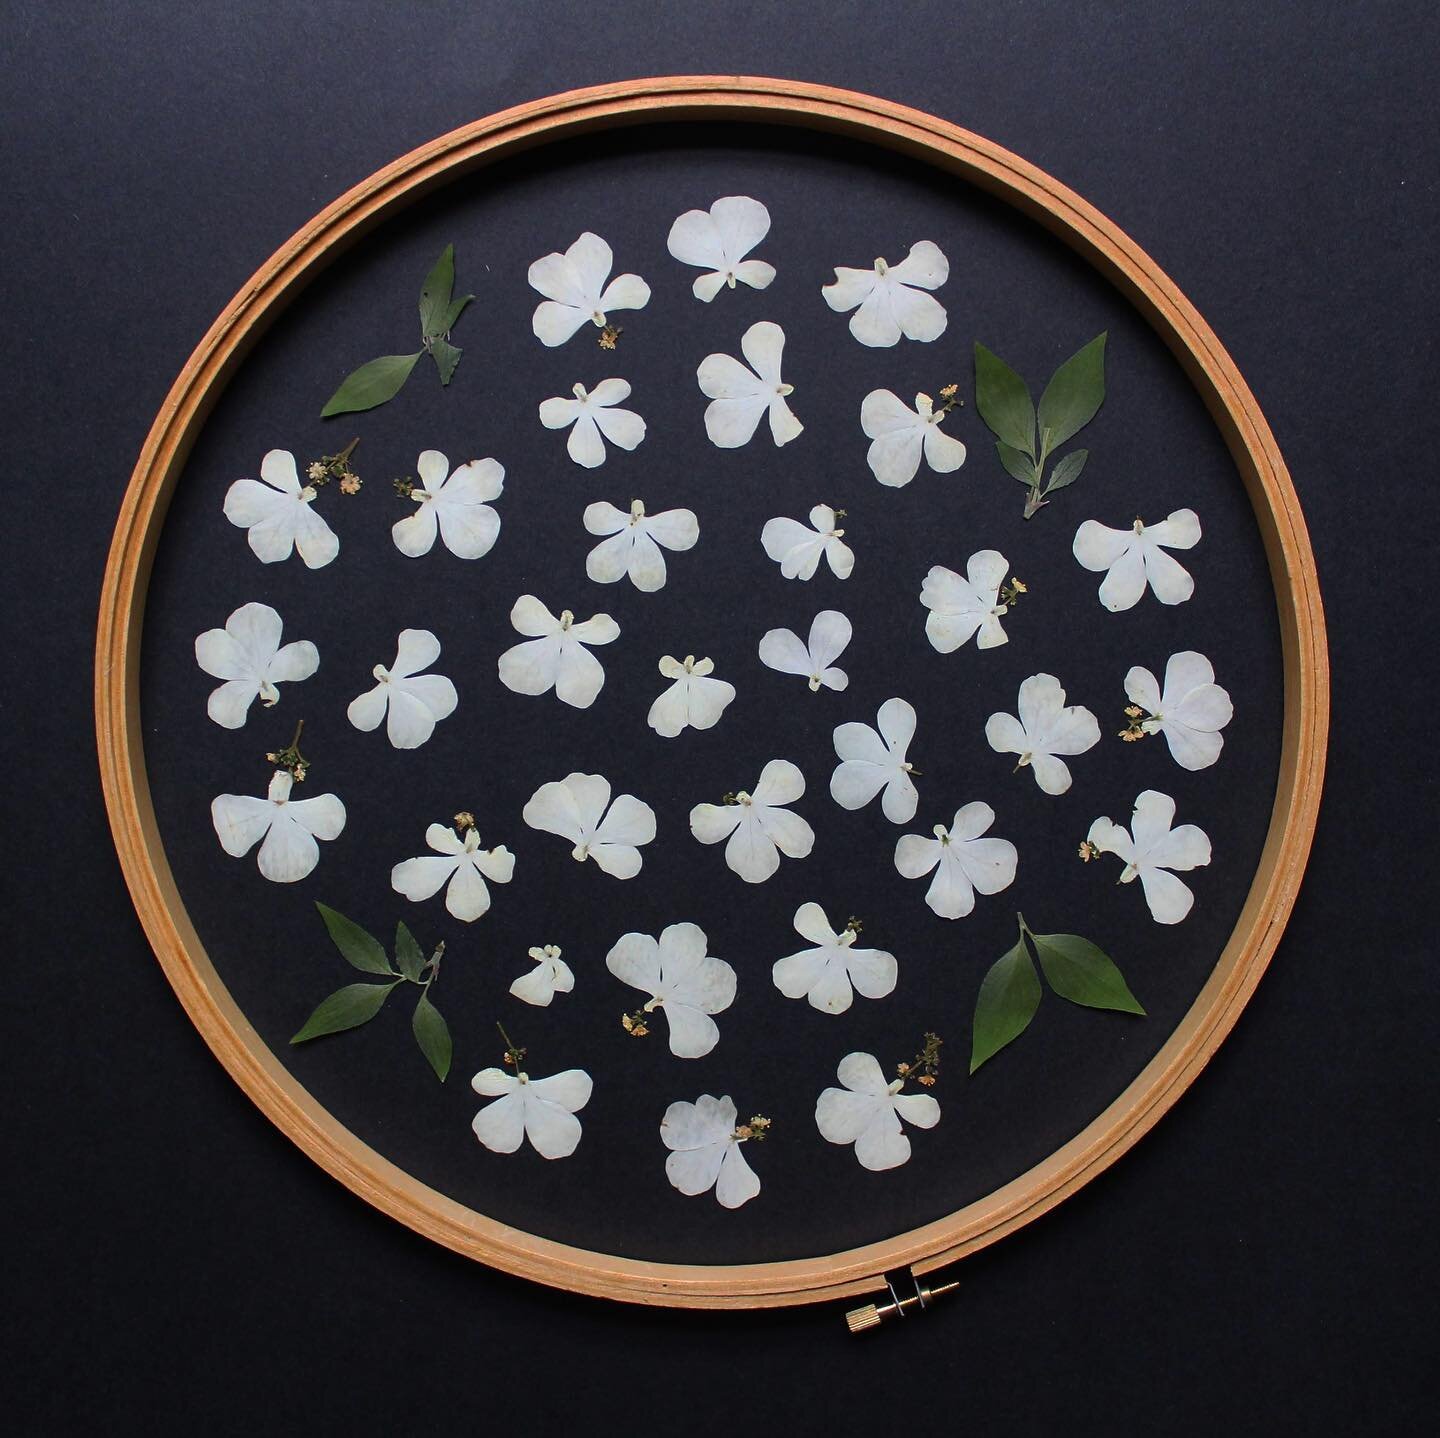
“I find myself favoring the use of medicinal plants, like yarrow, lavender, calendula, lemon balm, borage, echinacea, etc. in my work as much as I can. I think their magical healing powers speak to me, and do the same for others. Daisies and cosmos always end up in my pieces, too! I love their familiar shape, and that they bloom in so many different colors and sizes. Not to mention, they are easy to grow!”
Click on the following to view our available plants: Yarrow, Calendula, Lemon Balm, Cosmos

Garden of Color
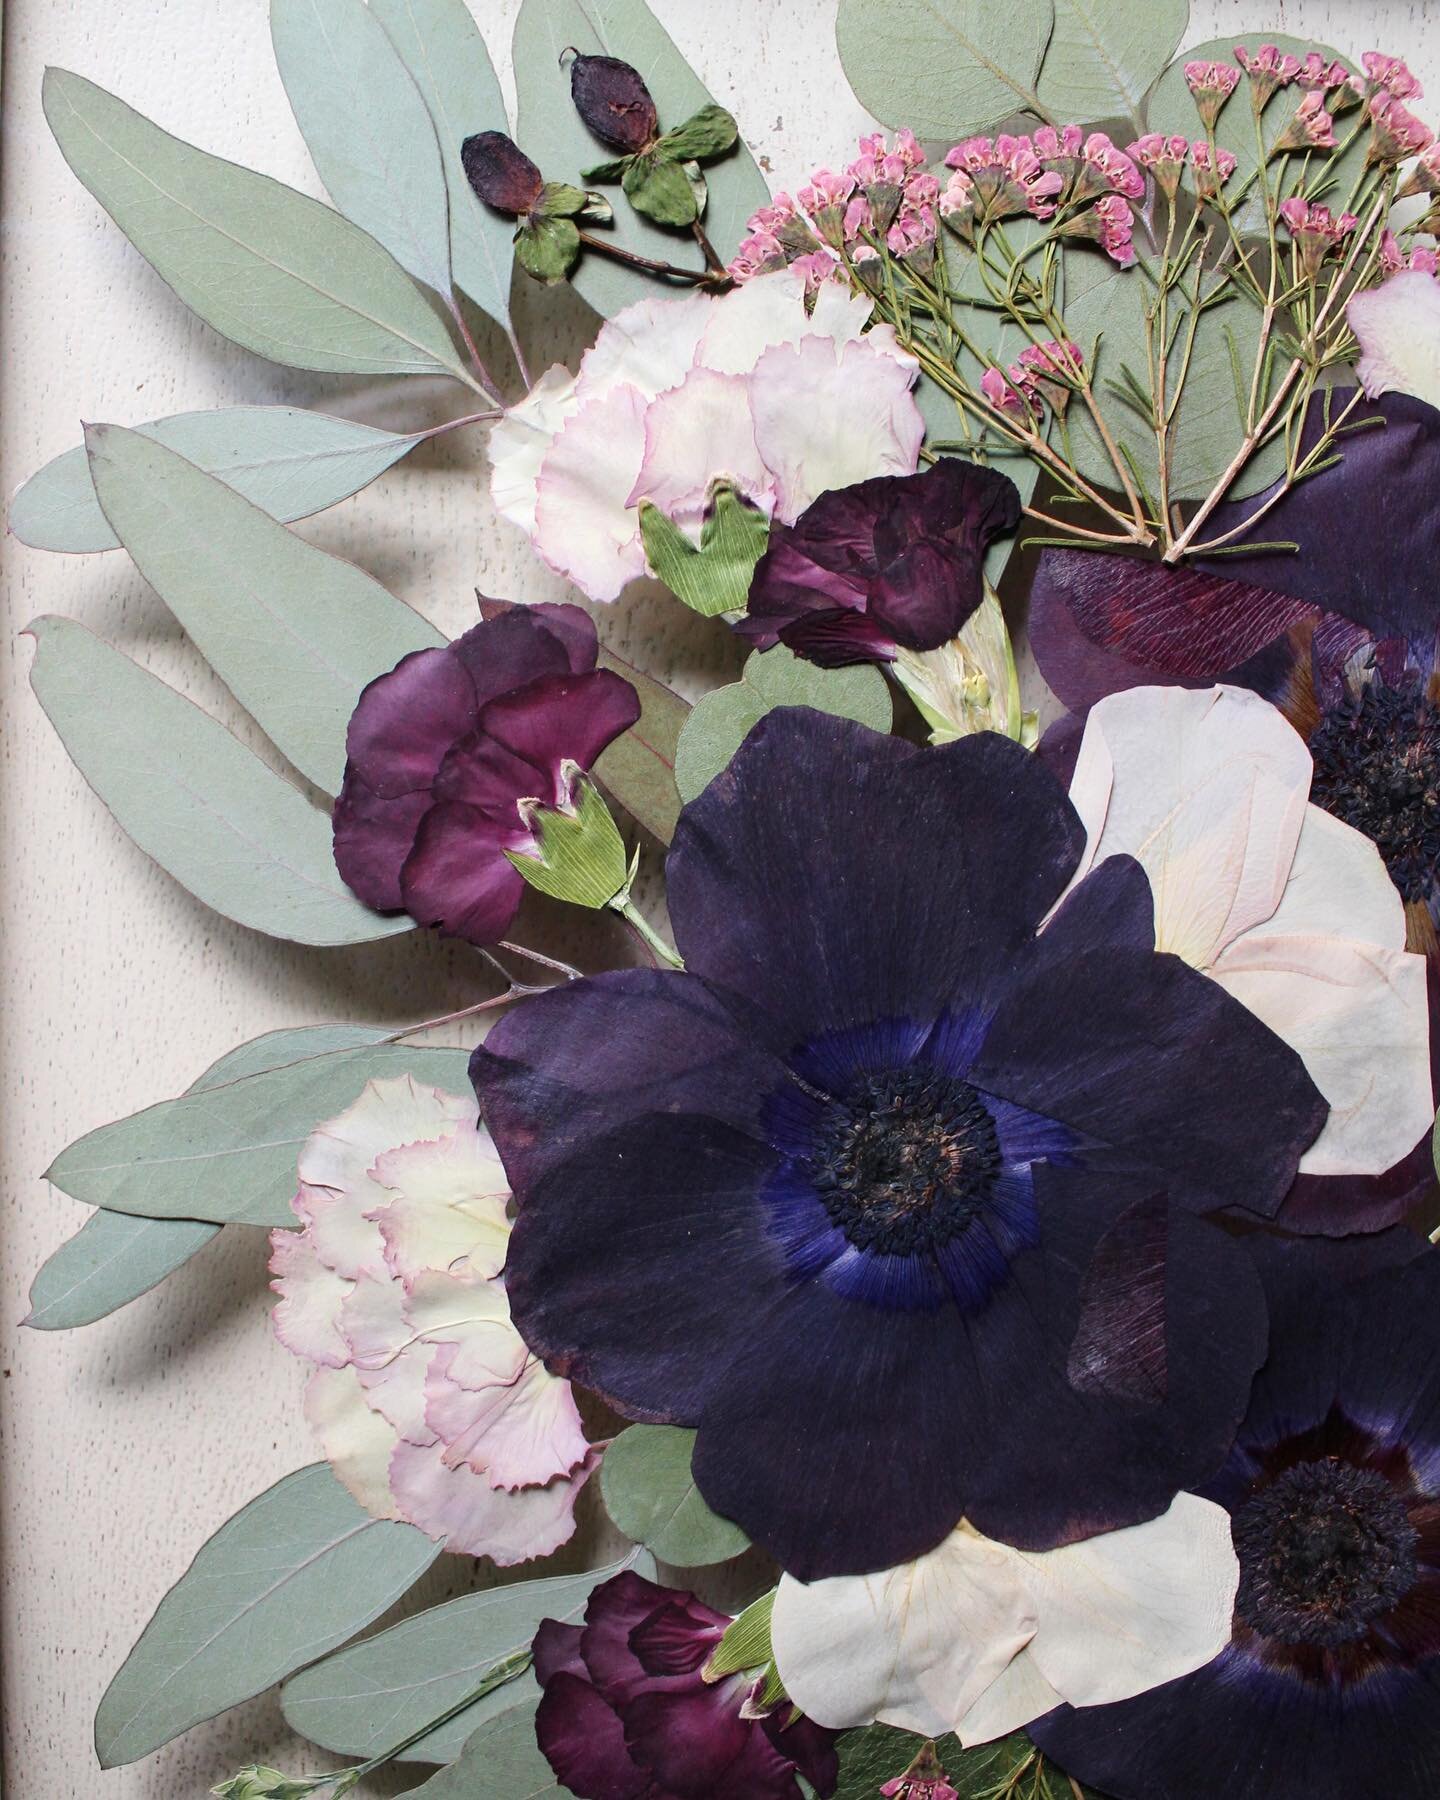
Carly continues, “When admiring a garden, color might be one of the first things that catches your eye. Those contrasting, vibrant hues invite you in for a closer inspection. As you are planning your garden’s layout, color grouping may be something to consider. Color grouping is when you plan your garden and/or a garden bed around a color palette, grouping certain colored plants together or beside their complementary color. This creates an unforgettable, and unique show of color in your garden!”
Photo courtesy of The Dandelion Fox


Carly’s use of different plants together in her compositions are stunning. Together the colors and shapes build something greater than anything could alone.
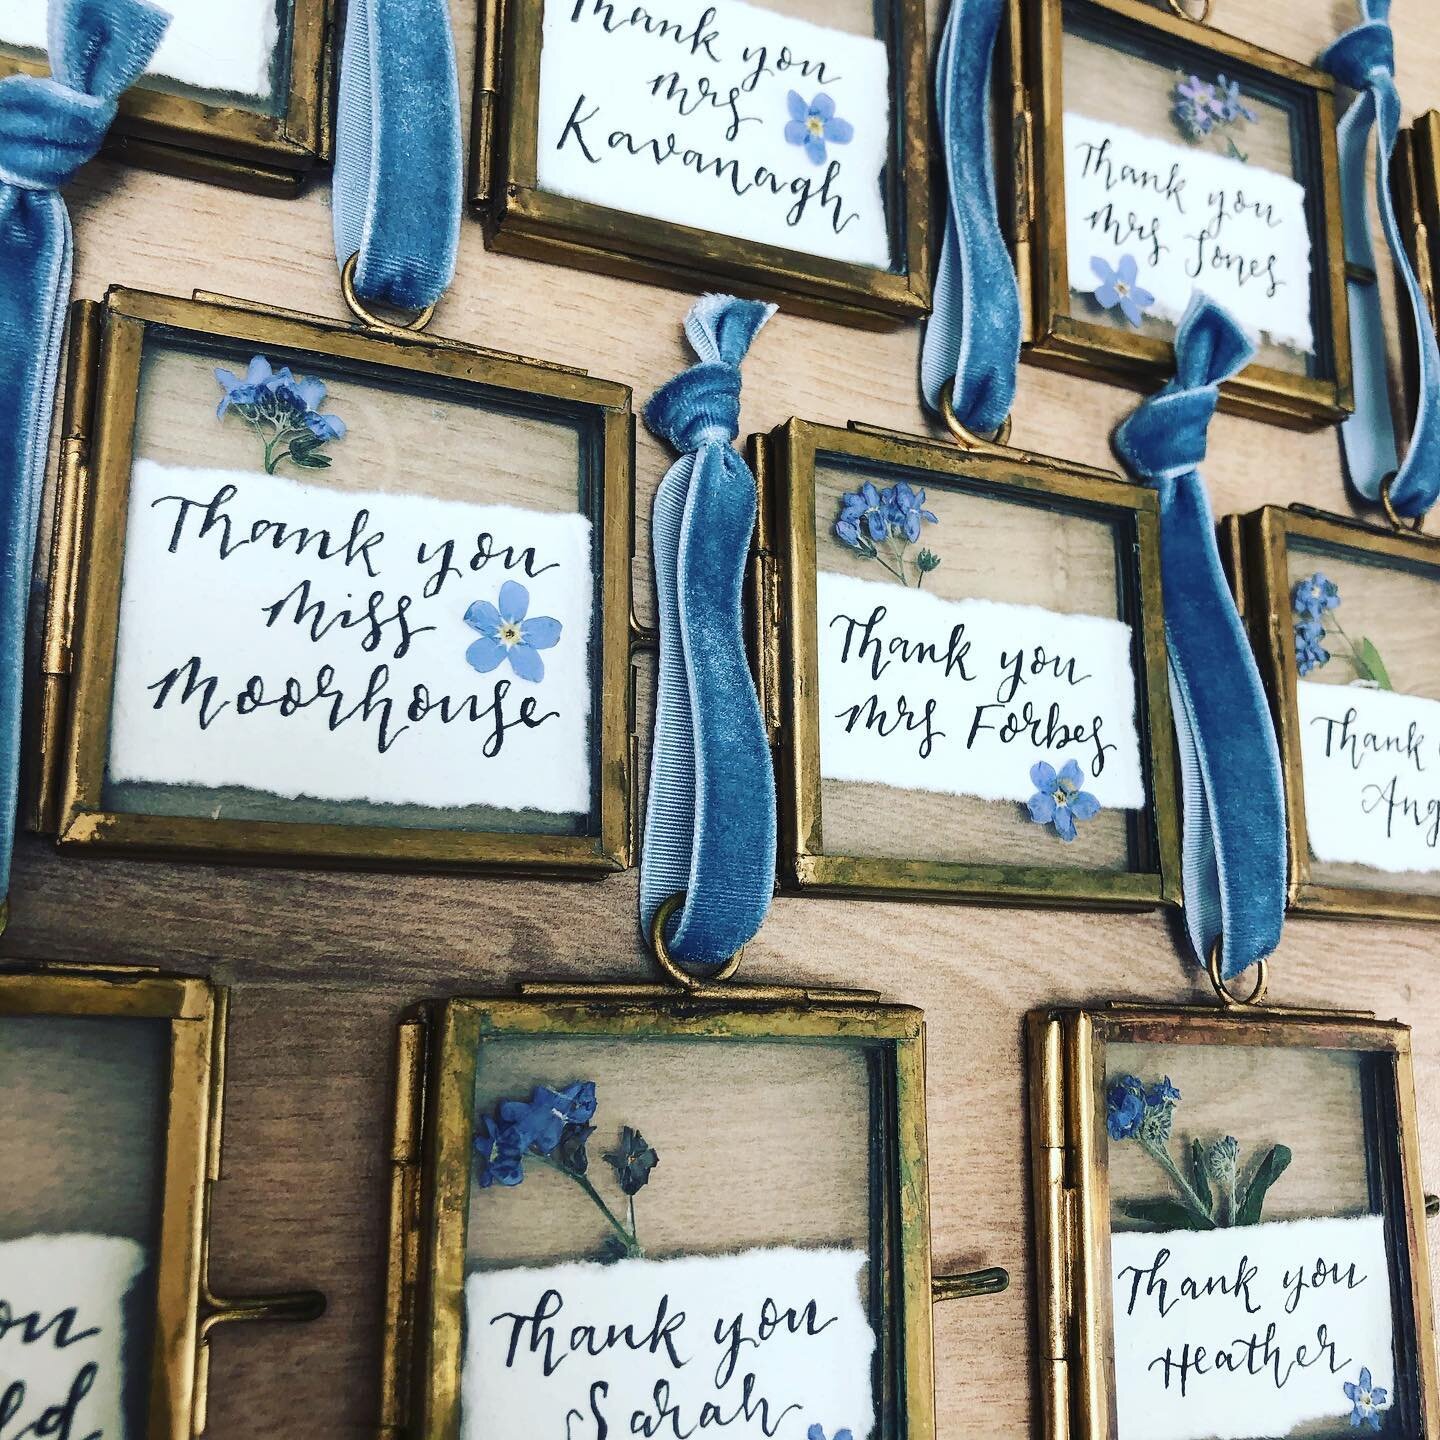
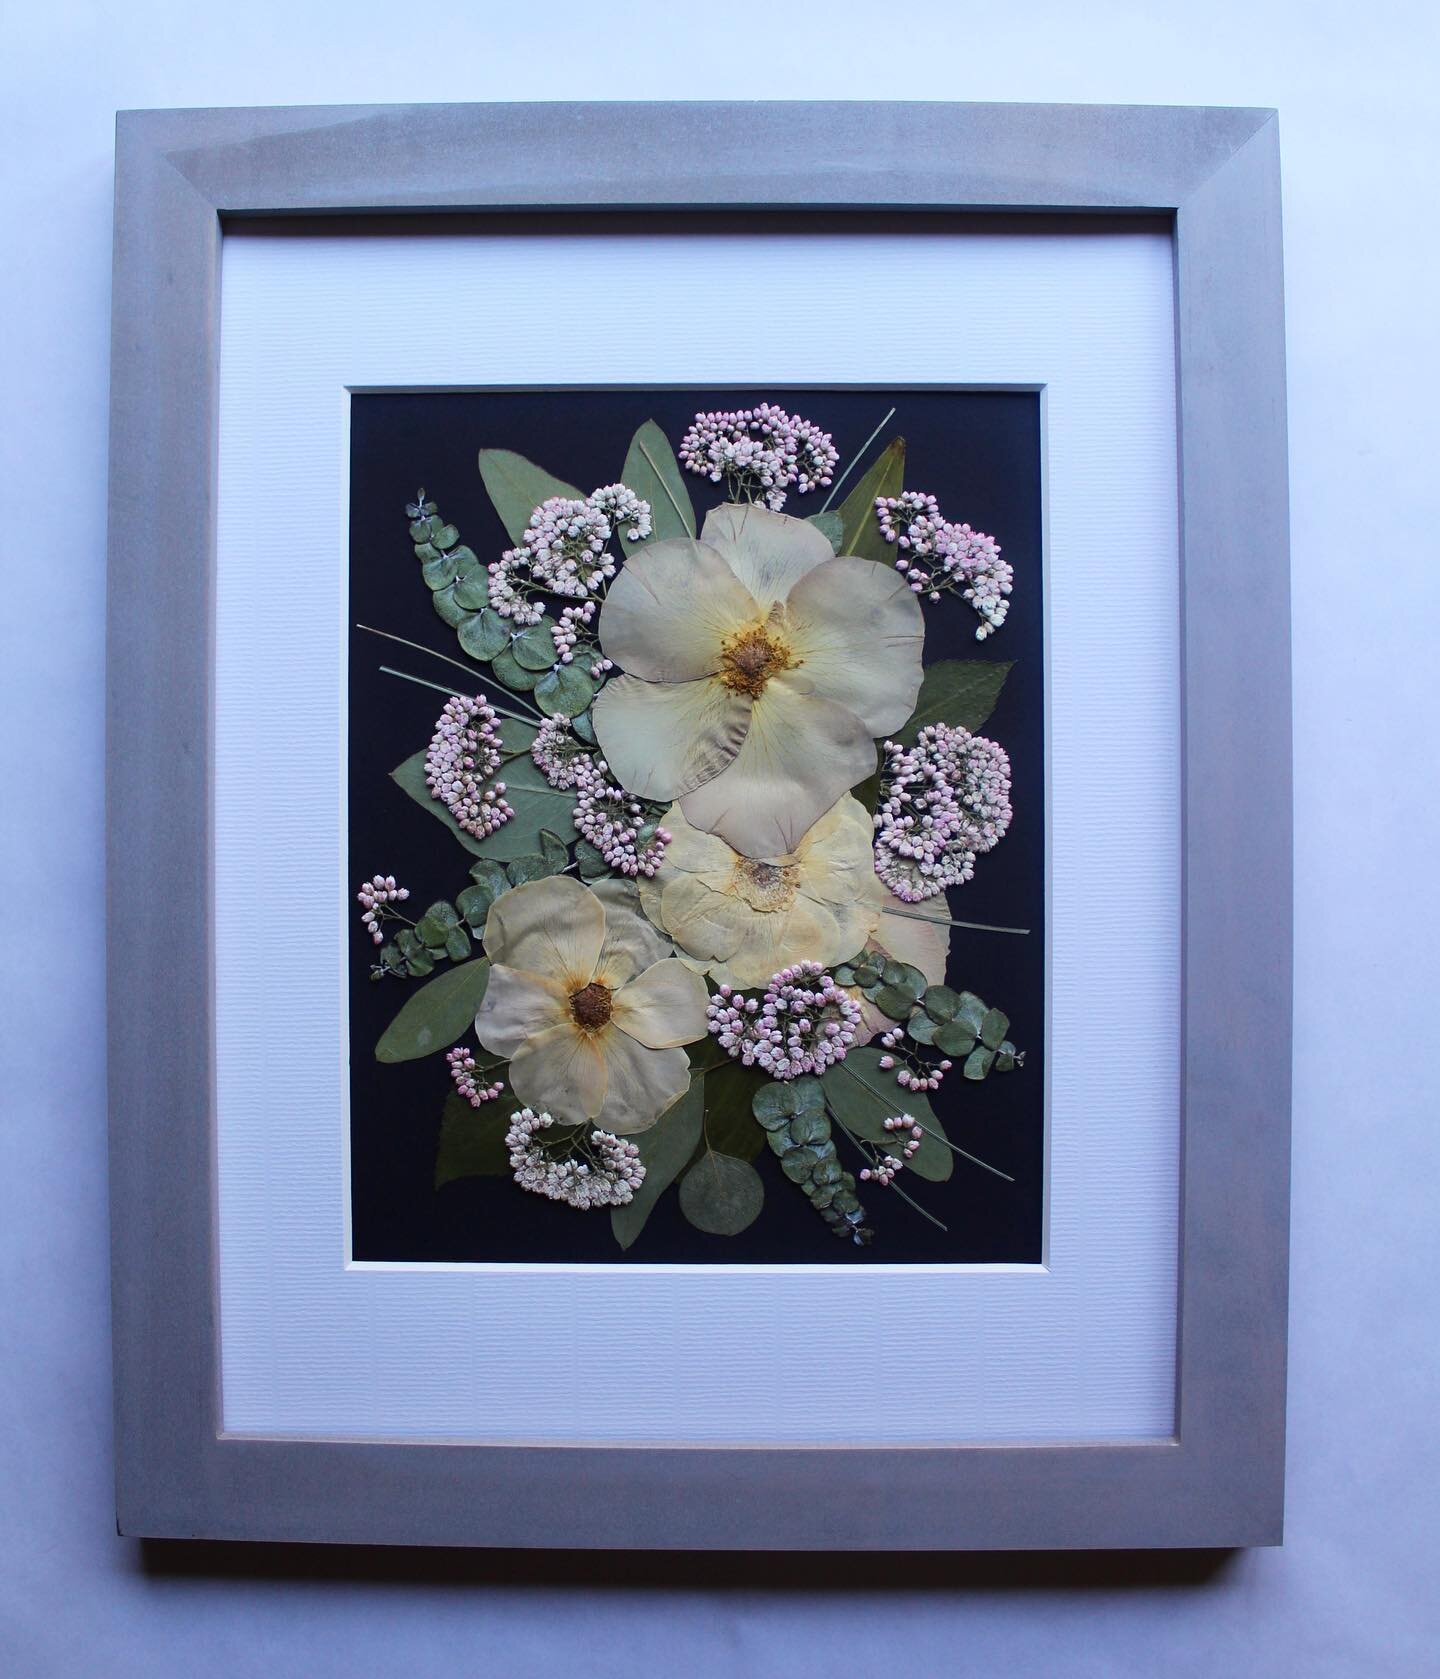
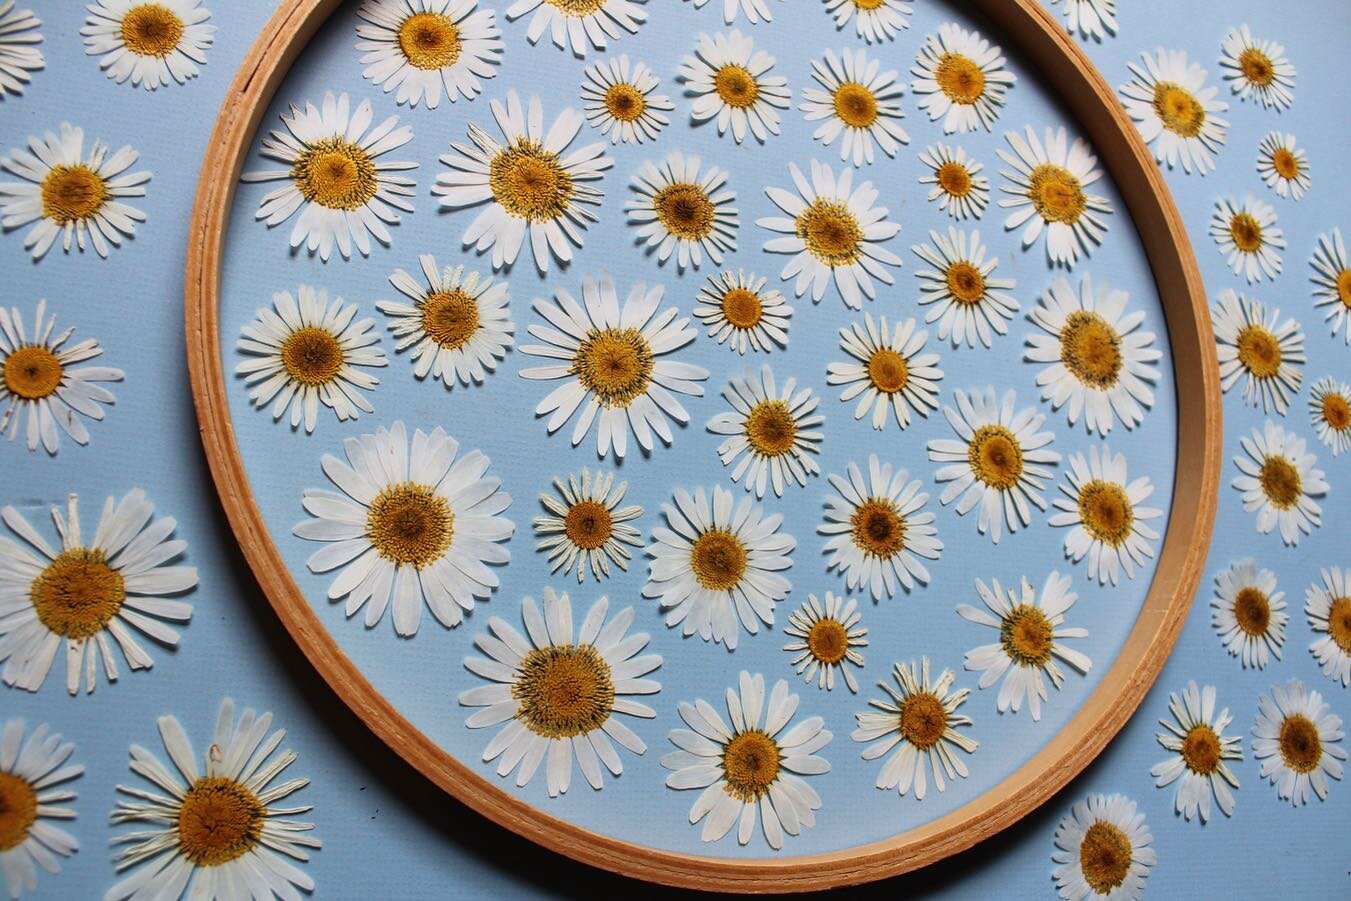
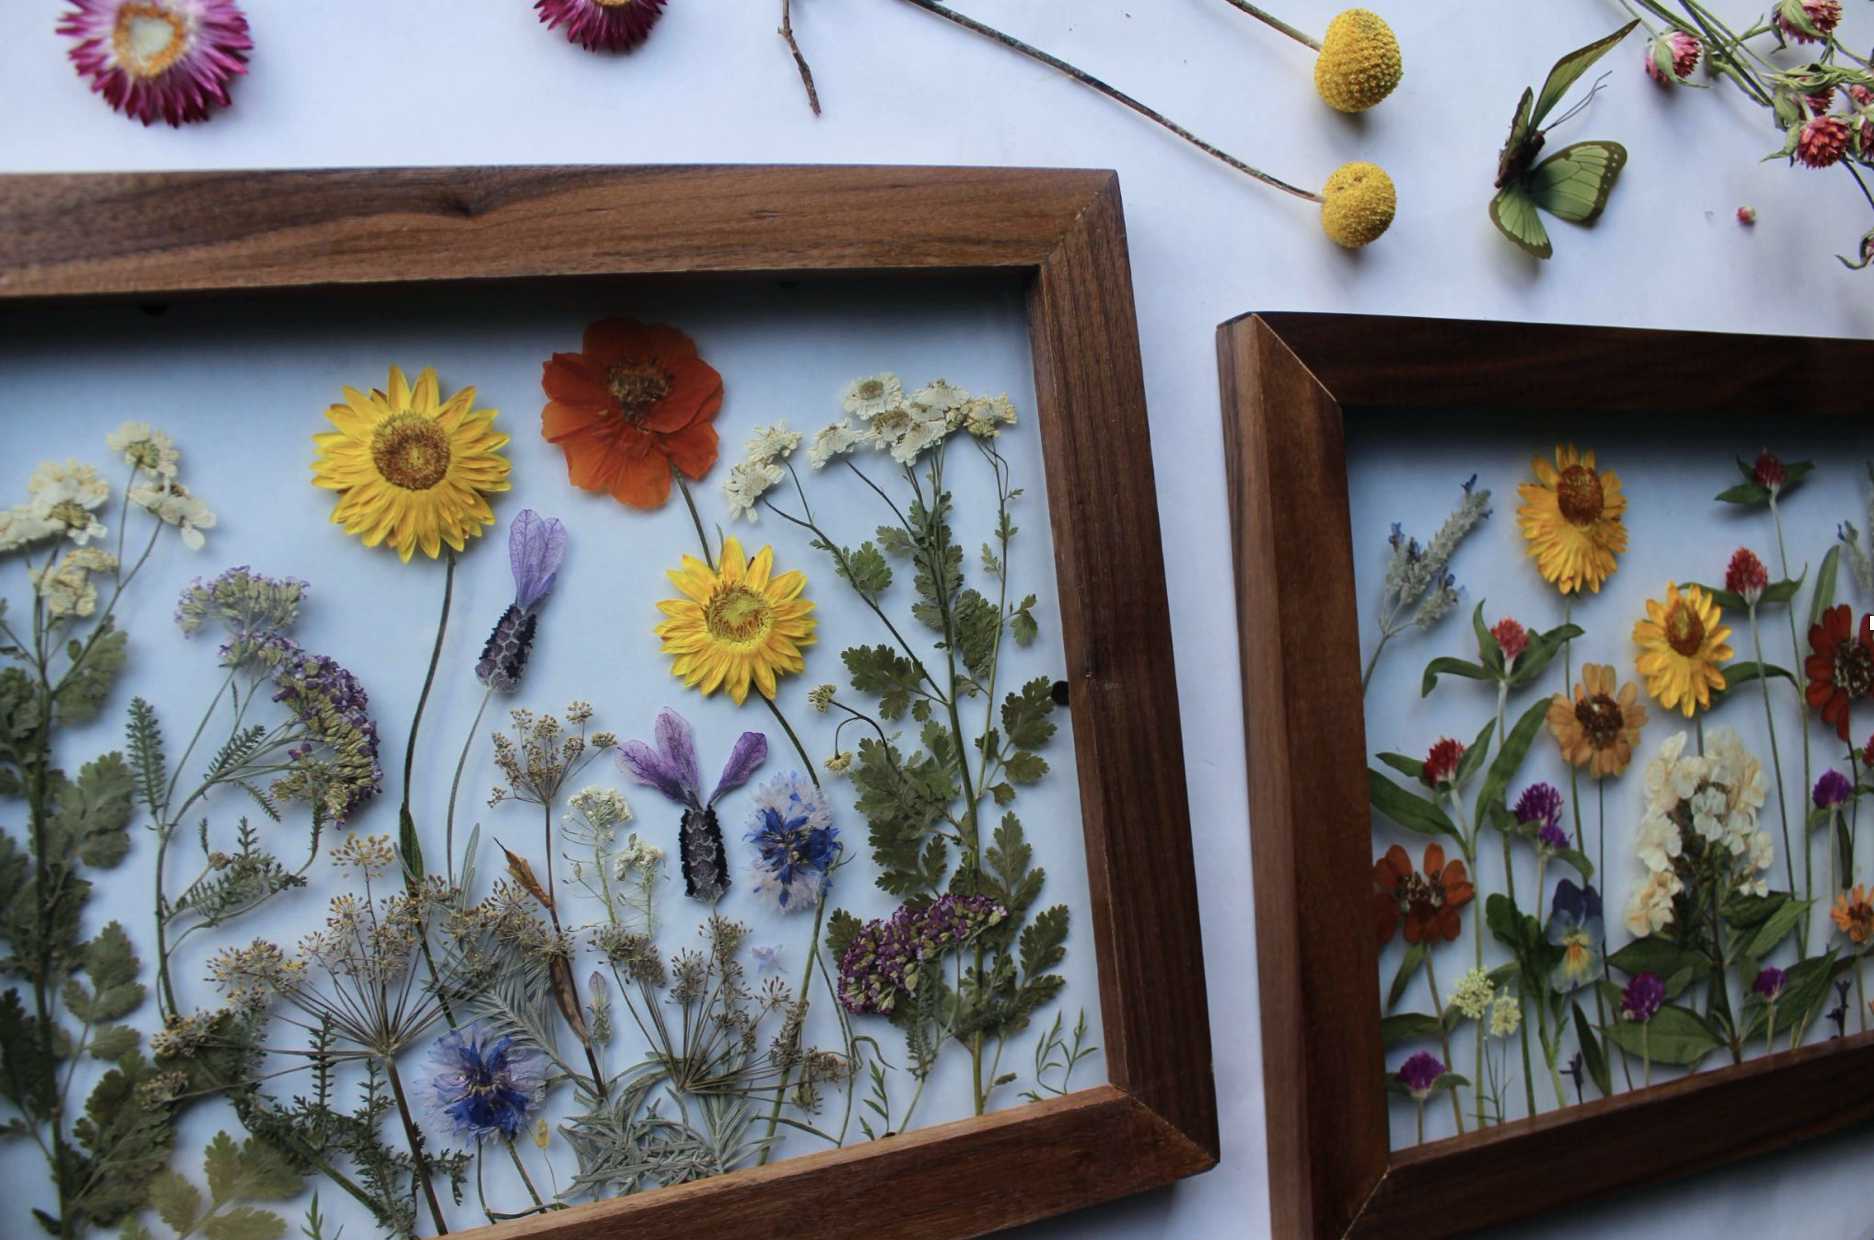
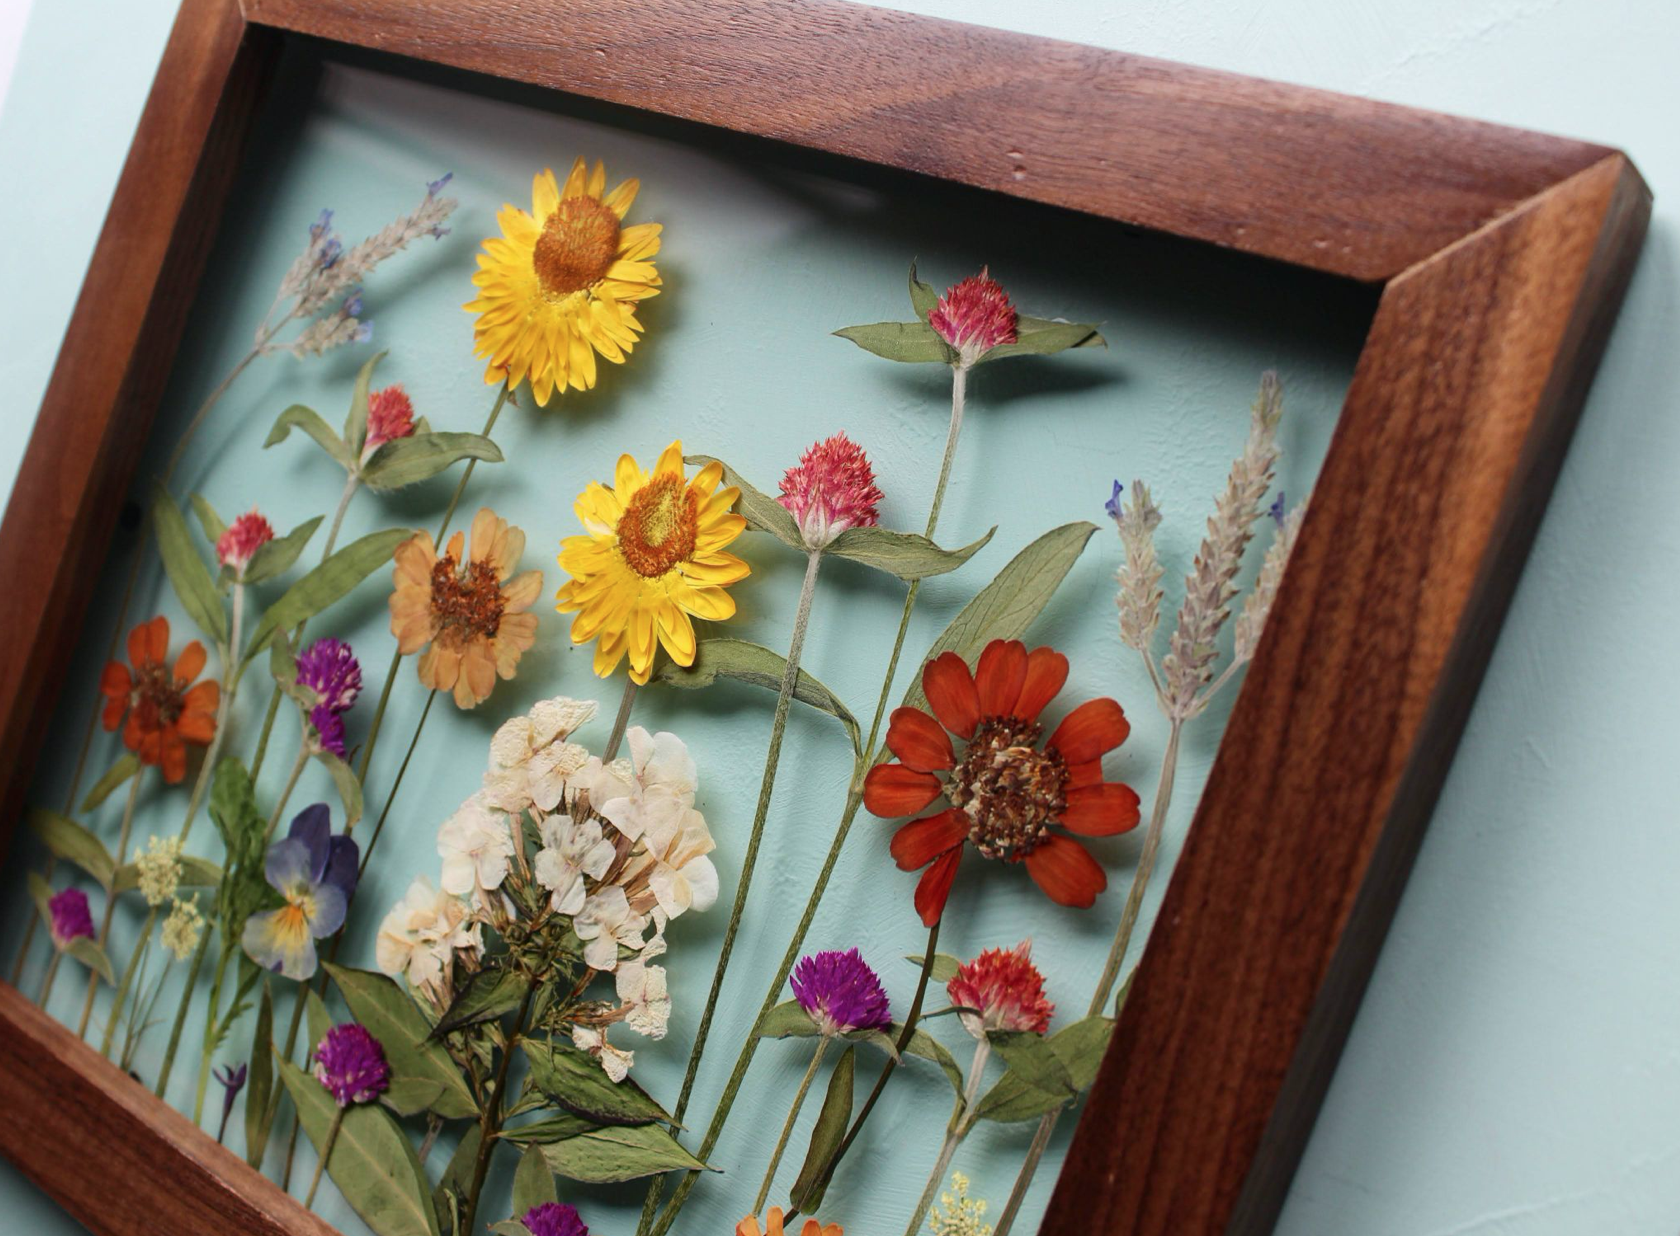
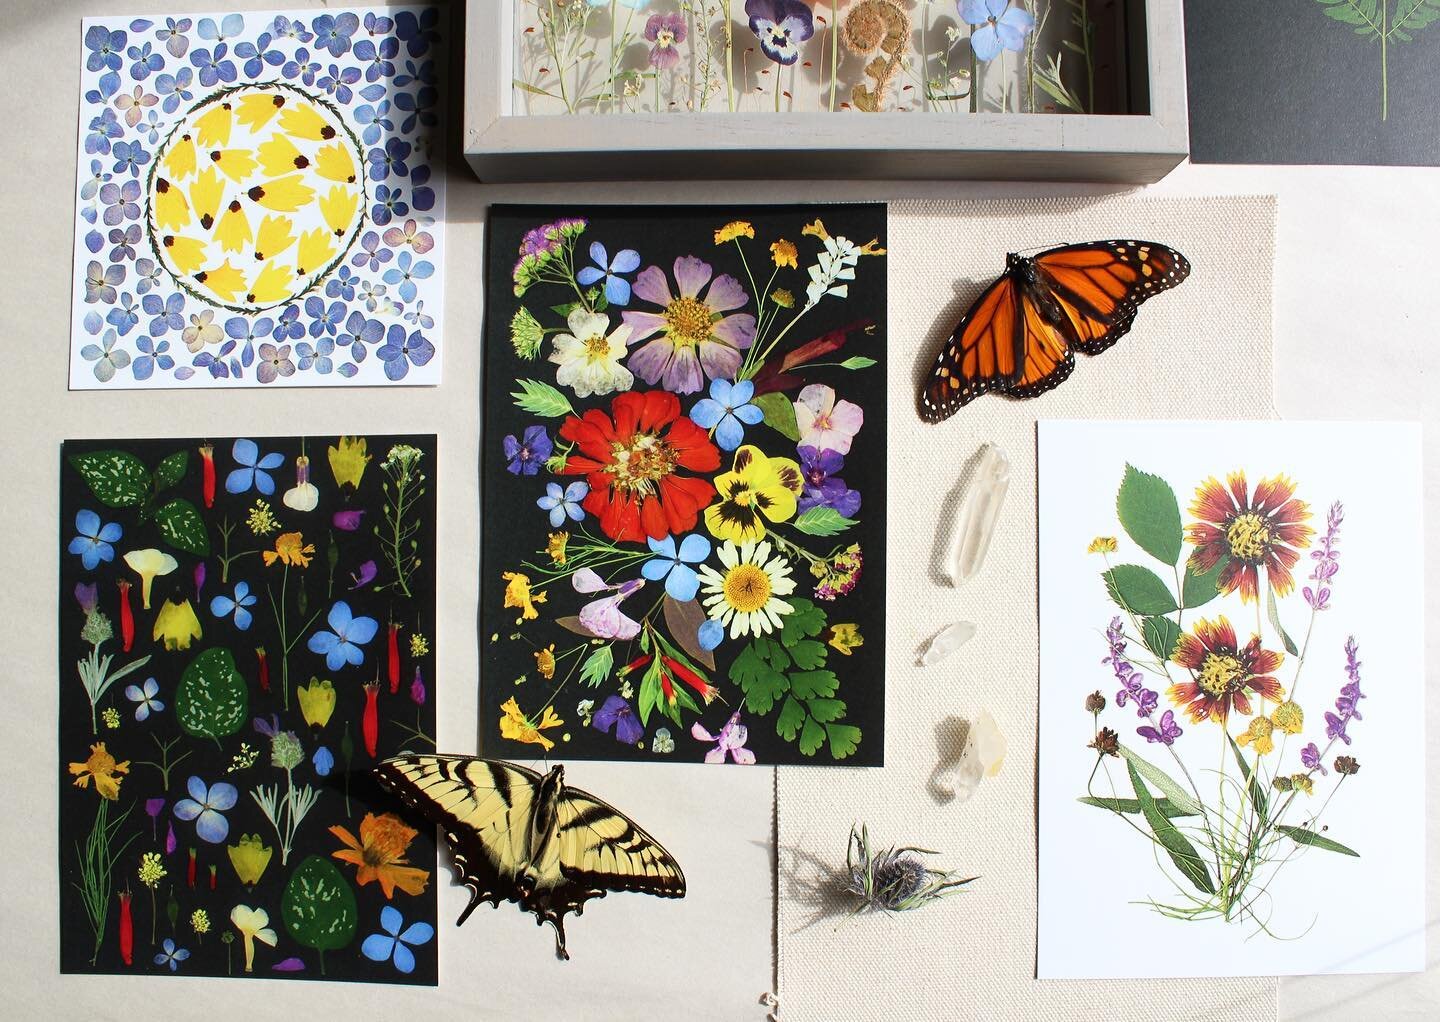
“Recently, my favorite pieces are from the collection of handmade, walnut and maple frames built by my Dad. I completed them with flowers my Mom and I grew at our home or picked wild near me. This collection of work truly feels like a walk in our backyard. It is such a remarkable experience to hold up one of my frames and be brought back to the memories behind each pressed plant. Sometimes, I add a naturally-expired butterfly or moth that I found to my pressed flower art. When I do, they always end up my favorites, and hardest to let go!”

Photo courtesy of The Dandelion Fox

“Worth the Work and Wait”
Gardening, as well as many other hobbies and activities are excellent teachers. Carly shared what lessons she has learned from her process that she values greatly.
“The process of growing, and preserving plants for my art has taught me patience. From planting a seed, tending to it as it grows strong, and patiently awaiting the perfect bloom for pressing, takes time. Then, pressing the flowers is a multi-step task in itself that takes weeks. This incredible and meticulous process has taught me that good, and beautiful things don’t always happen instantaneously, but they are absolutely worth the work and wait.”
Photo courtesy of The Dandelion Fox


Method of Discovery, Discovery of Method
Carly sometimes deconstructs a flower and reassembles it to achieve better results, like the sunflower pictured here.
View Halden’s varieties of Sunflowers and Vintage Botanical Print Set.
Photo courtesy of The Dandelion Fox

Photo courtesy of The Dandelion Fox

Of A Healing Nature
“My love for growing plants deepened while I was coming out of a dark time in my life years ago.” Carly related to us. “I found tending to a garden, collecting houseplants, and pressing flowers to be incredibly grounding, and healing.
My garden, and plant filled home became my safe haven. As we’re all still recovering and getting our feet back on the ground after COVID-19, I’d encourage others to seek beauty and peace in nature.”
Photo courtesy of The Dandelion Fox
View more of Carly’s inspiring work on her website or on Instagram at @thedandelionfoxart
All photos courtesy of The Dandelion Fox
Sweet Pink Summer Arrangement

For this arrangement you will need:
Winston Churchill Sweet Peas
Purple Jean Ranunculus
Violet Ranunculus
Chaters Double Hollyhocks
Oregano

Plant in early spring or direct sow in fall (Zone 4-7)
$3.95

Plant after the last frost or in fall in zone 8+
$25.00

Plant after the last frost or in fall in zone 8+
$25.00

Start indoors from seed in January or late summer.
$4.95

Start from seed indoors.
$4.95


Flowers from the garden of Sara Haller
Photos by Sara Haller
Floral Inspired Pastries with Emma Dodi Cakes

Photo courtesy of Emma Dodi Cakes
We had such a pleasure this week to interview Emma from Emma Dodi Cakes in London, England. Creating one of a kind work, this inspiring and enthusiastic artist shed light on balancing a focus on others and oneself. She taught us how creating time for yourself can not only lead to personal joys, but delightful success! Whether it’s making macarons or growing your own cut flowers, the smallest effort to make time for yourself is extremely valuable. Someday we hope to go across “the pond” and try her beautiful creations!
For a bit of inspirational fun, we’ve included flowers we think would pair nicely with each of her creations.

Introducing:
Emma Dodi Cakes
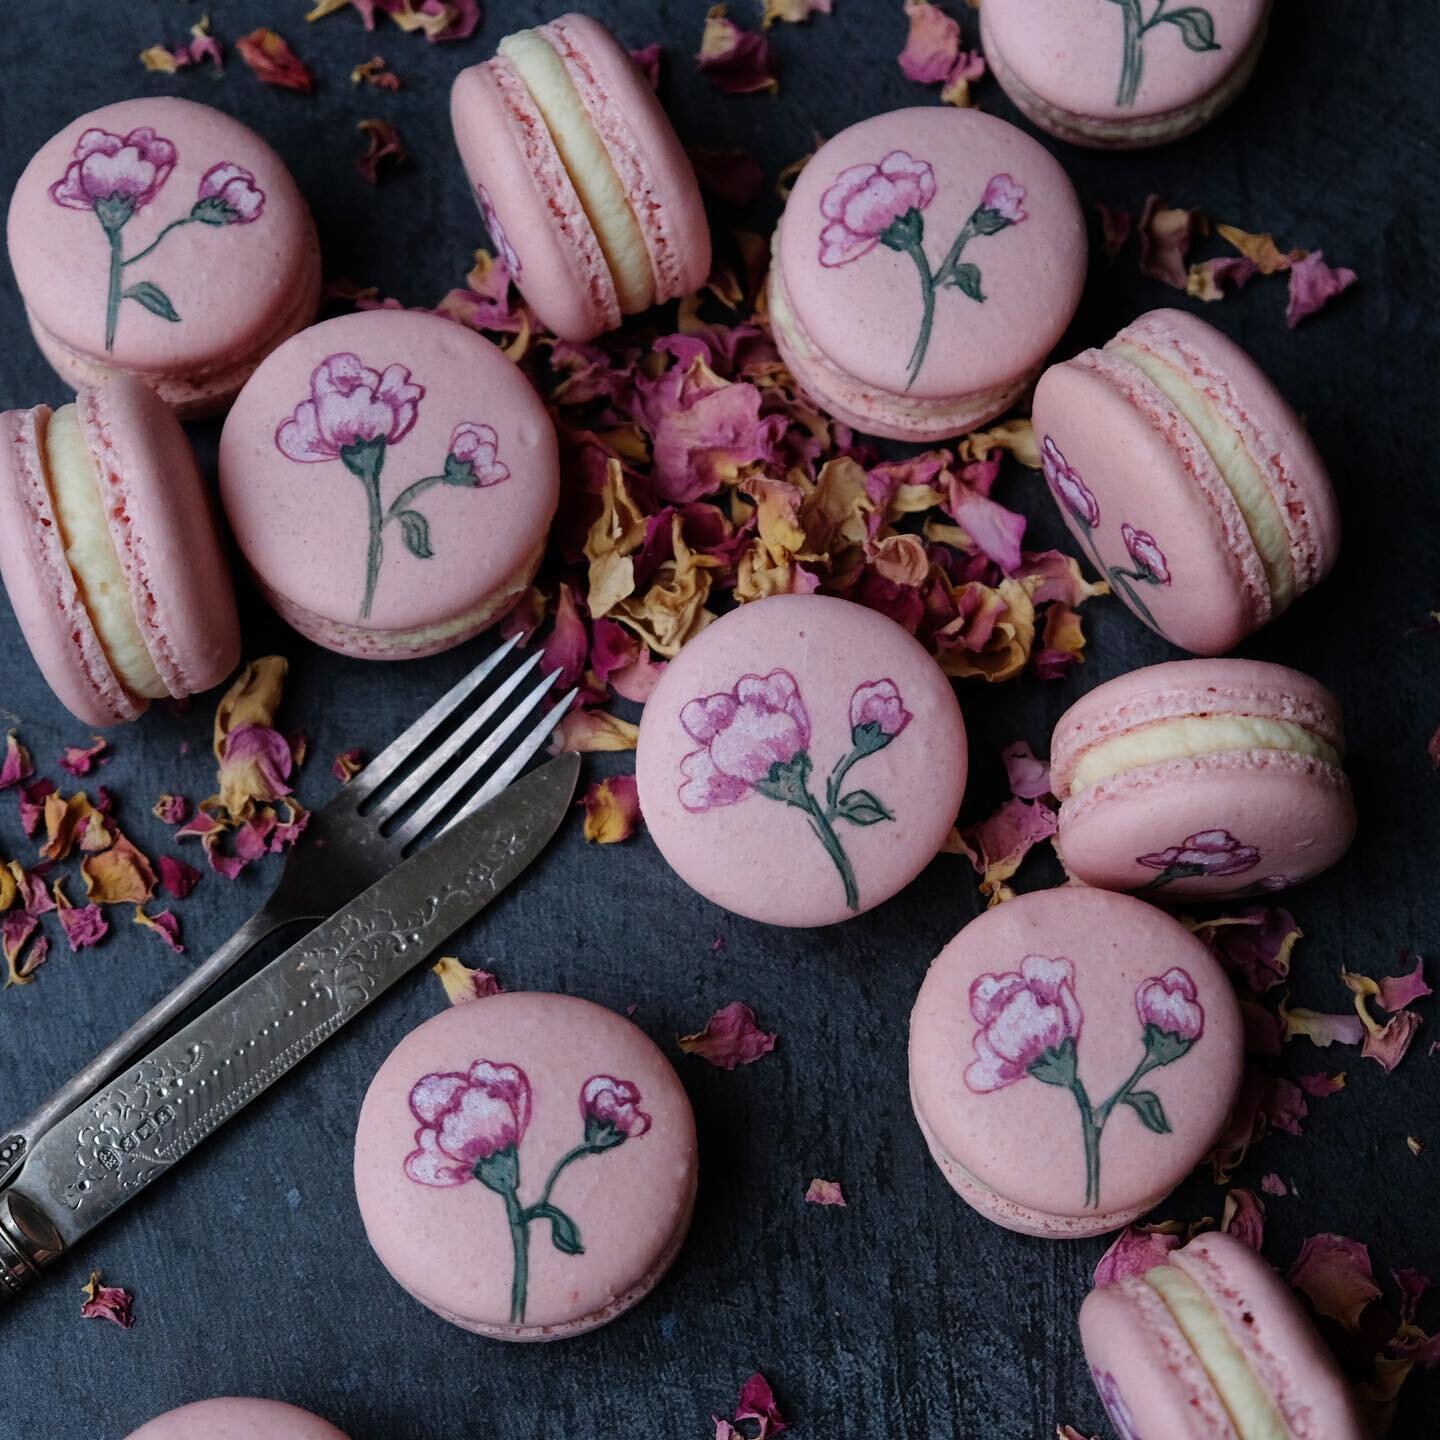
Emma is the mastermind behind Emma Dodi Cakes. She is a cake and macaron designer from London, known for her bespoke cakes and magical hand-painted macarons. Emma officially started her company in 2016, where it has grown to have a sister company, Emma Dodi Shop, that sells cake decorating supplies.
Photo courtesy of Emma Dodi Cakes
From Banker to Baker
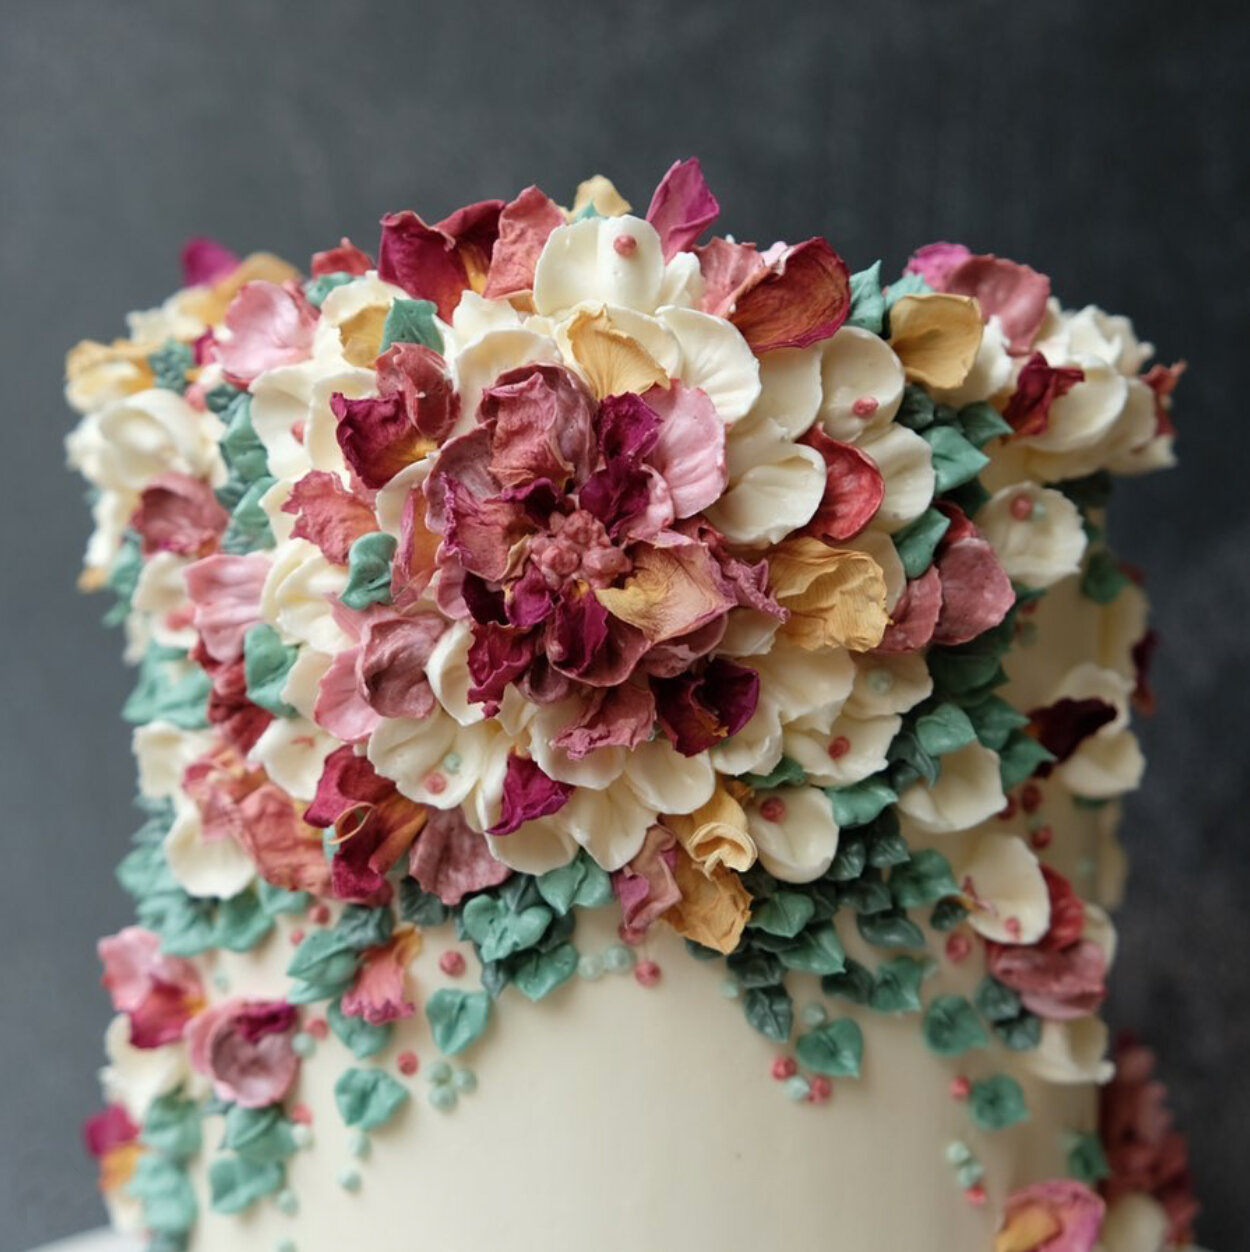
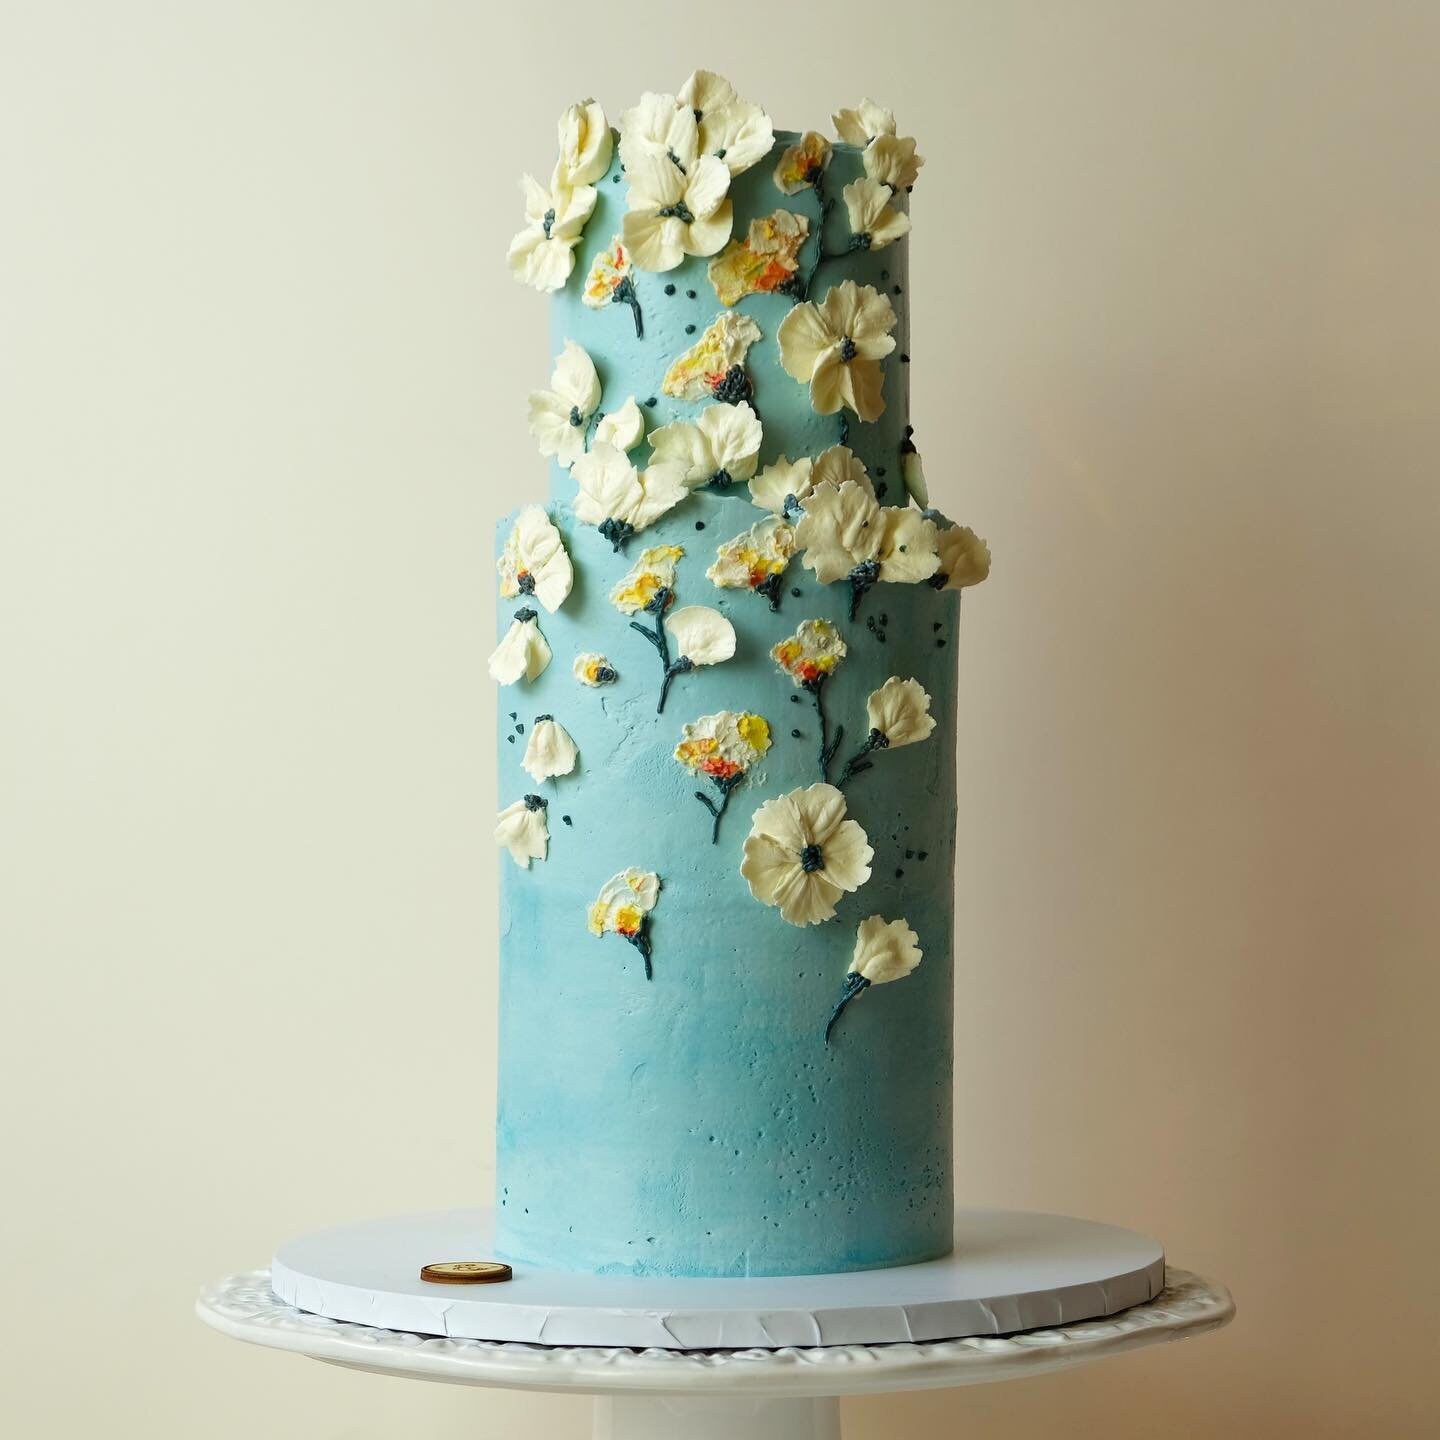
Emma explained her history to us, joking “I just decided to drop a letter and become a baker!! Haha!!” We can see her attitude is full of playful joy. She continued, “No, more seriously, it all started because after I’d had my 4th child I was in desperate need of something to do that was just for myself. A friend recommended a cake course she'd been on and so I joined her for the subsequent one, and it all started there! I have always been quite artistic so I really enjoyed it and it was quite delicious too!” Pictured right is a cake with a mix of piped frosting and dried flower petals.
Photo courtesy of Emma Dodi Cakes
Calendulas are beautiful as an accent cut flower or a fun way to add edible petals or color to food. View our Pink Surprise Calendula.

A Chain of Inspiration
When asked where she goes for inspiration, Emma told us, “I get inspiration everywhere. Magazines, exhibitions, books, even just chatting to people. I like to run, so I often think through my ideas whilst running, and hatch a plan!“
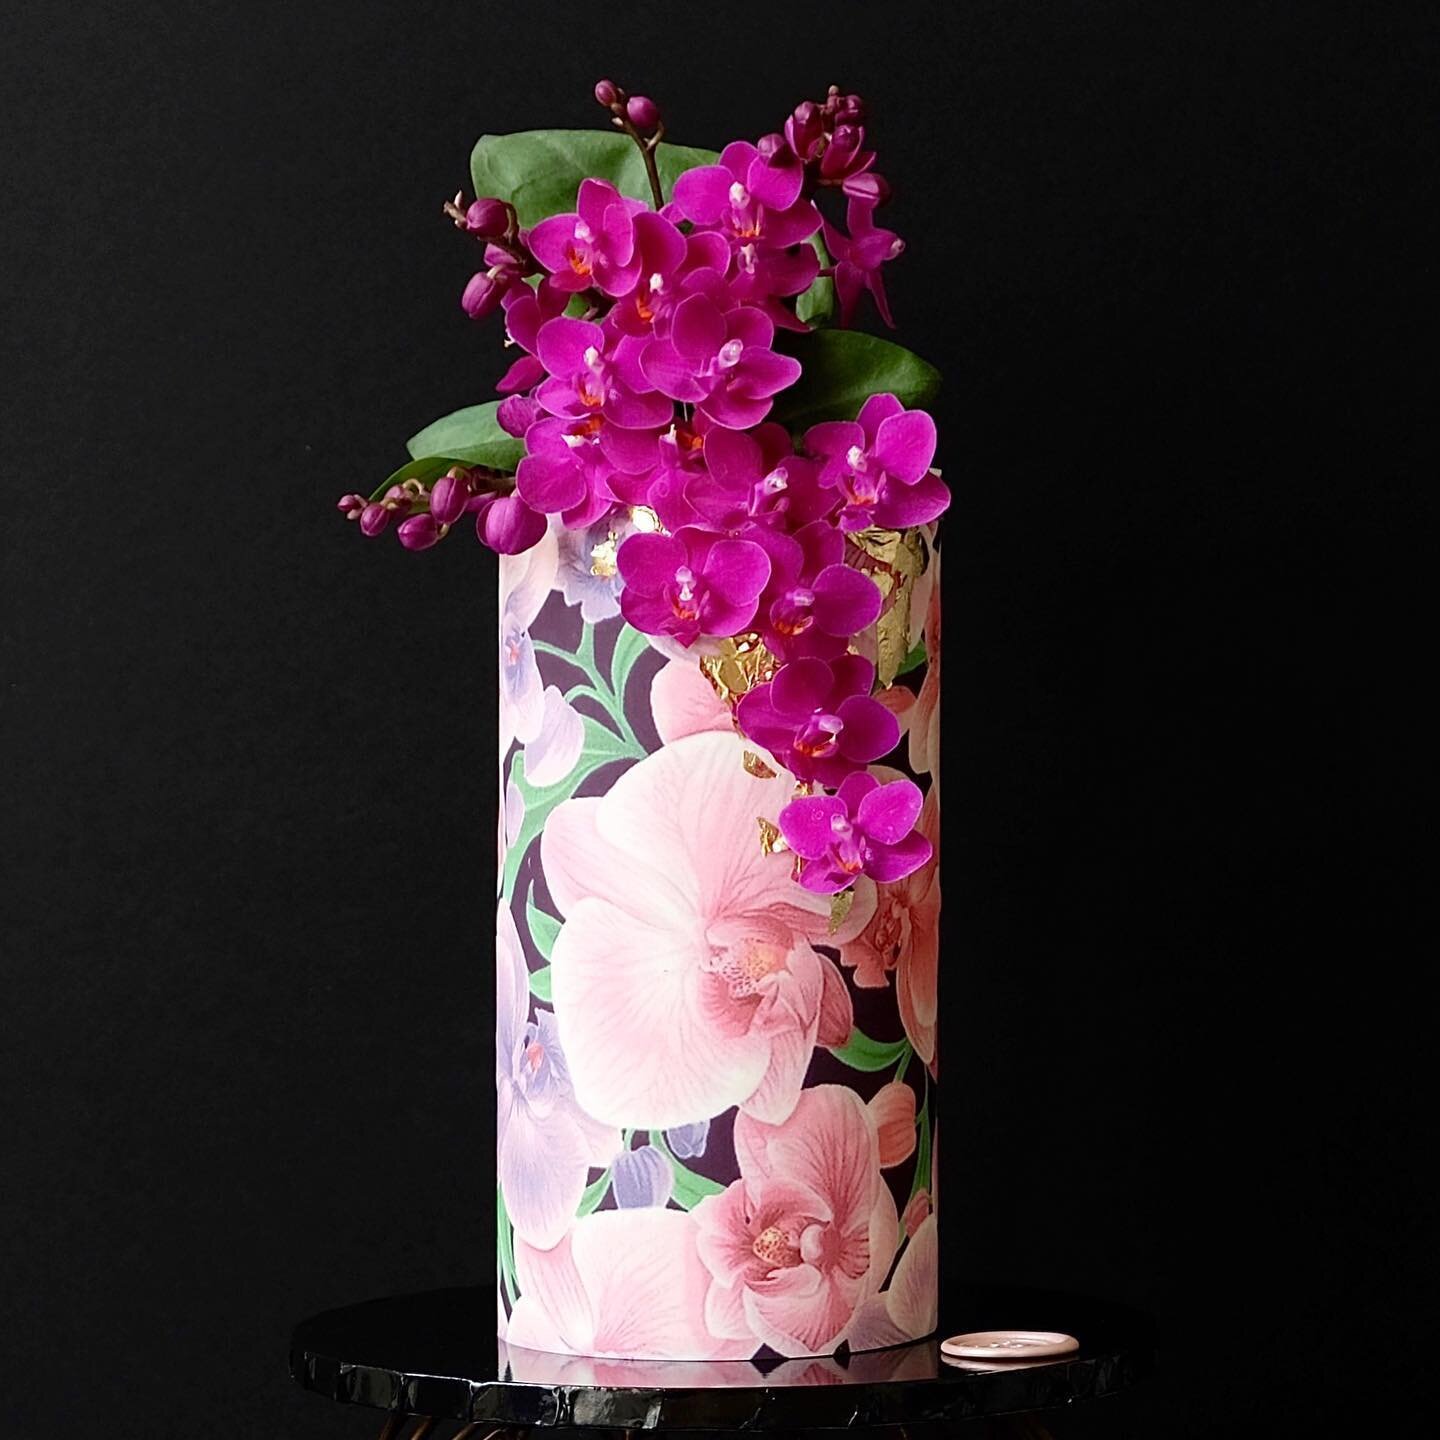
This gorgeous cake was inspired by a dress designed by Oscar de la Renta, worn by Taylor Swift at the 2021 Grammy’s. The dress was in turn inspired from the work of Tricia Paoluccio at Modern Pressed Flowers.
Photo courtesy of Emma Dodi Cakes
Pansies are excellent candidates for creating homemade edible flower decorations, pressed or fresh. View our Matrix Series Pansy.
Process of Learning
“I have learnt that you never stop learning! Every time I create something new and different for a client, I find myself figuring something out that I hadn’t thought of before. Also, the more I create, the more ideas I get. Even when I feel a bit lost for ideas, I get started and then something just comes up and off I go again.”
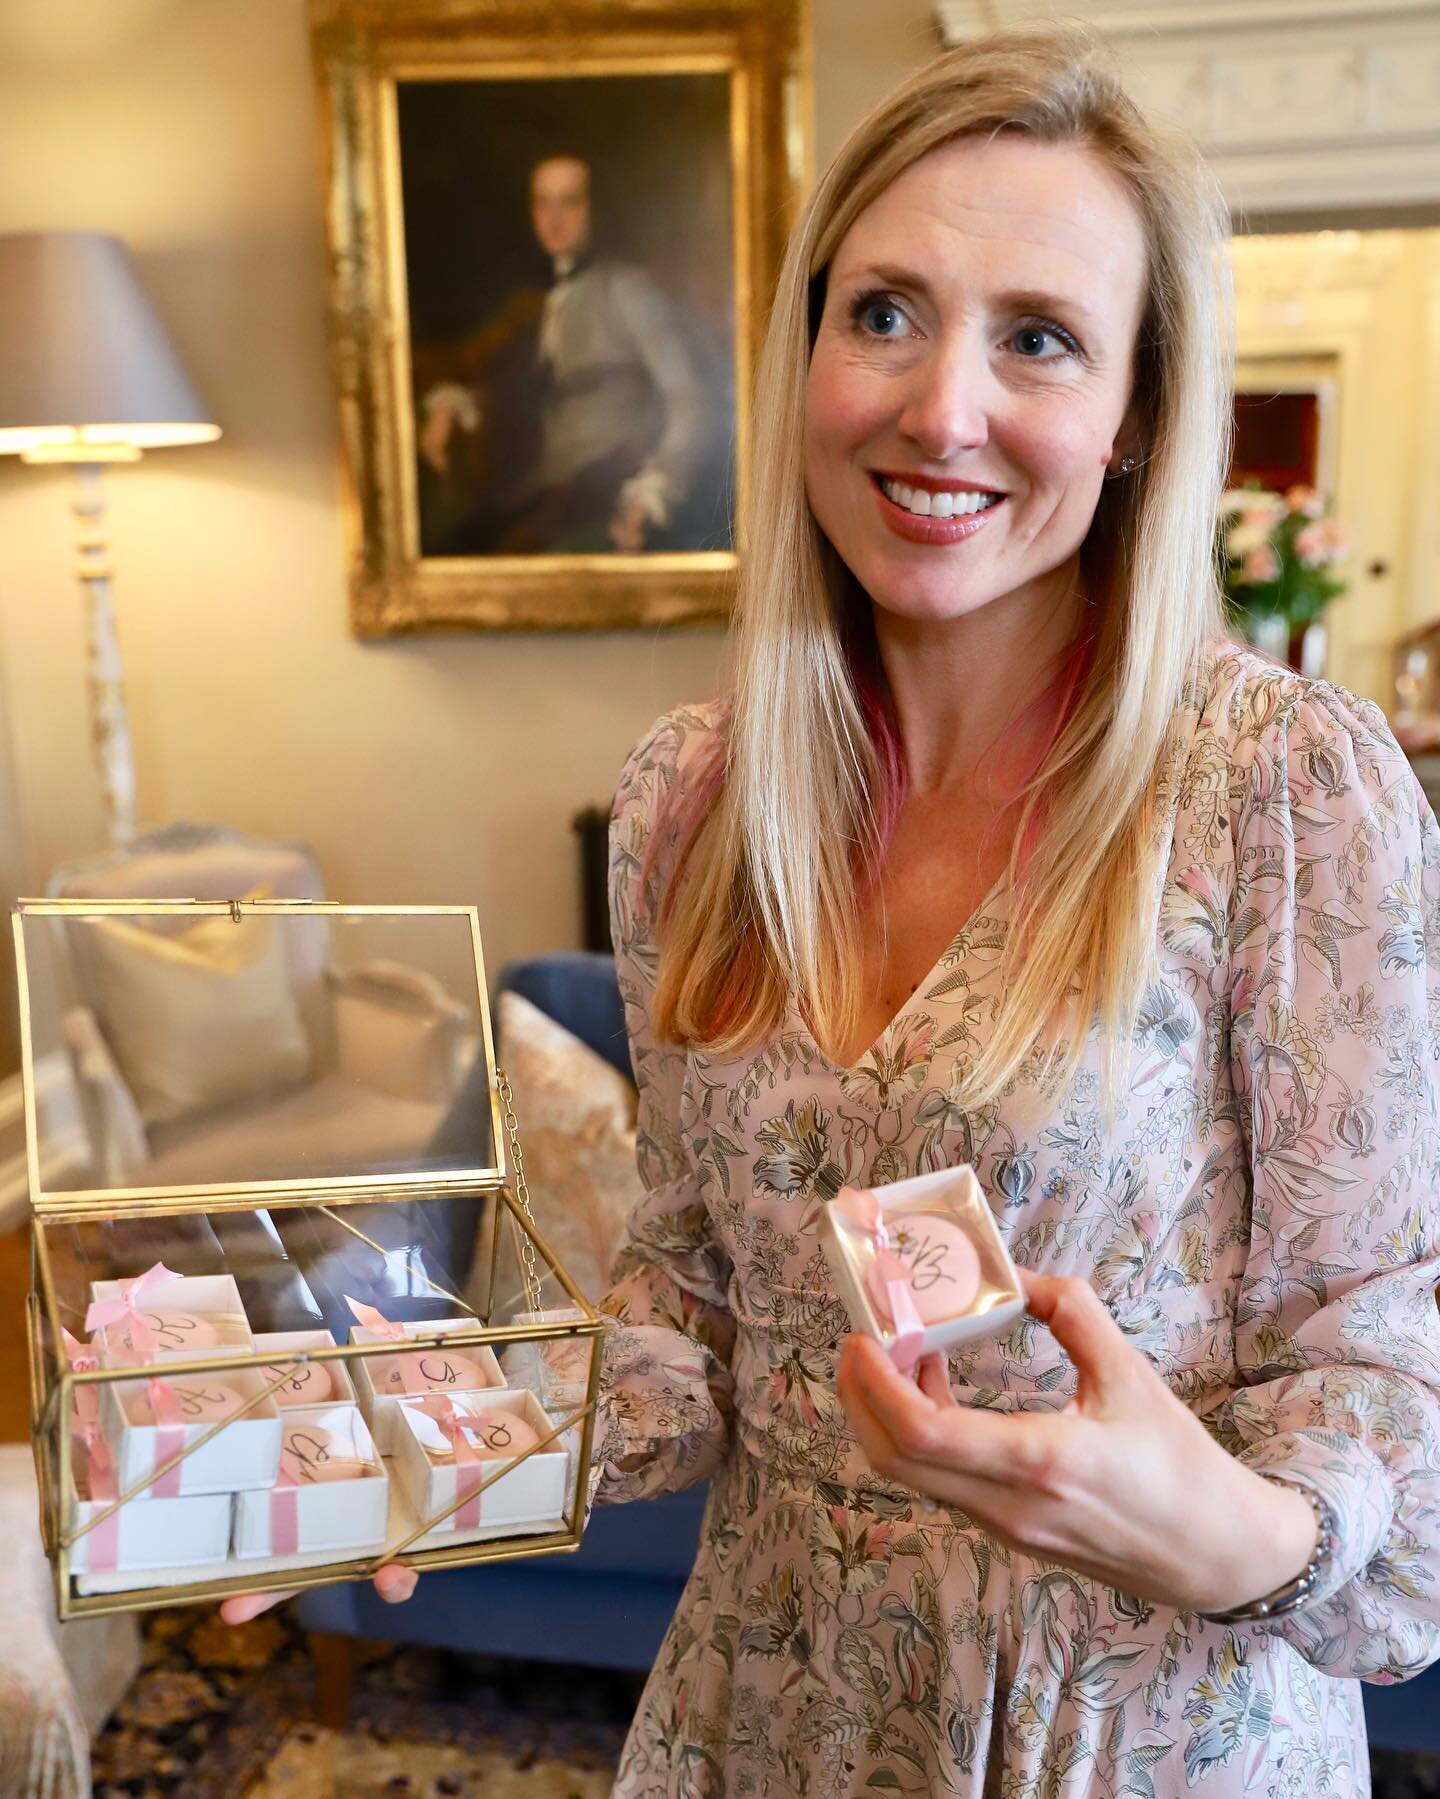
Emma shows her hand-painted macarons that match her dress at an event in London.
Photo courtesy of Emma Dodi Cakes


Hand-Painted Darlings
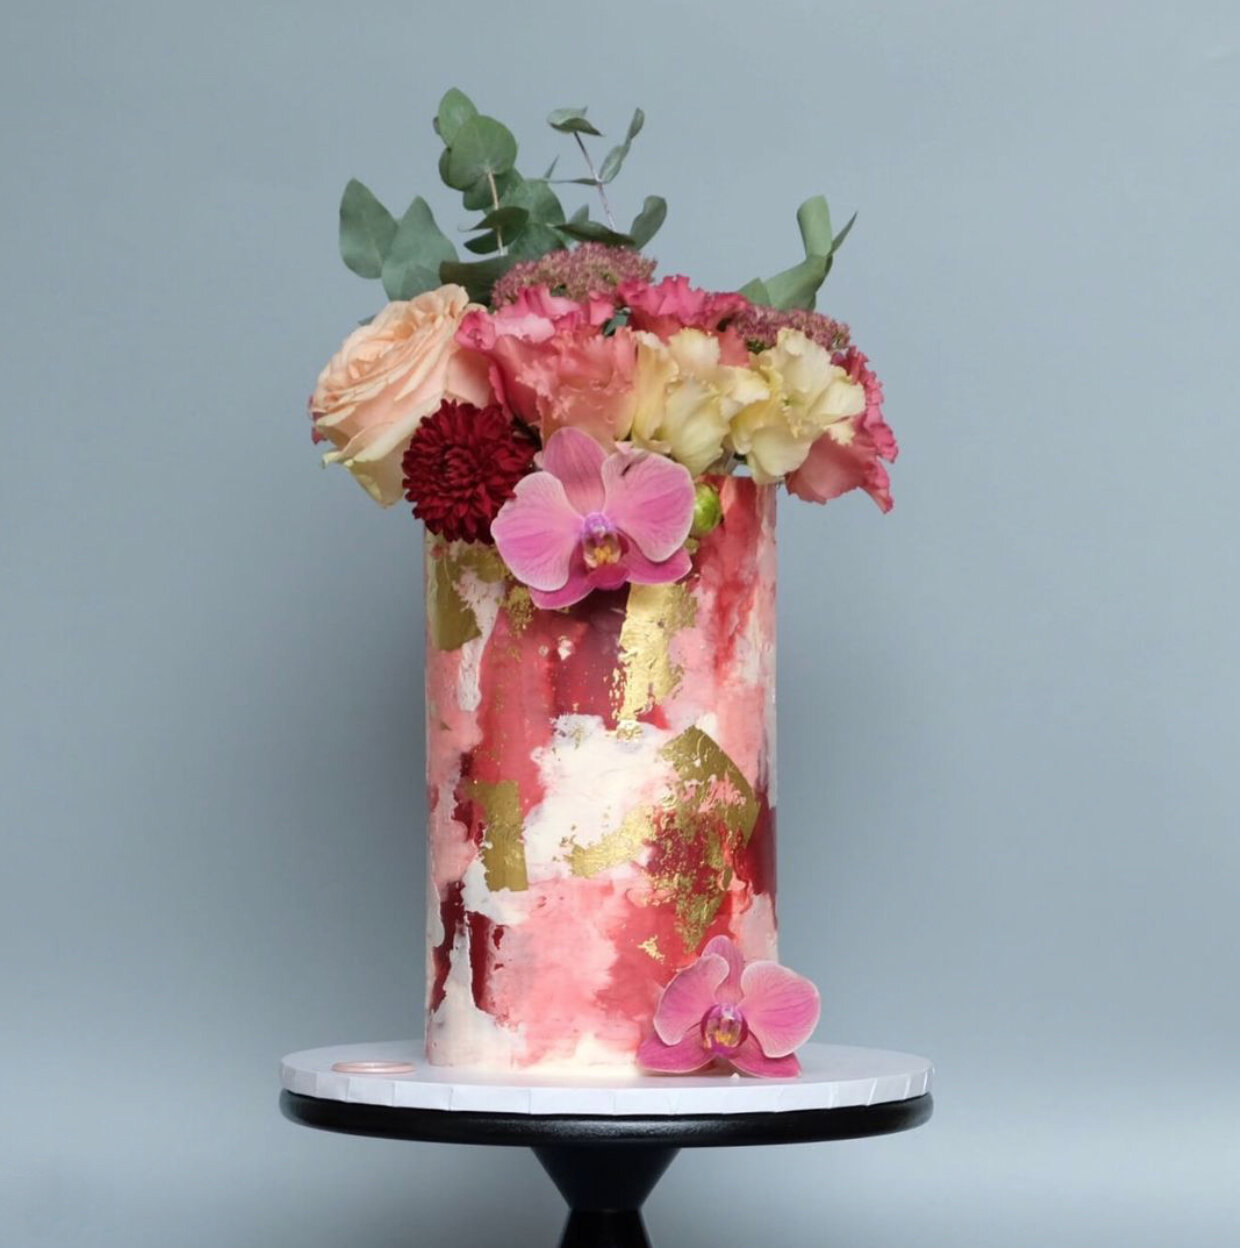
Each of Emma’s creations are amazing, but we had to ask which are dear to her heart. “Every time I create something new it becomes my favourite! But I think lately, my daisy macarons have been my favourites. I think the drawing is really pretty but I also love the duck egg blue colour I mixed for them.” Additionally Emma added, “I also really liked the mini wedding cakes I made with piped flowers recently - there was a smallish wedding cake and then every guest got their own little wedding cake, really very sweet (pardon the pun!).”
Photo courtesy of Emma Dodi Cakes
Just like Emma’s macarons, these Chamomile flowers will brighten up a garden with their sunshine yellow.

A Classic Beauty
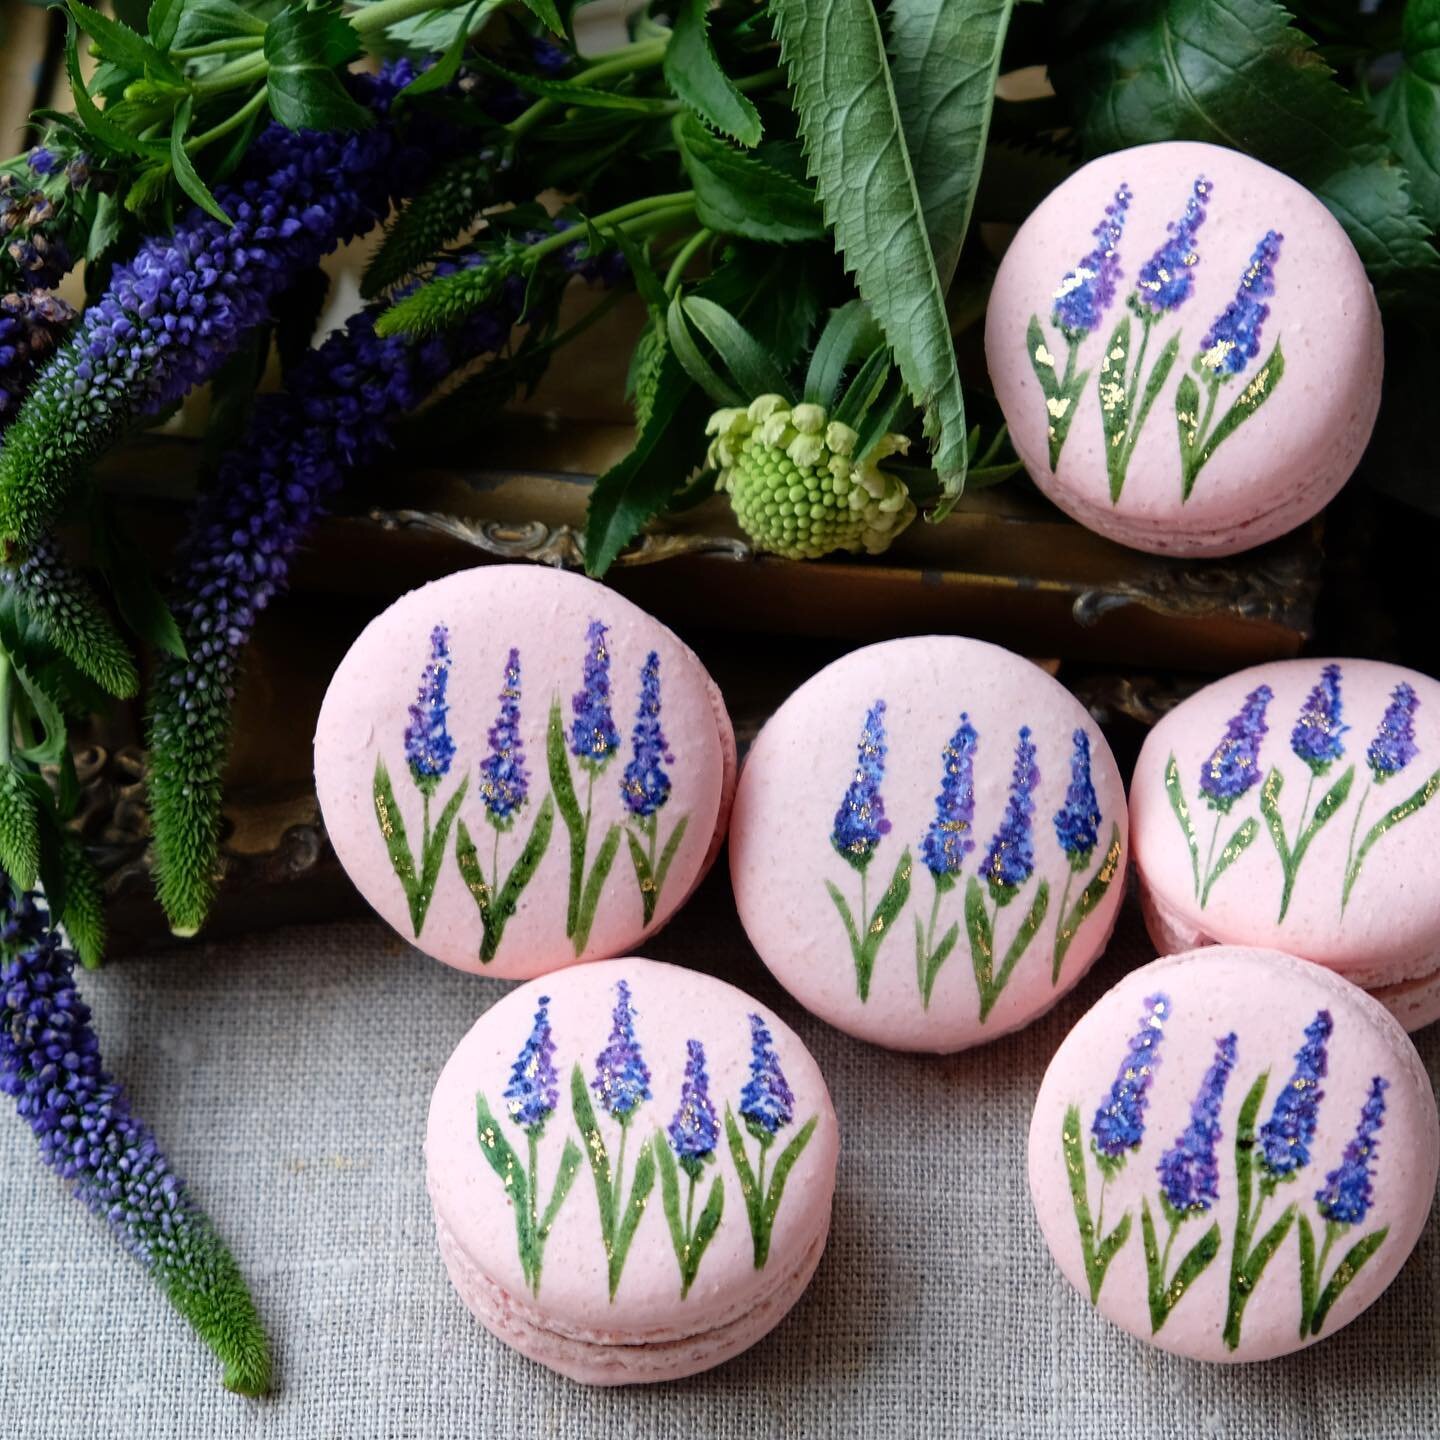
Flowers can hold meaning to each of us, whether from personal experience or cultural beliefs. Emma shared, “I love all flowers, I think I have lots of favourites and the mood I’m in dictates my preferred one. However, if I had to choose one type it would probably be roses. The roses I painted on my macarons right at the start of my journey, is what set everything off, and also, they were my father's favourites, so that makes me a bit biased.”
Photo courtesy of Emma Dodi Cakes
Carnations are another classic and staple for cut flower gardens. View our Chabaud Series Carnation.

Doing What You Love
In final words to us, Emma expressed her gratitude: “I really love what I do and I am lucky enough to be able to create new and exciting cakes and macarons every day. I love the whole process involved in what I do, from the challenge of making bespoke products, pushing boundaries, drawing in my sketch book, collecting magazine cuttings in my scrap books, designing a cake for a client that tells their story, the alchemy of the kitchen, coming up with new flavours, the lot! I always tell my kids that they should do what they love, because if you love it, then you don’t mind the long days and hard work.”
Photo courtesy of Emma Dodi Cakes
Check out our Edible Flower Seed Set to start growing your bundle of beautiful and edible blooms. Includes: Calendula, Pansy, Snapdragon, Nasturtium, and Marigold seeds.
View more of Emma’s gorgeous work on her website or on Instagram at @emmadodicakes
All photos courtesy of Emma Dodi Cakes
Early Summer Poppy Arrangement

For this arrangement you will need:
5 Shirley Poppies
5-7 Stems of Mint
5 Pink Ranunculus
3 Scarlet Ranunculus
3 Violet Ranunculus
5 Blue White Anemones
3-5 Stems Cherry Caramel Phlox
5 Stems Winston Churchill Sweet Peas

Fall or Spring Planted in any zone. Z 1-10. Perennial. $4.25

Mint. Herb.
Fall, Spring, or Summer depending on zone. Z 1-10. Perennial. $4.95

Fall planted in zones 7+ or under cover in colder zones. Spring planted in zones 6-. Perennial in 8+. $25.00

Fall planted in zones 7+ or under cover in colder zones. Spring planted in zone 6-. Perennial in 7+. $25.00

Fall planted in zones 7+ or under cover in colder zones. Spring planted in zone 6-. Perennial in 7+. $25.00

Fall planted in zones 7+ or under cover in colder zones. Spring planted in zone 6-. Perennial in 8+. $25.00

Planted spring or summer in zones 8-. Plant fall, winter or spring in zones 9+. Perennial. $4.95
Spring planted in zones 8-. Fall planted in zones 9+. Annual. $3.95


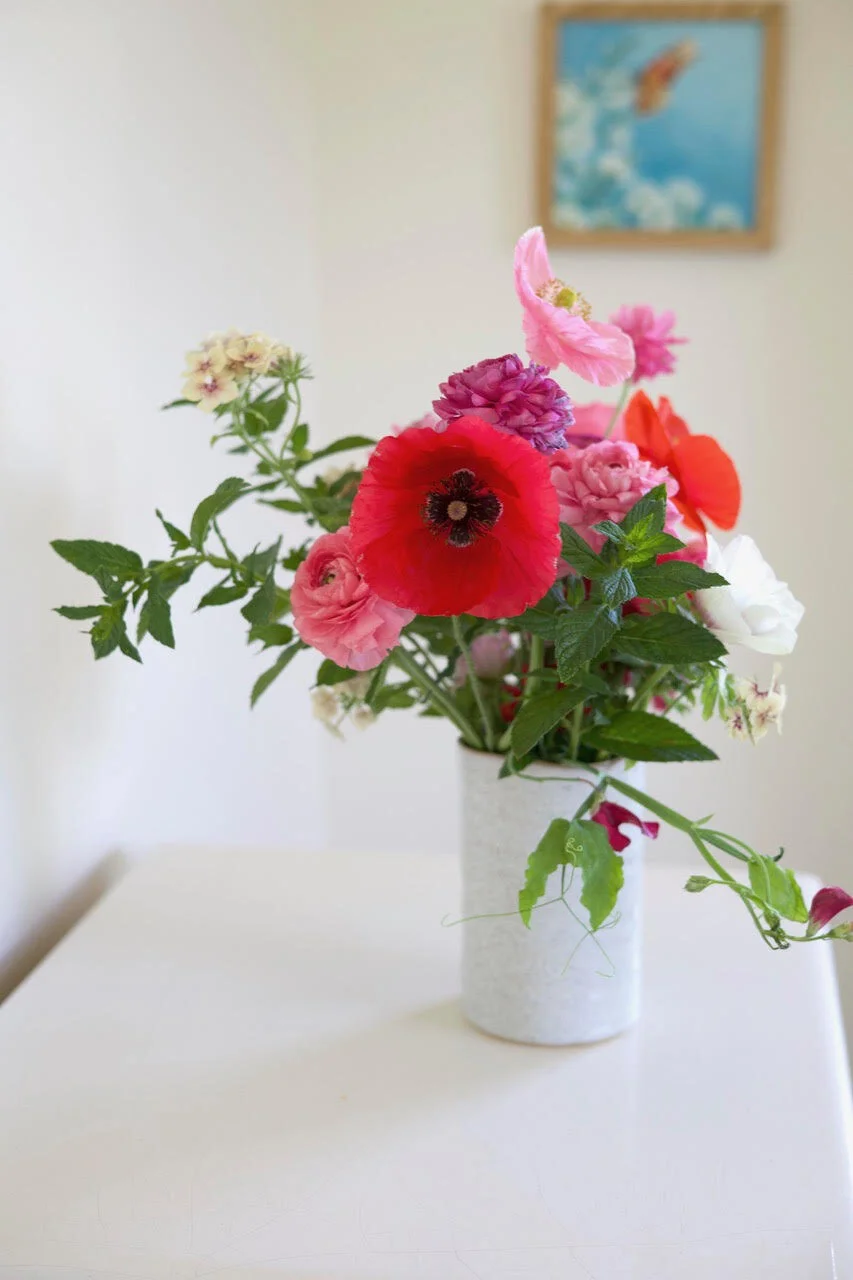
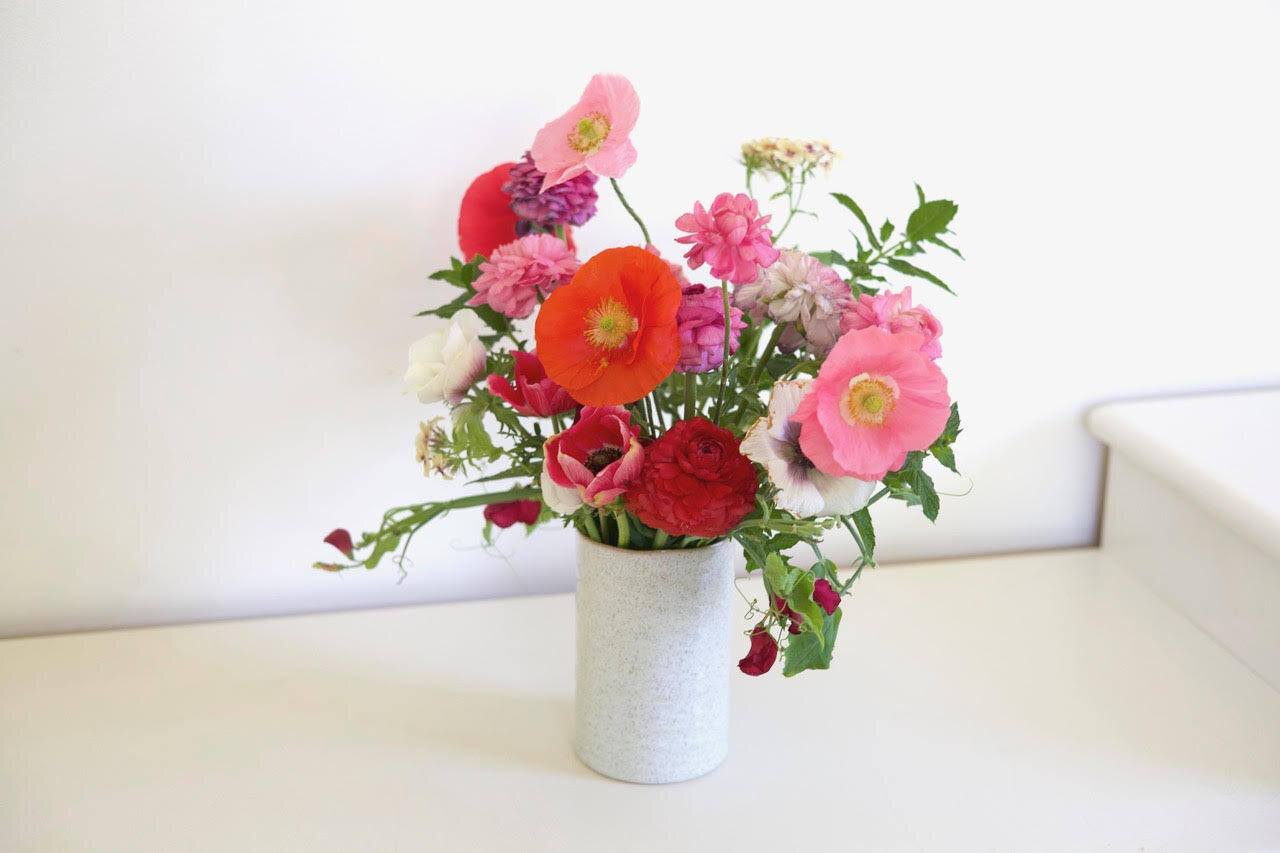
Arrangement by Mindy Lofgren
Flowers from the garden of Sara Haller
Photos by Sara Haller
How to Harvest and Arrange Your Spring Blooms
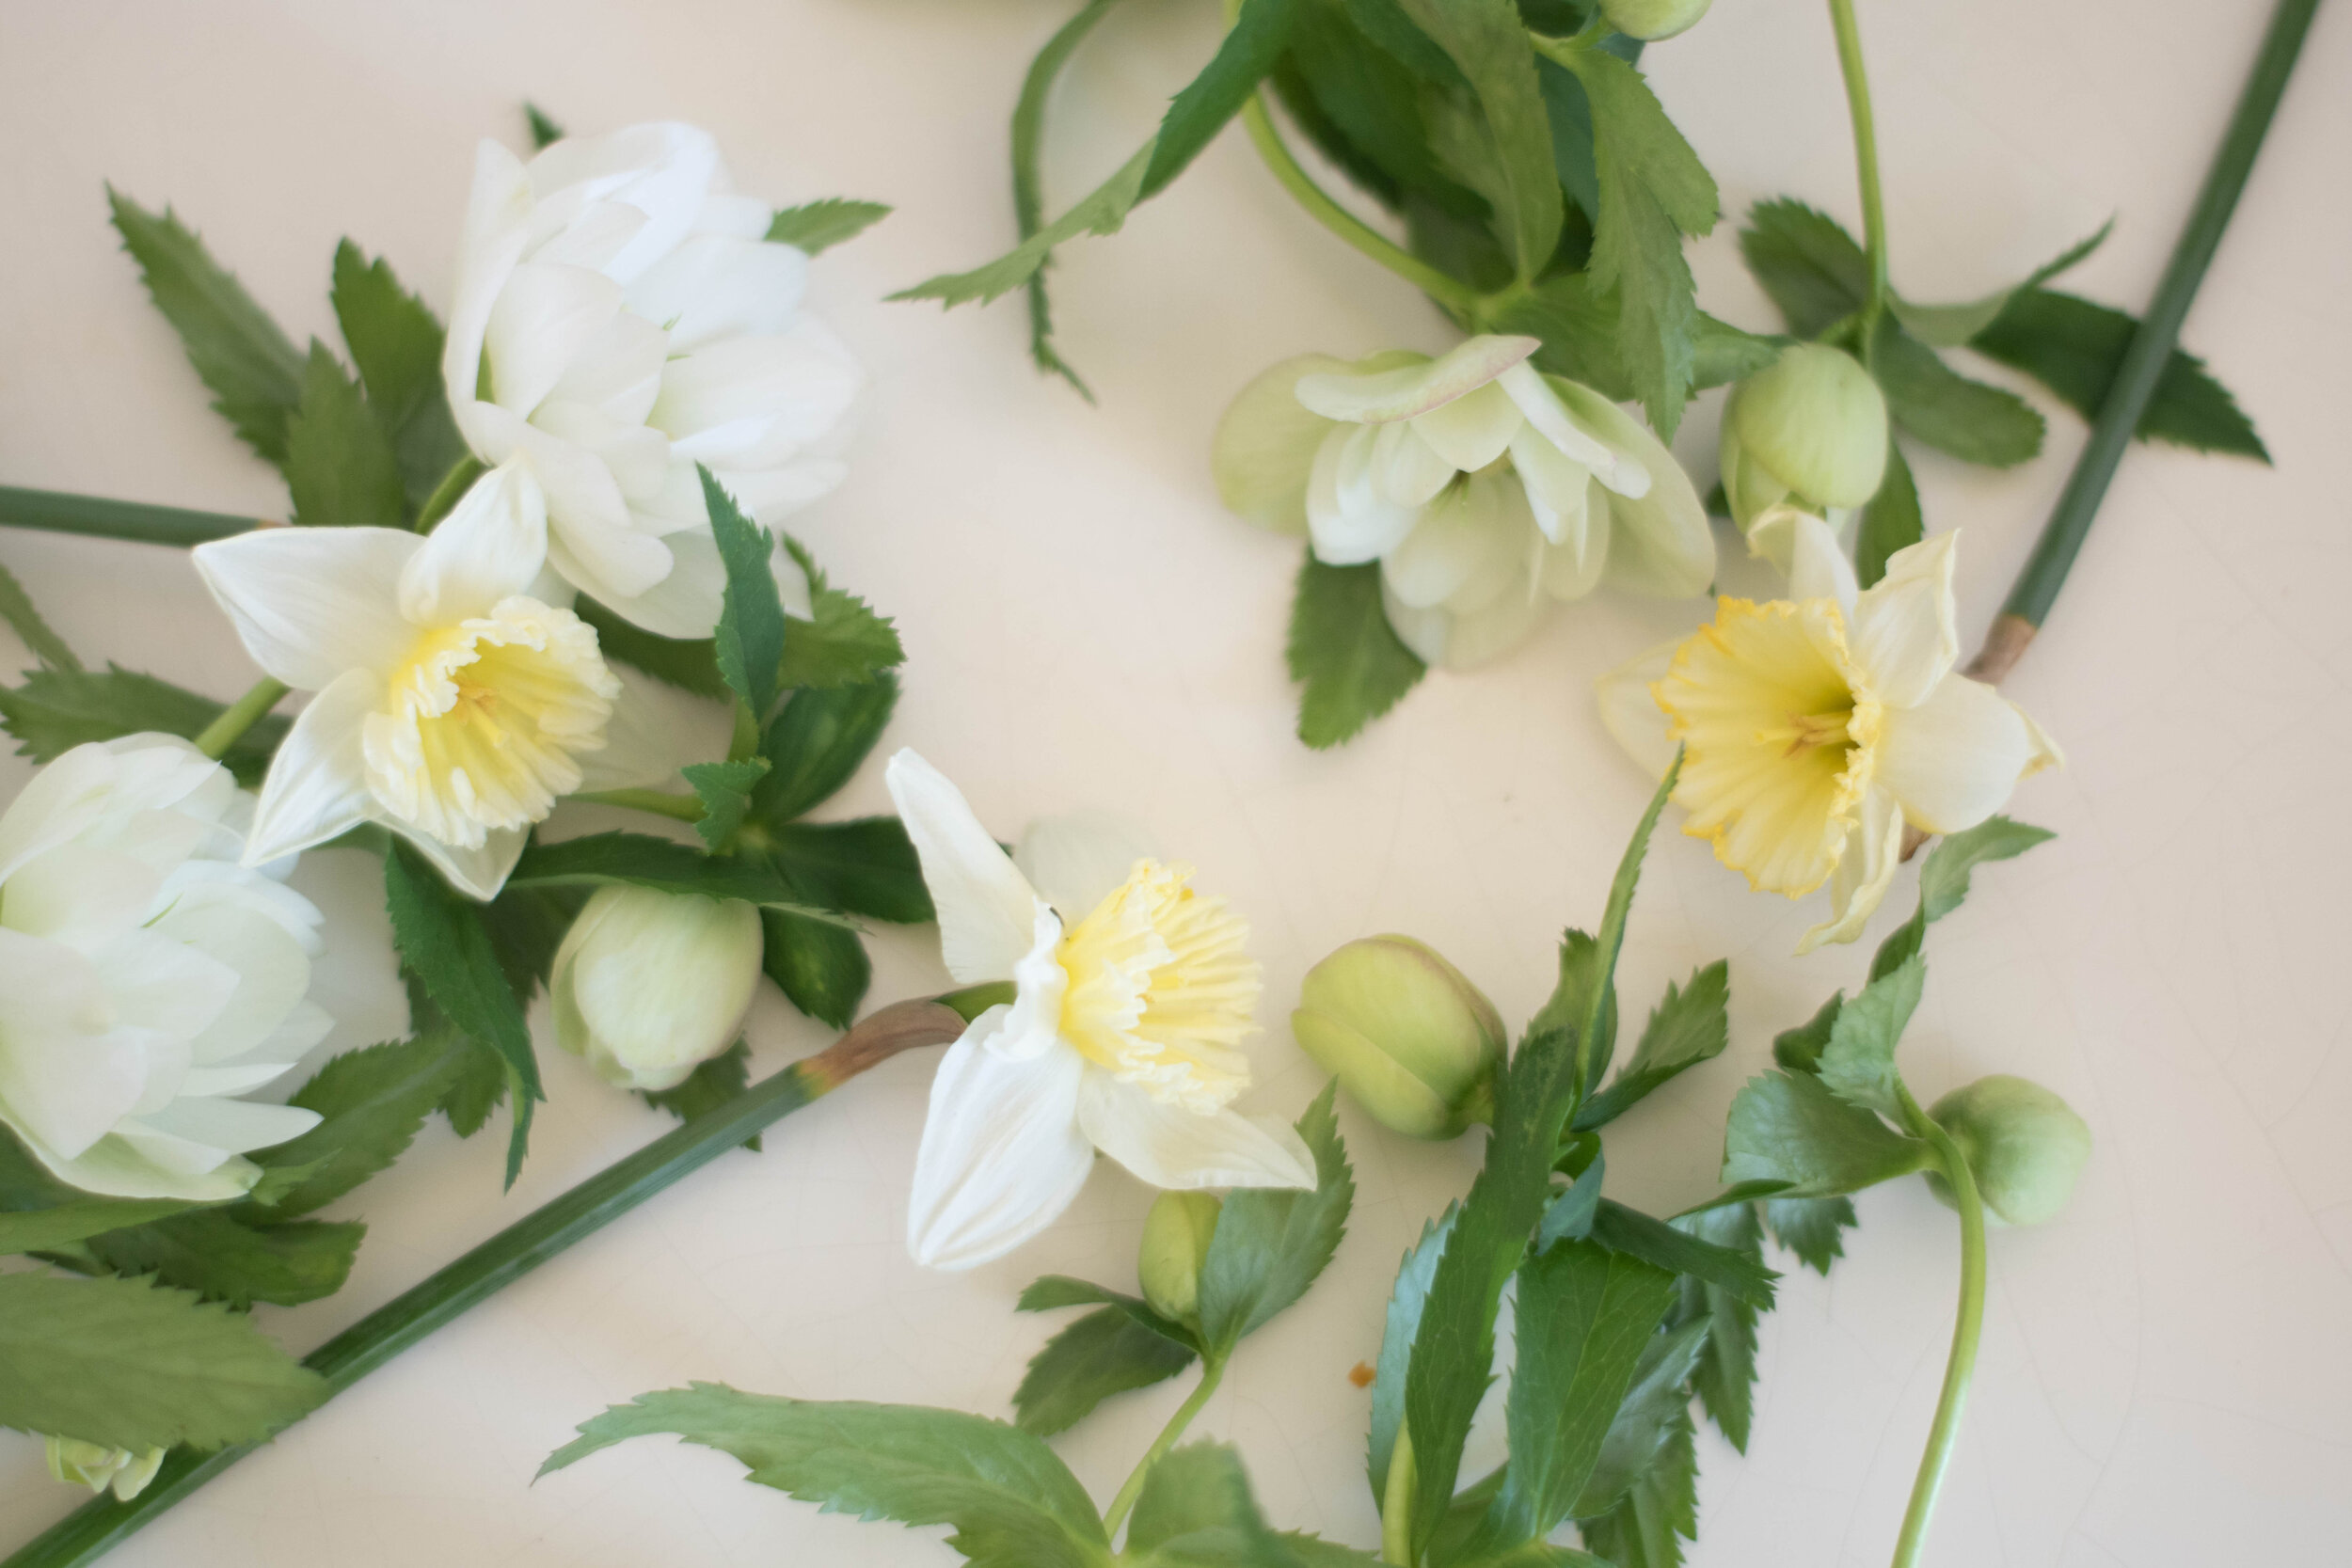
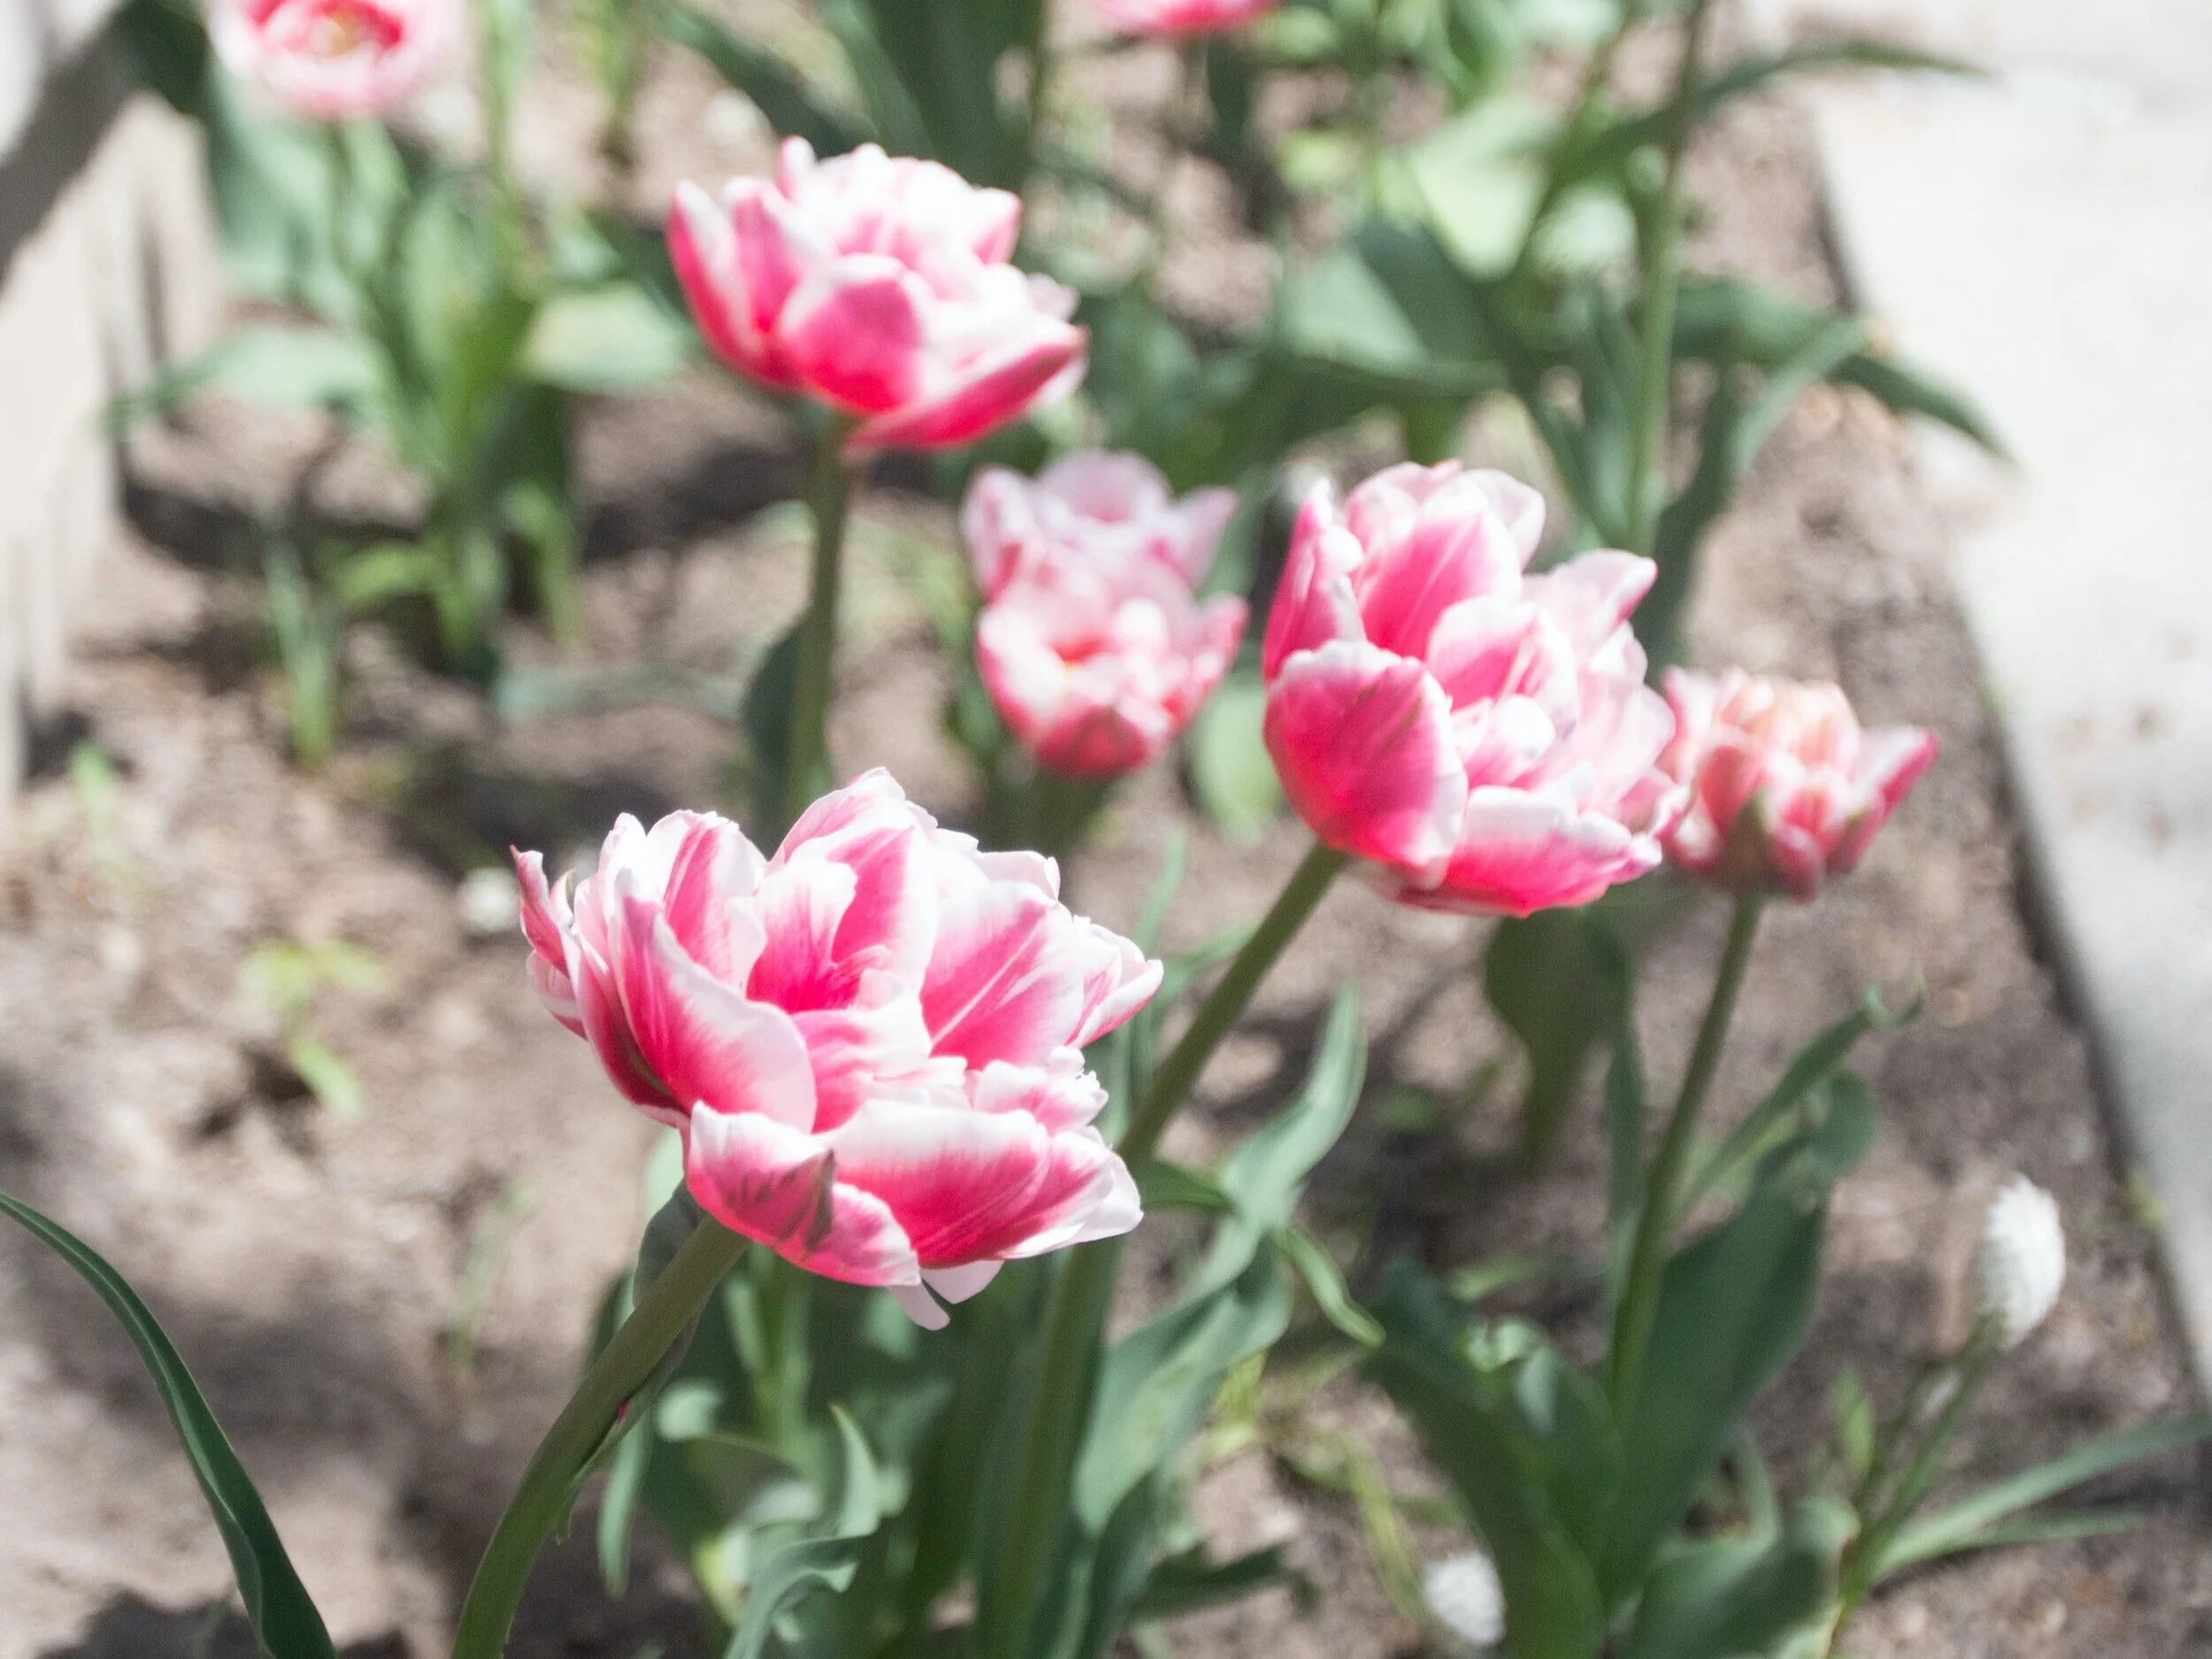
Fortunately, for those of us who are beyond ready for the beauty of summer gardens, there are many flowers which bloom despite the chilly weather in spring. Although I want to enjoy them it can still be too cold to spend much time outdoors admiring them so I usually bring a few indoors. My favorites include tulips, daffodils, hyacinth, grape hyacinth, anemone, ranunculus, hellebore, and peony. Each is a unique plant requiring equally unique harvesting techniques.

‘Pretty Princess’ Tulip
Tulips are the most common spring bloom to bring indoors with their diverse colors, textures and graceful stems adding flare to floral arrangements. Tulips can be harvested 2 different ways depending on your ultimate goal. 1) If you want the longest stem, and vase-life I would suggest pulling the stem with the bulb attached, 2) If you want the tulips to multiply and naturalize in your yard then I would suggest cutting the tulip very short and leaving the foliage. My caution with the second harvesting tip is you will have very short stems and tulips have a tendency to produce more stems for a few years but will eventually die-back and produce very few stems.
Harvest: When flowers are not open yet but are just coloring up
How: Cut stem at base or pull the bulb from the soil and cut the stem just above the bulb
Vase-life: 7-10 days but lasts a bit longer with flower food

‘Pink Charm’ Daffodil
Daffodils are a bright delight in the garden and come in a range of color and texture combinations with yellow, white, coral, peach, and orange. Daffodils are easy to harvest by pulling the stems with your hand until they pop from their base. Where gloves since the sap from daffodils can be toxic and irritate your skin. After harvesting, leave stems in water for 6-12 hours until the end of the stem seals up a bit. If you arrange flowers before the stem has sealed up then it can decrease the vase-life of other flowers in the vase.
Harvest: When flowers are just starting to open up and the petals are somewhat loose
How: Cut stems at base or tug by grabbing the base of the stem
Vase-life: 7-10 days but lasts a bit longer with flower food

Hyacinth stems are typically on the short side but are a densely covered flower coming in jewel and pastel tones. Stems are typically on the short side and can wilt easily after harvesting. I would suggest using this flower in short arrangements. You can harvest flowers and put them in a vase with the bulb attached for the longest vase-life. Wear gloves when working with this flower as hyacinths have toxic sap for the skin.
Harvest: After all of the buds are colored without green and a few flowers have opened up
How: Cut stems at base or tug by grabbing the base of the stem removing the bulb too
Vase-life: 5-10 days

Grape Hyacinth really does look like a bundle of grapes and comes in a range of purple grapey hues. They may be the shortest stems of the spring blooms but are a delightful addition to petite flower arrangements. Despite the common name of Grape Hyacinth they are actually a lily so despite the common name they aren’t toxic and are actually edible with a hint of earthy grape flavor.
Harvest: When bottom flowers are beginning to open with a slight white edge
How: Cut stems at the base or tug gently from the plant by grabbing the bottom of the stem
Vase-life: 7-10 days

Anemone flowers come in a gorgeous range of jewel and pearly white tones and are accented with a dark blue-violet center. Flowers are delicate and are best harvested when the petals are starting to open slightly. Cut the stems at the base near the soil leaving other side stems and leaves on the plant to produce more flowers throughout the year. Plants typically produce 15-20 flowers in the year before temperatures start to warm up beyond 80F.
Harvest: When petals are just starting to open up
How: Cut stems at base leaving foliage and side stems
Vase-life: 5-8 days but lasts a bit longer with flower food
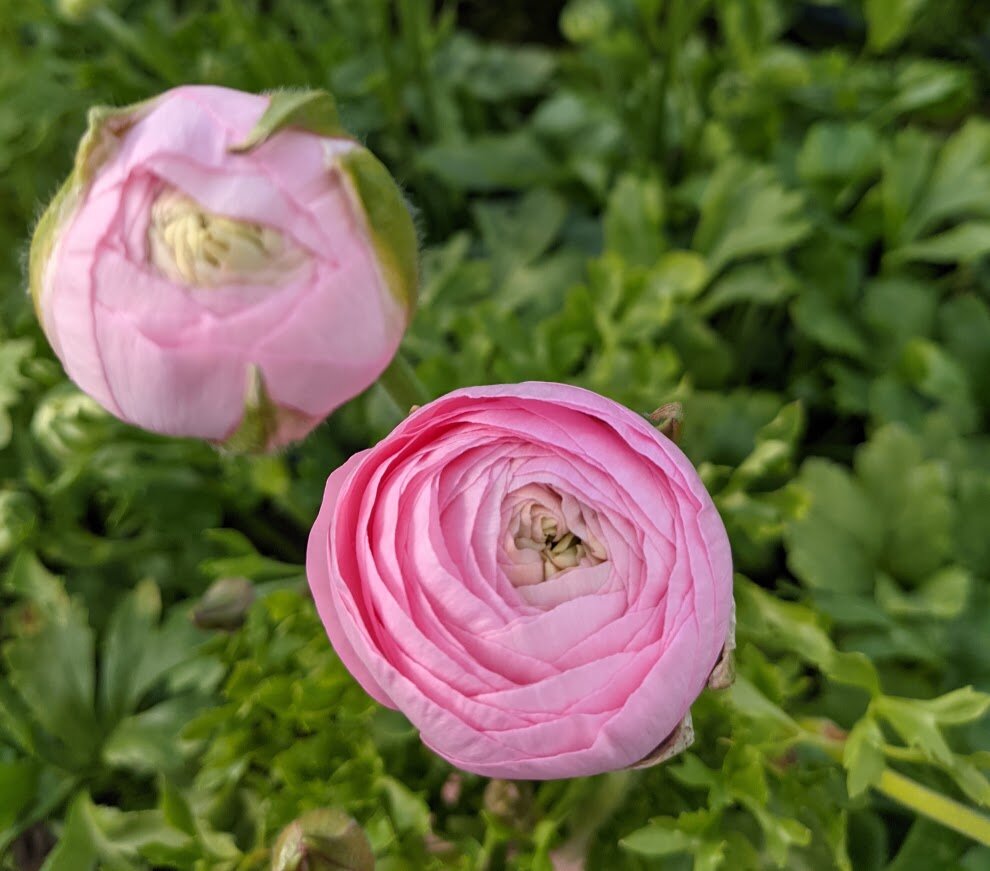
Ranunculus are ruffled beauties coming in a range of colors and the more they unfurl the more delicately fluffy they appear. It is best to harvest flowers when the petals start to color up and just before they unfurl. Cut the stems at the base near the soil leaving other side stems and leaves on the plant to produce more flowers throughout the year. Plants typically produce 5-10 flowers in the year before temperatures start to warm up beyond 80F.
Harvest: When the flower has colored up and is barely starting to unfurl
How: Cut stems at base or tug by grabbing the base of the stem
Vase-life: 10-12 days but lasts a bit longer with flower food

Hellebore often bloom in late-winter or early-spring and have multiple flowers held on each stem. Harvest when at least one of the blooms on each stem has lost the bright yellow inner petals and all that remains are the pointed centers and outer petals (which are actually sepals, shown in the picture to the right). Harvest flower stems at the base near the soil surface, place in boiling water for 5 seconds and slice up the sides of the stem a few inches just cutting through the outer tissue to improve water uptake.
Harvest: When yellow petal centers have fallen out and just the spiked green center remains
How: Cut stems at base or tug by grabbing the base of the stem
Vase-life: 14-21 days if you harvest at the right stage, boil and cut the stem, just a few days without using those techniques

Pansies come in a variety of colors and sizes and are delightful to use in arrangements. If you are using them in floral arrangements I recommend harvesting them just as they open up as they are a delight to watch unfurl. Since pansies are typically on the short side I would suggest types that are taller to achieve the longest stems for arranging. The large flower heads tend to flop a bit so I would recommend using other flowers to help support them and keep their bright little faces upward.
Harvest: When flowers are just beginning to open up
How: Cut stems as low as possible but leave foliage and lower side stems on the plant to continue to produce flowers
Vase-life: 5-7 days but lasts longer with flower food

Although all of these flowers are delightful in their own arrangements, wide mouth vases don’t provide enough support to a few stems so they often droop to the side.
In arrangements like these a flower frog is your best friend! Flower frogs come in a variety of shapes and sizes depending on your arrangement and vase. You simply set the frog in the base of the vase and push the stems onto the many upward facing pins on the frog.
Here is a close up of larkspur stems in a flower frog without the vase so you can see it in action. You can see the stems are nestled and pressed into the pins allowing the flower stems to gracefully branch away from each other.
With the addition of a flower frog you can create interesting and dynamic shapes. This one tool will take your arrangements from backyard bouquet basic to weekend flower stylist. Scroll for more design inspiration using a flower frog with daffodils and hellebore!

Daffodils in a white vase using a flower frog. Cutting stems at different lengths and directing the blossoms in different ways adds interest to this arrangement! Try using a variety of daffodils that will play off each others colors, shapes and textures.

Hellebore flowers often have leaves and other buds attached adding texture and depth to the arrangement. Flowers often dip downwards so arranging with a flower frog keeps the blooms a little more upright. I would also place these on a higher shelf or dresser so you can fully enjoy these flowers that gracefully bow downwards.

After you get the hang of your flower frog and arranging with your blooms start adding them together! I would suggest using complimentary tones that will make even beginner arrangements look well designed. Here you have 2 kinds of daffodils, 1 in bright yellow and 1 in creamy yellow and white tones. The creamy yellow daffodil acts as a bridge between the bright yellow daffodils and the white hellebore tying all of the elements together in this arrangement! You can also forage for some greenery from shrubs to add more texture and color to your arrangements. Enjoy your spring blooms!
Get to Know Your Soil
Your plants will only grow as well as the soil they are growing in so let’s talk about how you can get to know your soil and the best way to improve it!
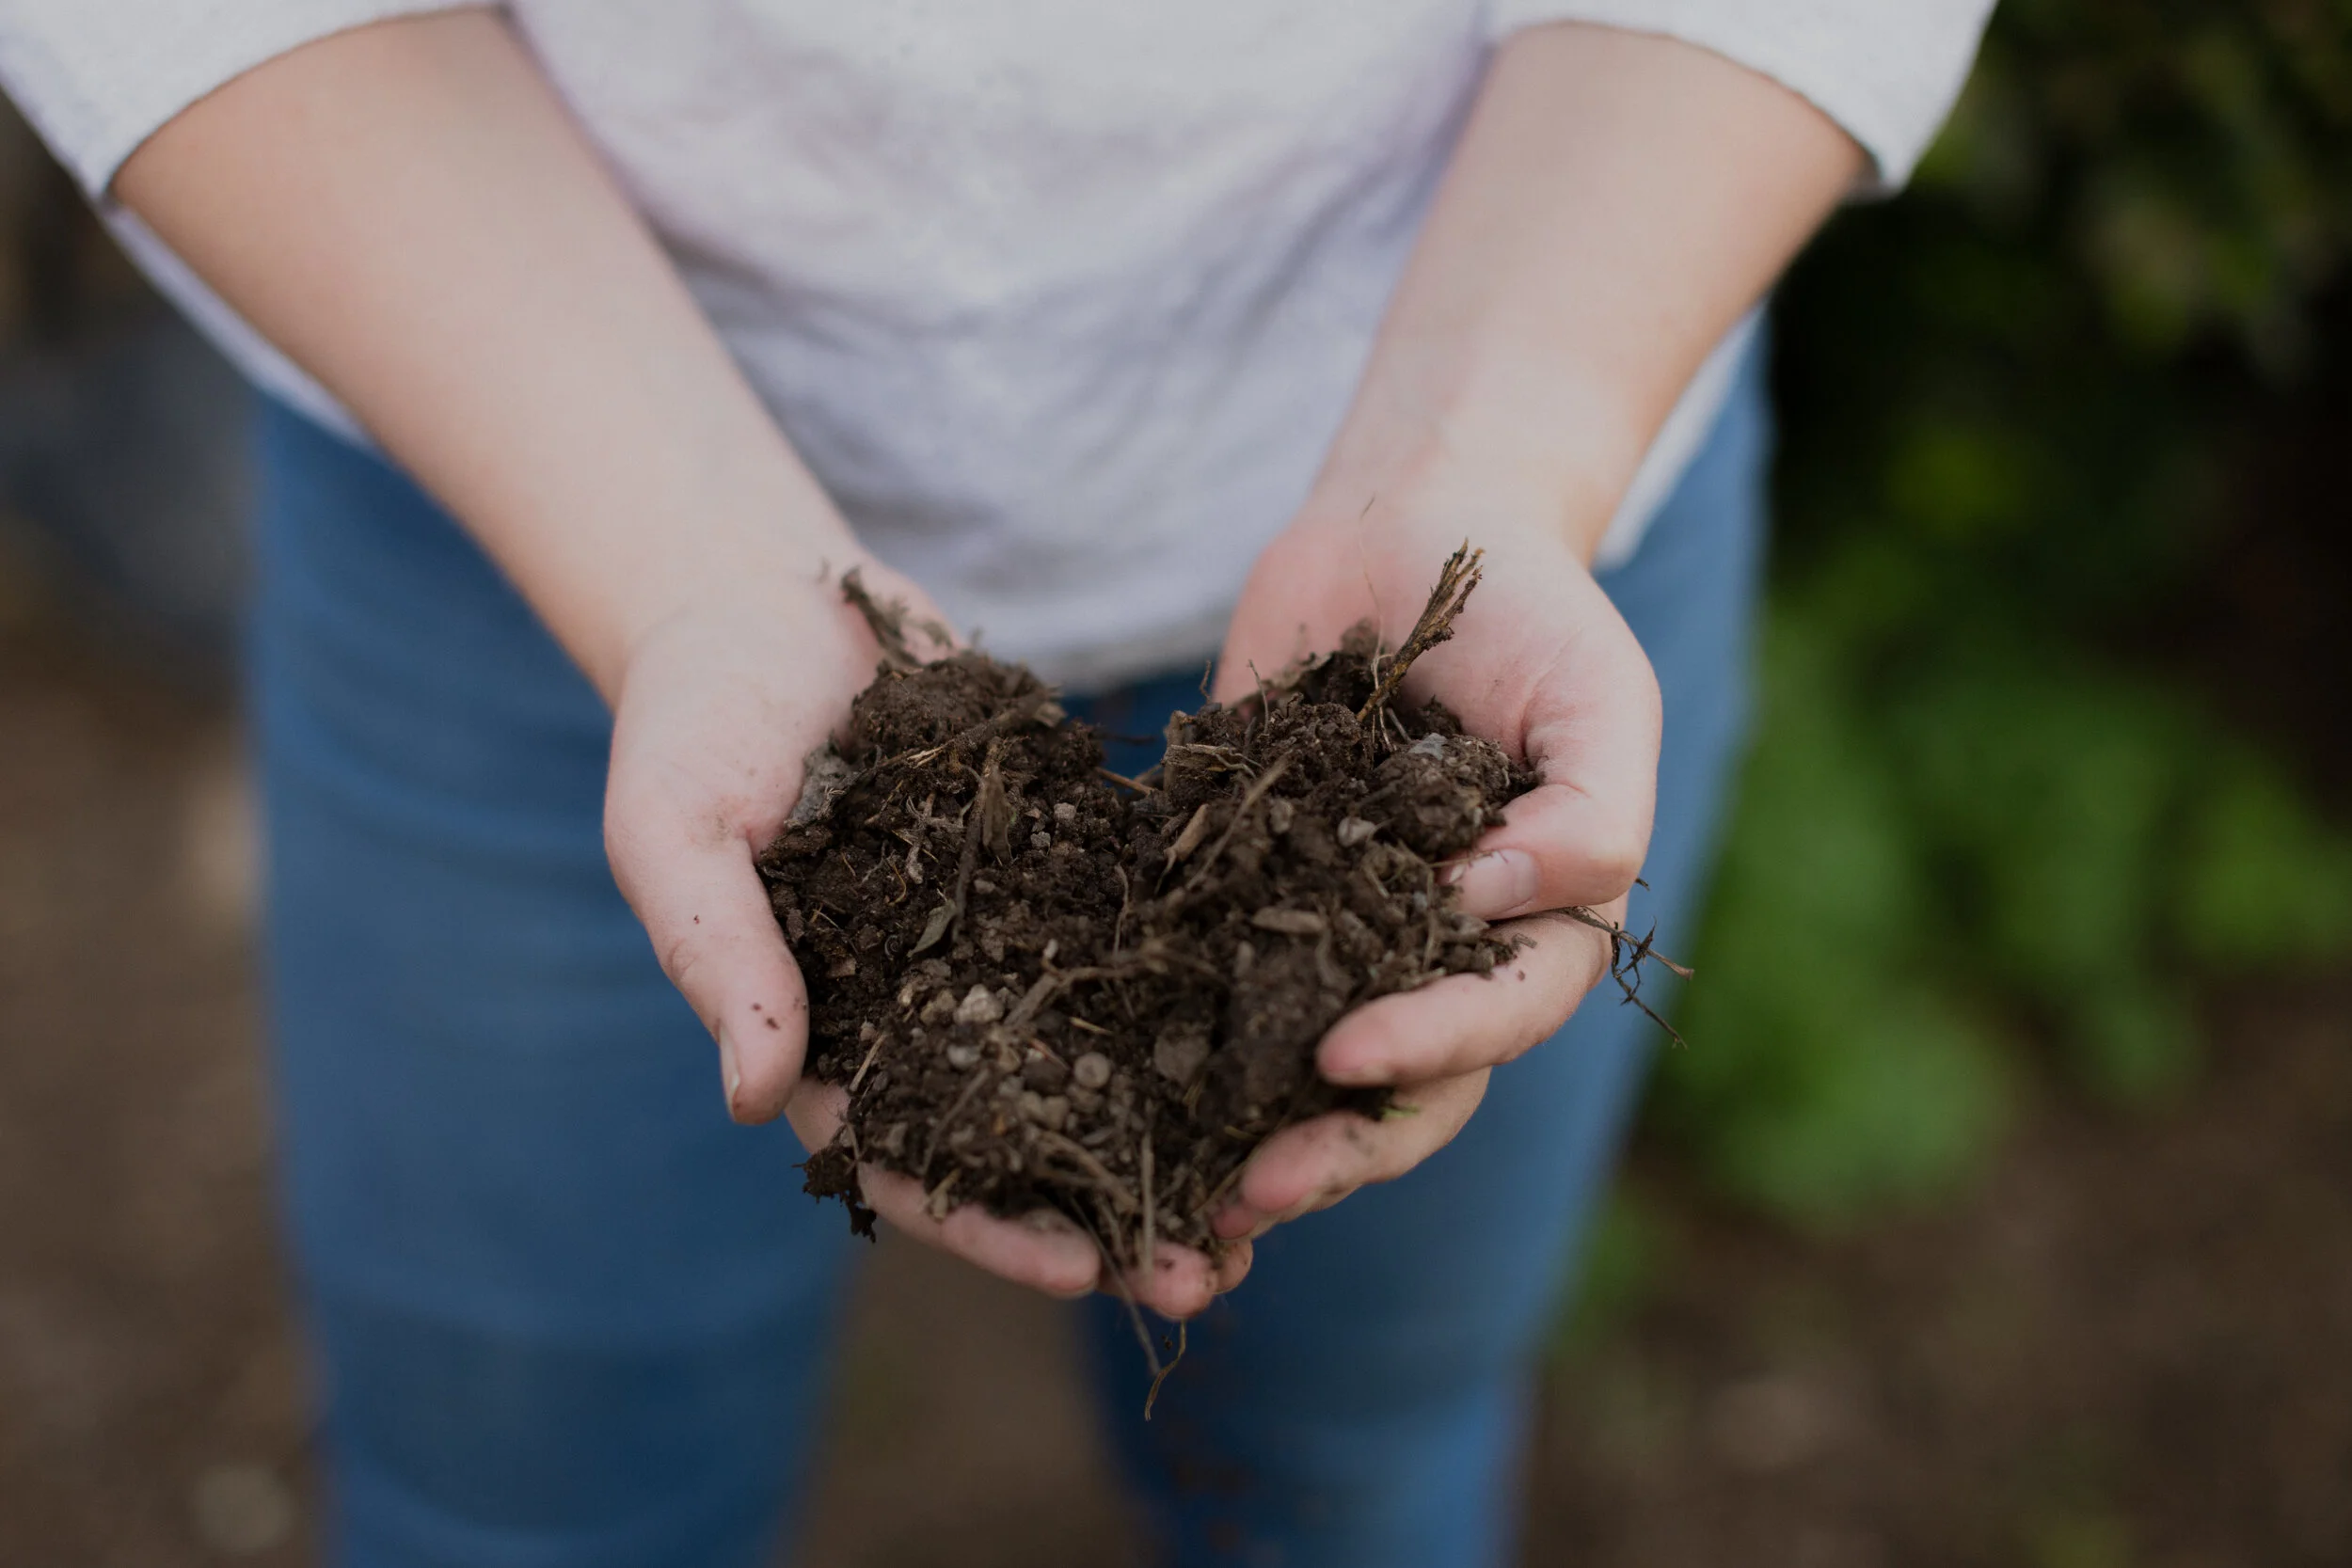
The foundation of your soil is the texture, which is defined by the ratio of sand, silt, and clay particles within your soil. Each of these particles are different sizes and shapes so they respond a bit differently to water and nutrients. Sand particles are large and round, the space between several of these particles is large so water and nutrients drain easily. Silt is relatively smaller (think of a Frisbee silt particle compared to a beach ball sized sand particle), the smaller pore size can retain water and nutrients better than sand but also releases them to the plant roots. Clay is the smallest particle (dime size by comparison) and each particle is made up of several plates. So not only do they hold water between the tiny spaces between particles, but they absorb water and nutrients in between the layers of each particle, which becomes difficult for plants to access.
You will almost always find a mix of these three components within your garden. An ideal balance of sand, silt, and clay, otherwise known as loamy soil, is the dream but there are ways that we can work with soil that falls into the sandier or more clay ranges!
You can figure out which soil type is present in your garden by hand texturing. Follow the steps and pictures below or use this link to follow a step by step process for hand texturing!

1. Sift about a 1/3 cup of your soil so no large sticks, leaves, or rocks are included.
The finer the sample the easier it is to determine the texture.

2. Place sifted soil in the palm of your hand and spray with a bottle, rolling the soil in your hand, until it is evenly wet and looks shiny.
If you’ve added too much water you will have to restart, add more soil, or work it in your hand until it has dried out somewhat.

3. After you have a ball, begin to pinch the edge of it between your pointer finger and thumb. Slowly work the soil through your hand forming a ‘ribbon’.
It takes quite a few tries to get the hang of it!
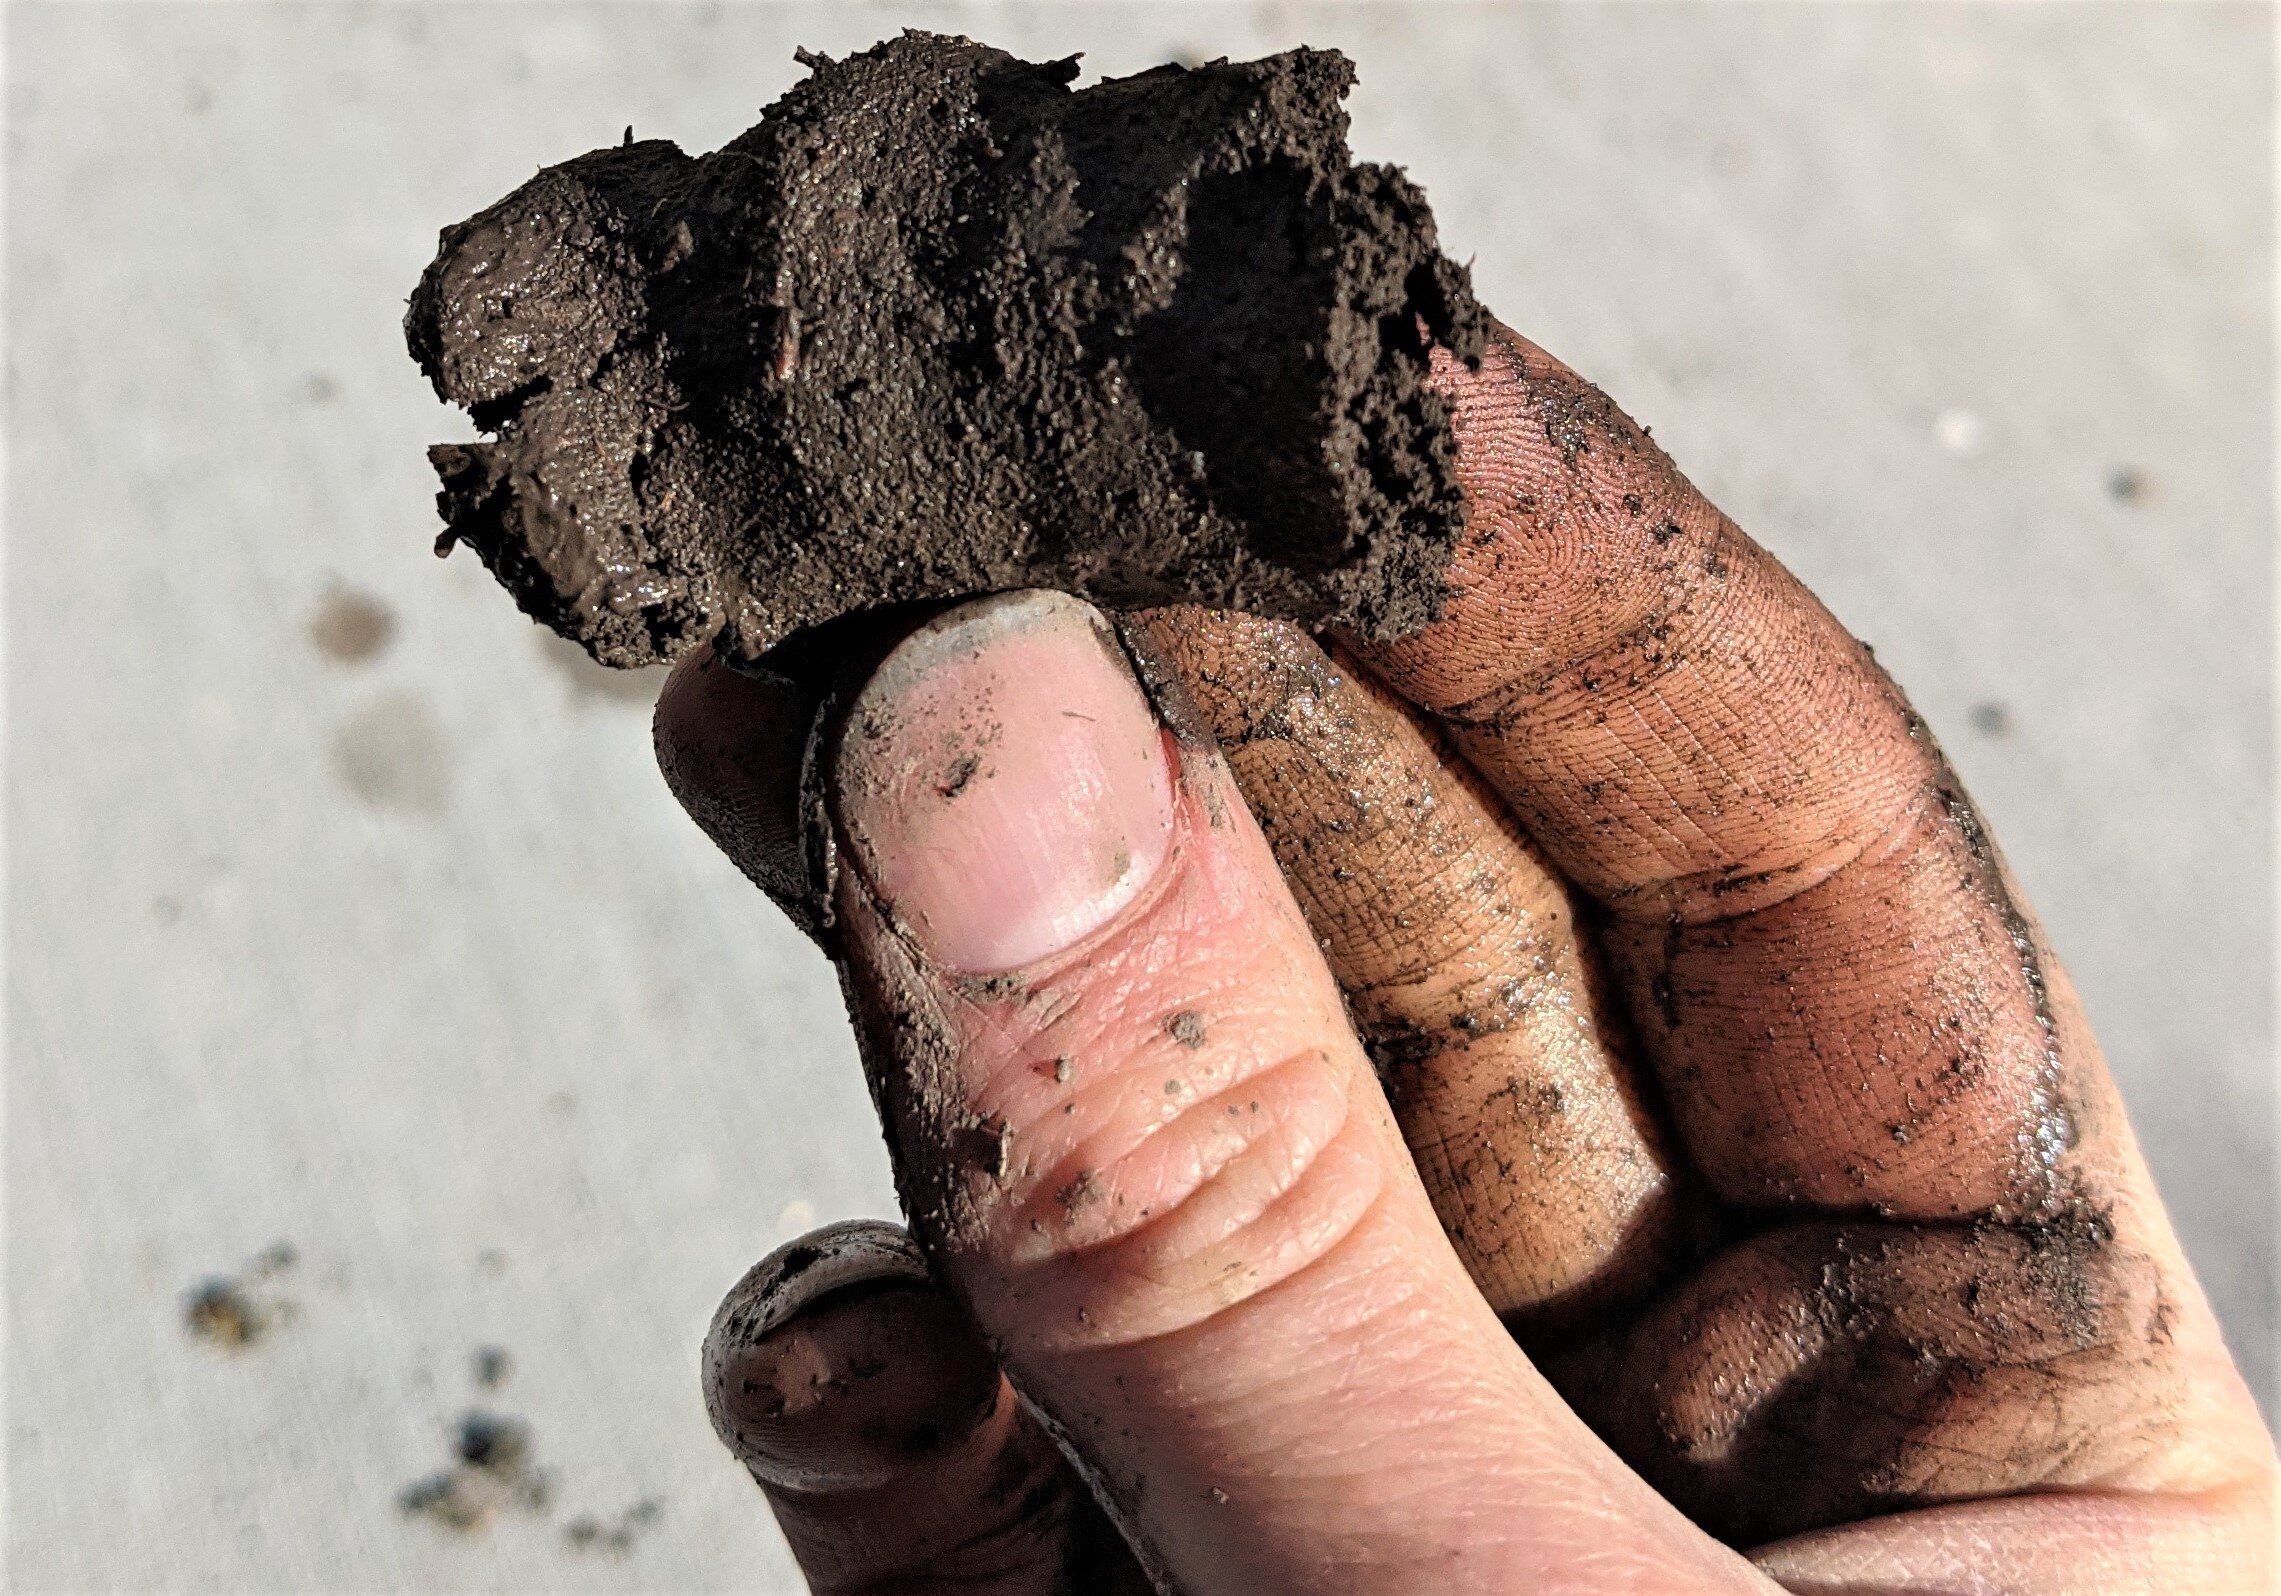
4. You can determine the primary soil particle based on the length of your ribbon.
Sand: Doesn’t form ribbon or forms less than 1” ribbon
Silt: 1-2” ribbon
Clay: Greater than 2” ribbon
5. You can determine the secondary particle by feeling the texture between your fingers.
Sand: Gritty texture
Silt: Silky texture
Clay: Finger print remains in soil ball after pressing your finger into it.
So, if your ribbon is 1.5” long with a gritty texture than it is predominately silt soil with some sand. If it is a 2.5” ribbon and has a silky texture than it is predominately clay soil with silt.
If your soil texture falls into the sand category than water will be able to work through the soil quickly, but it will also drain quickly past your plants root depth. So it is recommended to irrigate for shorter intervals more frequently. For the other extreme of a clay soil that the water has a difficult time penetrating and will slowly drain past the root depth, it is recommended to do a longer watering interval less frequently. Sandy soil may require 3 short watering’s a week in the heat of summer while clay soil may require 1 long watering per week. It is helpful to texture your soil, but I also recommend feeling the soil everyday to get a feel for how quickly it dries out. Dry soil won’t stick to your hand, and will look lighter colored appearance. Moist soil will easily stick to your hand and can’t be brushed off and will look darker. Cheap water sensors often don’t work well in home gardens but the look and feel of it won’t fail you!

If you want to improve the texture of your soil, the best thing you can do is add compost or other soil amendments. These soil amendments will not only improve drainage in clay soil and water retention in sandy soil but it will add food for beneficial microorganisms which break organic materials down into nutrients that will taken up by plants to support growth! However, be careful when adding compost. Certain types can be damaging to your soil health and adding too much of a good thing can also be bad. It is usually best to select types that have aged for longer than 6 months. In the spring till in a 1-2” layer in the spring for your annual beds and do a top dressing of 1-2” compost on your perennial beds. In the fall, do a top dressing on all of your garden beds of compost or a finely shredded mulch layer. Top dressing in the fall will retain moisture, insulate perennial roots from the cold, and prevent soil erosion from wind and rain. This top dressing will break down throughout the winter from the sun, microorganisms, rain and snow and can be tilled in the spring with your extra addition of compost.

It is important to understand your soil texture to select plants that will work in your garden. If a plant is described as being drought tolerant or prefers well draining soil then it is most likely ideal for sandy or silty soil. If a plant prefers moist conditions than it is best planted in silty or clay soil. We can continually work towards an improved soil structure for a balance of water retention and drainage with small yearly additions of compost! Keep checking back to our blog for more information on how to improve your soil structure, and health for strong, happy plants!
If you have questions about soil texturing, comment below or message us @haldenvegetable on Instagram!
8 Pro Tips For Getting Seeds to Germinate
By Maegen Lewis, MS Plant Science, Utah State University
It can be very rewarding to sow seeds and notice a couple weeks later that tiny leaves have begun to emerge. You can sense the hope of your new little plants as they absorb that first bit of light. Whether you are starting your seeds inside before the snow has melted or patiently waiting to seed outside when spring has sprung there are a few basic things you need to know that your seed packet may not tell you!
Identify Season Length
The first thing to do is get to know your region. The two things you’ll need to find out are: Frost dates in your zip code, and the USDA hardiness zone for your city. If you never get frost in your area then you’ll need to identify the dates that you start to get more than 10 hours of sunlight and the dates when you start to get 10 hours or less. This framework will provide your season length and determine when you should start your crops and which seeds will mature and produce flowers or fruit before your season ends.
Direct Sown vs. Indoor Seeding
After you have selected what seeds you want to grow, you will need to decide whether to direct seed outside or start your seeds indoors. Direct sown simply means you plant your seeds directly into your garden or raised bed soil when the soil temperature matches the germination temperature requirement on the seed packet. Starting your seeds indoors means you plant seeds inside in pots or trays and once the plants are large enough you transplant into the garden. This method is especially helpful for those with a short growing season who want to get a jump start on their garden. The seed packet may recommend one method over another, but most seed types can be sown with either method if you provide the right conditions!

Media
When starting your seed indoors, there are a lot of different soilless medias you can choose from. Unlike the soil from your garden that is primarily made of sand, silt, and clay particles, ‘soilless media’ is made up of a mix of peat, coir, perlite, vermiculite or a few other materials. This artificial soil provides nutrients, and a good balance of water retention and aeration that is needed for healthy roots when growing plants indoors. Using soil from your yard in small containers is not recommend since it will not drain as well without a large depth of soil below to draw the water down. Any soilless media will work but if you feel nervous about your selection, potting or seed starting mixes are your best bet.
Container
The next item you will need for starting seeds indoors is a tray or pot. Again, there is a wide variety of options from peat pots for individual seeds to plastic seeding trays that are reusable and can fit hundreds of seeds. A few plastic cups can work well too! Don’t worry too much about the “ideal container.” The most important factor of your chosen container is that it has drainage, so punch a few holes in those plastic cups if necessary. Drainage is important because it allows excess water to drain out, preventing your roots from rotting. A lesser consideration is container depth. Larger seeds typically need deeper containers up to 4” for something like a pea or tomato plant. Larger seeds typically have deeper roots and need a bit more space to stretch out their legs. Only have deep containers? Fill them up a little shallower, no need to buy a different container for every type.

Seed Depth
Seed depth is typically listed on a seed packet but if it isn’t, a good rule to follow is a depth 2 times the diameter of the seed. Seed so tiny you can barely see it? Sow it on the surface of your media. To prevent seeds from moving around before they establish roots, press seeds into the soil surface with your finger, or sprinkle a very fine media over the surface. The ultimate fan favorite media for this is vermiculite, which not only secures the seed, but allows light through and prevents water loss from the seed or soilless media.

Water
Water is what gives life to your seed. If seeds dry out even once they will fail to germinate. When watering, you will want to keep a few things in mind: First, always soak your media all the way through. Second, a very gentle surface watering or below tray watering is critical during the first couple of weeks to not disturb the seed. Below tray watering is done by placing your container in a shallow pool of water and removing it once the surface of your media is wet. Third, is maintaining high levels of humidity which can prevent seeds and media from drying out. For indoor seeding, any clear material can be placed over your tray to build up humidity. Once your seeds have grown a set of leaves you can remove or vent the covering.

When seeding outside, water is just as important and your seeds may dry out even faster due to wind and increased light. Frequent light irrigations are recommended to keep your soil surface wet, especially for seeds sown on the surface or at shallow depths. Rather then using plastic, you can use peat or coir or some other media that has high water retention to prevent your seeds from drying but will still let light through.
Light
Some seeds require light for germination, some are indifferent, and others won’t germinate if they are under light. However, all seeds will need light as soon as their leaves have emerged. Pay attention to your seed packet or the Halden site information that will tell you whether your plant requires light or darkness to promote germination. Whether starting seed or growing young plants the most important thing to remember is that plants need light for 12 to 16 hours a day. If your light doesn’t include a timer, consider investing in one or just using an alarm on your phone.
The spectrum of light that you use is also important. Although plants can grow under cool-white or warm-white alone, they will often be spindly or stunted plants. Full spectrum lights will best mimic the sun and produce the strongest plants. The two most common choices are LED and fluorescent bulbs which will give off less heat and be more cost efficient than many other types.
The height of a light above the tray is also important. Closer lights result in more absorption. Too close can excessively heat up your plants causing leaf burn. LED should be 8-12” away and fluorescent lights should be hung 5-6” above your trays. As your seedlings grow you will need to accommodate the new plant growth and raise the height of your lights. Always check to see if you have even coverage over your seed tray. One LED bar may not cover the entire tray evenly so a second may be necessary.
Temperature
It is important to pay attention to germination temperatures as temperature is one of the key components to triggering germination. Lower temperatures will slow seed growth or prevent germination from occurring while higher temperatures may accelerate seedling growth but result in weak plants. Germination temperatures of 50-60 often mean the plants will prefer cooler temperatures after they have emerged between 55 and 70. Plants with warmer germination temperature requirements of 65-80 will most likely prefer temperatures between 65 and 80 after they have emerged.
Although plants are miraculous and can grow in suboptimal conditions, following the tried and true methods above will result in higher germination rates and ultimately stronger, healthier plants, which means more flowers, fruits, vegetables and herbs for you! Each plant will be a little different and the fun is in getting to know them. Find the ones that you love whether it is for their ease of growing or their finicky nature, the success of each crop is so rewarding. I hope this guide will help to fuel your seeding success!

How To Grow Tulips
Columbus Tulip
Tulips are an incredibly diverse family of plants taking many shapes and sizes that are very easy to grow. They are perennials that are grown from a bulb that will bloom every spring. They need to be planted in the fall before the ground freezes for winter. They will tolerate light frost and the earliest ones even withstand light snow.
Where To Plant
Tulips require a period of chilling in order to bloom in the spring. For this reason they are perennial and will thrive and in zones 7 and below. In zone 8 and higher bulbs need to be planted in December or January and need to have been chilled for 8-10 weeks in a refrigerator. In order to get them to return each year in these hotter zones, they will need to be lifted after the foliage has faded in the early summer.
Plant in a sunny location in a place that has good drainage. Tulips don’t like muggy ground because it will rot their bulb. If you suspect that you have poor drainage, try digging a one foot hole and filling it with water. Watch it and if you can see that the water takes a long time to disappear then you have poor drainage.
How To Plant

Prepare your ground with compost and peat moss for taller, larger tulips. Tulips are strong and surprisingly withstand poor soil but they will be smaller and less vigorous the poorer the soil is.
Plant tulips 8-10 inches deep with the pointy end up. If you are planting tulips in a cut flower garden you will plant the bulbs close together to encourage long stems. Dig a shallow and wide trench and place the bulbs near each other, like eggs in a carton. Then cover the trench/bulbs with soil.
If planting for a seasonal display you will probably not plant nearer than about 8 inches apart. You can space them farther depending on the look and layout you’ve chosen. A bulb planter or just a shovel can be helpful for this method.

Tulip “Foxtrot”
Water
Once your tulips are all nestled in the ground you can water them well and then wait for spring. Before you know it, the world will start to warm and you will start to see little green heads poking up through the soil.
When the green shoots start to emerge be sure to keep them hydrated. You can also feed them with a flower fertilizer as they work to establish for more vigorous flowers.
Harvest
If you are growing for cut flowers you will cut them when the bud has just started to color. Place in a clean vase in room temperature water and you can feed with flower food. If you need them to store for a longer period you can pull them from the ground, leaving them connected to the bulb. This will continue to feed the flower and can preserve flowers up to 3 weeks in cold storage.
If you are growing for landscape use, after the blooms have faded it is best to let the foliage dry out. As the foliage fades it will feed the bulb and prepare it to go dormant beneath the ground until next year.

Planting In Pots
Tulips can easily be grown in pots. This is a good idea if deer are a big problem in your area so that you can move pots to an enclosed or protected area. Deer love tulips and it can be very difficult to keep them from eating them. Plant in a pot 8-10 inches deep and ensure that they have sufficient exposure to water in the winter and spring.
Vase Life
Tulips have a long vase life if picked at the right time and often will last a week and a half in the vase. Adding flower preservative will extend vase life the most. Hydrate well to encourage upright stems and be aware that tulips tend to elongate after a few days so tuck them down in a little further if working with them in arrangements.

Article By Sara Haller (Halden Co-Founder)