Paper mache Christmas characters are fun, cheap and easy Christmas decorations to make. It’s a great way to recycle newspapers or scrap paper and you can also fill them with sweets to turn into pinatas for party games. or use them as story props.

All you need to make the base for your paper mache creations is some newspaper (non glossy magazines, catalogues and telephone directories will also work.), PVA glue, two balloons and paint.
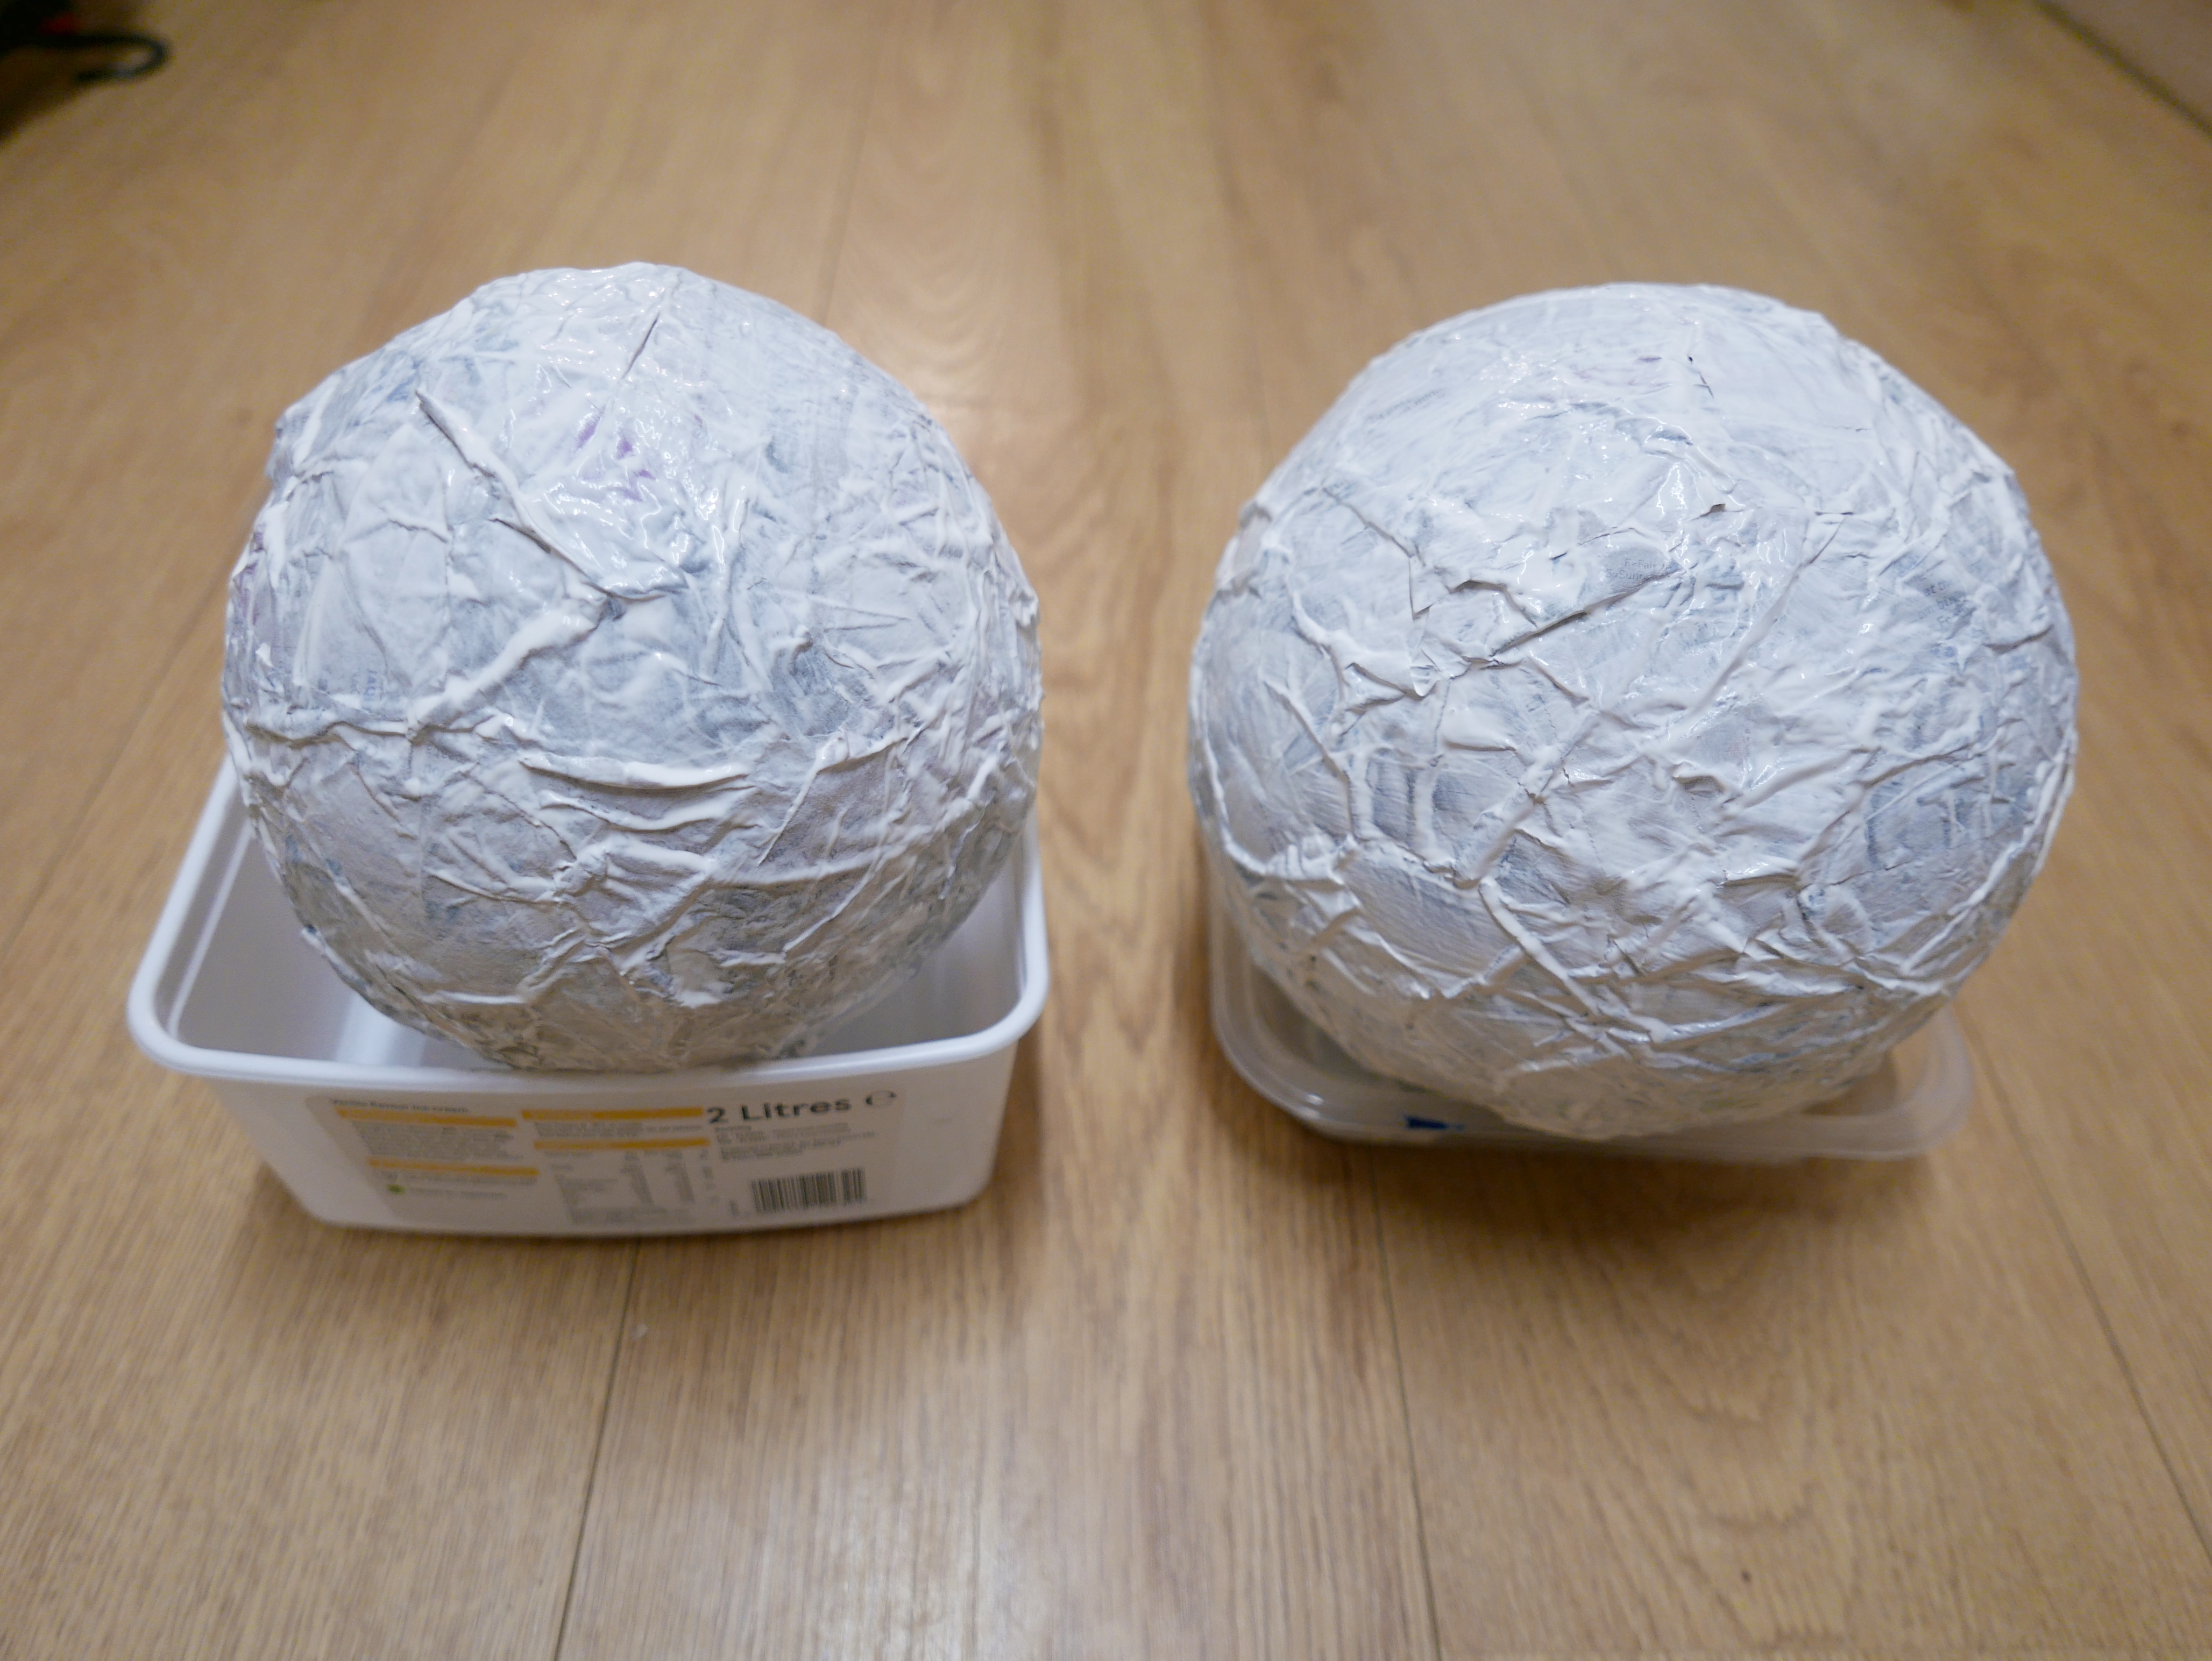
If you are making a snowman you will need two balloons. One of the balloons needs to be blown up bigger than the other to form the body. The smaller balloon will form your snowman head.
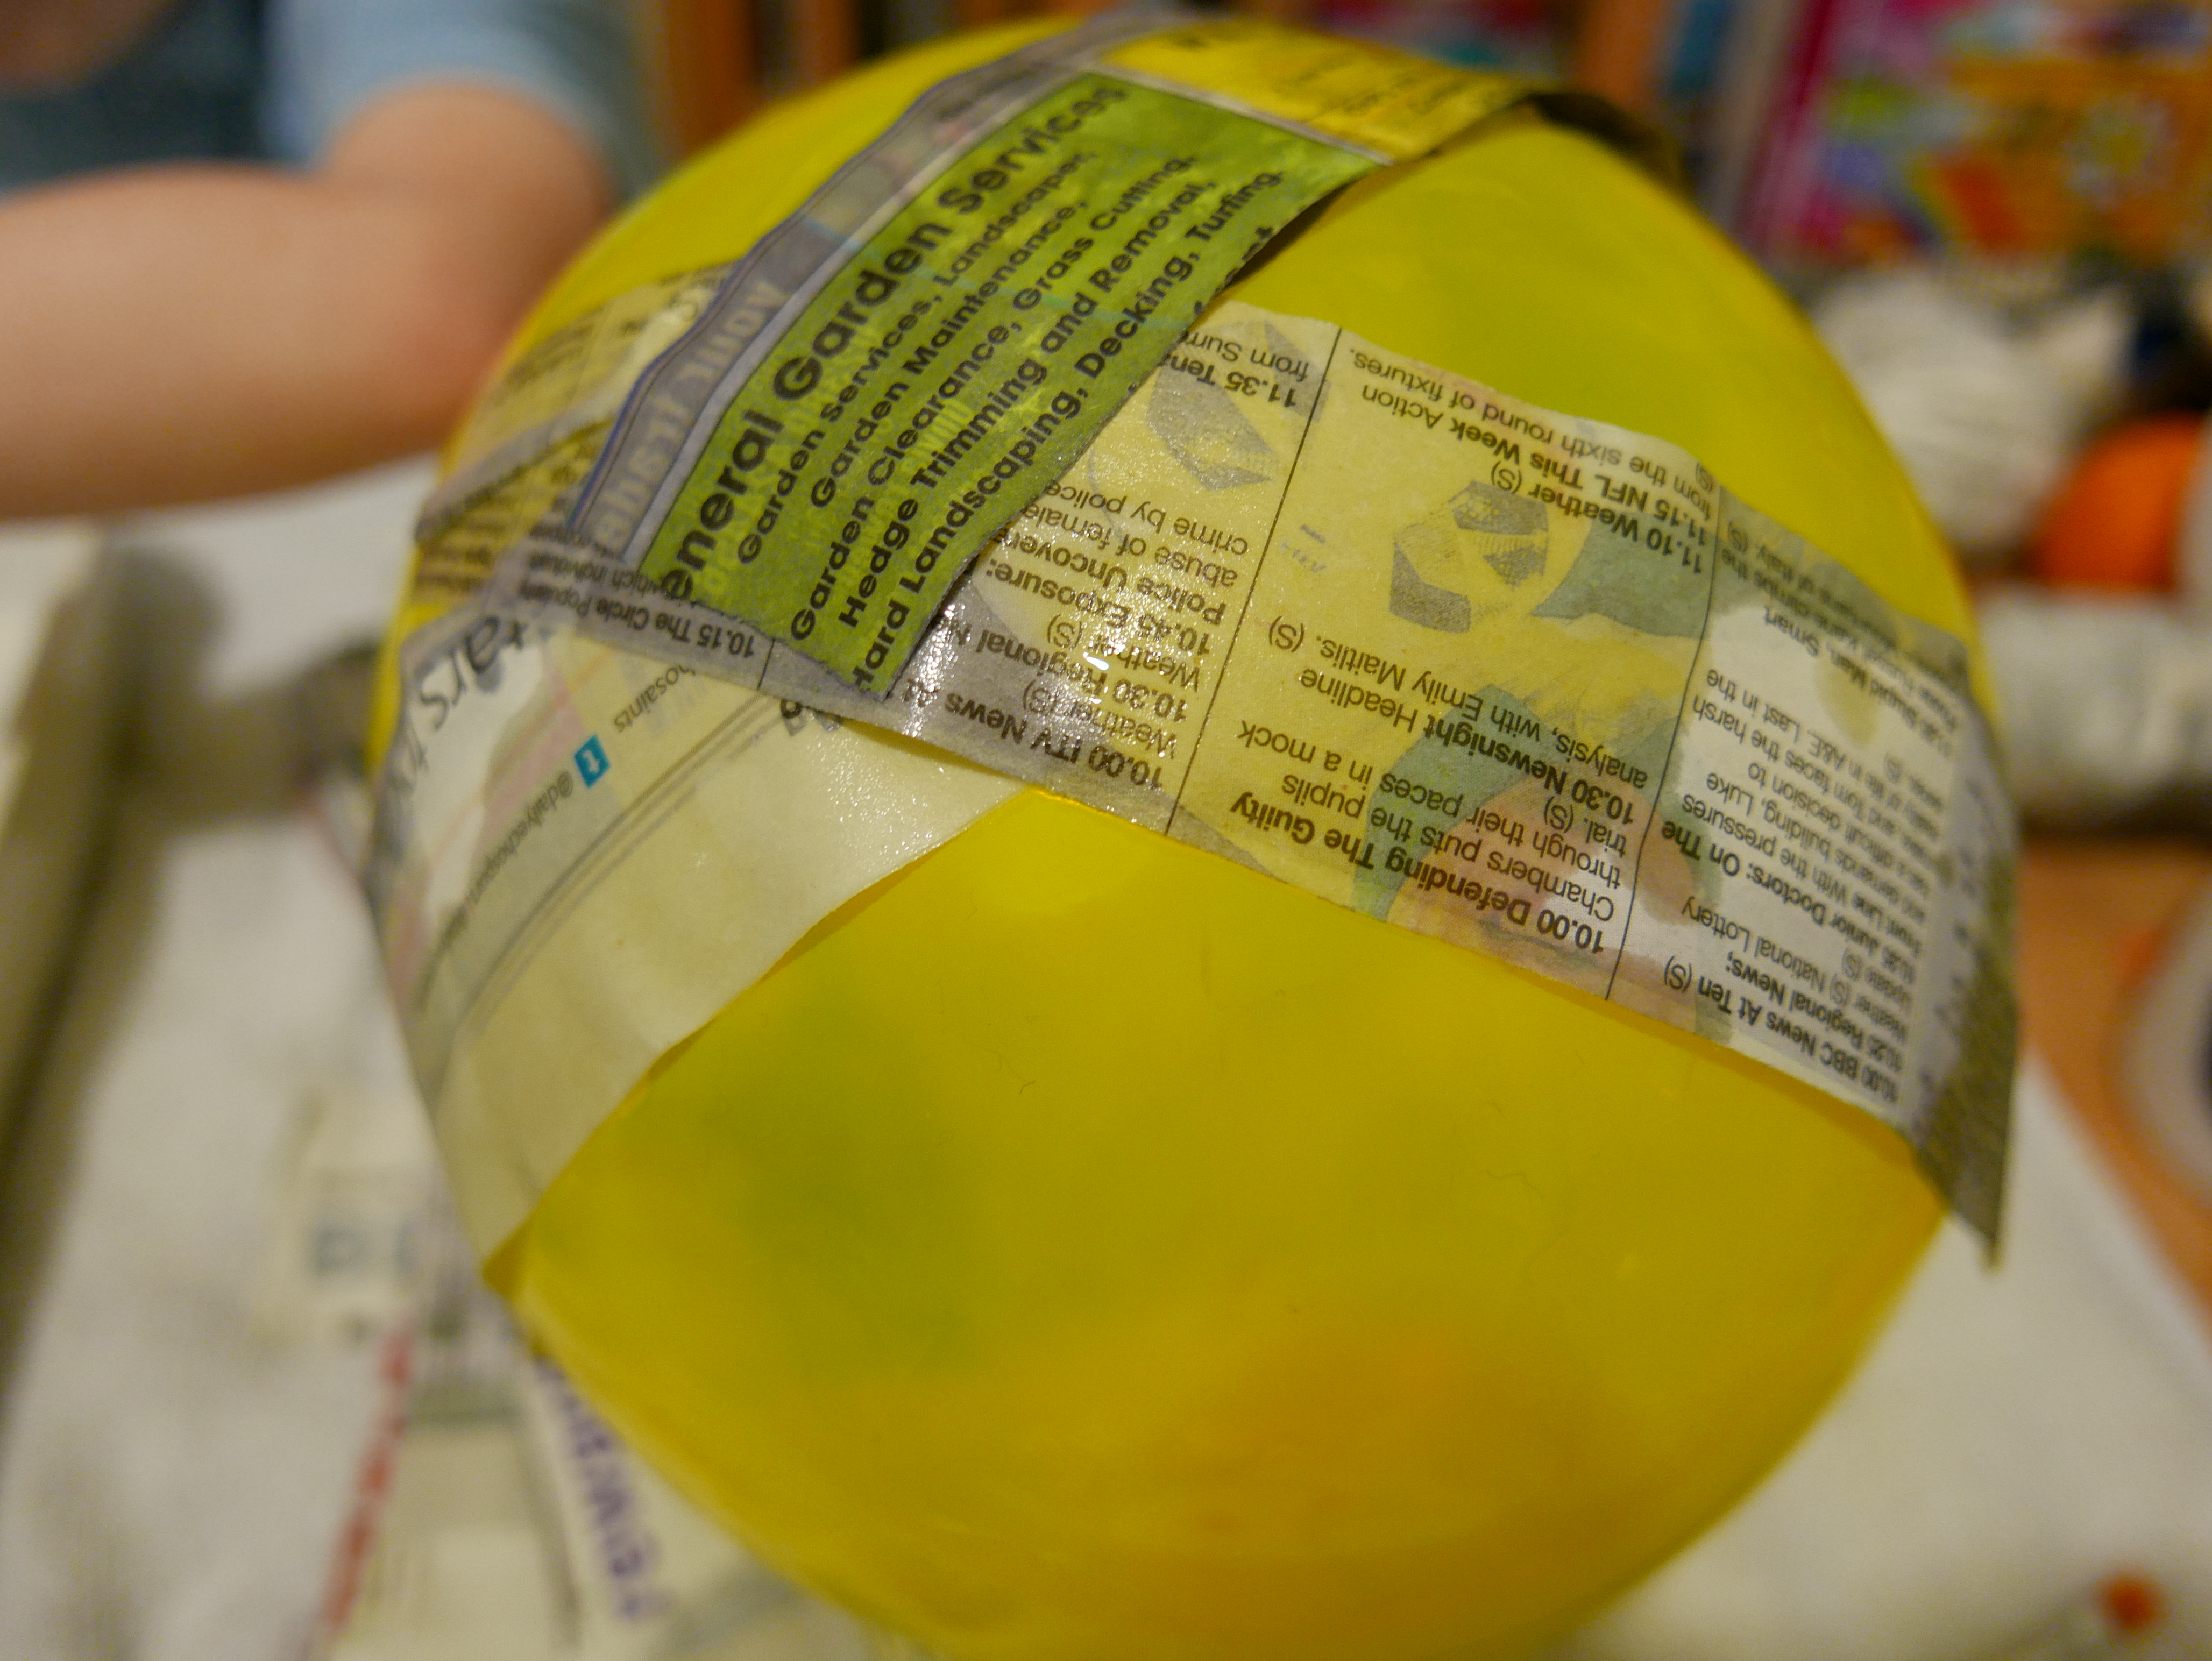
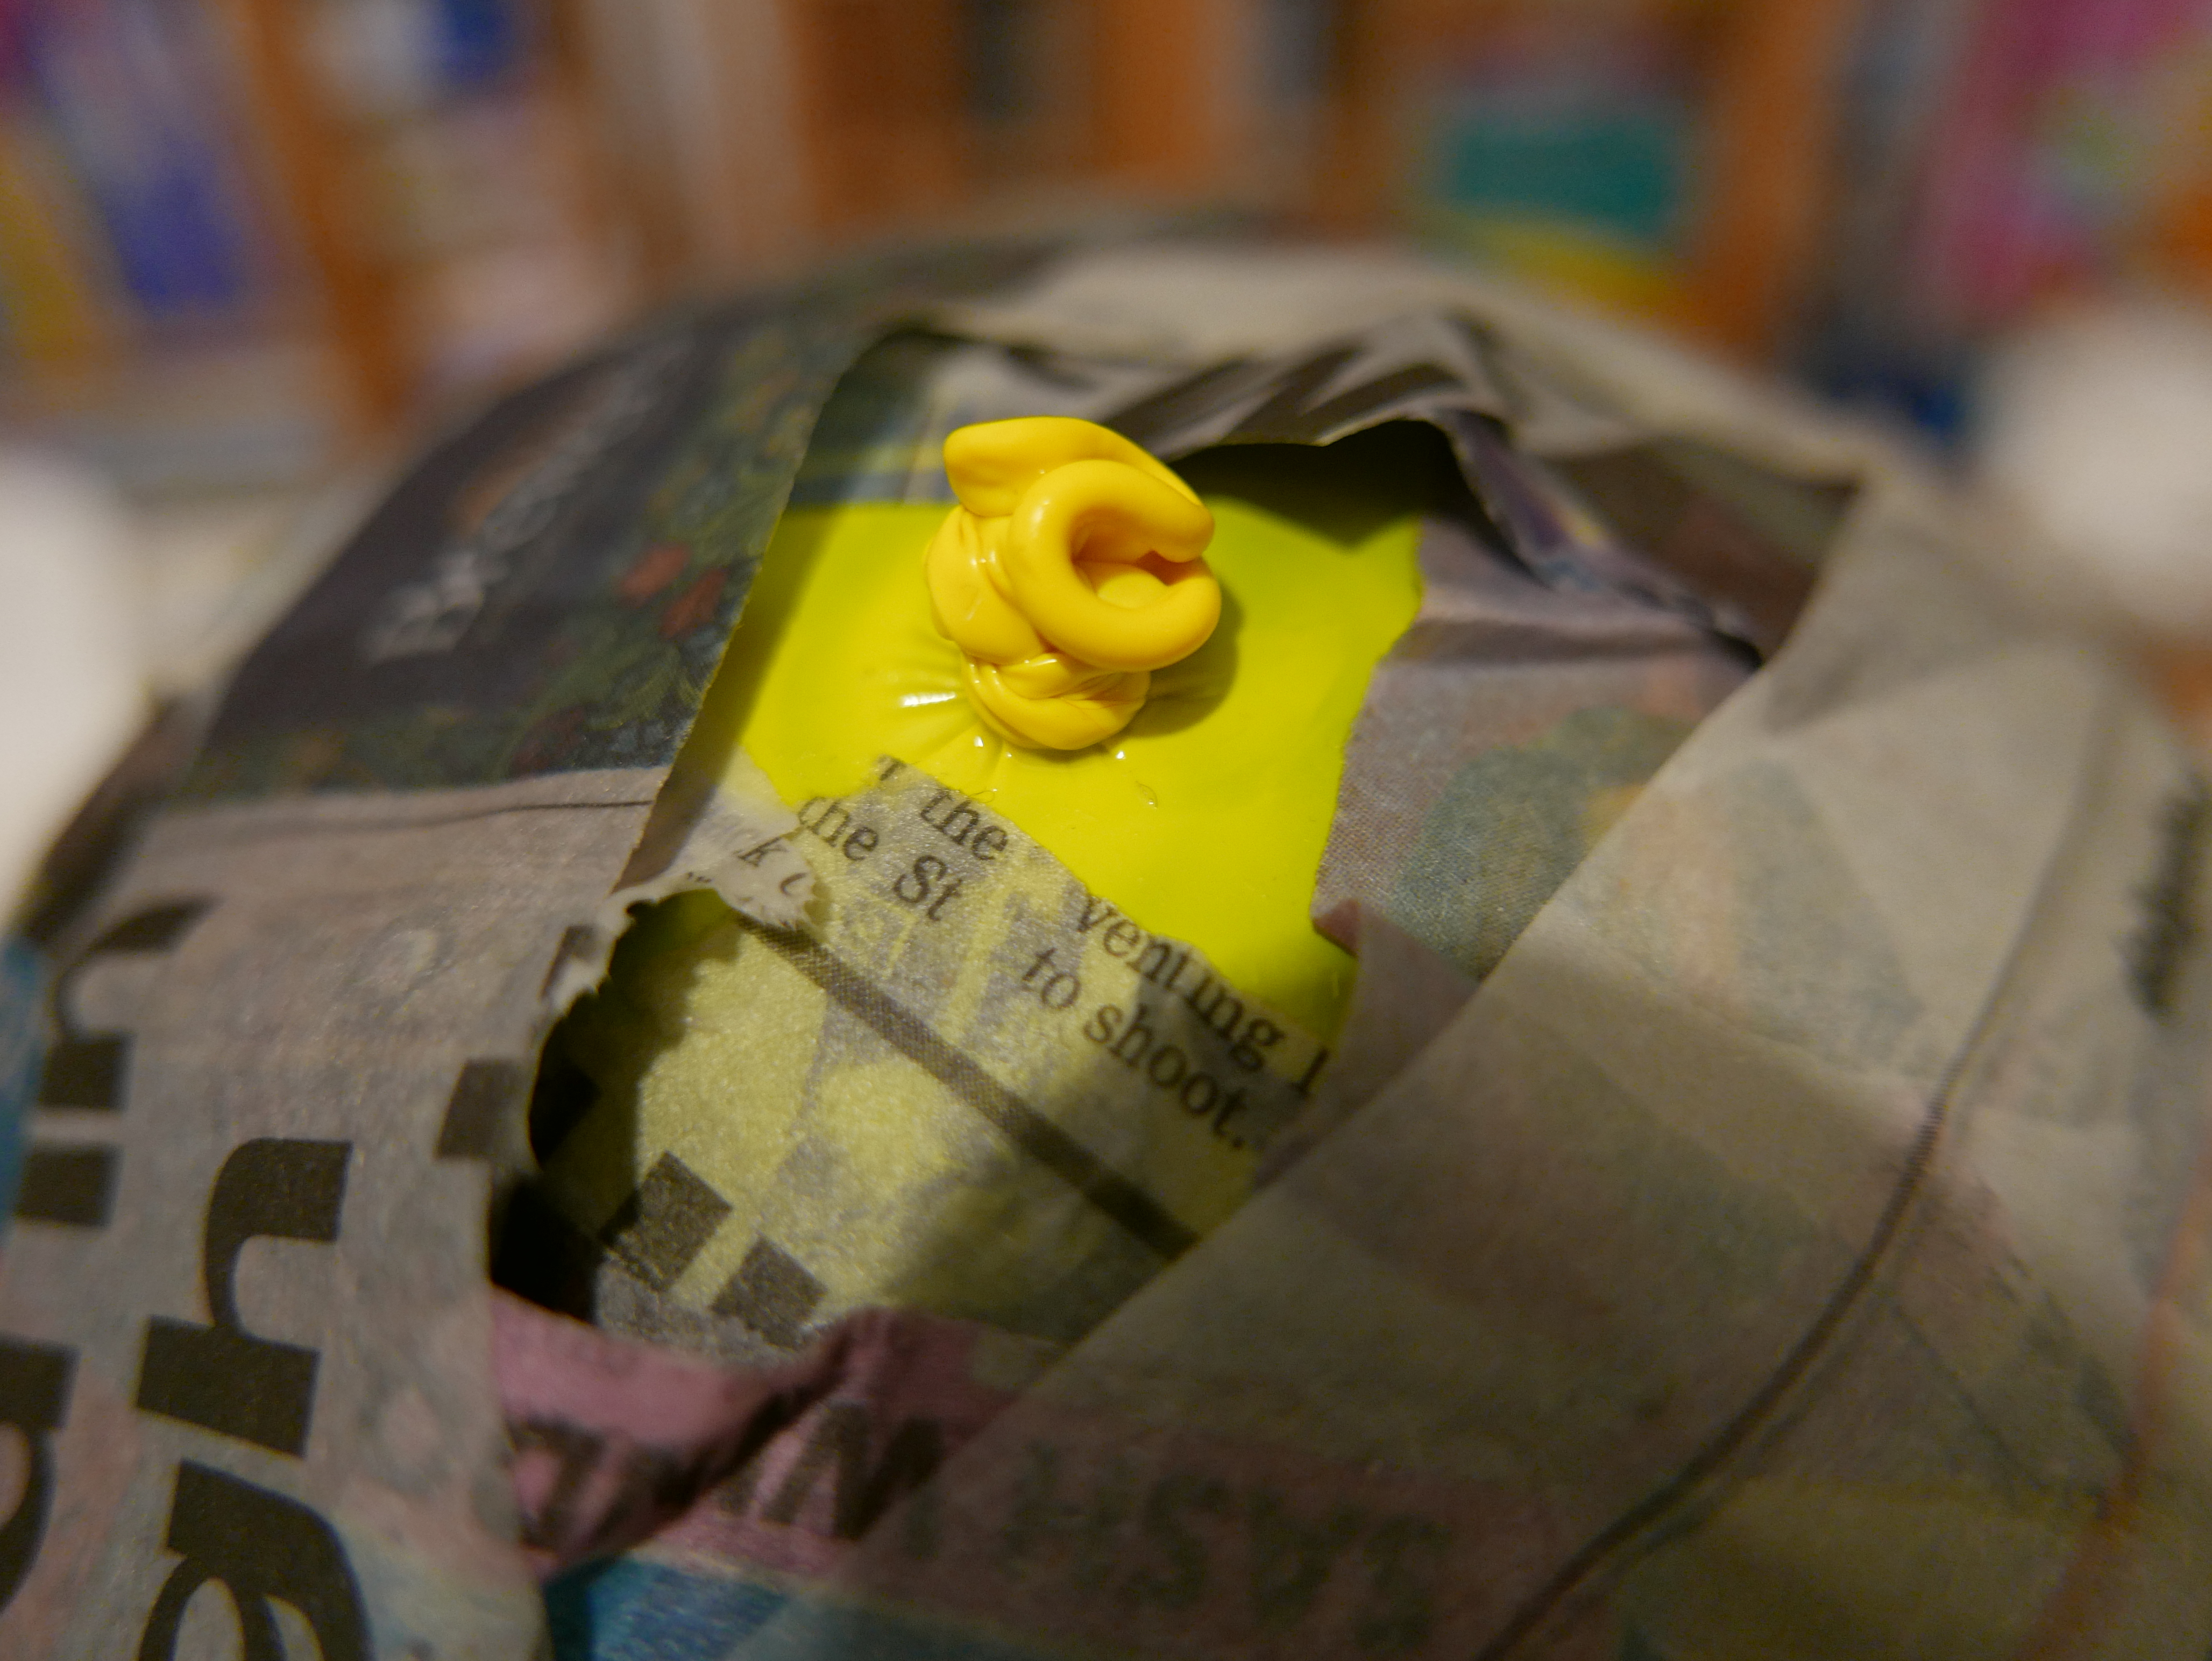
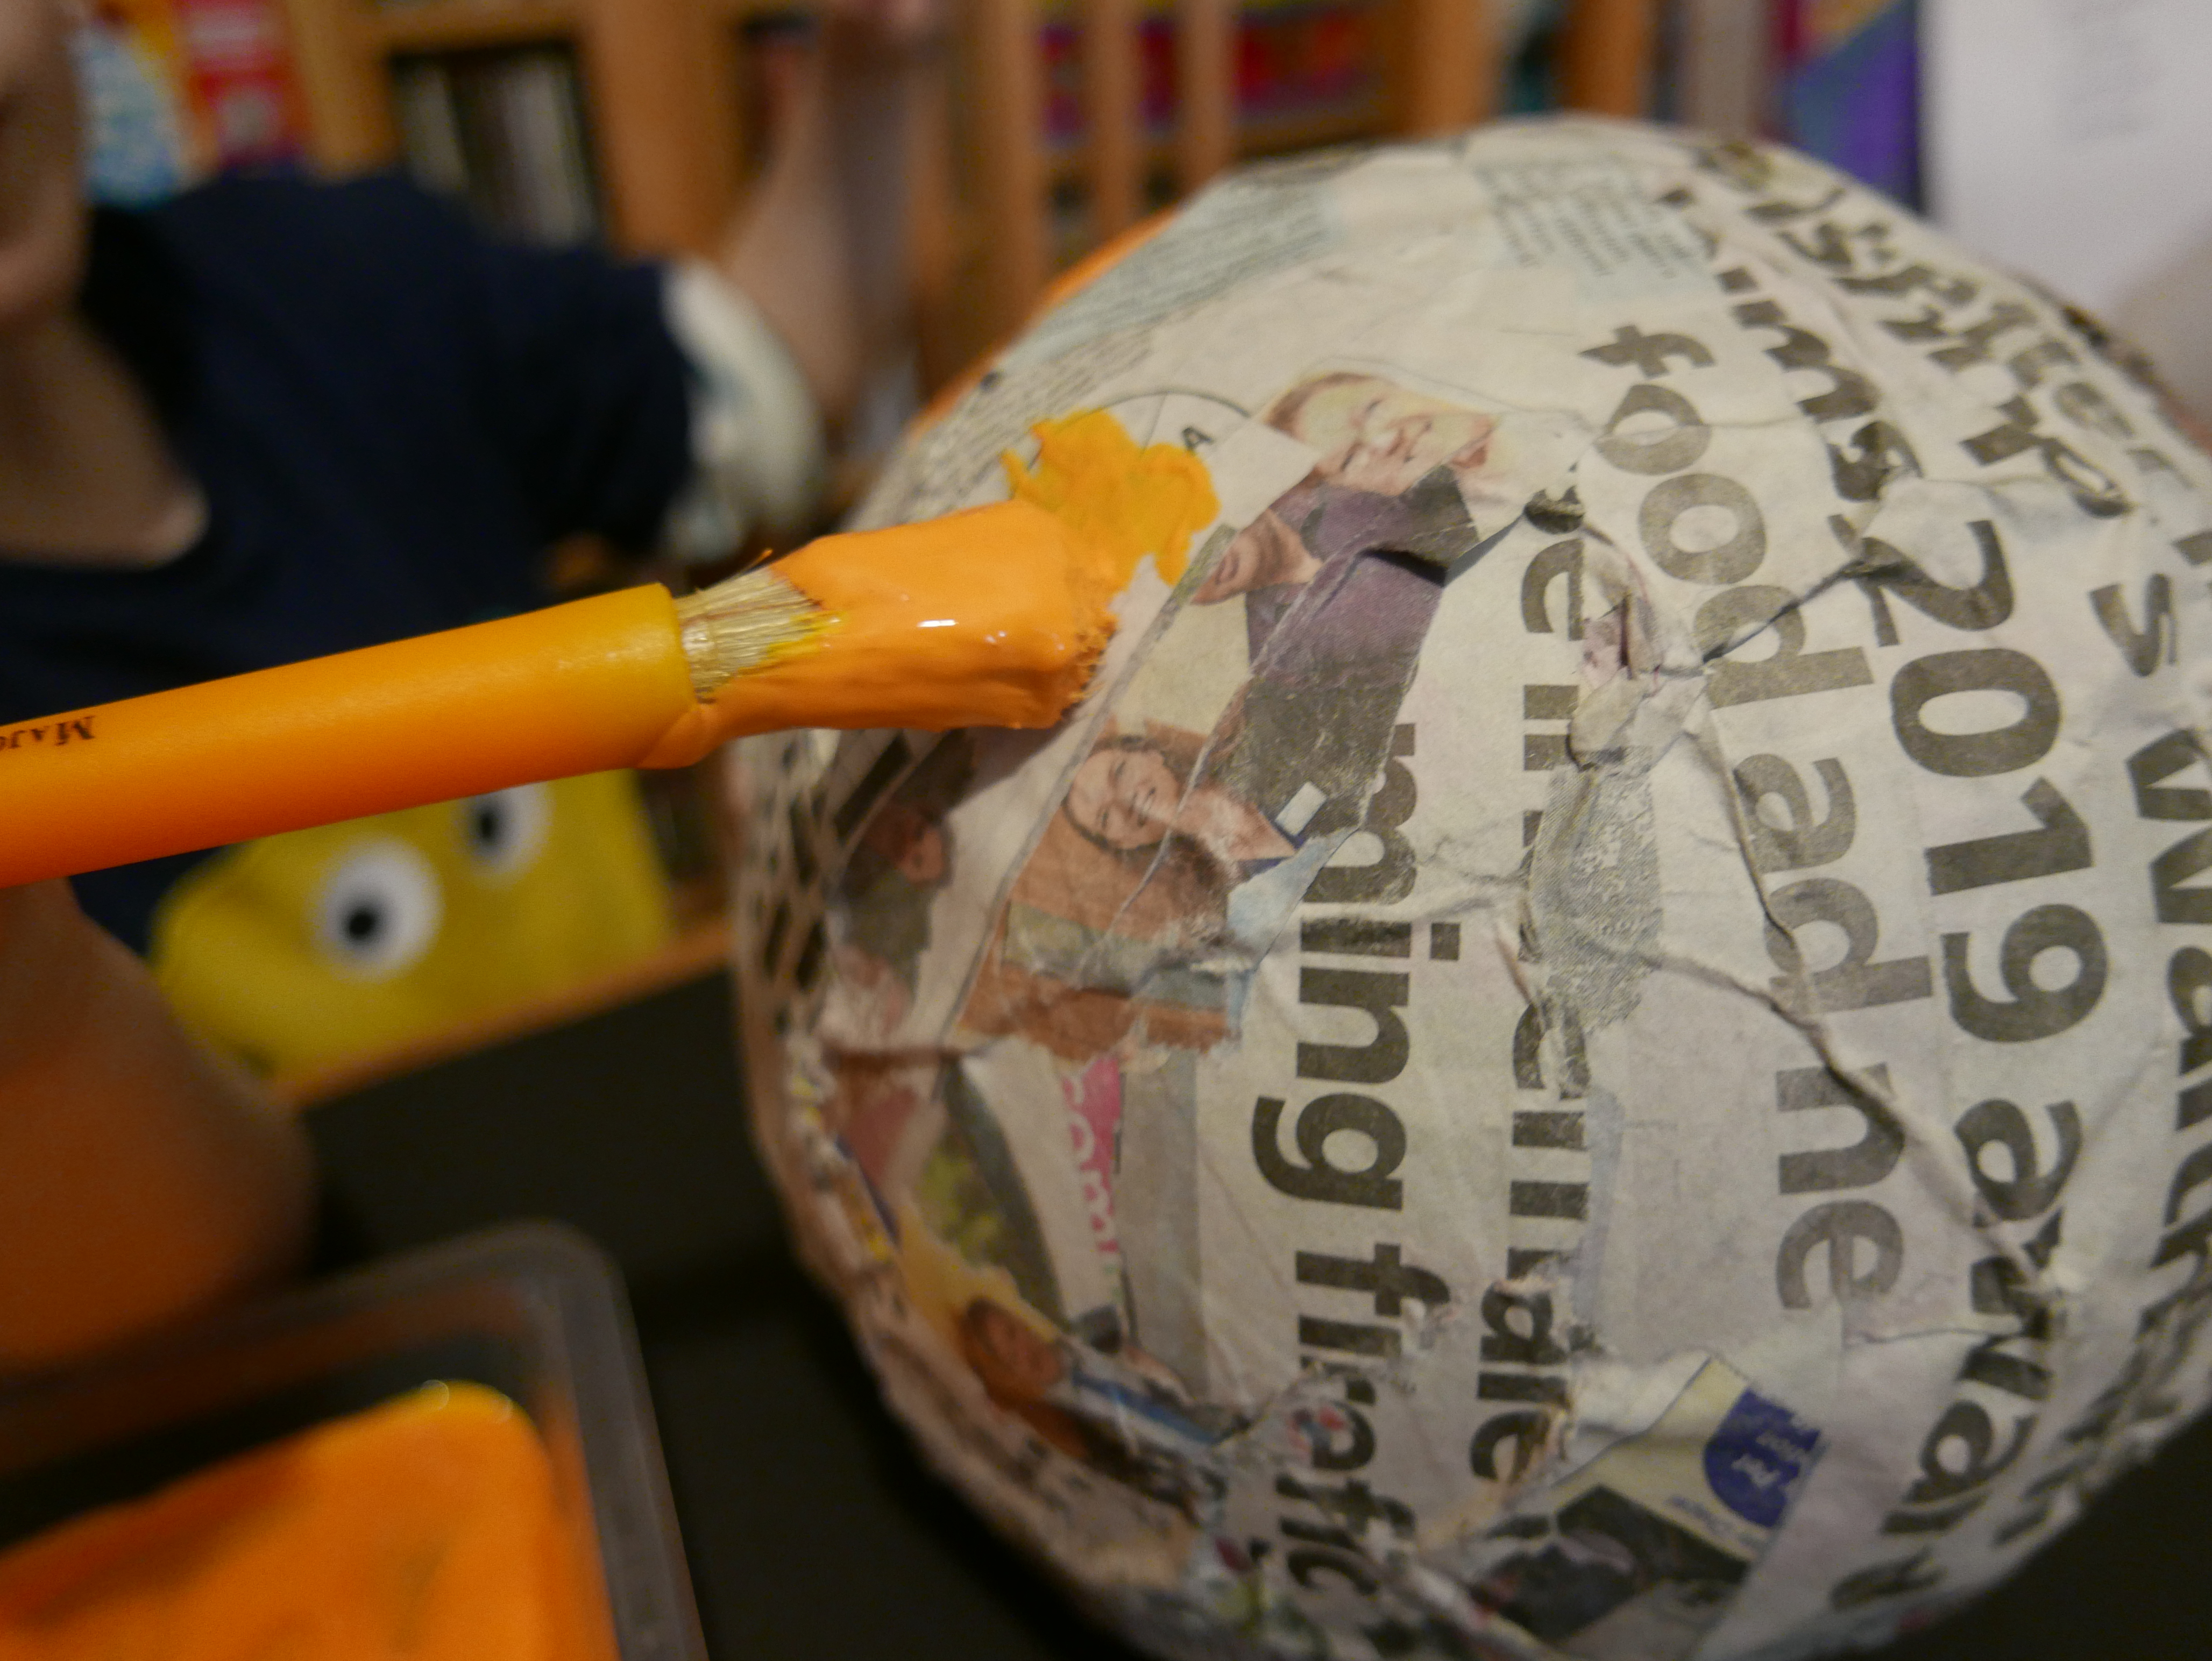
To make the paper mache you will need to mix PVA glue and water together in a tray or bowl to make a thick paste. Then cut the newspaper or magazines, catalogues and telephone directories into strips and then dip the strips into the paste.
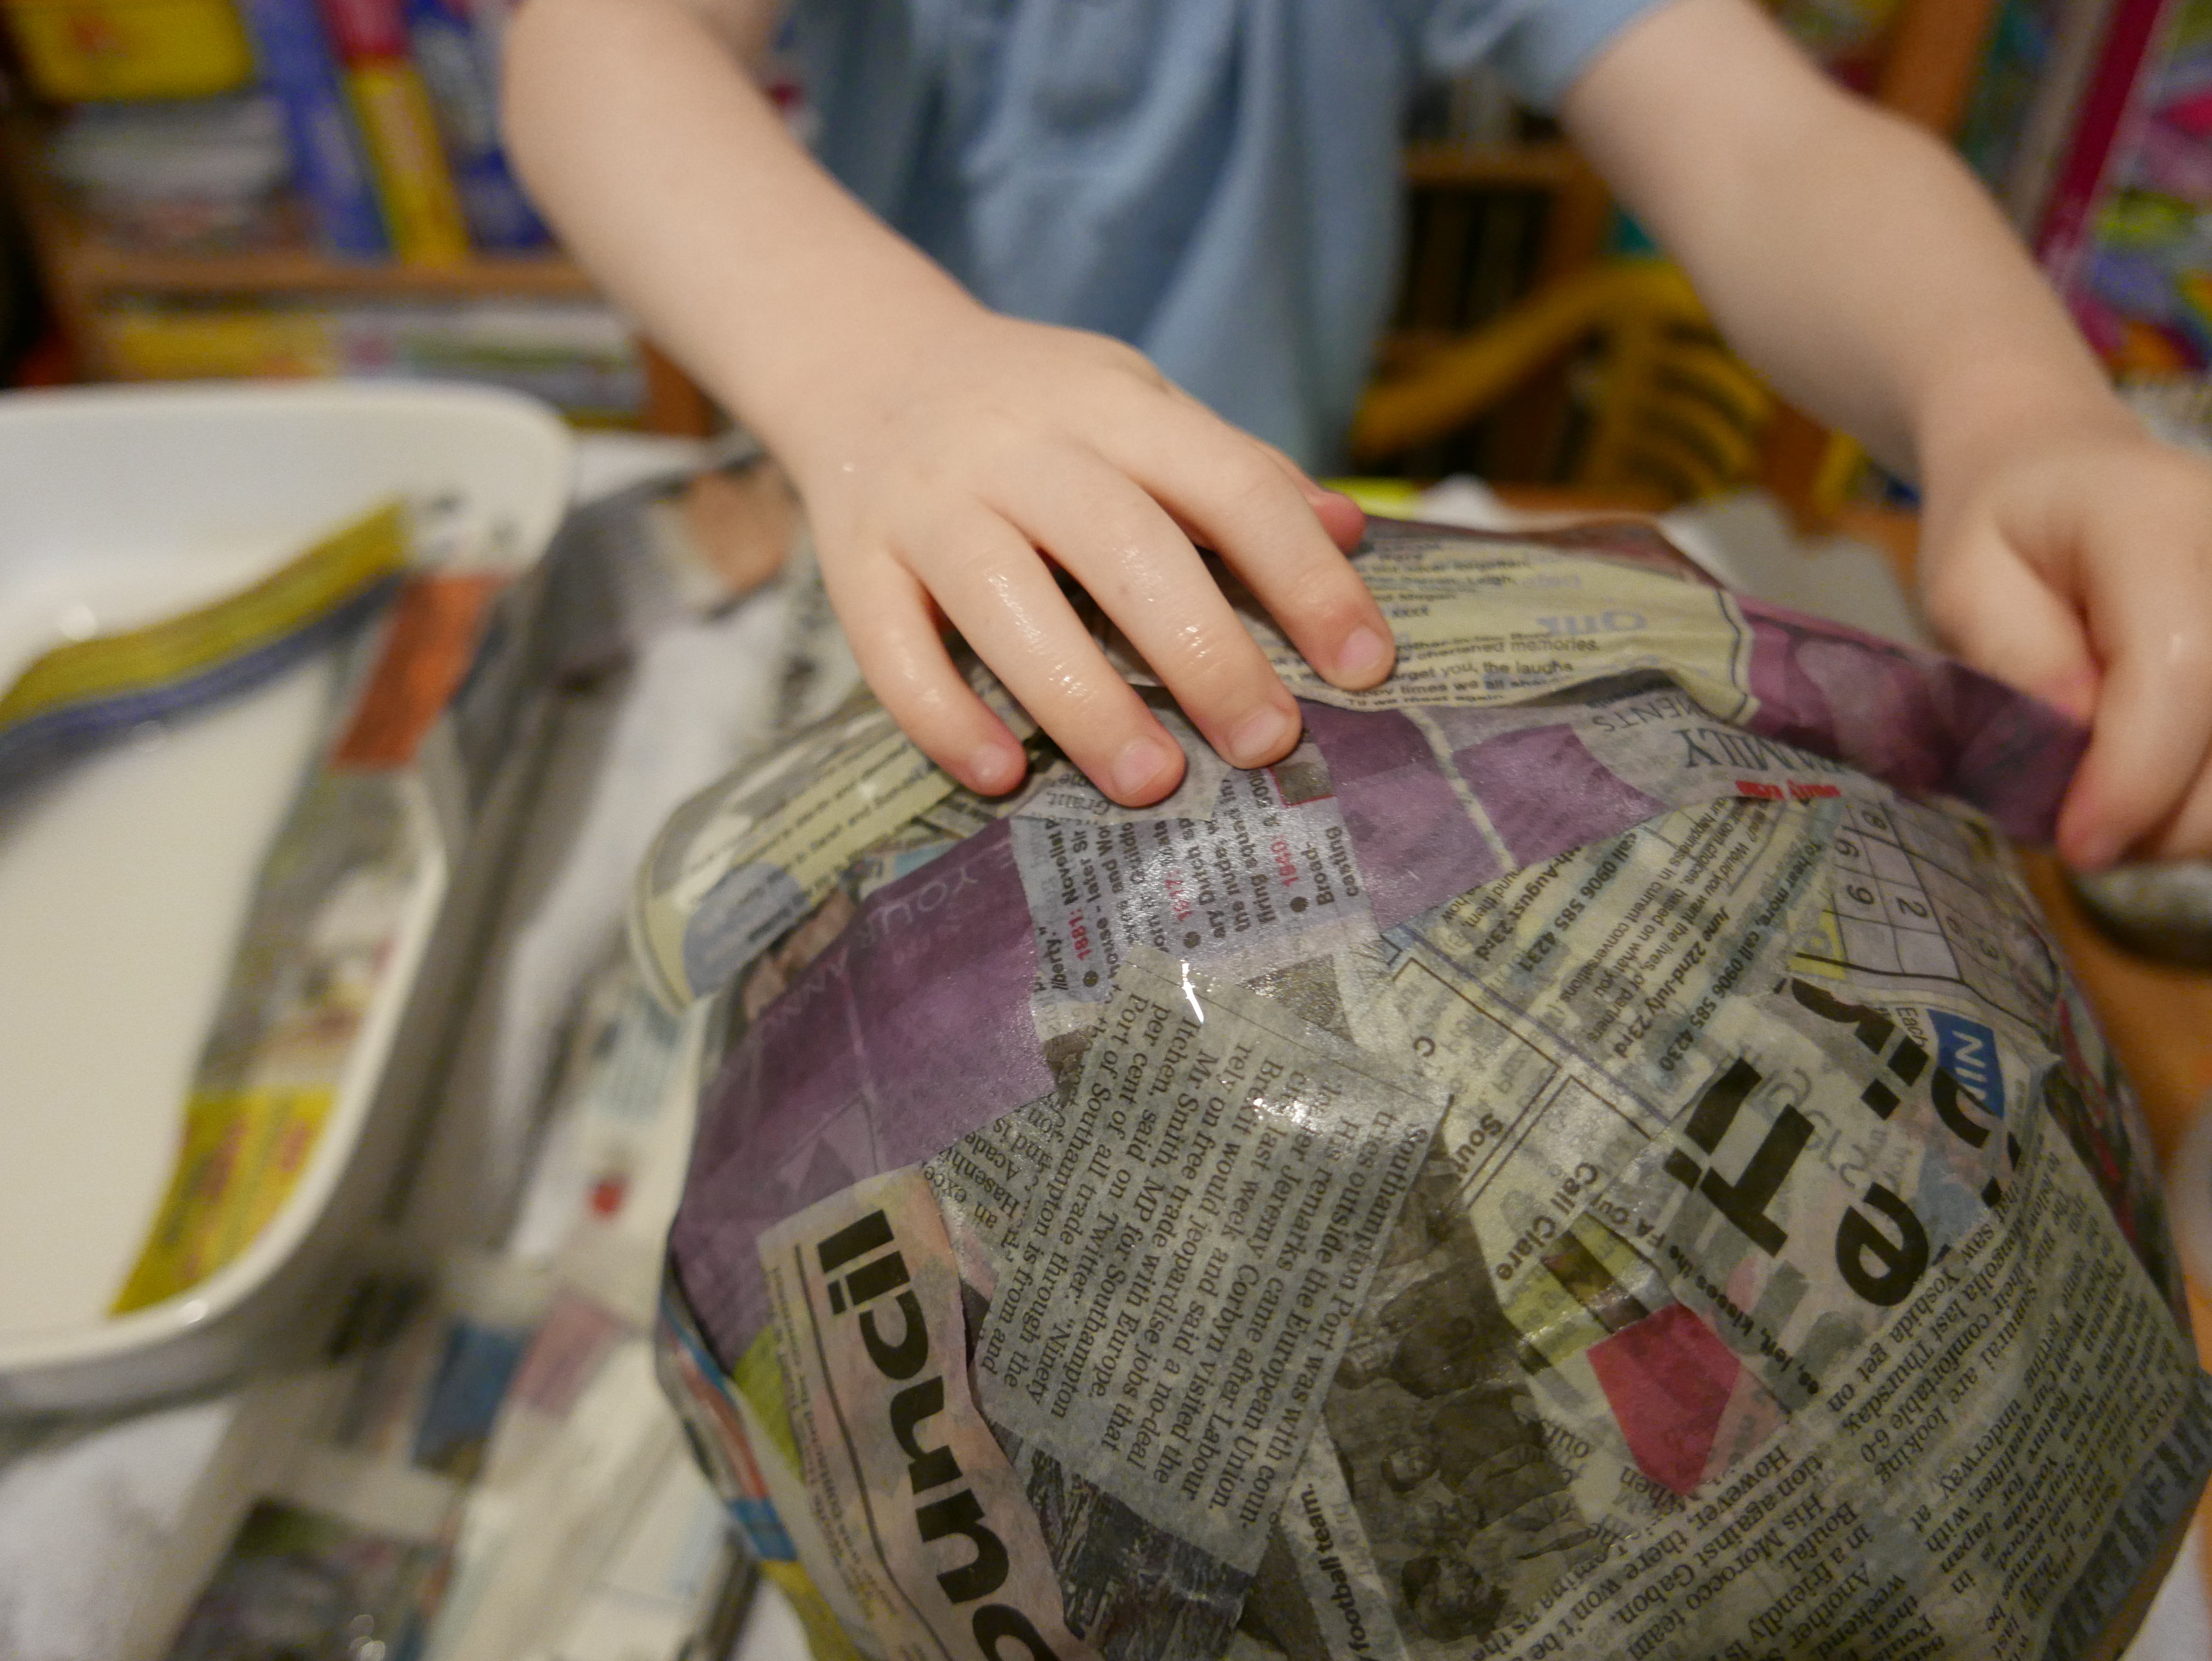
Drape the strips of paper over the balloons, slowly covering and layering the strips over the surface of the balloon until everything but the knot at the base is covered. You can cover the balloon in as many layers as you like, the more layers you use the sturdier the final decorations will be. But bear in mind it will also take longer to dry.
Now you need to leave your paper mache balloons to dry completely for a day or two. When everything is dry you can either pop the balloons to leave hollow paper mache shells. Or leave them in to keep the shape whilst you paint and add details to your decorations.
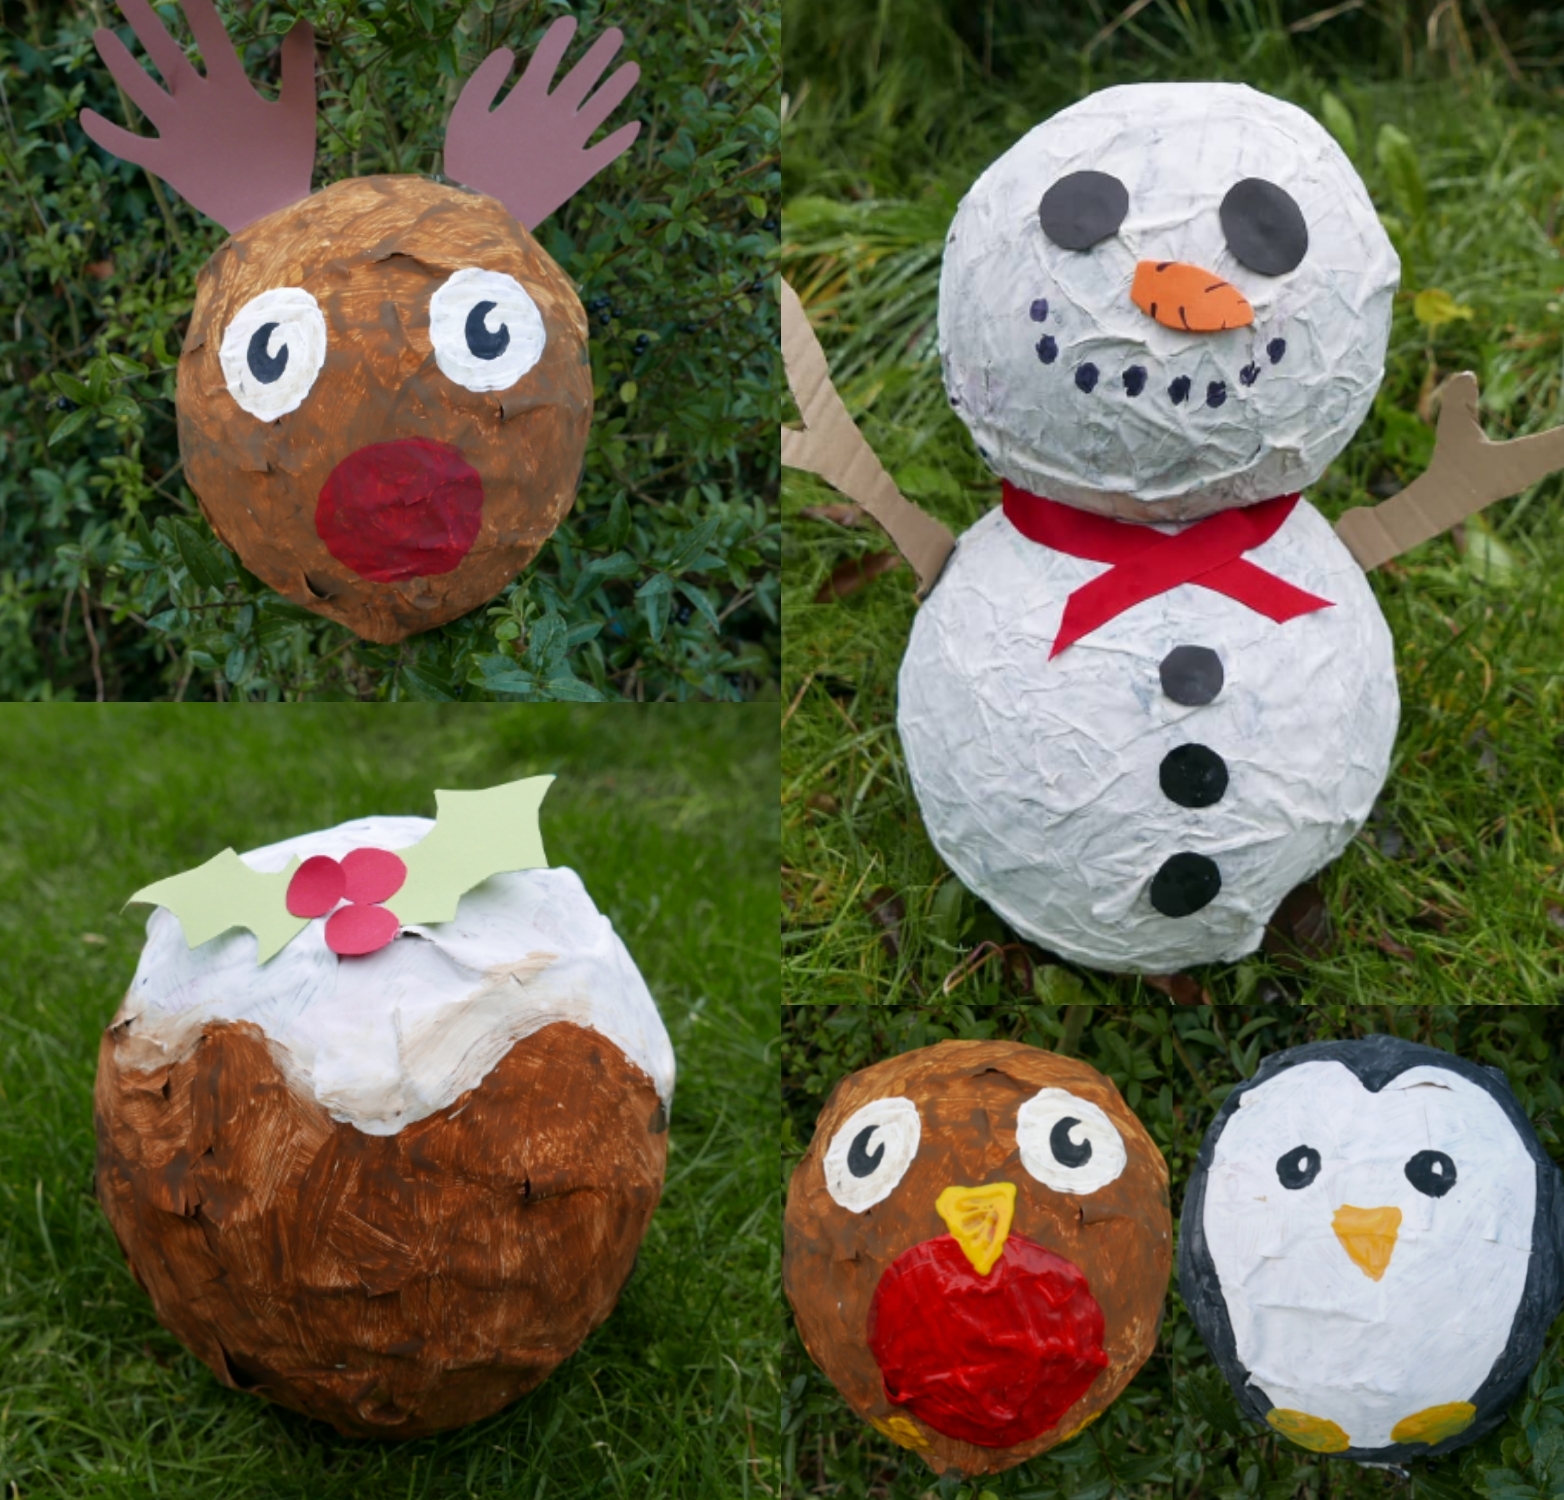
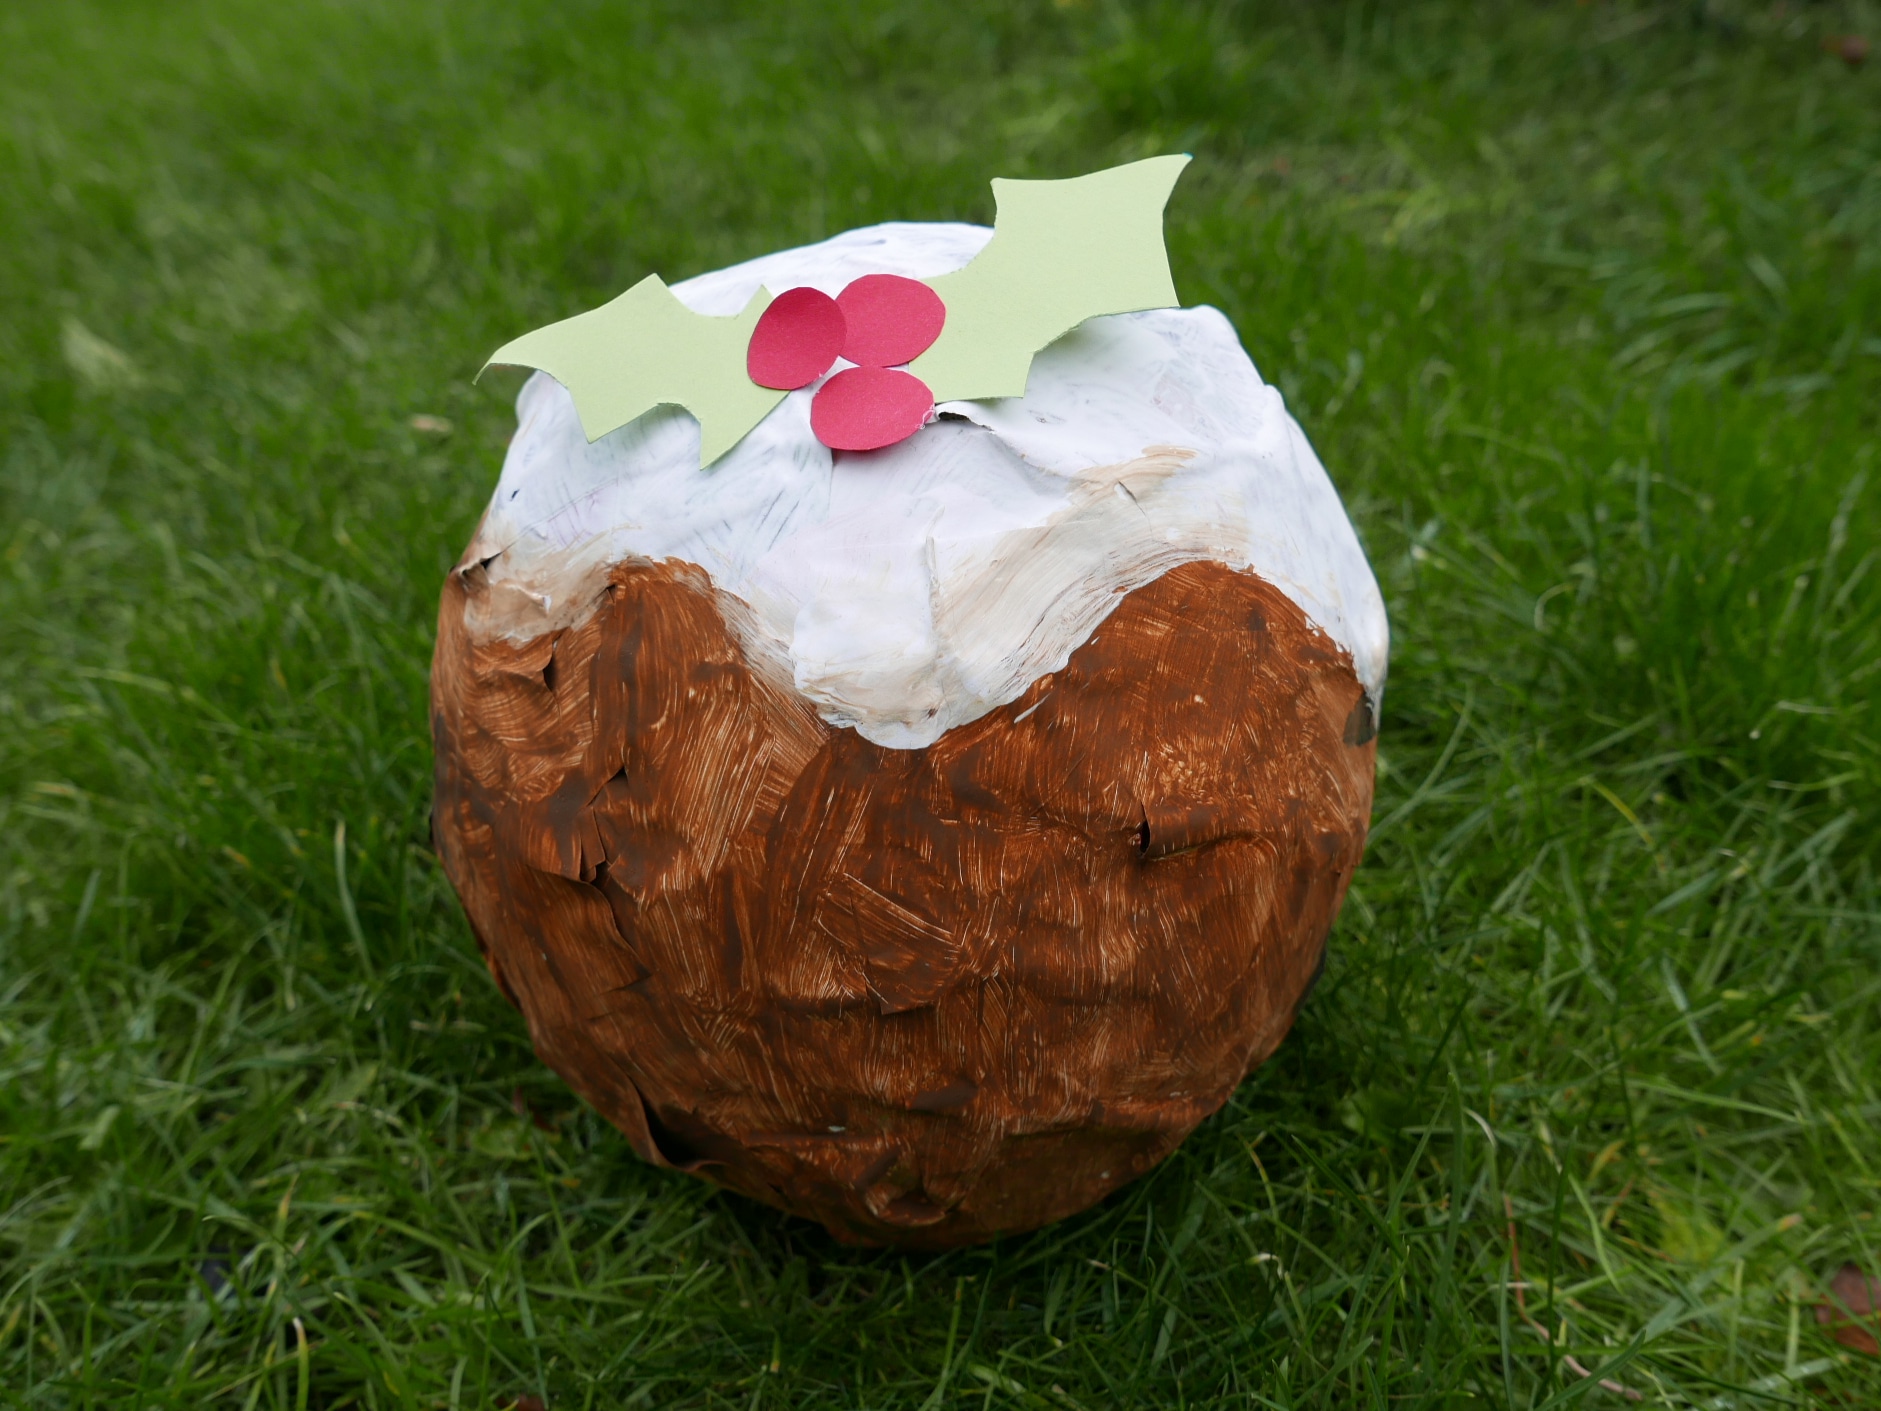
1. Paper mache Christmas pudding
To make a Christmas pudding you will need one paper mache shell and paint. You can use any paint you like. (simple poster paint worked well for us.) Simply paint the bottom of the Christmas pudding brown and the top white., You can then either paint, draw or stick on holly berries and leaves at the top of the pudding. You can then use your Christmas pudding as a decoration, as a story prop or fill it with sweets and use it as a Christmas pinata for party games.
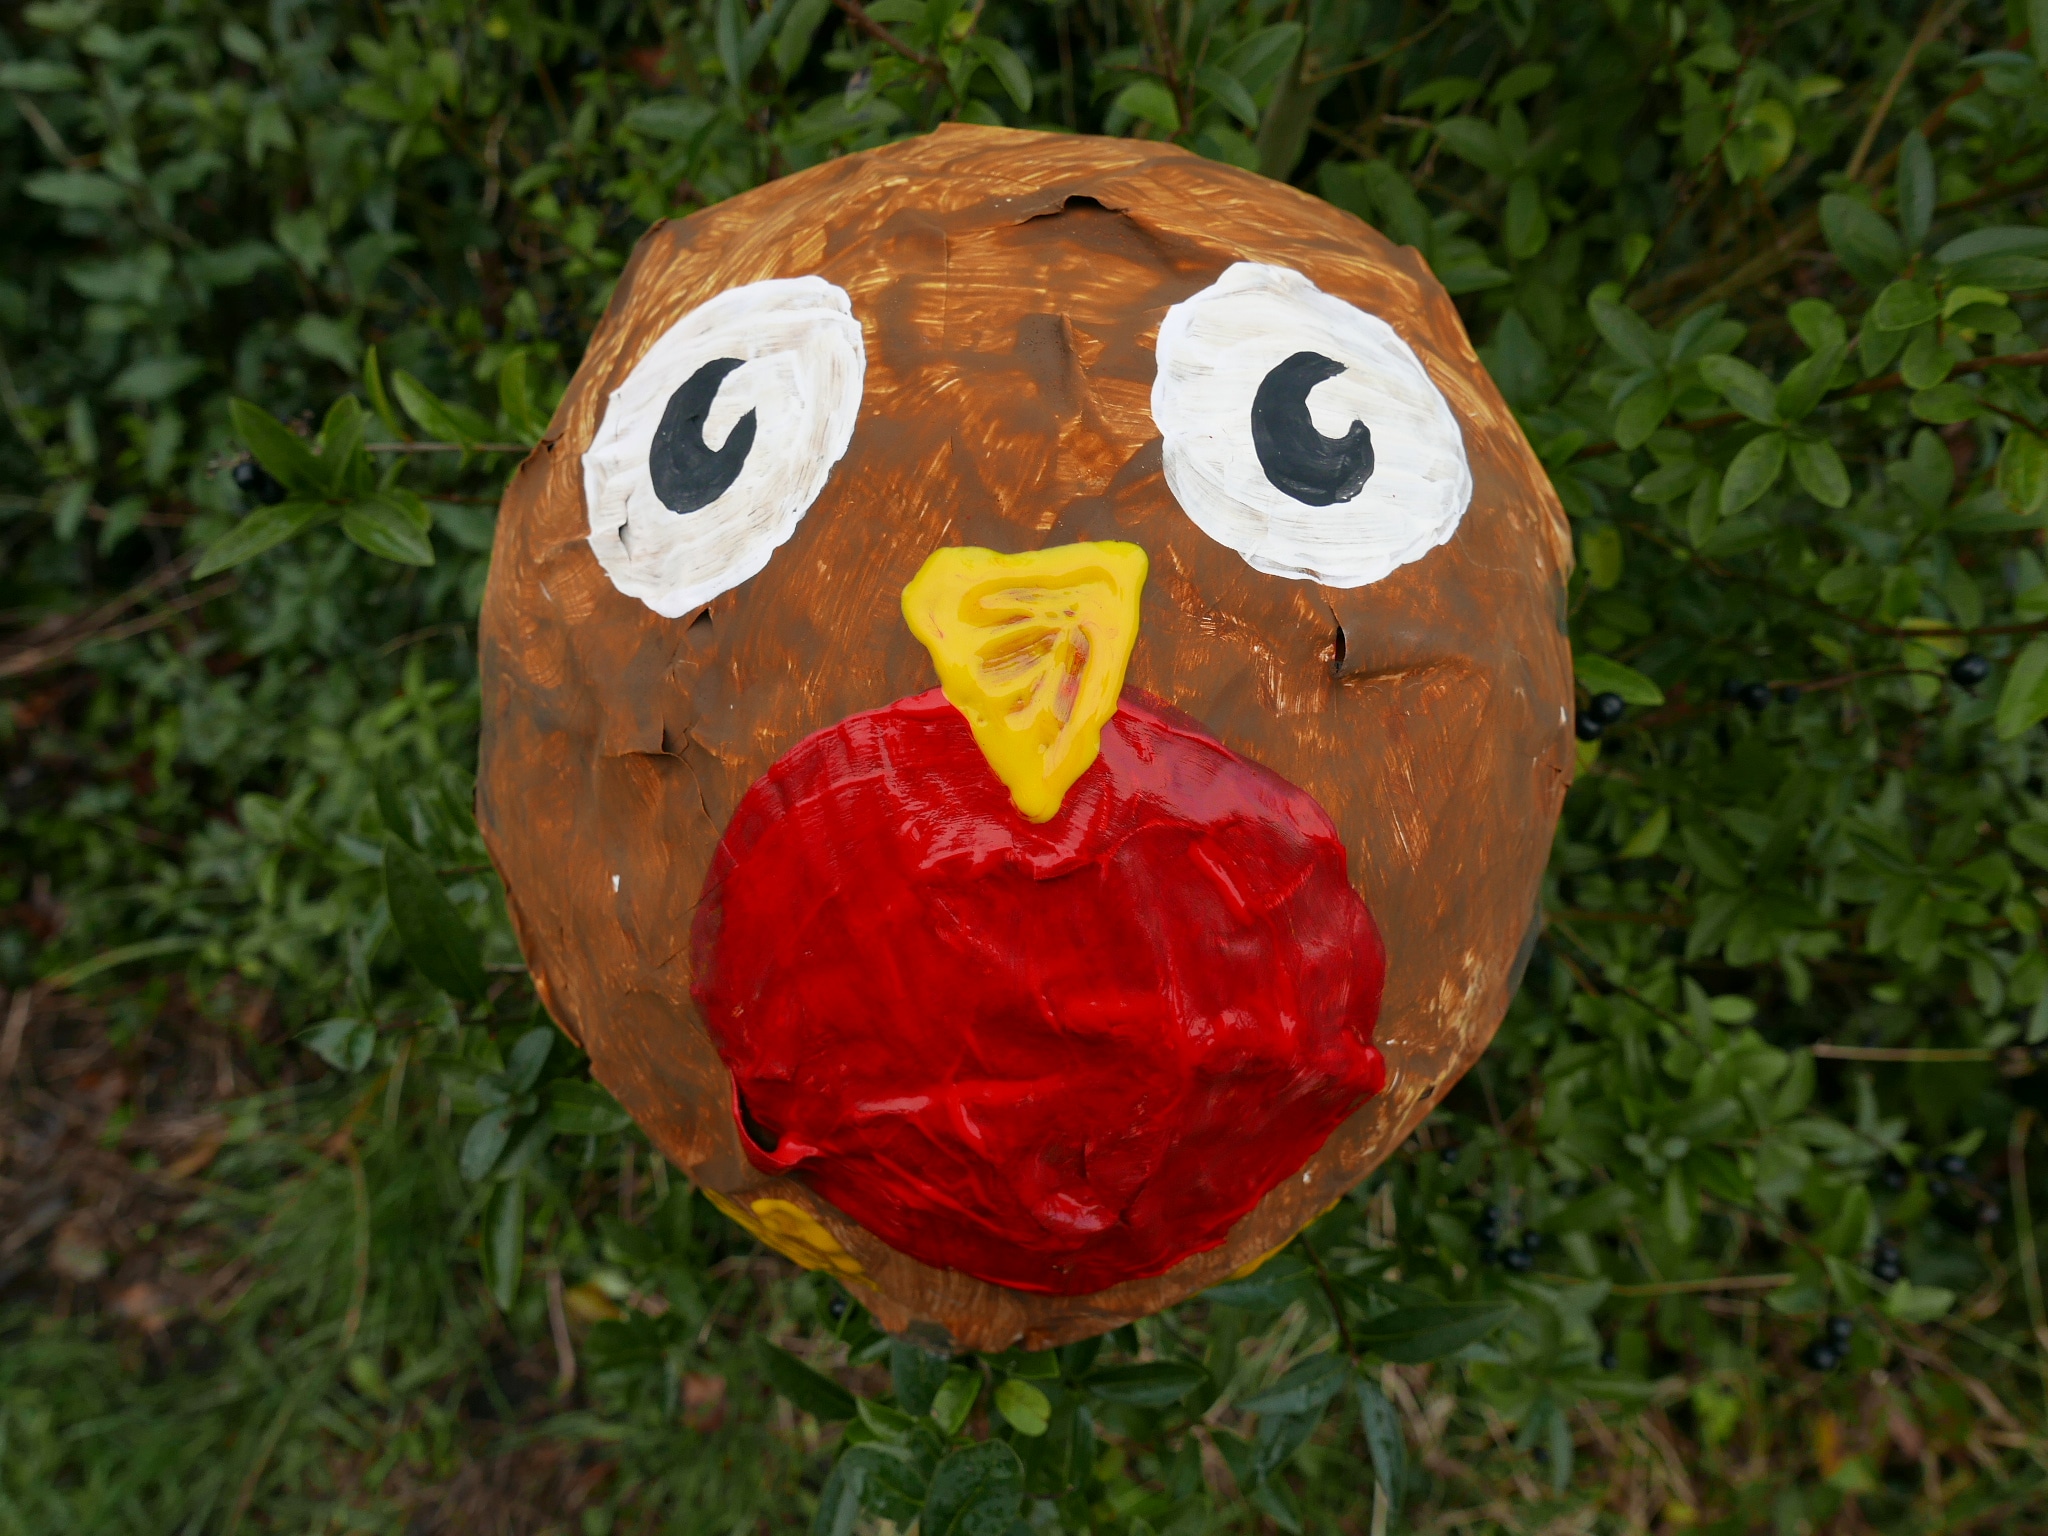
2. Paper mache Robin
To make a robin you will need one paper mache shell and paint. You can use any paint you like. (simple poster paint worked well for us.) Simply paint the the paper mache shell brown and then leave it to dry, You can then either paint, draw or stick on the robins, eyes, red breast beak and feet. You can then use your robin as a decoration, as a story prop or fill it with sweets and use it as a Christmas pinata for party games.
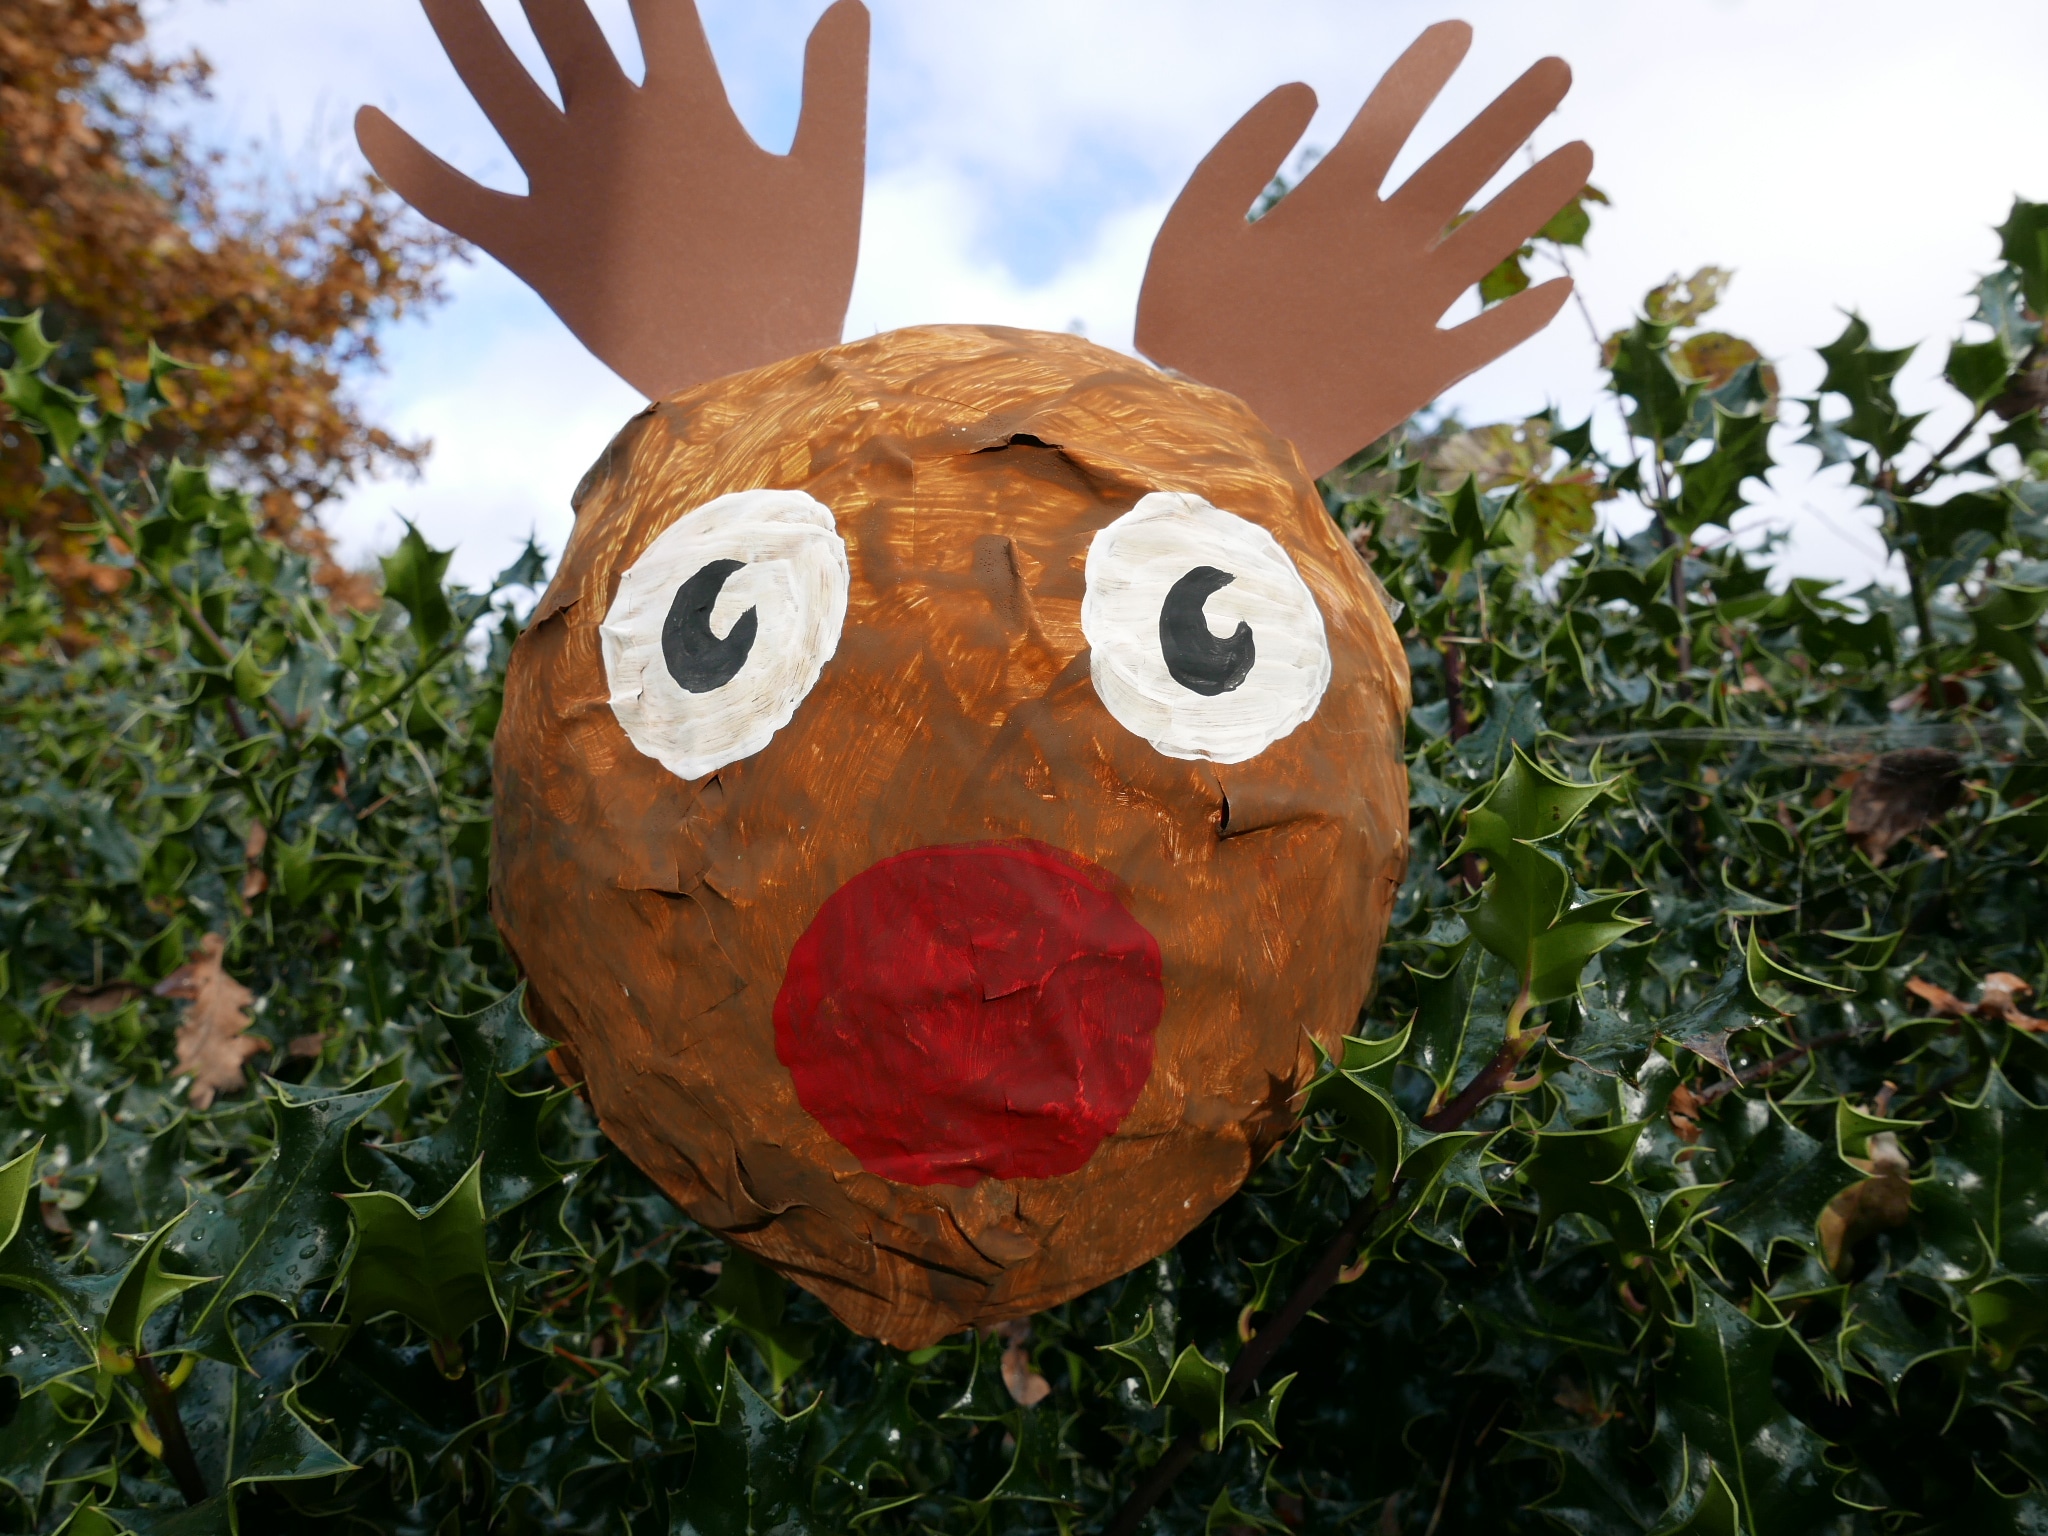
3. Paper mache Reindeer
To make a reindeer you will need one paper mache shell and paint. You can use any paint you like. (simple poster paint worked well for us.) Simply paint the the paper mache shell brown and then leave it to dry, You can then either paint, draw or stick on the reindeers, eyes, nose and antlers. You can easily make some cute antlers by drawing the outline of your hands and fingers on card or brown paper to cut out. How about using your reindeer as a decoration, story prop or filling it with sweets and to use as a Christmas pinata for party games.
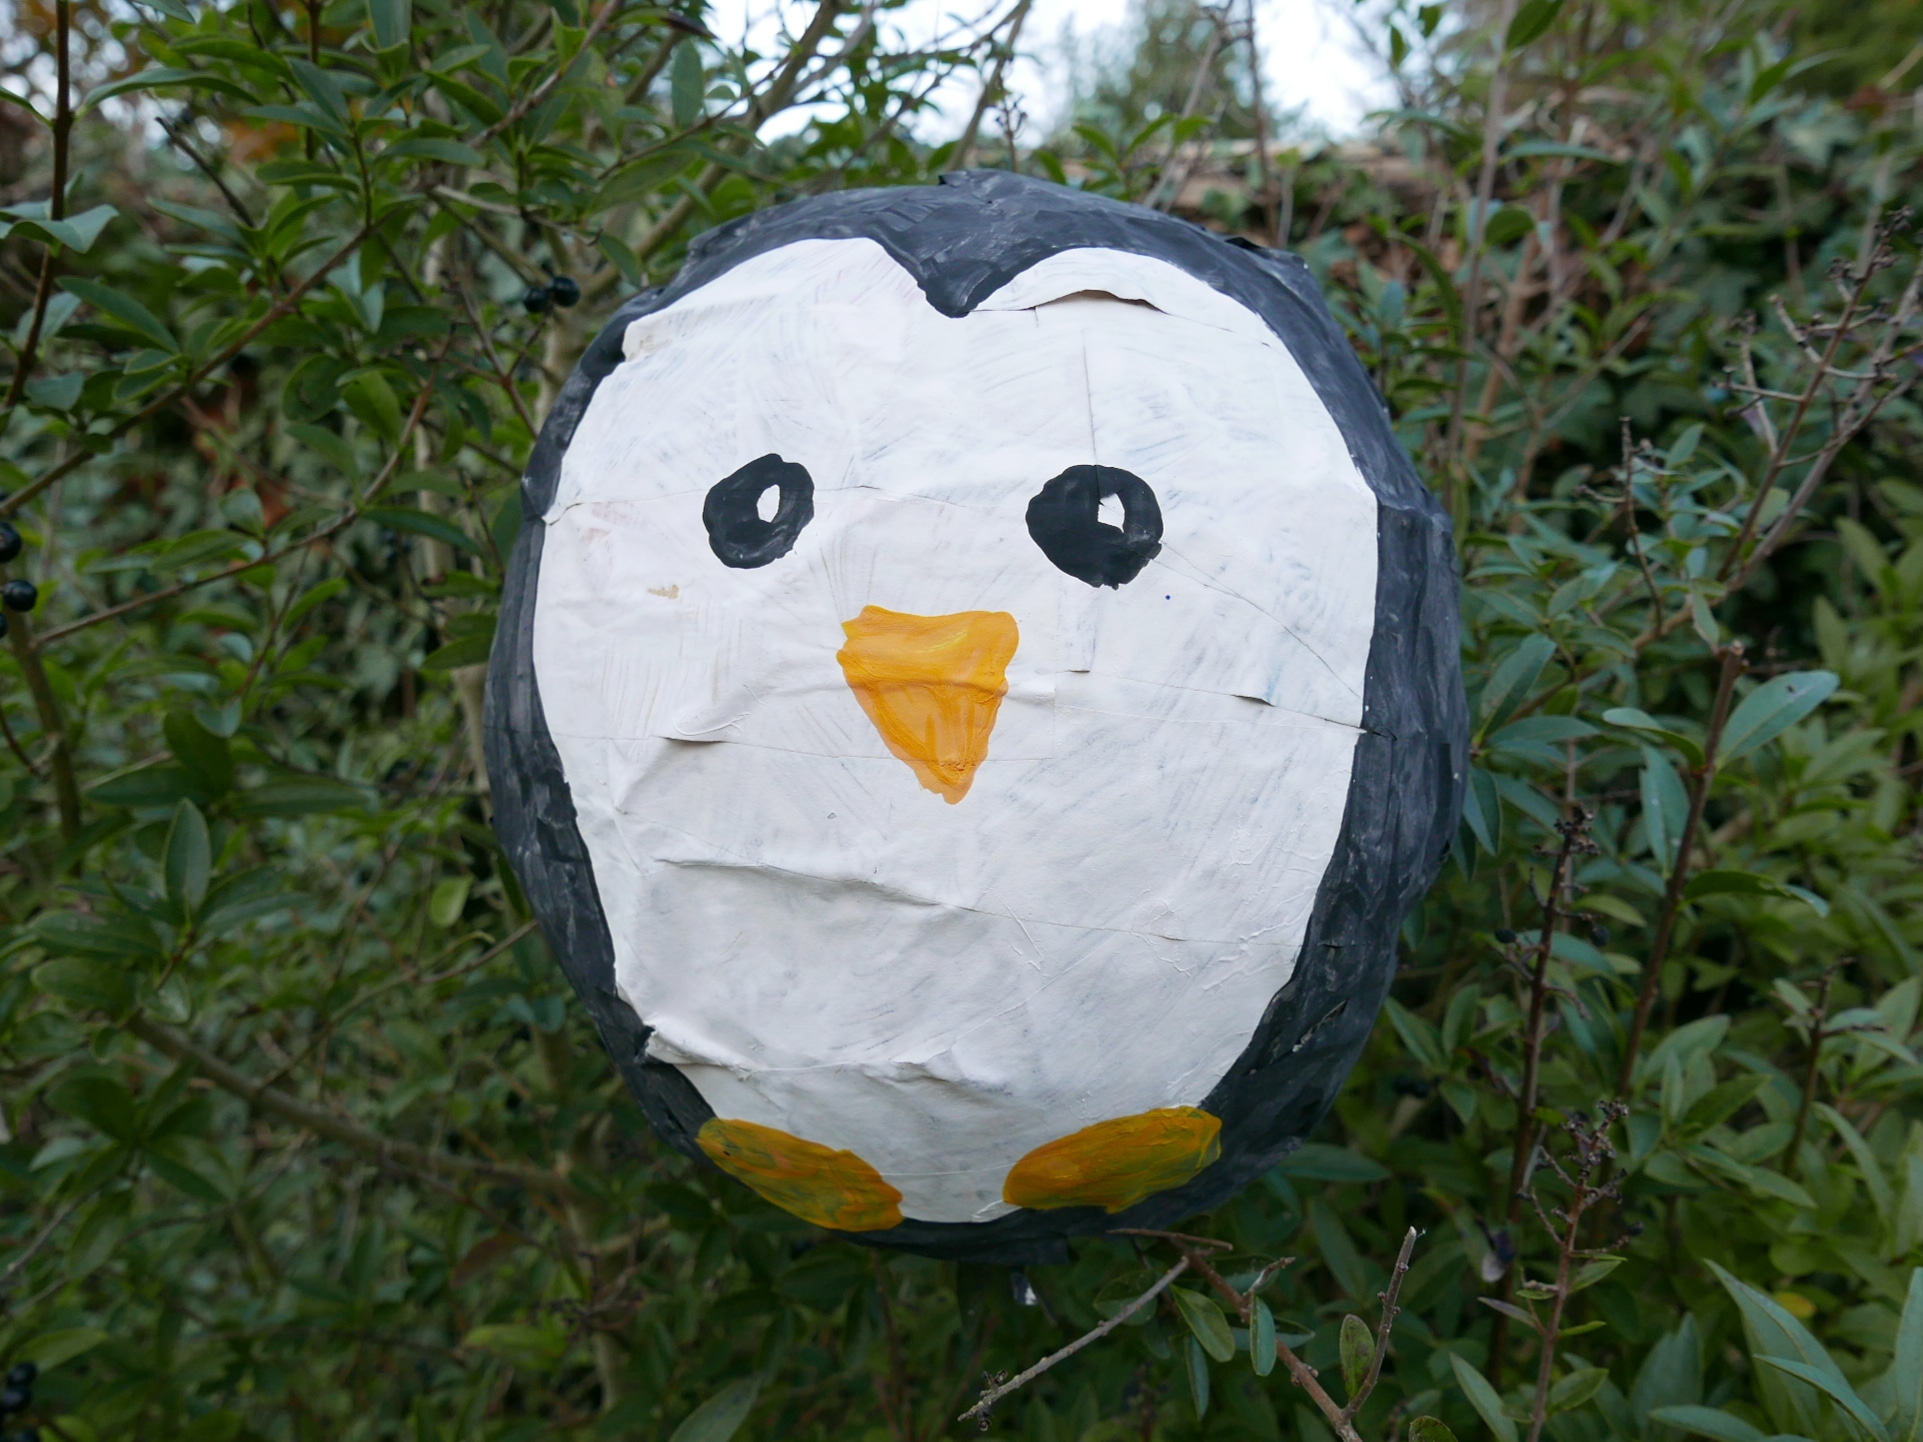
4. Paper mache Penguin
To make a penguin you will need one paper mache shell and paint. You can use any paint you like. (simple poster paint worked well for us.) Simply paint the majority of the paper mache shell black and one side white to form the face, You can then either paint, draw or stick on the penguins, eyes, beak and feet. You can then use your penguin as a decoration, as a story prop or fill it with sweets and use it as a Christmas pinata for party games.
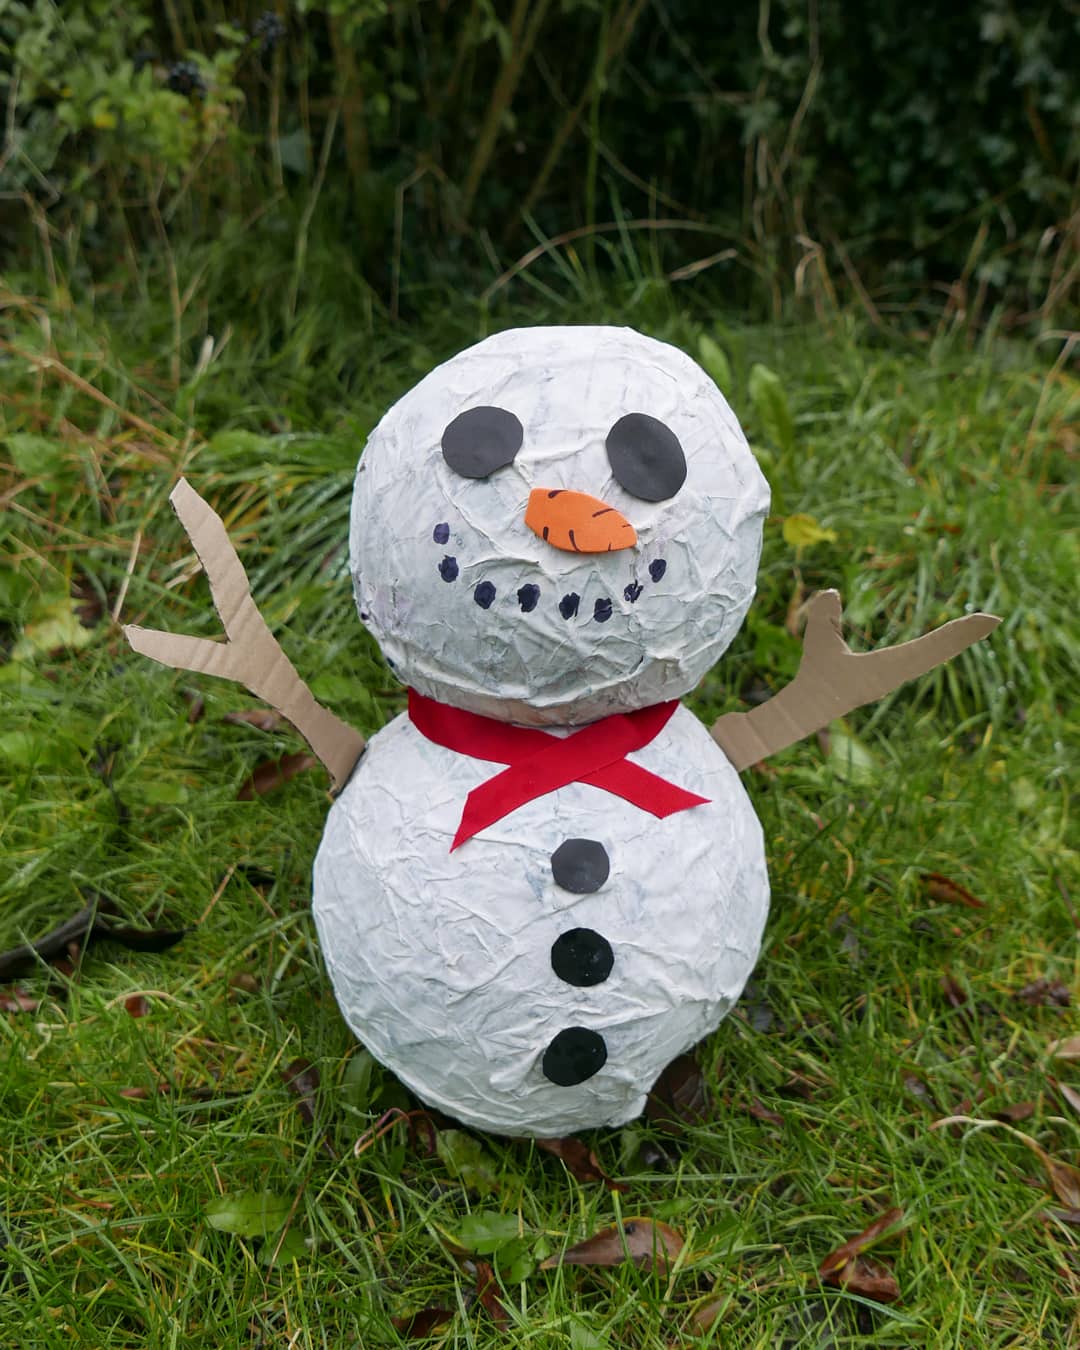
5. Paper mache Snowman
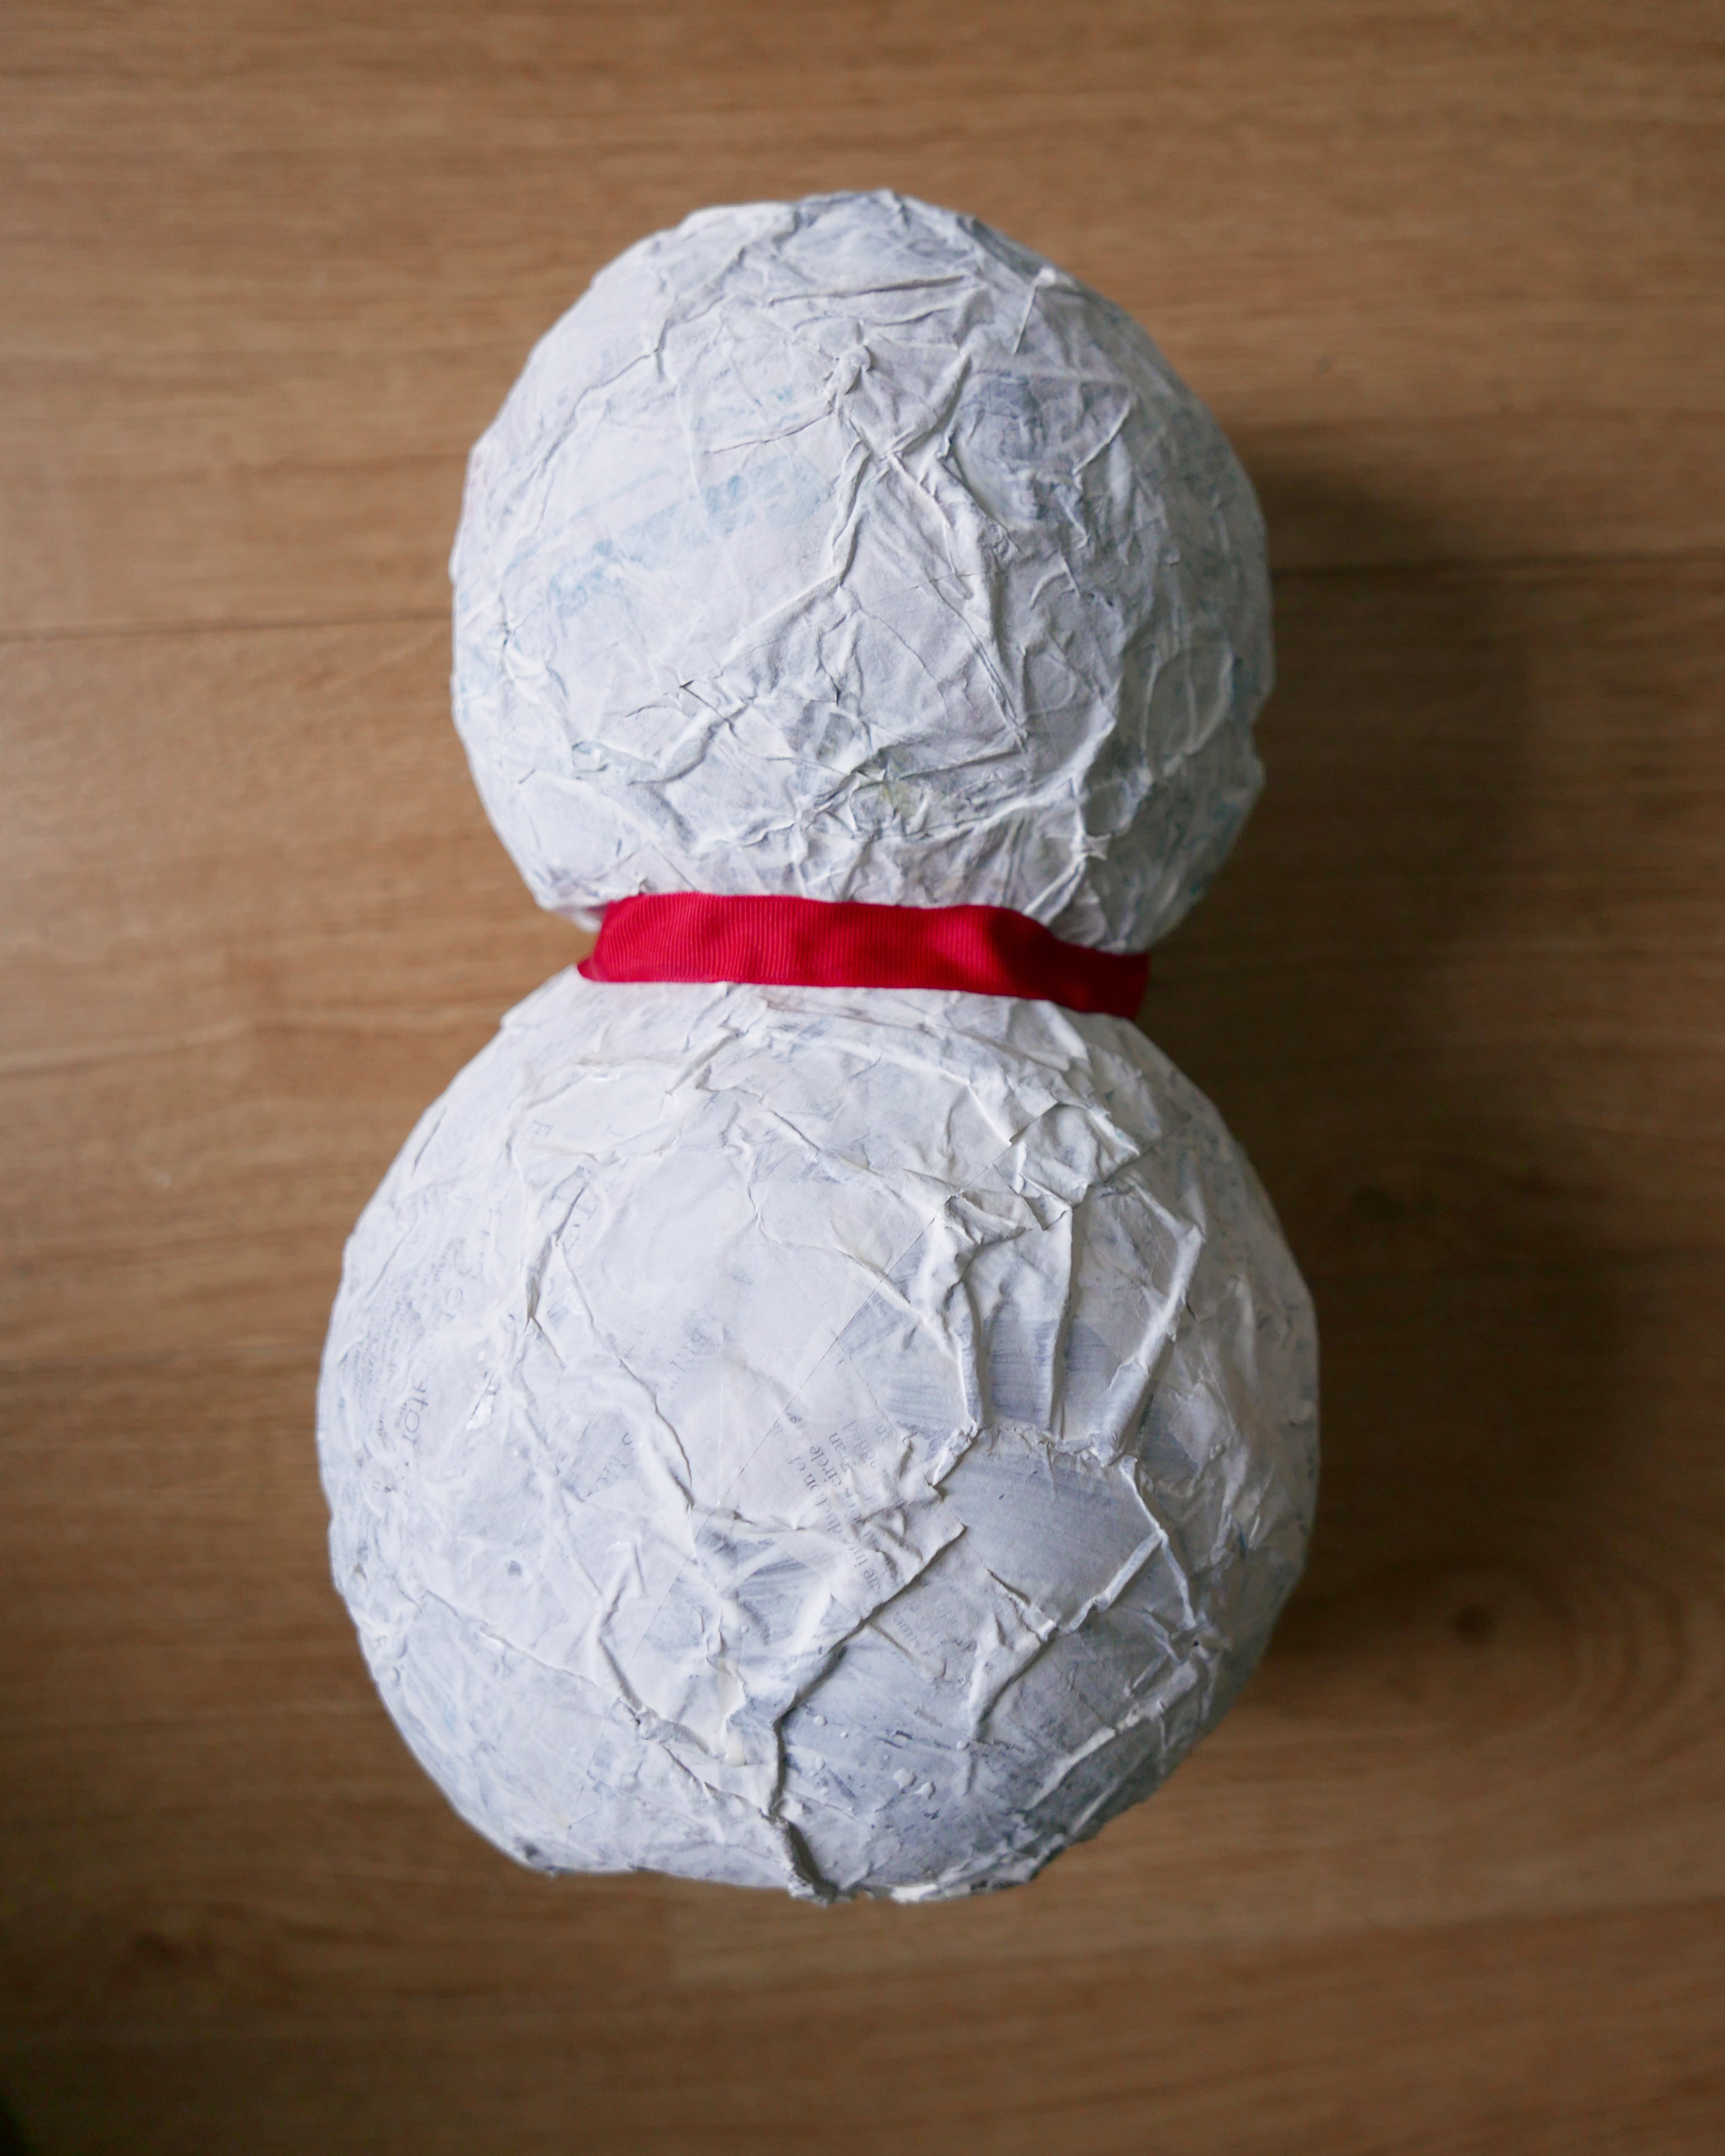
To make a snowman you will need two paper mache shells and paint. You can use any paint you like. (simple poster paint worked well for us.) All it needs is one coat of white paint. We placed ours on old tubs to help them dry/stop them rolling around.
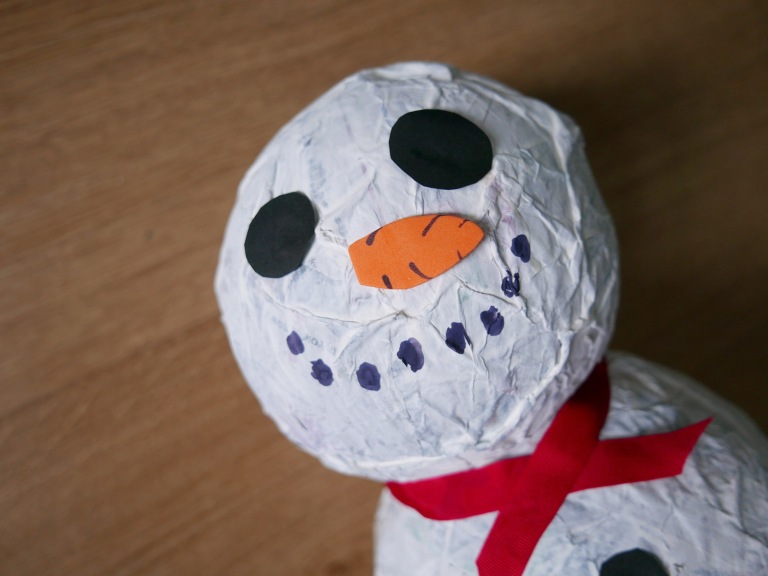
When the paint has dried you can then glue the head onto the top of the body. We found this easier to do if you slightly squash both the bottoms of each half to make them flatter so your snowman balances nicely.
It helps to stick a ribbon or piece of fabric round the neck at same time to make your snowman a scarf. When the head and body are firmly glued together you can then either paint or stick on the other parts of your Snowman.
We cut out the eyes and buttons from black paper, the nose was orange paper and the arms we cut out from cardboard. But you could also use real sticks for the arms as well as real buttons for the tummy. Finally we drew on a dotty smile with pen. You can use your snowman as a decoration, as a story prop or fill it with sweets and use it as a Christmas pinata for party games.
If you like this you might like to try:

8 thoughts on “Christmas paper mache craft ideas”