As one of Norway’s three most spectacular hikes, Trolltunga easily made it to my top 5 hikes of all time. The hike met my standards in terms of length, challenge, and interesting terrain.
The views, especially at the “Troll’s Tongue,” are what made this out and back hike move right onto my favorite hikes list.
The hike from the village of Skjeggedal requires some pre-booking and planning especially depending on the time of year and extent of the challenge that you want. That way, if you happen to go, you can choose the best way for you to enjoy this hike’s spectacular Norwegian landscapes.
Why Is Trolltunga Named Troll’s Tongue?
Trolls are iconic in Norse Mythology.
The first written record of trolls in Nordic folklore was in a 13th century book called Prose Edda. Trolls are featured throughout Norwegian history as a mystical and supernatural creature said to be found in rocks and caves.
in the literature, they are described as large, ugly, with large eyes and bulging noses.
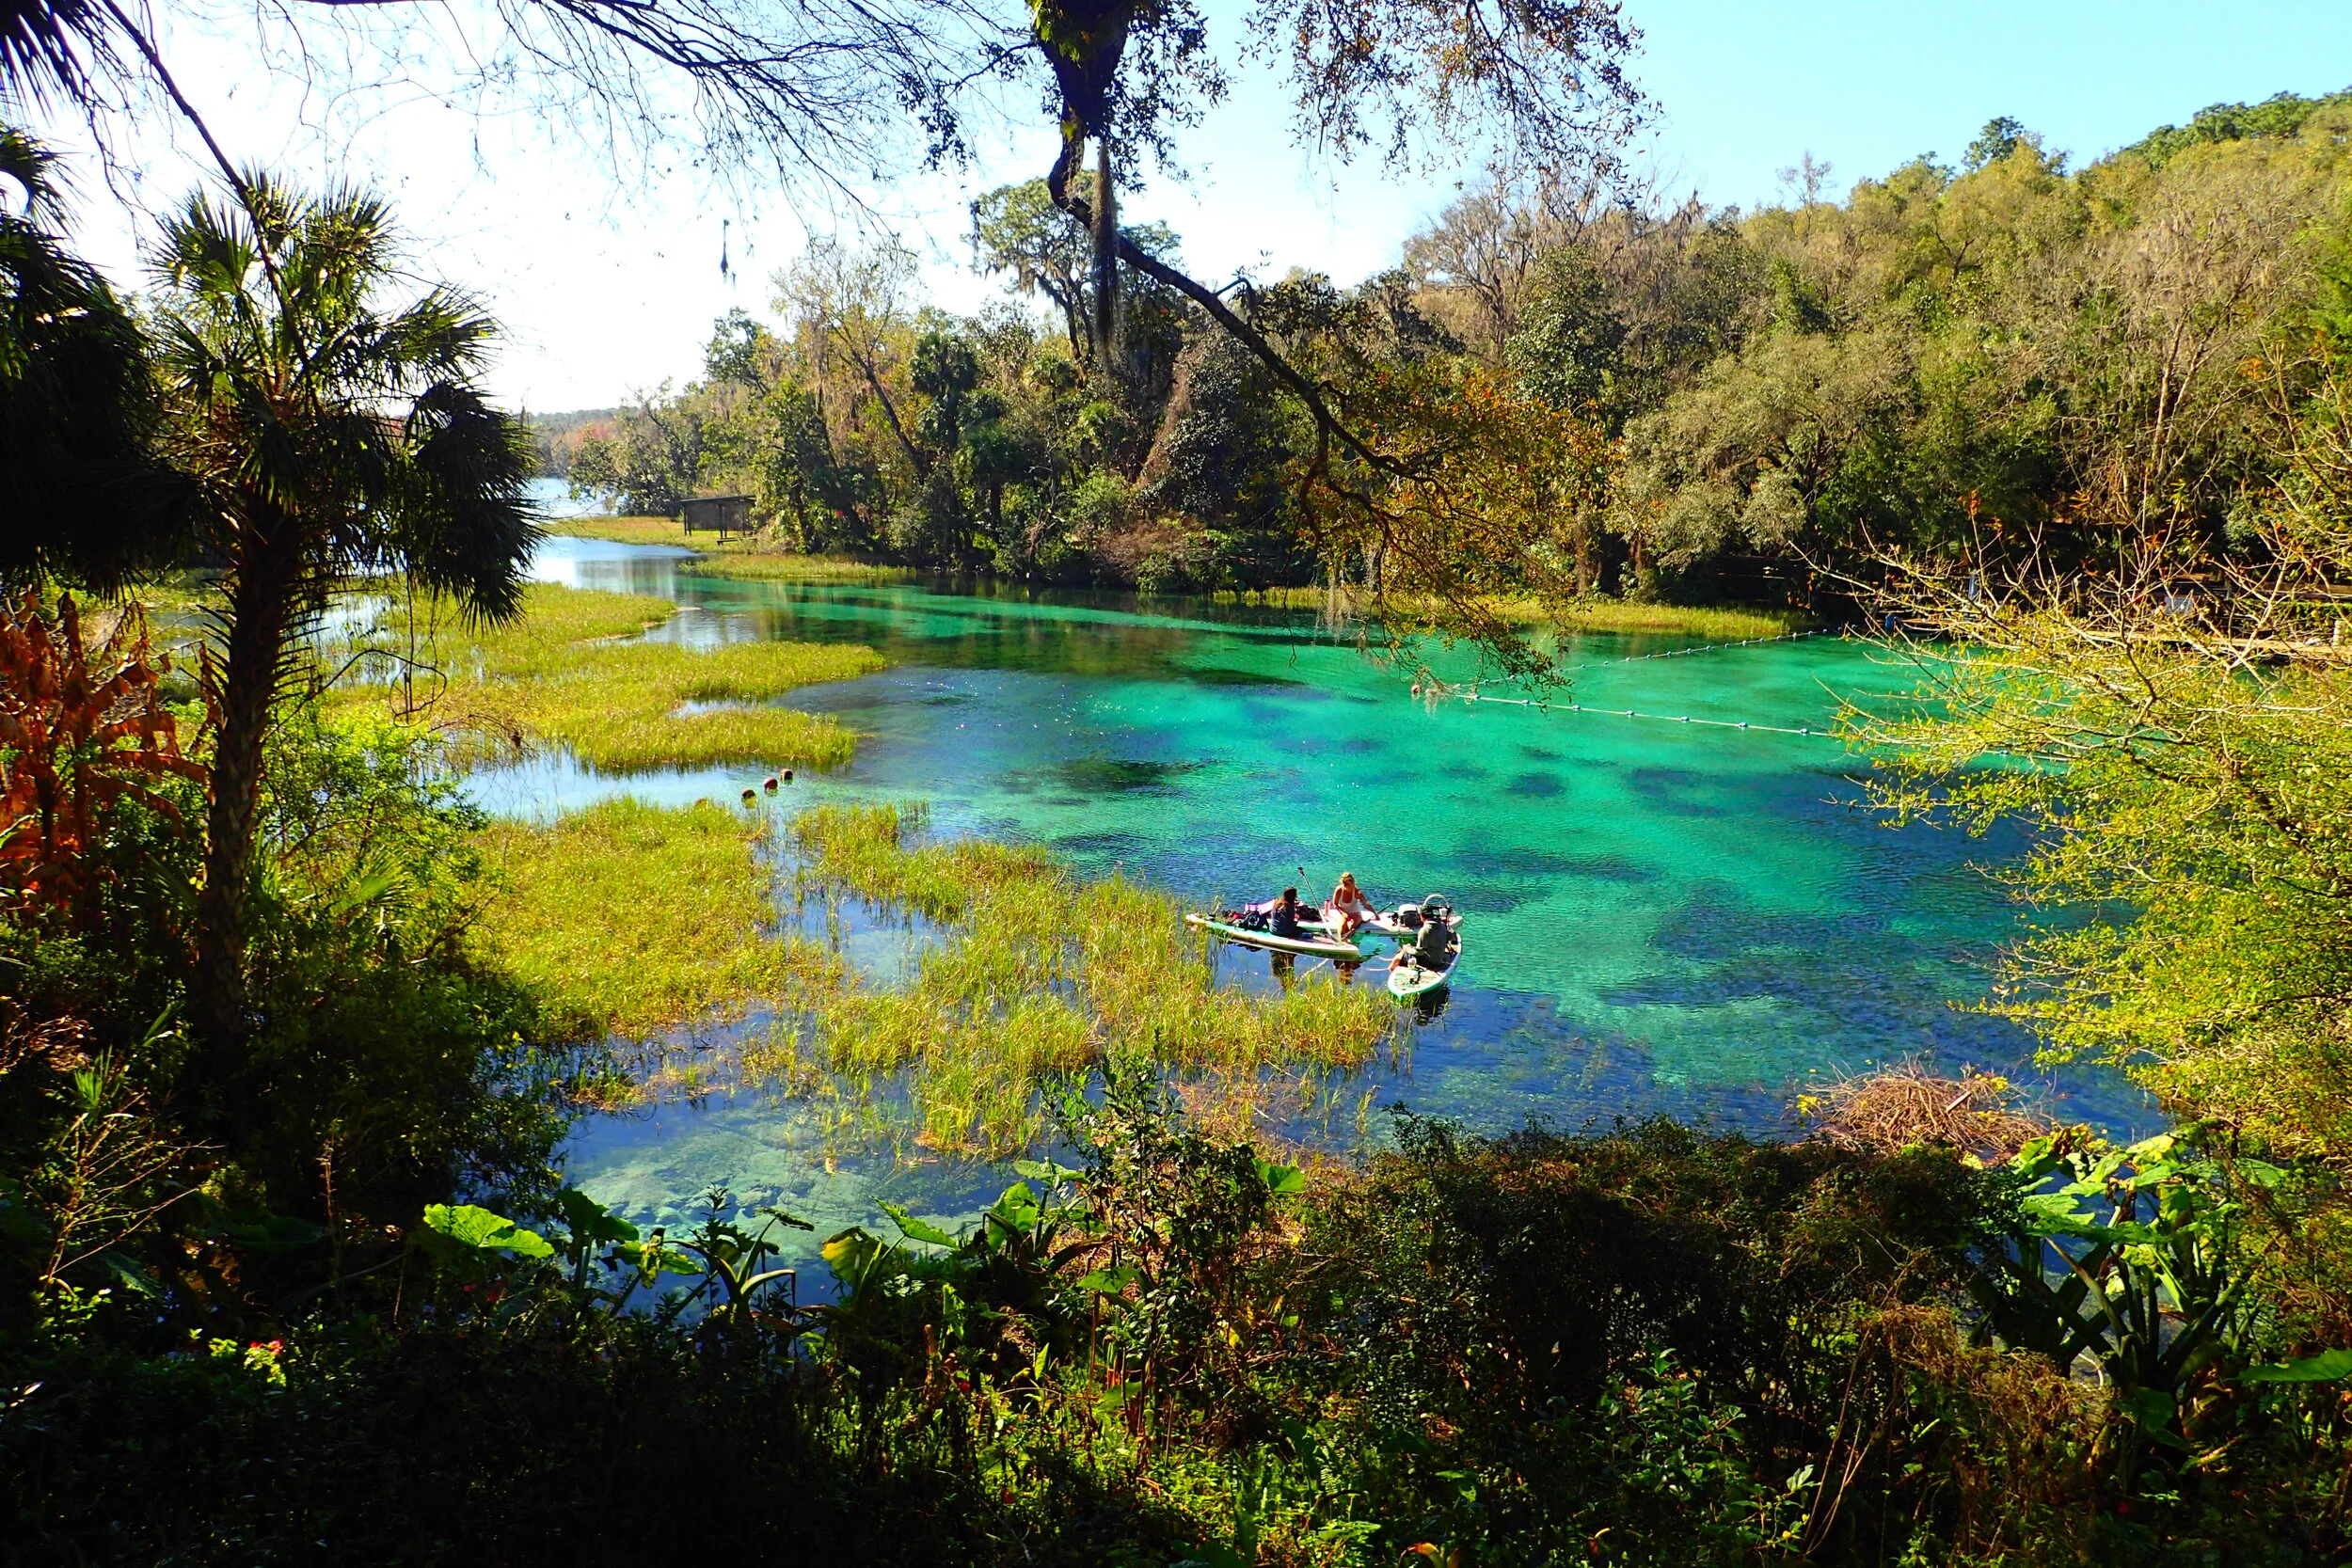
Troll souvenirs at Låtefossen
You may remember the trolls from Disney’s Frozen—they are disguised as stones in the forest. Trolls in Norse mythology are said to turn to stone when exposed to sunlight. This characteristic carries into other modern fantasy fiction, as is the case of the trolls in Tolkein’s The Hobbit, too.
So it’s no wonder so many rocky landmarks are named after them.
Where Is Trolltunga?
Trolltunga hiking trail is located closest to the village of Tyssedal which is part of the Ullensvang Municipality in Vestland county, Norway. Tyssedal is about 6 km (3.7 mi) from the town of Odda, the largest urban area in the district.
But the actual trailhead is not in Tyssedal—the access road is there. The trailhead begins in Skjeggedal.
Also, the less than 10,000 year old rock formation that the hike is named after is located just over 9 km (5.5 mi) East along the trail above the North side of Lake Ringedalsvatnet.
How To Get To The Trolltunga Trailhead?

The Trolltunga hike has three different parking lots and 2 separate starting points.
The three parking lots are at Tyssedal (P1), Skjeggedal (P2), and Mågelitopp (P3). The first starting point is from P2 and the second is from P3. There are multiple ways to get to P2 and really just one way to get to P3.
When driving into Tyssedal along RV13, you will turn right to find signs pointing the way to Skjeggedal or Trolltunga, which is actually just to P2.
P1 requires parking payment at the machines there and the booking of transportation from there to Skeggedal where P2 and the first starting point for the trail is located.
There are taxis and other services that run between Tyssedal or Odda and P2. Campervans, mini vans, and buses cannot drive the road between P1 and P2 because the path is too narrow (max vehicle length is 5.2 m). While driving it, you’ll see that your vehicle must stop and let cars passed at wide road points even in a small vehicle.
At P2, you can catch a shuttle up to Mågelitopp (P3).
The drive up is also a narrow road and only people who have reserved one of the few parking spots at the top can drive up there. Otherwise the shuttle vans are the only ones that go up.
After that, the trailhead at P3 begins with a sloping, gravel pathway.
What Is the Cost To Hike Trolltunga?
Parking, transportation, and tolls will cost you to access Trolltunga in summer. The only other costs incurred are if you decide to do an overnight hike or if you hike in winter (October to May).

The parking per day rate varies by the lot you choose. P1 is about 300 NOK (~$30). P2 is about 500 NOK (~$50). P3 must be booked well in advance because there are only about 30 spaces and it costs about 600 NOK (~$60).
The road toll between P1 and P2 is about 200 NOK (~$20). Finally, the shuttle between P2 and P3 if skipping that part of the trail (which I recommend) is about 150 NOK (~$15) per person, one-way.
If you take a taxi from Odda to P2 it can cost around 600 NOK (~$60). The best deal would be to drive yourself if you’re traveling with a rental or, better yet, get dropped off as I did! I paid in advance for the shuttle online to get from P2 to P3.
With the toll to get dropped off at P2 and roundtrip ticket for the shuttle to/from P3, I paid about $50 total to hike Trolltunga. Worth every penny in my opinion!
If you decide to stay overnight on the trail, you can do so for no additional cost with your own camping gear or book cabins (~$200+) or glamping stays (~$425).
If you hike during the winter, you must book a guide which starts at about $160 for a day hike.
How Long Does Trolltunga Hike Take?
If hiking from Mågelitopp (P3), the hike is estimated to take between 7-10 hours. The hike is about 20 km (12.5) roundtrip with an ascent of 320 m (1050 ft). It’s longer from Skjeggedal (P2), which adds 1-2 hours and an extra 3-4 km (2.5 mi) both ways and a steep 400m (1312 ft) ascent right at the start of the hike.
I don’t recommend hiking from P2. Save the time and energy, as there isn’t much to see and you mostly walk on the road to get to the trail at P3 anyway.
Below shows my FitBit tracker data for my hike from P3 to the Troll’s Tongue rock formation. I paused my tracker while I was there and then restarted it again for the way back.
FitBit tracker data for the trek to the viewpoint for Trolltunga
You can see it took me a little over 3 hours to get there. This was at a very steady pace that I tend to maintain when I hike solo. I stopped only for photos, including a somewhat longer stop at a specific point when I first got views of the Lake, which you can see at just after the halfway point.
A stop for selfies over Lake Ringedalsvatnet
The way back took me less time. I was so exhausted (remember I tested positive for COVID the next day!) that I forgot to turn off the tracker when I boarded the van back down to P2.
The end of my tracked data back is just me cooling down on the ride. The hike back actually took me about 2 hours and 45 minutes.
FitBit tracker data for the trek back from the viewpoint for Trolltunga
I spent at least an hour at the Trolltunga rock formation taking photos, so you’ll also want to factor that in.
If you want to catch photos in all kinds of light, from sunrise to sunset, then you may want to plan and book an overnight stay on the hike.
I saw a few tents set up along the route. This costs nothing except the gear and food to survive as a hiker.
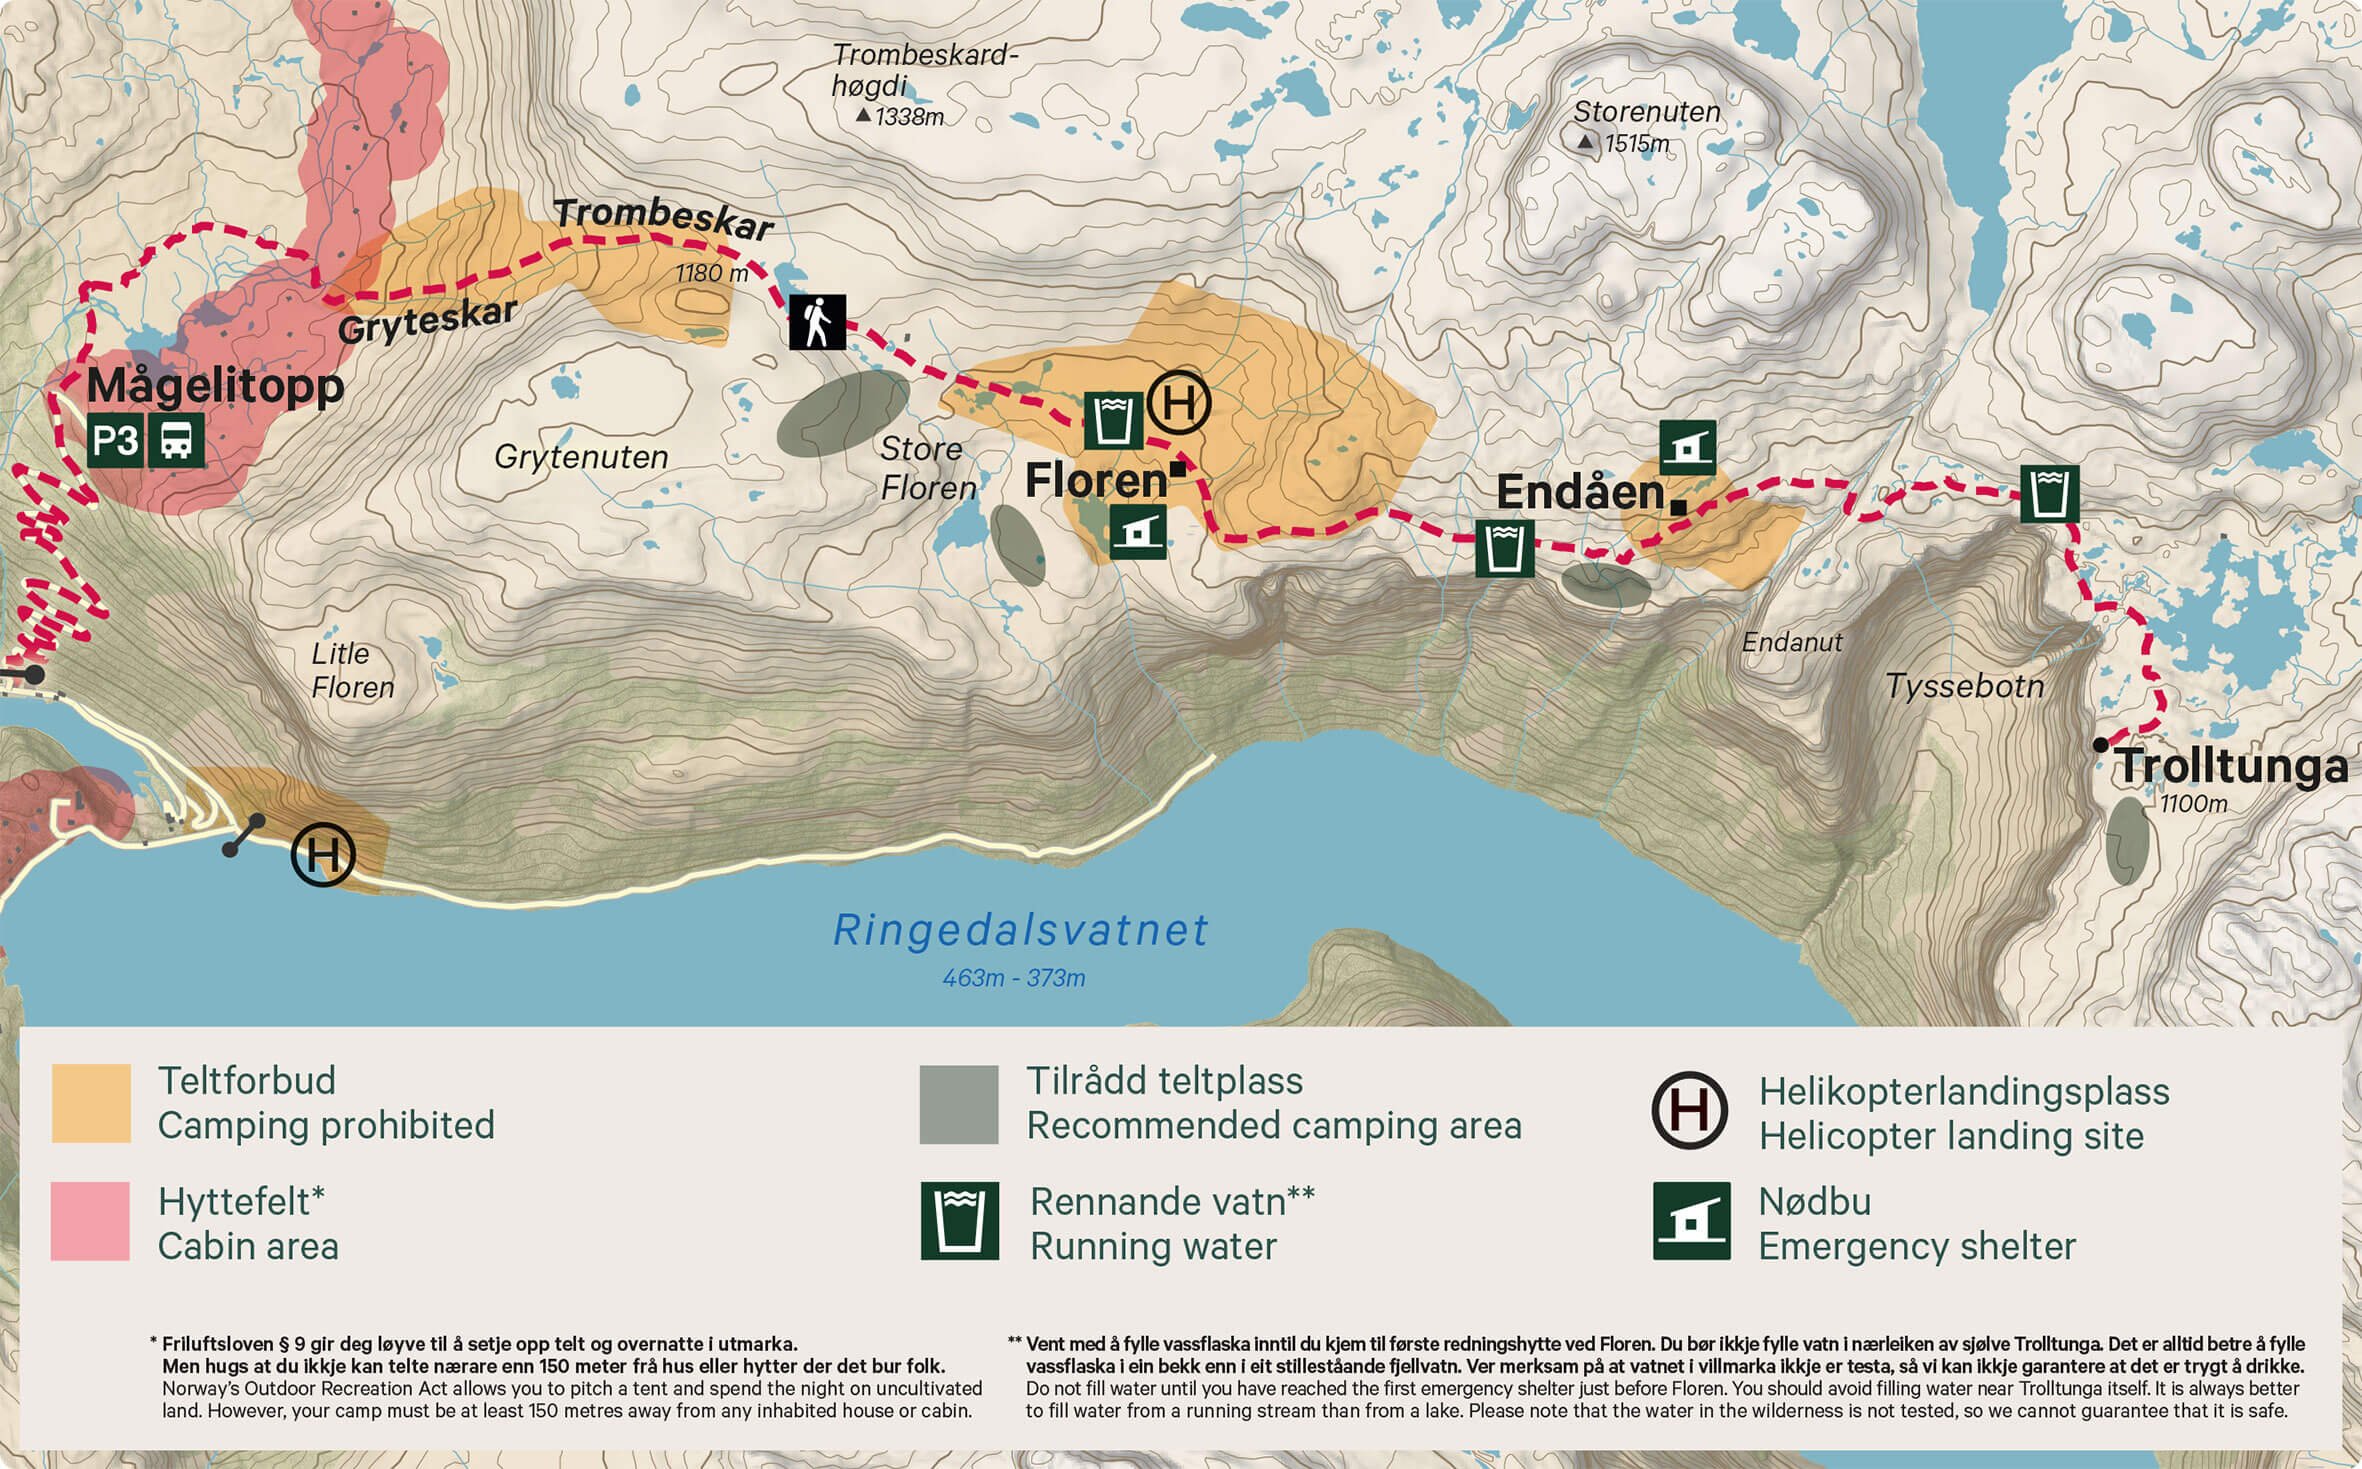
However there isn’t exactly a allemannsretten or “every man’s right” option here. There are some areas where camping is prohibited vs recommend, as you can see on the map below
Otherwise, the cabins appear to be bookable via Airbnb! Or you can book a glamping experience with Trolltunga Active for 4250NOK (~$425). Their website lists this as a 28 hour experience.
I must admit, the glamping spots seemed epic and the photos I’ve seen of sunrise and sunset up there are astounding. I’d love to return to Norway one day, maybe for a different hike, and do an overnight stay!
What To Wear And Bring For Trolltunga?
For a day hike, I was able to pack fairly minimalist.
I wore layers for my hike to Trolltunga including a sports bra, moisture wicking t-shirt, thick fleece I bought in Sweden, and packable puffer jacket plus a lightweight scarf and sunglasses. I had on yoga pants under my hiking pants and thick hiking socks with broken-in hiking shoes borrowed from Carolina.
In my backpack, I brought 2 liters of water and lots of snacks. I also had a powerbank charger, some first aid items, hat, gloves, and sunscreen.
Other recommendations are to bring a change of clothes and emergency shelter but I didn’t feel the need for these.
The weather for my hike changed periodically, as happens often in mountain areas. There was morning fog, it drizzled rain at a few points but was otherwise mostly overcast with periodic sunshine.
It was fairly cool the entire time. I only removed my outer puffer jacket at the midpoint of the hike when I worked up a sweat and needed to cool down. I got lucky on this hike, as it was raining the days before and after!
What Is The Trolltunga Hike Terrain Like?
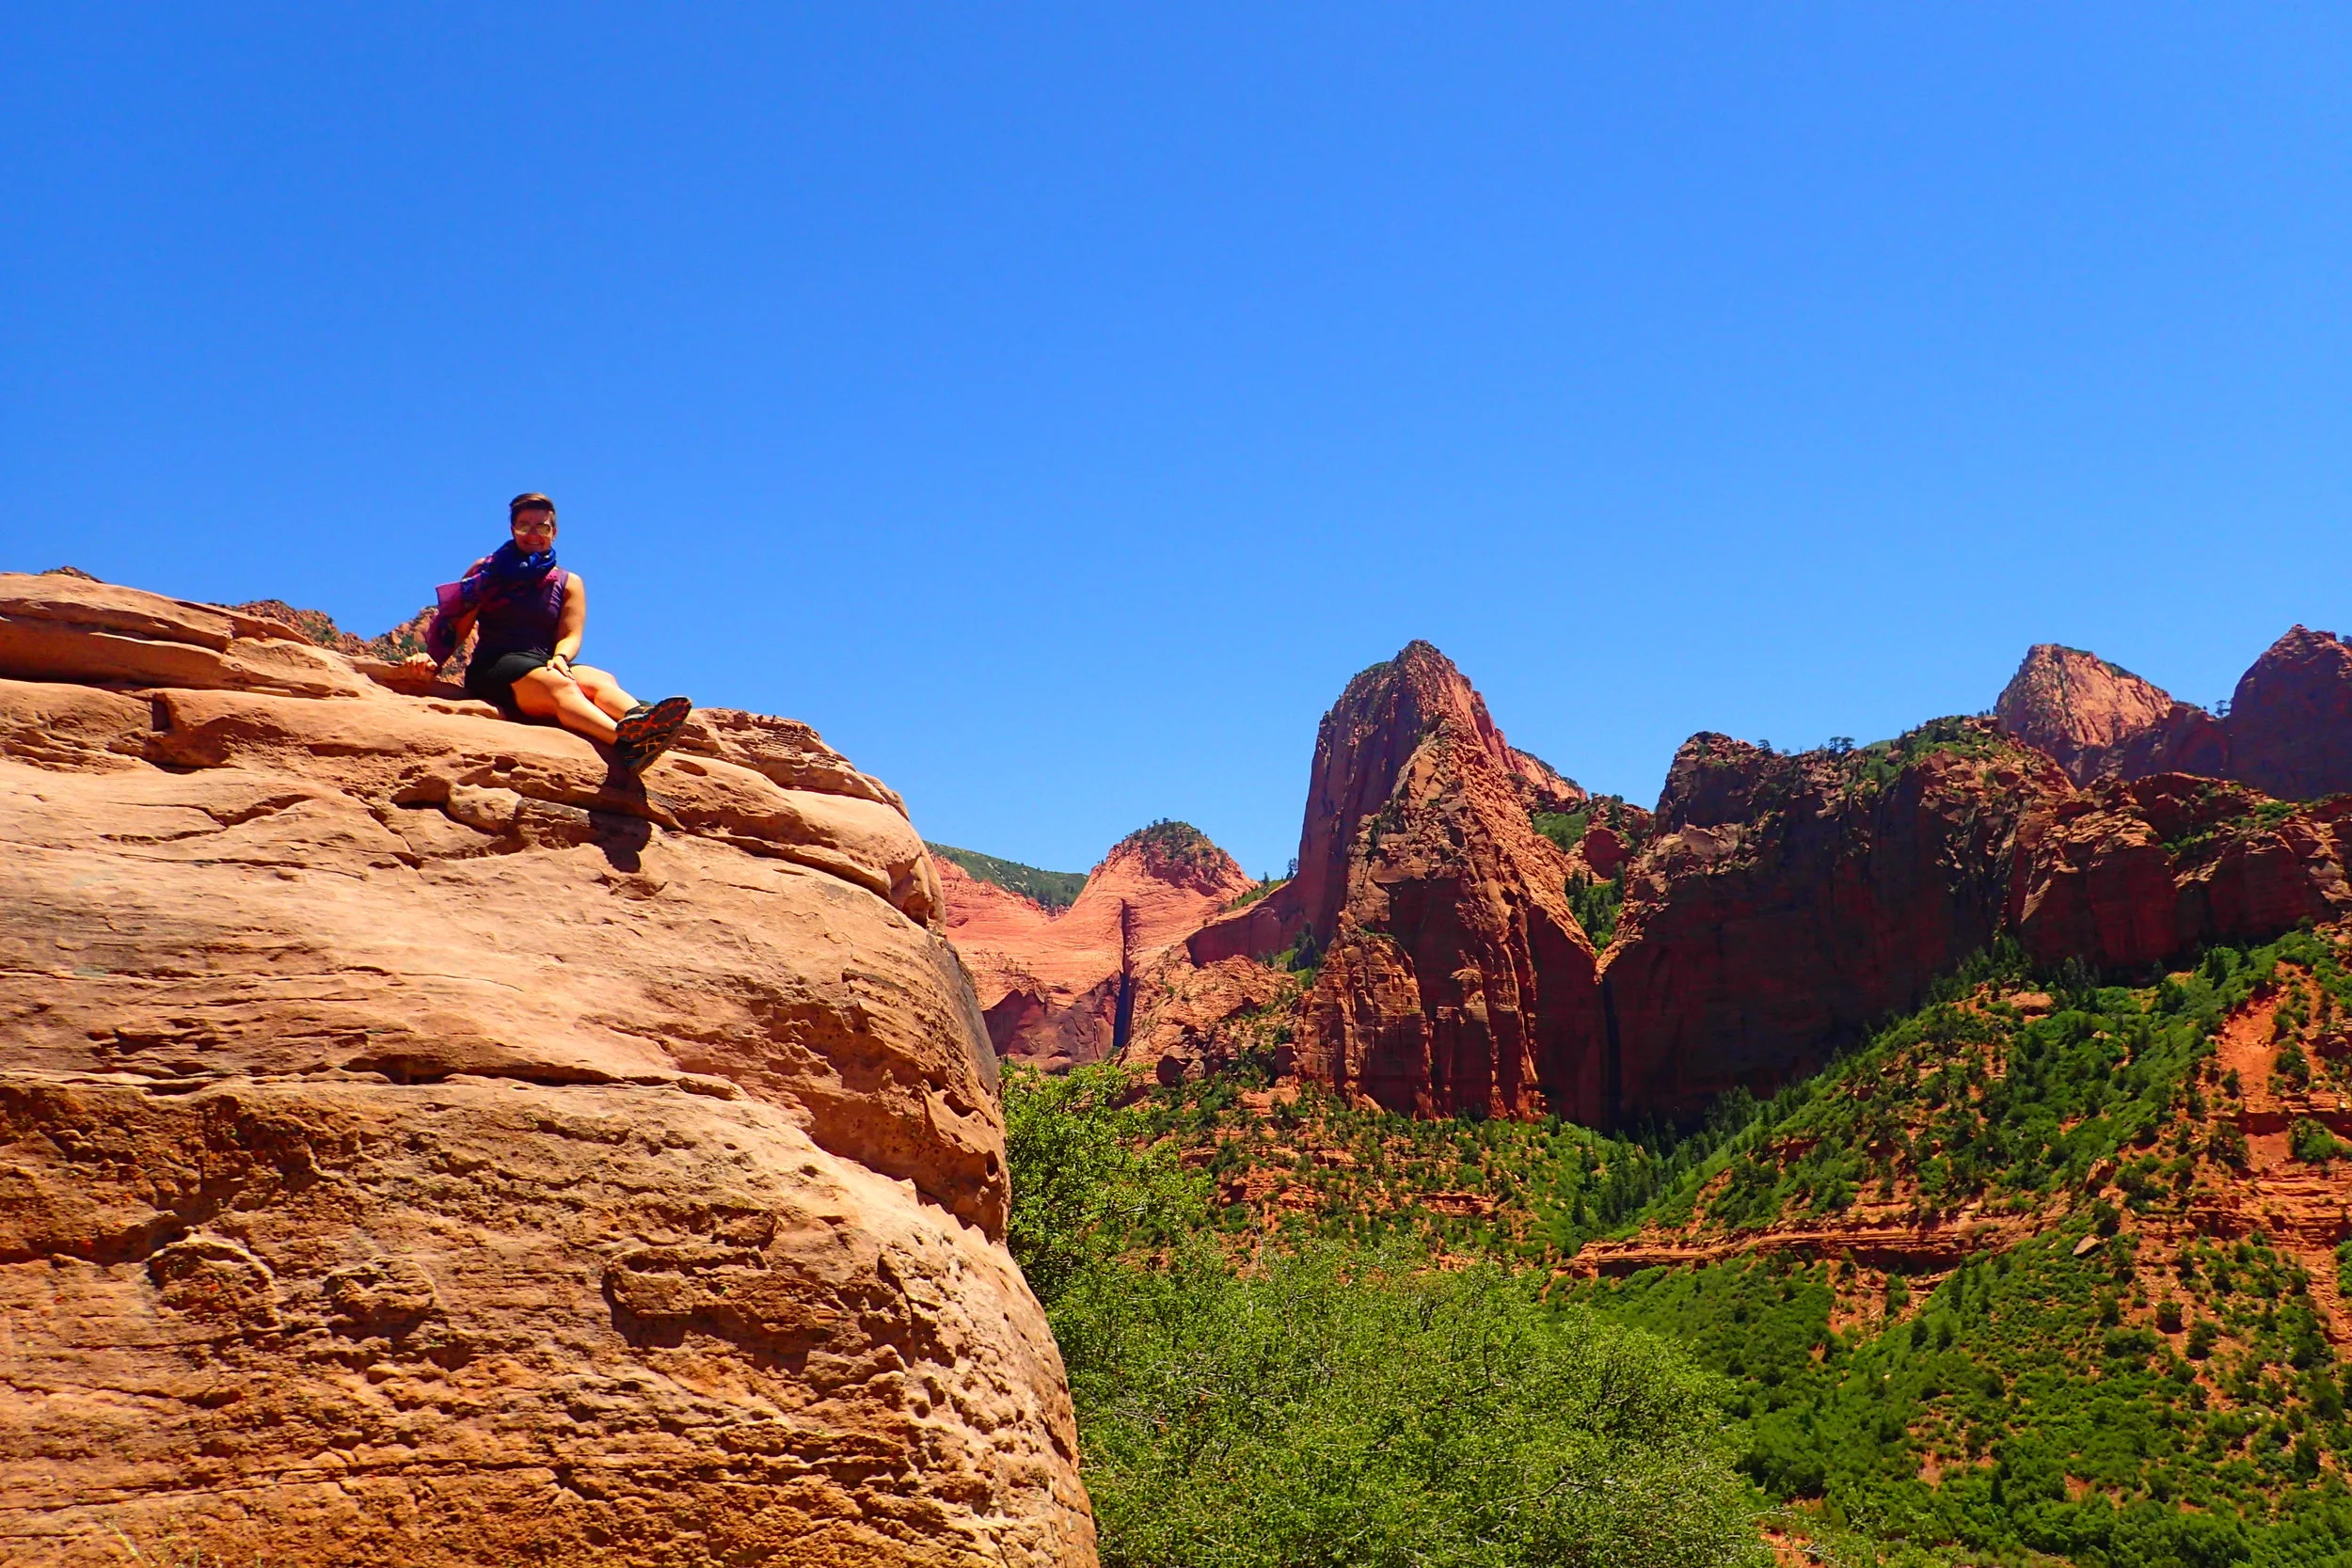
I found the terrain of Trolltunga to be extremely interesting and varied with an emphasis on the changing views of the lake and surrounding mountains. Overall, it wasn’t too challenging but challenging enough on some of the ascents.
The start of the hike takes you across large, sheet-like rocks spread over a mostly flat area. There are some small metal bridges, stepping stones, and maintained pathways crossing running water.

Eventually the path ascends with stones placed in an inconsistent stair-like pattern upwards. This is where the majority of the ascent takes place from P3.
red markers and also red, painted “T” marks on rocks help guide the way, especially across landscapes that otherwise don’t appear to have a clear path ahead.
The next major ascent goes up over many rocky shelves and the path is your own to choose. Picking the most direct route is a test of your eyesight and spatial ability but the red markers are visible to guide you generally.
Once over this hurdle, I reached the snow level! I only saw snow like this in patches or short stretches throughout the hike.
This first, thick, trekked-over-snow area led around a small, reflective lake and then a short descent took me down the other side passed more rushing alpine waters.
The pathway can be muddy at times or rocky to help with stepping over the muddy parts.
Other people on the trail were also consistent. Those you ride the shuttle up with are who you will bump into or walk alongside but others on the route will catch up or fall behind to you, too.
The landscape is mostly a mixture of brown and green in the height of summer—it was July for me! For those hiking in winter, they will likely see snow for miles and miles and there will even be ice beneath the snow they trek across. The right gear and guide in winter is imperative for safety!
At about 2 hours into the hike, I could finally see Lake Ringedalsvatnet. This lake is human-made by a dam. Ringedalsvatnet added a beautiful bright blue reflective body of water to the base of the valley between all the surrounding mountains.
After views of the lake, the trail took me away from the cliff’s edge and inward over a darker and more densely packed rocky area.
I absolutely loved the look of this area. It reminded me a little bit of Mordor! Specifically, it reminded me of the area where lots of lava rock formations were on the Tongariro Northern Circuit in New Zealand.
These rock formations go passed a dammed lake with a bridge and this marks the final section of the hike before reaching the Troll’s Tongue!
I absolutely loved the diversity of terrain of this trail. Ultimately, getting to the end for those quintessential photos was the goal, but I was pleasantly surprised by the overall beauty of this whole area!
How To Get Solo Traveler Photos At TrollTunga?
Arriving at the final destination of the Trolltunga hike meant finding myself among many other hikers. This is where the overnight stayers and the day hikers all congregate. They chill and observe the views or line up to get their photos.
It’s fun watching everyone go to get their photos to see what they will do. Will they jump into the air? Will they swing their legs over the edge? Will they crawl up and stay low to the ground? Will they propose marriage?!
Yes, there is a marriage proposal on the Troll’s Tongue and even some wedding ceremonies that take place there on a regular basis!
As a solo traveler, I found myself at this point curious about how I might get those perfect photos of myself at the end of the rock formation.
It was, in fact, a bit windy up there! :D
I stood watching how one person in a couple would go out to the end and turn around to wave at their partner on the other side. Then they would trade spots so the one taking the photo could get in the next one.
In observing this, I thought about how those couples surely must want a photo of them together! I walked up to a couple who just arrived to the scene and asked them, “Hey, would you be up for trading photos? I can take ones of you both out there!”
I ended up doing this twice. The first time with a couple who took photos that were good but I wanted more—different angles and different poses. So I hung out a bit longer and then asked a separate couple for the same deal.
I must give a big thanks to Kiki and Tommy from Minnesota! They were the second couple I asked and are the ones that captured some of the best photos of me at Trolltunga.
A couple out on the Troll’s Tongue
Kiki and Tommy of Minnesota
Here’s a little photo series of me on the Troll’s Tongue, thanks to Kiki and Tommy:
How Dangerous Is The Tongue At Trolltunga?
At 700 m (2,300 ft) high (3600 feet above sea level), a fall from Trolltunga or the surrounding cliffs would certainly be fatal.
But perception is everything! From the angle of the above photos, the Trolltunga rock formation looks super precarious to stand on.
Yet, I felt surprisingly comfortable sitting on the edge! I was surprised because even I looked at others doing it and thought I wouldn’t sit over the edge…until I stood out there!
Before I get into explaining why I felt so comfortable, I should note some of the precautions in place on the Trolltunga hike. In the summer season, a mountain guard is present at Trolltunga day and night. Remember, you must always have a guide in the winter!
There are also two rescue cabins on the way to Trolltunga. The dangers are not just the cliff edges but the elements and the harshness of this hike on people’s bodies—especially for unfit or inexperienced hikers. Plus, accidents and injuries can happen along the way to anyone.
Before you go on this hike, I recommend reading up on mountain safety and other hiking tips by Norwegian tourism.
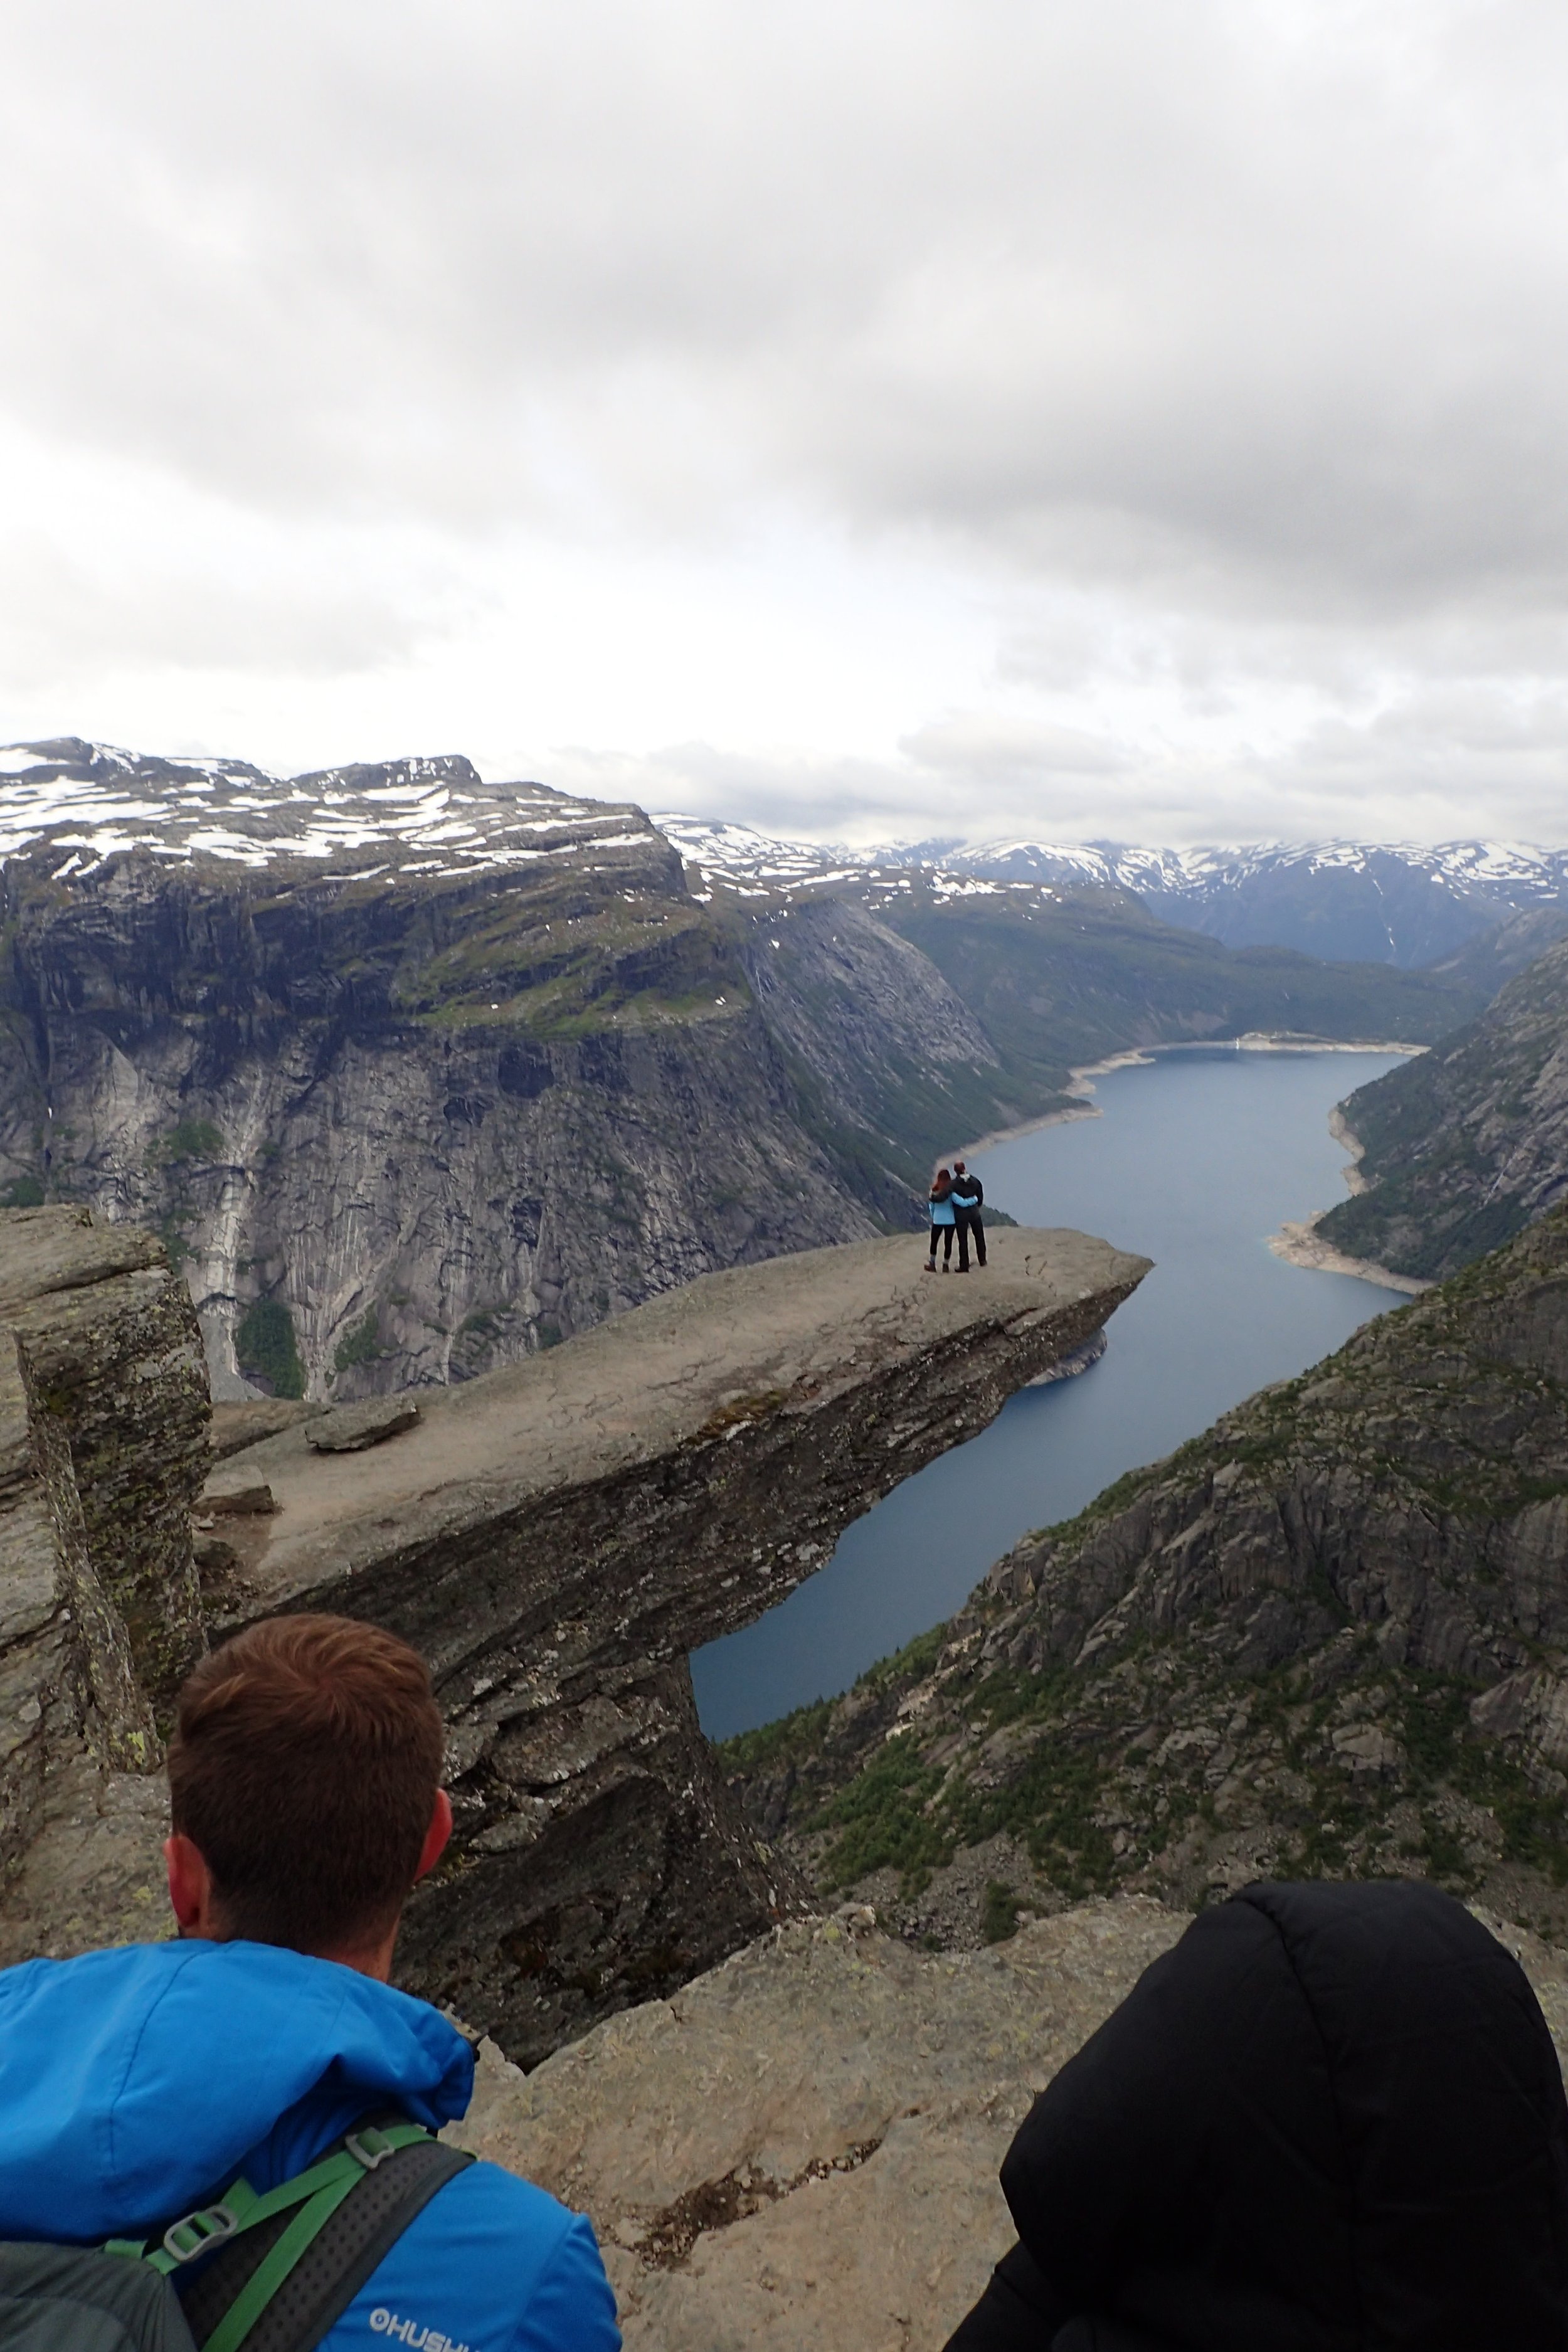
Ok, now it’s time to demystify the Trolltunga cliff a bit. First thing’s first: The OMG-factor photos associated with this rock formation is all about the angles. If you change the angle, you get a whole different feeling.
From the typical shot, the rock formation looks thin and maybe even a bit dangerous and unstable to stand on—like it’ll snap off and drop down into the valley at any moment! But from a different view you can actually see how wide and thick this rock is.
Looks thin, unstable, and scary
Looks wide and less precarious
The bird’s eye view shows you how wide this rock is. Walk out a bit and look back at the rock formation and you can also see how thick and secure this rock is set on top of and attached to a major chunk of mountain.

A little harder to tell from the photos, the rock also juts out horizontally at an upward sloping angle. I share a video below that shows it a bit better. But when I walked out onto it, I didn’t feel like I was going to fall off because it was more like I had to climb up it!
Gravity actually worked against me to keep me on the rock, not lean me off of it. So it felt secure to me.
I couldn’t even capture my feet in the shot I took over the ledge because my knees were angled upward and I was almost falling backward against the rock rather than forward into open air.
The view from the end of Trolltunga with my legs propped up over the ledge
What Else Is There To Do At Trolltunga?
The main attraction is of course taking photos at Trolltunga. But I didn’t just focus on getting my photos out on the rock formation. The entire surrounding area is gorgeous and there’s a bit more terrain to explore, too.
Panorama of the whole area with Trolltunga to the right
I ventured out behind the rock formation to get some additional photos and to get away from all the people for a bit, too!
It was here that I found some of the most amazing cairn formations I’ve ever seen created by other visitors! Just look at all the layers and stacked so high! This was such a fun shot to get:
There’s also a whole other side and area with pathways leading up into the mountains. I wondered what other hikes there were and where the trails would take me if I followed them further east!
Alas, it was time to head back to catch my shuttle back down to P2. I left the area and on the way back I even ran into Kiki and Tommy again.
I was also able to capture some additional photos of the landscape, now not as foggy and more sunlit than when I started early in the morning!
In Conclusion
The following video shows a little overview of the hike experience from start to Trolltunga!
I made it to the end and met the shuttle right when it arrived so I easily got a seat on board. I was able to text Carolina to come pick me up so the timing worked perfect meeting her back at P2. I was grateful for the pickup.
Overall, this was a spectacular hike! From the diverse landscapes and the epic views with just the right amount of challenge, I enjoyed every aspect of the experience. This hike is the hike that actually made me think about writing a top 5 hikes of the world post (coming soon)! A conversation with Tommy on the way back actually inspired the thought, so thanks again, Tommy!
The last leg of my time in Norway is coming… but a positive COVID-19 diagnosis came first! Stay tuned to learn about my entire COVID-19 experience in Norway!